Selecting the right brush, and properly maintaining it, will ensure you get the best finish possible.
Applying a finish is often mentioned as an afterthought in woodworking articles. This is no surprise, as finishing is not the most exciting part of woodworking. As well, there are dozens of finishes available, and just as many ways to apply them.
Brushing on a finish is not a difficult proposition, but choosing the right brush for the finish being used; correctly loading the brush and then applying the material in an efficient manner will go a long way in helping to achieve a perfect result. Quality brushes represent a sizeable investment, and properly cleaning them will protect your investment and keep them in fine form for many years.
There are three parts to a brush – the bristles, the ferrule, and the handle. You judge a brush on the quality of finish it gives, and it’s the bristles, along with your brushing technique, that has the greatest impact on the finish.
Just as finishes have evolved over the years, so have brushes. One thing remains clear – cheap bargain brushes are great for staining a fence or shed, but they are of little use in the shop. Cheap brushes will begin to fall apart with the first use, and will shed bristles that stick to the finish. Save yourself the aggravation of repairing these finish problems by using a quality brush from the start.
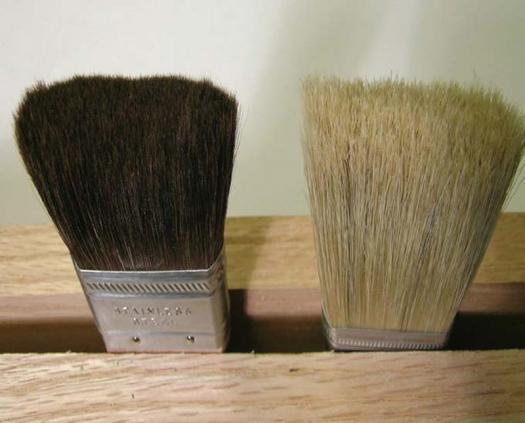
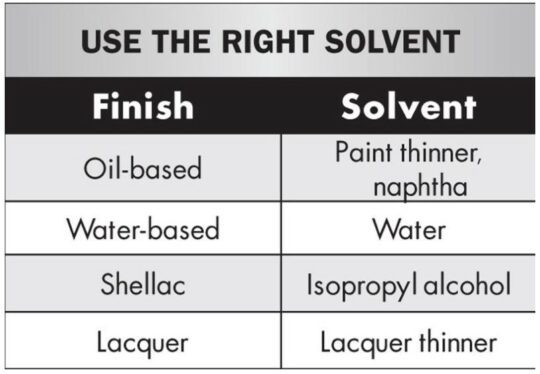
Natural bristle brushes are the best choice for oil-based finishes, shellac and lacquer. Each of these finishes requires the maintenance of a wet edge as you work. A natural bristle brush will carry more finish than its synthetic counterparts, allowing you to work with fewer trips to the can to reload. Natural bristles have flagged ends – a split at the end of each individual hair. This enables the brush to hold more finish, and release it with minimal brush marks. While quick drying finishes reduce the chance of foreign matter getting trapped on a still tacky surface, the need to maintain a wet edge calls for a properly loaded brush and the proper application technique. The main drawback to the natural bristle brush is that they wear faster and the bristles tend to break more often than the synthetic variety. Picking stray bristles out of a fast drying finish can put a strain on your sanity. Natural bristle brushes are not suitable for water-based finishes, which can soften the bristles causing the brush to lose its shape and form, making it harder to maintain precise control as you work. Most natural bristles are made from hog hair (China bristles), and come in various weights and stiffness – white bristles tend to be coarser than black bristles. Hog hairs have naturally split ends, which enables them to carry more finish. They also taper from the base to the tip, which makes the hair strong yet gives it a lot of spring, enabling the brush to maintain its shape in use. Higher quality brushes, like the Gramercy (toolsforworkingwood.com), are made from ox hair, which is a finer more pliable bristle than boar hair. These brushes leave a virtually brush-mark free surface.
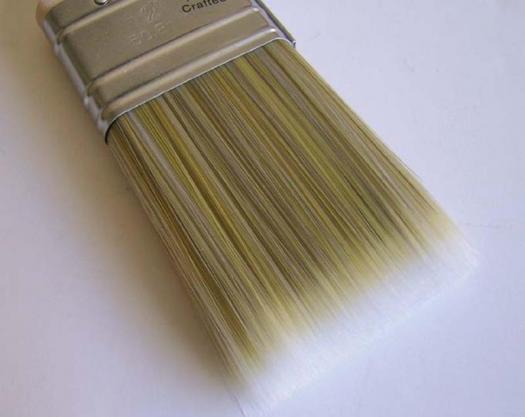
Fresh Synthetic bristle brushes have come a long way in recent years. The first polyester and nylon brushes, developed to apply the new generation of water-based finishes, had a tendency to leave obvious brush marks in the finish. Manufacturers have come up with new blends of synthetic bristles that have largely resolved these issues. Two of the most common synthetics are polyester and nylon. Polyester bristles hold and release more finish than other synthetics, while nylon bristles wear longer, making polyester/nylon blends, like the Simms Vintage Pro, excellent choices for general purpose finishing. There are also polyester/bristle blends, such as the Dynamic Flowline Stubby Pro (getpainting.com), that offer the advantages of both natural and man-made filaments. Manufacturers sometimes whip the hair in a process called flagging, which splits the bristle ends into finer filaments. While this makes for finer bristles, they tend to be weaker. As well, synthetic bristles are not as absorbent as natural bristles. However, they are less expensive. The finest synthetic fibres, like Chinex and Taklon, are particularly good for applying water-based, oil-based, and shellac finishes. However, unlike natural bristles, they don’t hold as much finish, and require more frequent refilling.
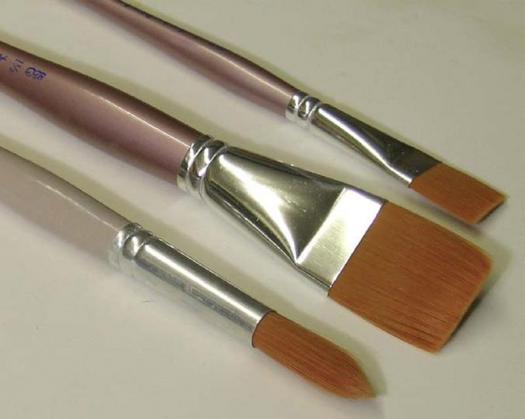
If you look at the tip of a brush you’ll see that it’s cut either flush across the end, or in a chisel shape. A chisel tip will give you much better performance.
Ferrules are typically made of plated steel or stainless steel. Where available choose stainless steel – it won’t rust and contaminate a finish, particularly if you use water-based finishes. Plated ferrules can peel and the seams can rust. Inside the ferrule is a filler piece that serves two purposes. It helps to secure the bristles to the handle, and serves to create a reservoir in which finish can accumulate.
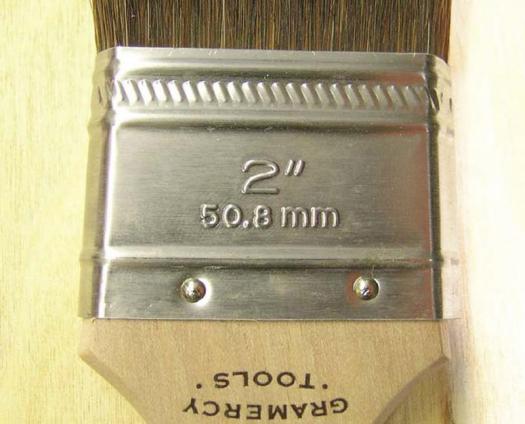
Handles are made of wood or a composite, plastic. Of greater importance than the material, is how comfortable and well balanced it is in use. The brushes we have used come in 4″ to 8″ lengths (measured from the end of the ferrule). Longer brushes are great for house painting, but we prefer a 5″ length for applying finishes. For use in tight areas such as the insides of assembled cabinets, choose a 4″ (stubby) brush.

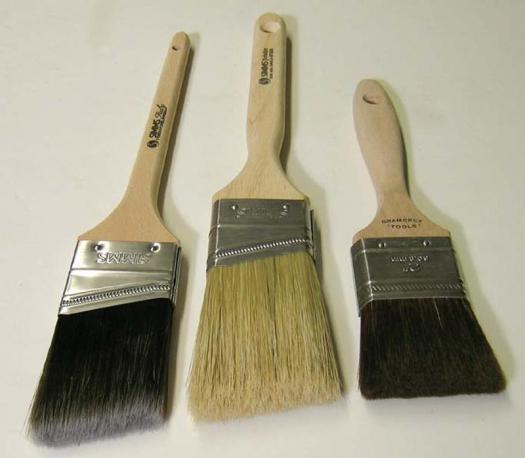
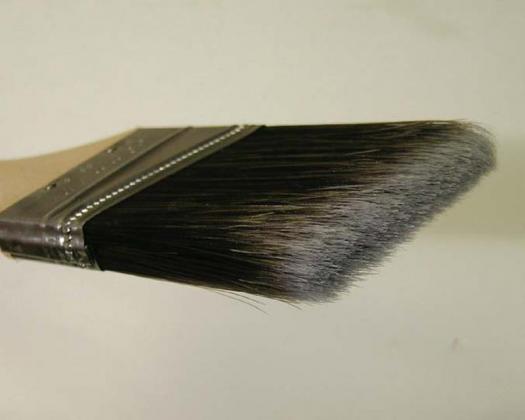
Brushes come in various widths, lengths and configurations. When finishing large surfaces such as a tabletop, a 2″ or 3″ wide brush is a good choice. For smaller panels, frames, edge work, and legs, a use a narrower 1 ½” to 2″ brush. When house painting a long, thick handle is useful, but for finishing furniture or cabinetry, a shorter handle is usually more manageable. Bristles that are cut square across the bottom of the brush are ideal for large flat areas but they offer little control in corners and tight areas. In this case it is better to choose a sash brush, such as the Simms Vintage Pro (simms.com), which has the ends of the bristles cut at an angle across its width. This allows finer control in corners and tight spaces, with the wrist remaining at a more natural angle resulting in less fatigue during use.
To apply a finish to a small area or something with a great deal of detail, such as fretwork, look to one of the small specialty brushes from an art supply house, such as opusframing.com or currys.com. These small brushes excel at working in small areas, and the fine bristles allow the finish to flow onto the work easily with virtually no visible marks. Though they are small, these brushes can often cost as much, or more, than their larger cousins.
Foam pads are the final option and are best left to the application of paints or first coats which will be levelled with sanding afterwards. Unlike a regular bristle brush where the finish flows out naturally from the bristles, the finish is removed from a foam pad by squeezing it out. This makes it almost impossible to achieve a smooth even finish. Using this type of pad on pieces with many edges or carved elements almost always results in drips and runs. Lacquer, and some solvents, will actually dissolve the foam or the glue that holds it onto the handle, so test a sample before starting on a project.
Using a brush to apply a finish to a piece of wood is very much like driving a car, for the best results you need to take into account the feedback you are getting from the process and incorporate it into your method. For the best results you want a brush that has been loaded with the correct amount of finish for the surface at hand and you’ll want to apply it to the surface in a manner that avoids any potential problems.
The proper loading of finish onto a brush is critical to a perfect result. A large thirsty surface such as a tabletop has the capacity to absorb finish at a faster rate than a smaller object such as a carving or a piece of trim. If you are too stingy with the finish in this case you will find it difficult to maintain a wet edge and the result will be noticeably streaky with brush marks where the finish was unable to flow and blend together. Applying too much finish to a carved or contoured piece will result in runs and sags that can be very difficult to correct. A good brush will provide some feedback to the user, much like a decent performance car will transmit road feel to the driver. Pay attention to the feel of the brush as you apply the finish and you will soon learn to identify the various conditions. Apply too much finish and the brush will feel as though you are pushing a puddle of liquid and if you don’t apply enough it will feel as though it is dragging on a dry surface; learn to identify these conditions and adjust your brush loading accordingly. These conditions will change with different woods and finishes but by watching these signs, experience will soon show you the correct load for each situation.
Dipping the brush into the finish up to the ferule will overload the brush and allow finish to drip as you move the brush across the project to your start point. Only dip the bottom ⅓ to ½ of the brush into the finish and allow the finish to wick into the brush. Before moving the brush to the project, adjust the amount of the load by pressing the brush against the sides of the container. We’ve all painted a house and dragged the side of the brush across the edge of the paint can to adjust the load. This will work with house paint but it will cause problems in the shop. As the brush is moved across the edge, small air bubbles are introduced into the finish as it runs down the edge of the container and these will cause problems later; they often remain suspended in the finish as it dries, leaving a rough, cratered surface. By pressing the excess finish out against the side of the container, this problem can be avoided.
A common mistake many woodworkers make when applying a finish to a panel is to start brushing at one edge and then work the finished area toward the other edge. This technique creates a long wet edge that can be difficult to sustain. By placing the brush at the edge of the panel and then brushing onto the surface you will leave a lot of finish right at the edge of the panel. It’s difficult to use a brush to mop up this sagging finish; usually the best course is to wipe up the excess finish with a rag and reapply the right amount of finish properly. When applying a finish to a panel, land the loaded brush on the front edge of the panel, just in from the edge and move the brush to the far edge. After completing that stroke, return to the landing point and brush back from the starting point to the unfinished edge of the panel. As you get to any edge, the brush should just glide off the top without moving down the edge of the panel. After completing the first pass, go back and work the finish toward the edge parallel to the stroke by pulling the finish gently up to it.
For a frame and panel it’s best to begin by staining the corners first, and then move onto the panel. Follow up with the stiles and rails, and finish the edges last.
Before you begin applying a finish, there are a few things you can do to make cleanup easier. Begin by dipping the brush into some compatible solvent as recommended by the manufacturer of the finish. This will wet the brush, making it easier to clean afterwards. If you are using both oil and water-based finishes in your shop, be sure to have dedicated brushes for each type as some of the resins will be left behind after cleaning, leading to cross contamination. When loading the brush, try to keep the finish out of the area at the top of the brush covered by the metal ferrule. Once the finish has gotten into this area it is especially hard to clean. If you have areas to finish where you must use the brush in an upside down orientation, do these areas first. There won’t be as much finish in the brush to run down into the ferrule and up the inverted handle.
After the finish has been applied, it is time for everyone’s favourite activity, cleaning the brushes. I would venture to say that like me, most woodworkers have at one time or another chosen to throw out a cheap brush rather than clean it properly. But when you have invested in some high quality brushes you’ll want to devote the time needed to keep them in top form. Although natural bristle brushes are the traditional choice for oil-based finishes they are not as easily cleaned as their synthetic counterparts.
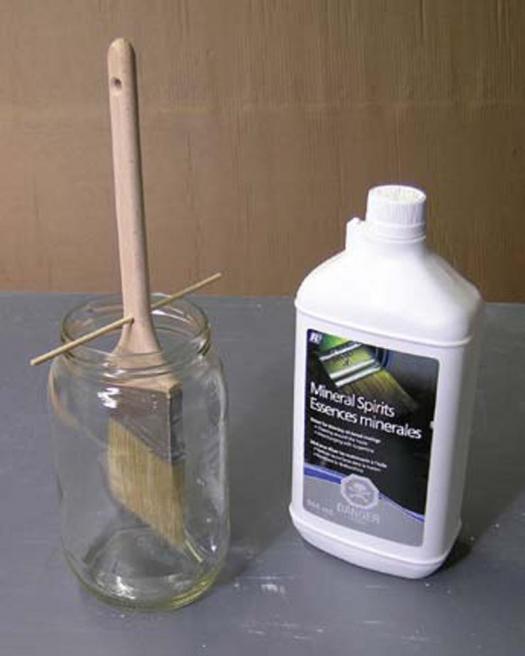
If you are applying an oil-based finish, clean the brush with the proper solvent as soon as the last coat is complete. If you are applying a finish that will require several coats of the same product then the brush can be wrapped tightly in plastic, or hung in a container in solvent overnight; in the morning simply press the excess solvent out of the brush on the side of the container and continue working. Don’t allow the brush to contact the bottom of the container, as the weight of the brush will deform the bristles. You may have to drill a new hole in the brush handle so that it hangs above the bottom of the container. Leaving a brush in the solvent indefinitely without a complete cleaning will cause the finish left in the brush to react with the solvent and gum up the brush. The initial cleaning can be done with used solvent, but the last wash should use clean or filtered solvent. After all the finish has been removed from the brush with a solvent wash, clean the brush with a citrus-based cleaner and water to remove the final traces of solvent from the brush.
Cleaning up after applying a water-based finish is a much easier proposition. Work the bristles back and forth under warm water to remove the excess finish and then add a little dish soap to the brush and work it through completely and then rinse the bristles thoroughly.
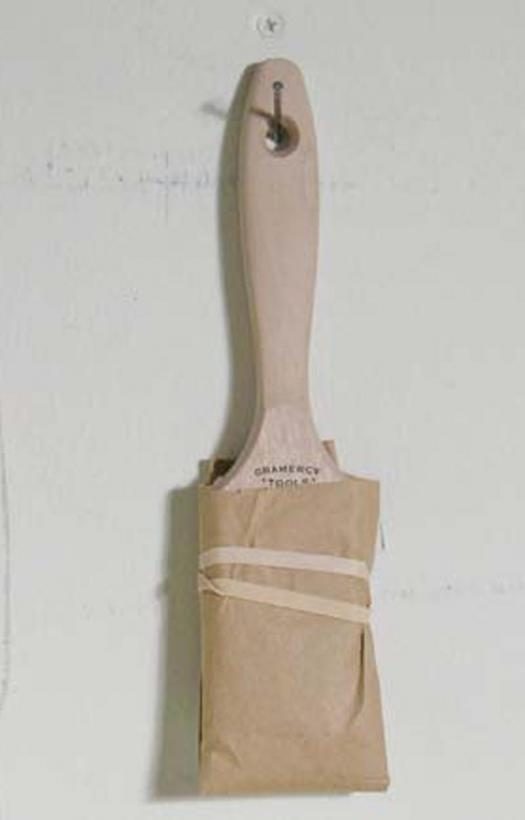
With the brushes clean, shake out the excess moisture by swinging it downward at the end of your arm several times and wrap the bristles in kraft paper or newspaper held in place with an elastic band. This will allow the bristles to dry, and keep them in good shape for the next job as well as keeping the shop dust from getting into your next finish.
The most efficient way to finish a project with a brush is to break it down into the smallest components possible, and, where possible, apply the finish before assembly. Fully assembled projects present difficult areas to finish such as inside corners where finish can pool and vertical surfaces that can run and drip and sag. Use an easy to remove masking tape, such as Scotch-Blue #2090, to cover areas that will receive glue.

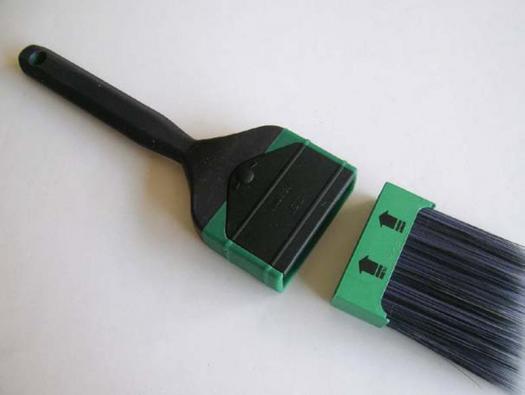
The Dynamic Enviro-Brush comes as a two-part system; the handle and the replaceable refills. The bristles come as a separate unit that is attached to the handle using a clip. The removable end is easier to clean, and when it is worn or damaged beyond repair you simply buy a new refill to replace the old one while re-using the handle.