PROJECT
Turning a tulip

Allan Cusworth

Find more Featured projects , Woodturning projects
With a few offcuts, a few dollar store dowels, a little colour and some glue you can make a beautiful bouquet of tulips to give to that special someone, and they’ll last forever.
A spring garden full of beautiful flowers always brings a smile to my face and joy to my heart. Snowdrops, crocuses, daffodils and tulips are a few of the first to show their colourful heads in spring. The problem is that as soon as they’re picked, put in a vase and placed on the kitchen table they start to lose their natural sparkle and die quickly.
My goal for this project was to turn a colourful wooden flower whose beauty would last much longer than the ones from the garden.
Turning a tulip
Preparing the blank
The blanks can be various sizes since tulips are not all the same size or shape. For this project, I selected a big leaf maple blank 2″ square by 4″ long. However, any hardwood, such as ash, oak or hickory, will make a beautiful flower. The finished flower will be approximately 1-3/4″ in diameter by 2-3/4″ long. If you decide to make one a different size, the measurements used here will need to be adjusted accordingly.
Mark and dimple the centres on the ends of the blank, mount it between centres and cut a tenon on one end to fit your chuck jaws. Don’t round it off yet.
Prep the stem and a pistil
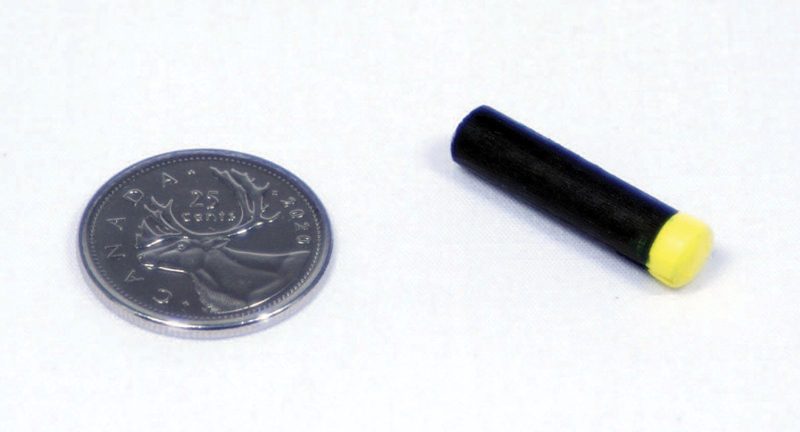
I like to add a pistil to the centre of the tulip. It’s best to prepare a couple ahead of time so they will be dry when the tulip is assembled. I cut a piece of 1/4″ dowel 1″ long, dye it brown or black, colour the tip with yellow acrylic paint and let it dry. This piece will be glued into the 1/4″ hole inside when gluing in the stem during assembling.
You should also prepare the stem in advance so it will be dry. To do this, colour a piece of 1/4″ dowel with either green dye or acrylic paint. A green bingo dabber works, but you’ll need to apply nitro-cellulose sealer diluted 50/50 with lacquer thinner to seal the surface to stop the green colour from rubbing off. I use dollar store dowels for the stems since I can’t turn a 1/4″ dowel that cheaply.
If applying a natural finish, finish the pistil and stem to match the flower, but I add a yellow tip to the natural pistils, too.
Shaping the outside
Mount the square blank in a chuck and line it up using the centre point of the live centre in the tailstock. Replace the live centre with a Jacob’s chuck. Using a 3/4″ Forstner bit, bore a hole 2-1/4″ deep in the centre. Replace the Forstner bit with a 1/4″ drill bit and bore a hole all the way through the blank. This will be used to glue the pistil and stem in place.
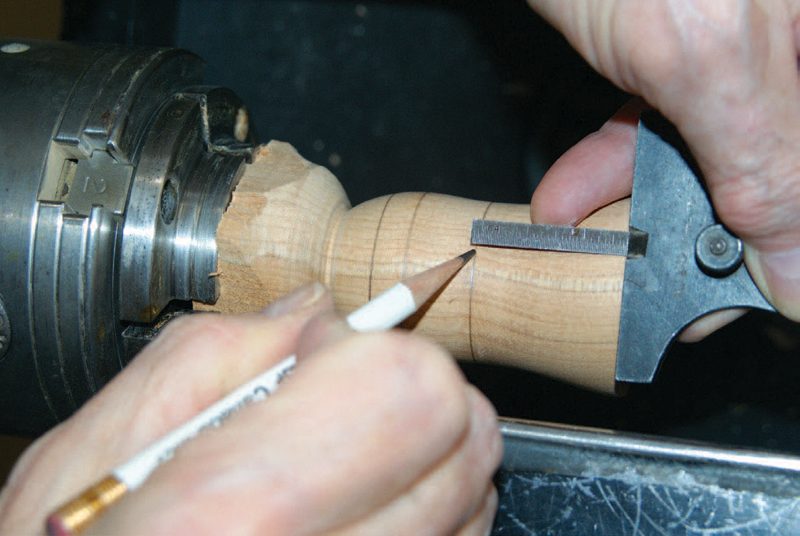
Round off the blank using a cone on the live centre in the tailstock for support. Make sure you don’t catch the chuck jaws. Mark the inside depth dimension 2-1/4″ from the tip on the outside surface of the tulip. Also mark the bottom of the tulip which will be 2-3/4″ from the tip. This will provide a 1/2″ base to allow for gluing the stem into the bottom, as well as a pistil inside.
Decide on the petal design, open or closed, and shape the outside of the tulip. Leave extra wood at the base for support when hollowing the inside.
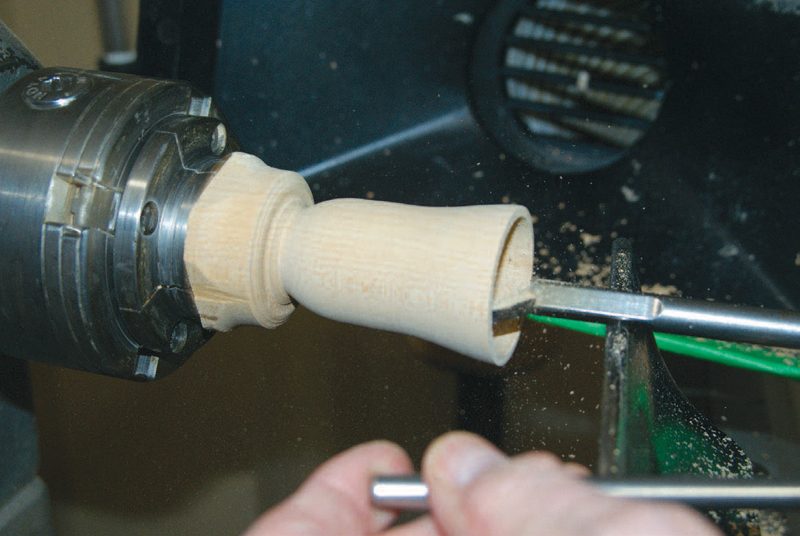
Remove the live centre and hollow out the inside of the tulip following the outside profile of the petal area just made. I use a Don Derry small hollowing tool with an outrigger, but any hollowing tool will work fine. Make sure you’re cutting on, or slightly above, centre. Make the inside bottom concave to be more natural and for easier sanding. Don’t make the petal areas too thin, otherwise they may split when cutting them out later. It’s a good idea to remove the live centre from the tailstock to protect your elbow.
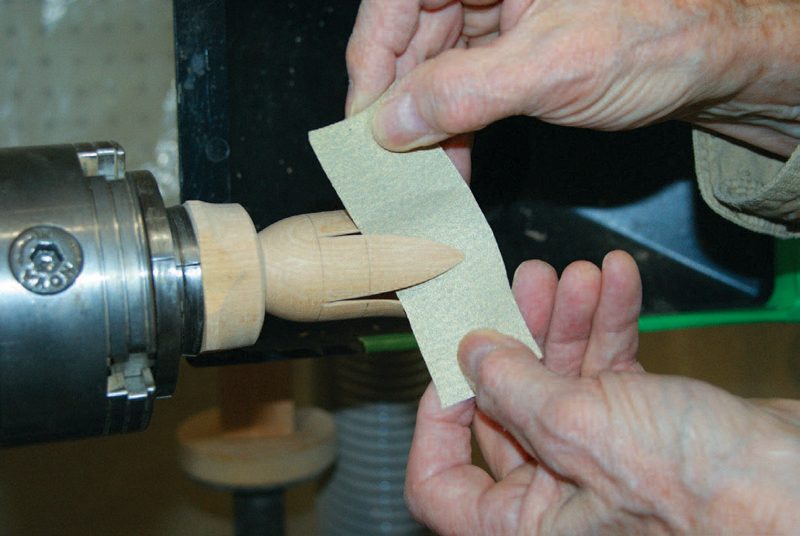
I use 80 grit sandpaper to do the final shaping of the tip of the petal area. Continue sanding the inside to 220 grit using strips of sandpaper on a split dowel, or a small foam ball covered with sandpaper on a stick. Fingers inside the flower can get injured very seriously. Sand the outside surface to 220 grit to remove any tool marks. Final touch-up sanding of the outside will be done later.
Laying out the petals
To lay out the petals, lightly mark rings on the outside surface showing the following distances from the tip: 2-1/4″ for the inside bottom; 1-7/8″ for the bottom of the petals; and 1-3/8″ for the base of each petal curve.
Line up the end of the toolrest with the point on the live centre in the tailstock so a pencil can draw a line exactly on centre. Place the petal layout cone against the point in the live centre in the tailstock and carefully bring it up to touch the rim of the petal area.
Decide if you want to make four or five petals and mark the rim where the black lines meet it for four petals, or where the red lines meet it for five petals. Using the centred tool rest, draw straight lines from the rim to the 1-7/8″ ring on the tulip.
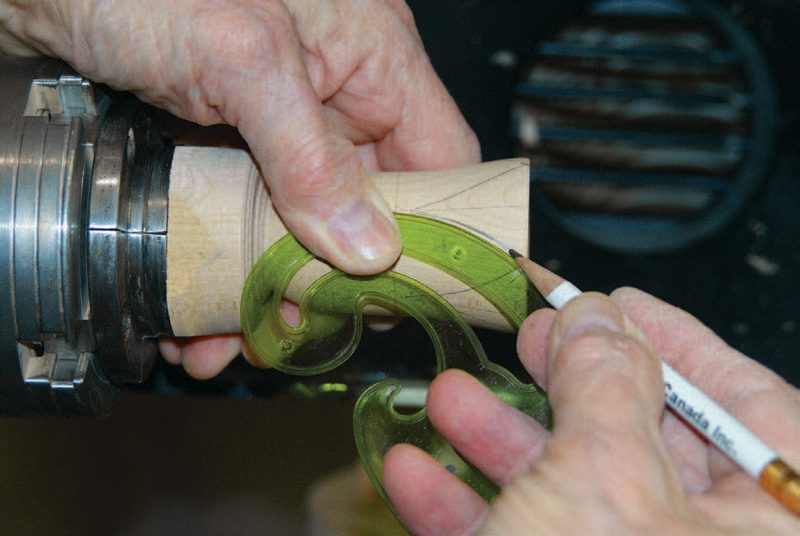
Remove the cone and make a mark, by eye, at the midpoint of the tip between the lines just drawn to identify the pointed tip of each petal. Draw an arc from the petal tip mark to the spot where the petal curve ends on the 1-3/8″ circle. I like to use a French curve, but freehand is okay, too, because not all flower petals are symmetrical.
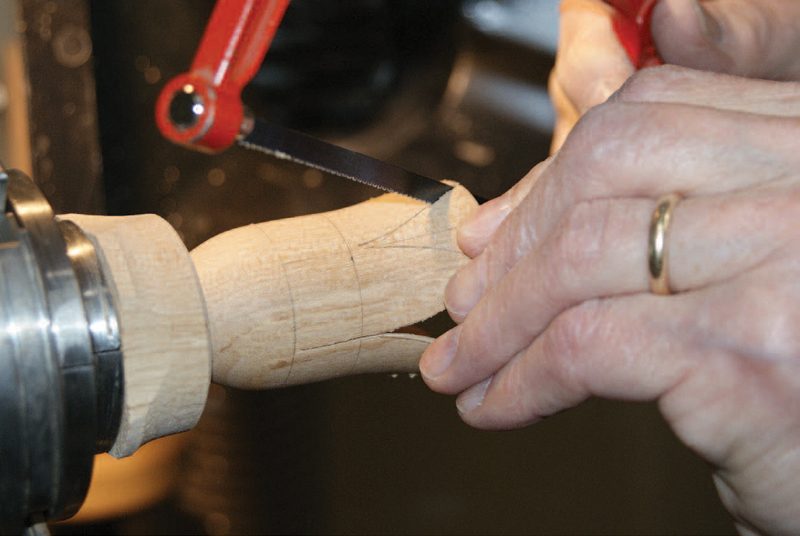
Cut along these curved petal lines with a small fine-tooth saw to the 1-3/8″ ring on all petals. Avoid a more aggressive saw, as it could easily damage the turning. After all petal curves are cut, continue to cut the slot from the 1-3/8″ ring to the 1-7/8″ ring to complete the rough shape of the petal. Use the spindle lock to hold the flower from spinning for this step. Finalize the petal shaping with strips of 80 grit sandpaper.
Mark the 2-3/4″ overall depth dimension on the outside of the tulip and continue shaping the outside of the base. A little bead at the base provides a little decoration. Don’t cut into the 1/4″ stem mounting hole.
Finish sanding the outside to finished grit with strips of sandpaper. Make sure the edges of the petals are smooth. Use a light touch when sanding the petal tip area.
Other petal layout methods
If you have an indexing feature on your lathe, it may be used to mark the petal locations. You can also refer to the spaces between the chuck jaws to eyeball the locations for four petals.
Finishing and colouring
Finish the tulip on the lathe. To add colour, dye or paint the inside and outside surfaces with your colour of choice. Shading with a complementary colour can be an added effect. Aniline dyes work well, as do acrylic paints. A bingo dabber will work surprisingly well. When the color is dry, rub the tulip with extra-fine synthetic steel wool and then wipe the dust off with a tack cloth. Complete the finishing process using aerosol spray lacquer or polyurethane with the lathe spinning at about 350 rpm. Leave the lathe running at around 100 rpm to reduce the tendency of runs. Apply three light coats, rub the outside of the flower with extra-fine synthetic steel wool and wipe off the dust with a tack cloth after the first two. Leave the last coat to dry and harden completely. If a natural wood finish is preferred, use only the spray lacquer or polyurethane.
After the finish has hardened, part off the tulip close to the base. Sand the bottom and finish to match the rest of the flower.
Assembling the tulip
Glue the pistil about halfway into the inside of the 1/4″ hole drilled in the flower. You may need to use a hemostat or other long-nosed pliers taped with masking tape on its tips to protect the yellow end of the pistil if the petal tips are too close together. Glue the stem into the outside of the 1/4″ hole to meet the pistil. After the glue dries, your tulip is complete.
Layout cone for petals
Mark and dimple centres on each end of a piece of hard or softwood 5″ long x 3″ square. Round off the blank to exactly 2-1/2″ diameter. Accuracy is important here for later calculations. Mark a ring 3-1/2″ from the tailstock end of the blank and cut a groove. Turn a straight-sided cone from the 3-1/2″ ring towards the tailstock end making a 3/4″ diameter rounded nose. Leave the 1-1/2″ section straight and the ring mark intact. I like to apply some nitrocellulose sanding sealer so the ink in the layout markings won’t run.

Marking lines for petal locations
Wrap a 3/4″ wide strip of paper around the blank on the non-tapered section of the cone at the 3-1/2″ ring and mark where the paper overlaps itself. Remove the strip of paper to mark five equal divisions. If you want a different number of petals you can divide this distance by that number.
Tape the strip of paper around the straight, non-tapered section of the cone at the 3-1/2″ ring and mark the five positions on the cone. Line up the tip of the toolrest with the point in the live centre in the tailstock so a pencil will draw a line on centre. Place the toolrest at each position and draw a straight line with a thin red marker from the 3-1/2″ ring to the rounded nose.
Photos by Allan Cusworth
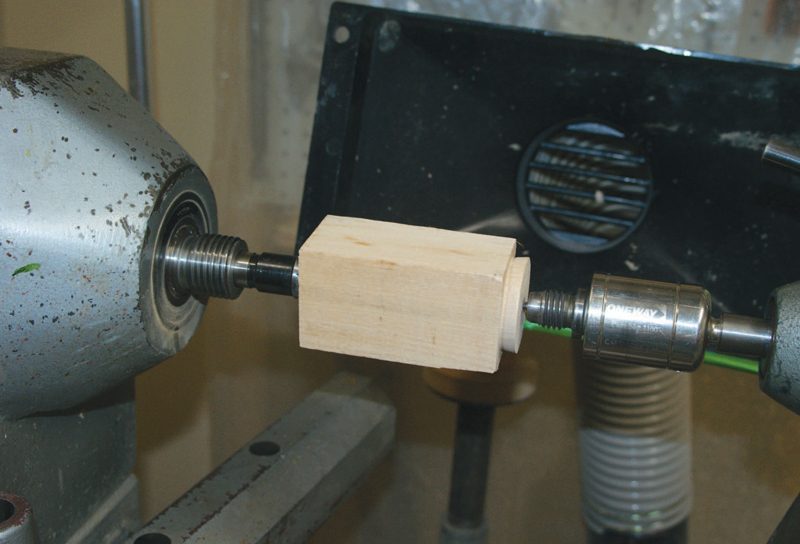
Turn a Tenon
Dimple the centre of both ends of the blank and mount it on the lathe. Turn a tenon on one end.
Make the Pistils
To give them time to dry, make the pistils now. Cusworth dyes the pistil dark then adds yellow acrylic paint to each of the pistil’s tips.
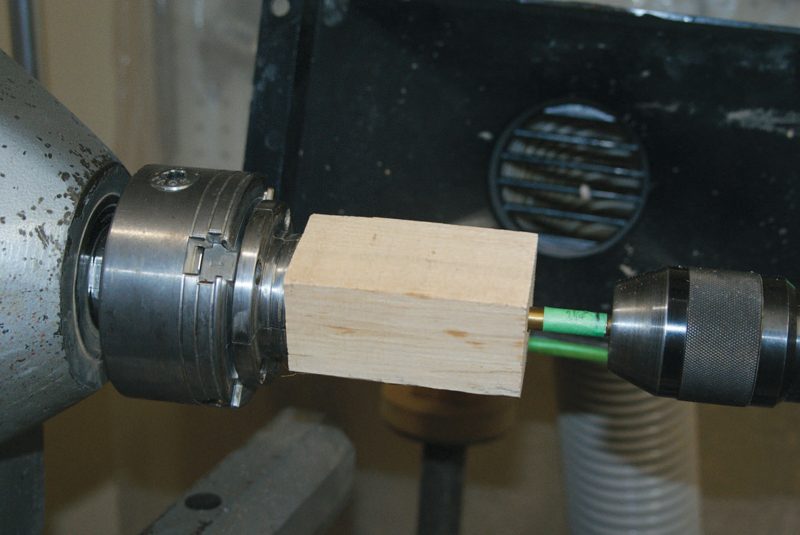
Bore a Hole
Reverse the blank and bore a 1/4" diameter hole into it. This will accept the stem and pistil down the road.
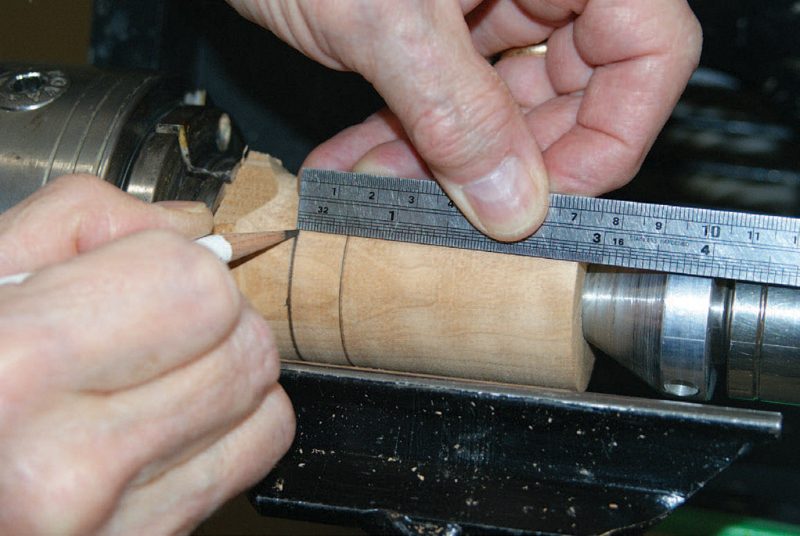
Two Guidelines
Cusworth now adds two pencil marks on the outside of the turned blank. One is the overall depth of the tulip and the other is the inside depth of the tulip. These lines will guide you when hollowing the tulip.
Hollow It Out
Now that the outside shape of the tulip has been completed, it’s time to hollow out the inside of the tulip.
Lay Out the Petals
Cusworth adds three lines on the outside of the petals to guide him while marking the petals.
How Many Petals?
The petal layout cone will allow you to easily and accurately mark the petal divisions on the blank. Cusworth added red marks on his layout cone for a five-petal tulip and black lines for a four-petal tulip.

Add Arcs
A French curve will help you mark even arcs on the outside of the turning. Doing this hand is also possible, as tulips don’t need to be symmetrical.
Remove the Waste
Cusworth cuts away the waste between each petal. Do this with a fine-toothed saw; a more aggressive saw may break the thin walls of the turning.
Smooth the Petals
Some sandpaper will allow you to smooth the hand-sawn edges and fair all the curves.
Ready for Colour
Cusworth added a small bead at the base of the petals. Now the tulip can be parted from the tenon and finished.

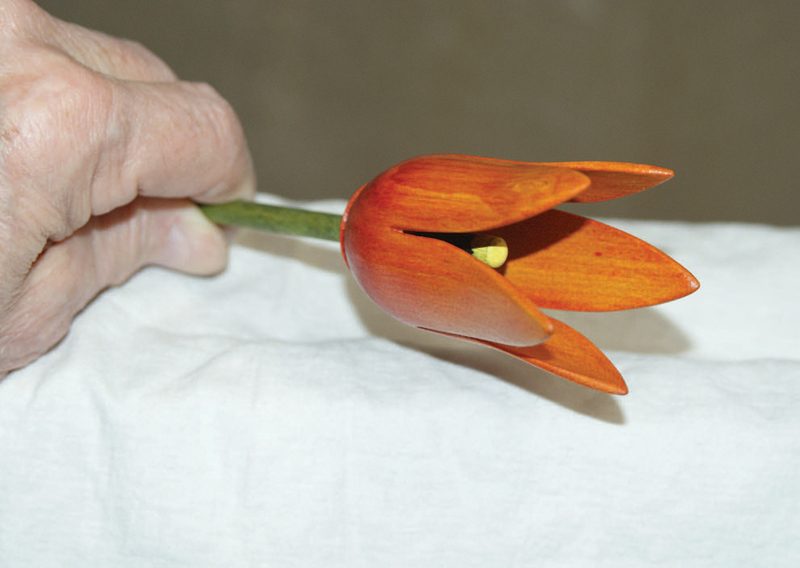
All Done
The finished tulip, complete with coloured stem and pistil.


Thank you for your explanation. I have attempted several times with less than pleasing results. This will enable me to improve my Tulips.
Un petit coucou de France et un grand Merci pour vos publications.
Woodturning is a great hobby. There are a lot of fellow turners who are more than willing to help.
Thank you very much, I turned my wife a collection of flowers that I am not allergic to. Also, a great reason to purchase a Nova chuck. Fantastic detail well laid out article with just the right pictures.
Might have to give wood turning a try
Great sequence and build illustrations . Thank you Alan . Ken D.
Allan thanks for a great tutorial, as usual great details
Glad you enjoyed the article. Flowers are always a welcome gift and these turned ones last a lot longer than fresh ones.
If you have any questions don’t hesitate to contact me.
Please email a picture of what you make to me.
Thanks for your detailed instructions, Allan. I enjoy doing small-scale turnings like this one, and will definitely try making a few tulips this spring.