TIPS & HOW TO
Turn your router into a jointer

Mark Eaton

Even if you currently have a jointer, there are some times when your jointer just won’t do the job that a router can do on jointed edges.
For a long time, like many woodworkers, I couldn’t afford a jointer for my home shop. Eventually I did get a jointer, but for many years before that I used my router as a jointer. Even if you currently have a jointer, there are some times when your jointer just won’t do the job that a router can do on jointed edges.
The router is a very easy tool to set up and use for jointing edges and in these next steps I will take you through the process of jointing boards with your router.
The first step is to choose your cutter. I prefer a flush trim bit for jointing.
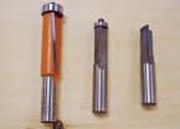
The flush trim bit that I use (middle bit) has a 4 degree sheer angle on the carbide. This is an up sheer angle that carves the wood from the stock rather than just slapping it off like jointer knives would. The other two bits shown are a ¾” flush trim with a very large down sheer angle, and a straight bit with no angle at all.
Chuck your bit into the router and raise it just above the table surface.

The fence that I am using has 1/16” taken off of the infeed side – very much like a jointer but not adjustable.
You can make a fence for your router table by double sided taping a piece of plywood or other thin material to the outfeed side of your fence.
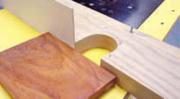
To set up the fence on your table, C-clamp the out feed side of your fence to the table only. Make sure that the bit is lined up with the centre hole of your fence. Now isolate the bearing of the flush trim bit with the out feed side of the fence only.
C-clamp the infeed side of your fence and you are ready to rout.
One of the main applications for using the router as a jointer is on very erratic grained woods.

This is a piece of curly maple. I find that my jointer wants to tear the stock rather than carve the stock on this type of wood, but the router cuts much smoother.
There is also a big safety advantage of using your router as a jointer: you can reference one large surface flat against another large surface. With a jointer you always have to stand your stock on edge.
Begin feeding your stock into the cutter just like you would normally rout.
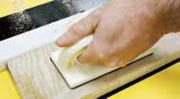
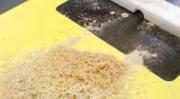
You will notice that if you are using a sheer angle cutter that the router produces shavings rather than just dust.
You also have the ability to joint narrower stock safely. Because you have a larger surface to reference against the table, you have more control of your piece .
Note how little stock is above the “pork chop” safety guard on a typical jointer. This is definitely a time when push blocks would need to be used.

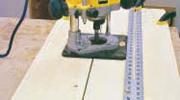
Taking this application a step further you can also joint the edges of larger stock. Your jointing ability is limited to the length of the fence on your router table. If your fence is 20” long then I would recommend jointing stock up to 36” (or 1/3 longer than your fence).
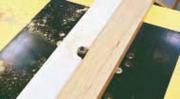
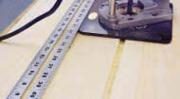
For longer stock, lay out your boards on a scrap piece of ply in the order that you want them laminated and clamp them at both ends to your bench.
Choose a router bit that is wider than the gap between your boards. In this case I chose a 1/2” straight bit.
Clamp a straight edge to the top of your stock so that your router bit will be centered in the gap between two boards.
Set the depth of cut so that it will cut through the stock and slightly into the ply underneath.
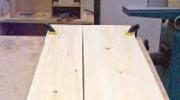
Hold your router tight to the straight edge and begin cutting. Remember the bit rotation from the top is clockwise so with your straight edge on the left make a push cut and the rotation will hold the router tight to the fence.
If you find your router pulling away from the straight edge, your direction of feed is backwards. Start from the other end to correct this. If you do wander a bit, don’t worry too much. The router is cutting both surfaces at the same time, so any drift will be in both boards and the fit will still be perfect.

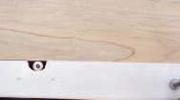
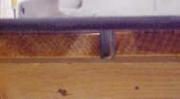
The pencil shown in the photo above is laying on and pointing to the jointed edge.
So you see with a little practice jointing edges becomes possible with your router even if you are still saving to get a jointer. In addition this technique gives you another use for your router.


Woodworking – your e-mails, I have subscribed to. On this topic, references are made to pictures above the number of 6. So, despite using the latest of MS Edge and using Google, I am unable to find more pictures than using the left or right arrows. Am I missing something about using this file?
I’ve add the missing photos into the article Ken. Glitch on our part! Unfortunately the photos are very small. Hope this works for you.