TIPS & HOW TO
Restoring hand planes

DAVID EISAN

Buying and restoring old hand planes is economical, educational, practical and enjoyable.
As my journey into woodworking continues, I find myself reaching more and more for hand tools (hand planes in particular) to achieve that exact fitting of parts and/or surfacing of panels.
If money were no object, I would simply call up Lie Nielsen and order one of everything in their catalogue. Since that is not an option, I have taken to buying old hand planes and restoring them.
I recently bought a 114-year-old Stanley #5, a 99-year-old #4 and a 76-year-old #3. I bought all three on Ebay and after paying in US dollars, including shipping; the cost was on average $50 Canadian per plane. I paid a little more than was necessary because I bought planes that had intact handles and were well presented (with several clear photographs). That way I knew what I was buying. If you don’t know anything about hand planes, buying them on Ebay can be an expensive way to learn.
One of the best books out there on how to identify and date old Stanley planes is “Antique & Collectible STANLEY TOOLS Guide to Identity & Value”, by John Walter (tel. 1-740-373-9973) (ISBN 18789110105).
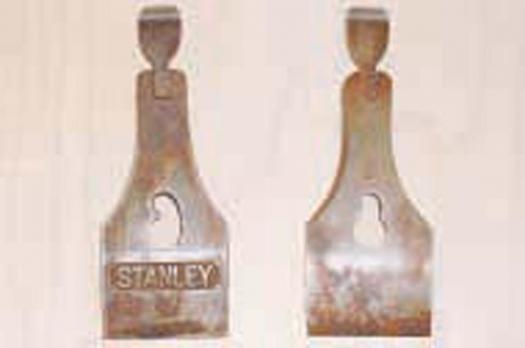
Here are some very simple rules to follow when looking to purchase an old Stanley hand plane. Look for a keyhole-shaped hole in the lever cap. That indicates it is a type 15 or earlier Stanley bench plane (made before 1932). If the hole that the lever cap screw passes through is kidney-shaped, the plane was made in (or after) 1933. That is not to say you won’t have success with a later made plane. If you don’t know the subtle differences between a recently made plane of questionable vintage (looks old, but isn’t), noting this difference might save you from buying a lemon.
Don’t worry about a used up blade. There are many sources for replacement blades. Lee Valley sells both Hock and their own Veritas brand blades, both of excellent quality.
Also, don’t worry about what the plane looks like. Just make sure all the parts are there. A rusty plane just means you are going to pay less.
Broken handles can be fixed or replaced. Again, Lee Valley sells replacement rosewood handles if the ones on the plane you buy are beyond repair. There are also several companies on the Internet that sell replacement plane handles for almost every hand plane, in almost every species of wood.
If you are buying on Ebay, be sure to look at the “Completed Auctions”. That will show you what different hand planes have sold for, and in what conditions. This is a great research tool to see the market value of a specific plane in a given condition.
Most importantly, when buying on Ebay (or any auction): DON’T GET CARRIED AWAY! If the price exceeds what you wanted to pay, drop out. Next week there will be another 50 Stanley #4 smooth planes up for auction.
Disassemble each plane completely. All that is needed to take apart a plane is a couple of sizes of slot screwdrivers. Put the parts from each plane in separate containers and label them. You can go further than simple disassembly, and use a drift punch to drive the pin out of the frog that holds the “Y” adjusting lever in place. Wrap part of an inner tube around the threaded shaft that the blade-adjusting nut goes on. Then, with a pair of pliers, remove the threaded shaft. Note: it is a reverse thread! If the threaded rod doesn’t come out easily, then don’t struggle with it; leave it in. If you ruin the threads, you cannot simply run to the hardware store and buy a left hand thread, 9/32″ x 24 TPI rod to replace it.
Collectors and purists may cringe, but I clean and repair these planes to “as new” condition. Keep in mind, the three models that I am dealing with here are very common Stanley bench planes, not some rare and expensive Norris infill smoothers. Mind you, there are some rare and expensive Stanley bench planes, but my subject planes certainly don’t fall into that category. Try to find out the value of your planes before you give them this kind of treatment.
The “before” photos don’t properly reflect the condition of the planes, as there was much more rust and pitting on them than what appears.
Remove the rust from the cast iron plane parts with electrolysis. Although my high school transcript reports that I took chemistry, I don’t remember too much of it. Therefore, I will not include a detailed explanation of how electrolysis works.
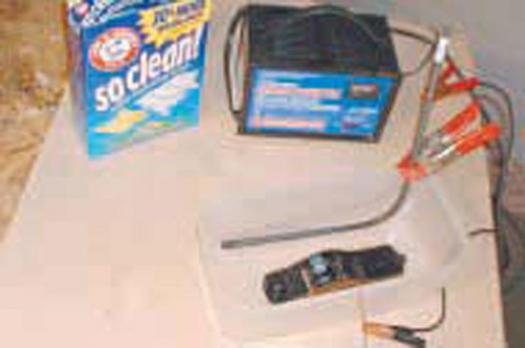
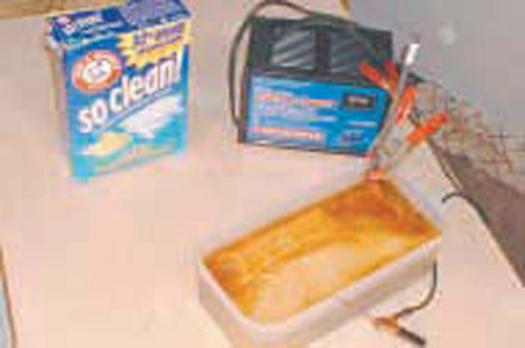
Instead I will just tell you how to do it. The things you will need are: 12V car battery charger, anode (rebar works well), non-conductive container, and sodium carbonate (Arm & Hammer washing soda).
Attach a copper wire to the plane body and set it in a plastic tub on a couple pieces of dowel (to keep it off the bottom of the container). Bend a piece of rebar and hold it to the side of the container with a spring clamp. Be certain there is no chance of the anode (rebar) touching the cathode (plane body). In another container, make the electrolyte. Mix one tablespoon of washing soda for each gallon of water. The washing soda tends to clump, so make sure to mix it well. Pour enough of the electrolyte into the plastic tub to cover the plane body. With your battery charger unplugged, attach the red positive clamp to the rebar and the black negative clamp to the wire attached to the plane body. Be sure your positive connection occurs out of the solution or it will dissolve. It is not as important to keep the negative one out, as nothing bad will happen to it. (Note: make sure you have the polarity correct, or you will dissolve your plane and make a clean piece of rebar!).
With all your connections made, confirm the battery charger is set to the 10 amp setting and then you can plug in the battery charger. You will start to see small bubbles rise to the surface of the electrolyte from the plane and the rebar.
These bubbles are oxygen and hydrogen, so use appropriate precautions. Do this in a well-ventilated area with no open flames or sparks. Leave the solution to foam and froth away for a few hours (for a light cleaning). Leave for a couple of days for a very rusty plane. Always unplug the battery charger before you connect or disconnect either conductor.
When the plane has sat in the solution long enough, clean it under warm running water with a grey Scotchbrite pad.
It is at this point that the plane body will transform before your eyes, from a dirty mess, to clean metal. Make sure that you dry your plane off immediately; otherwise your newly cleaned body will literally rust before your eyes. Dry the plane body as best you can with a towel, then place it in your oven at the lowest setting. My toaster oven is good up to a #5 plane. For larger planes I have to use my full size oven.
Leave the plane in the oven for at least an hour to evaporate all the water from every crevice.
If you take the plane body out of the oven and see some very light rust, a couple of quick swipes with a dry grey Scotchbrite pad will clean it all off.
Now, do the same process with the plane blade, cap iron, and frog. You can do these three pieces at once, stringing them together with a single wire for the electrolysis process.
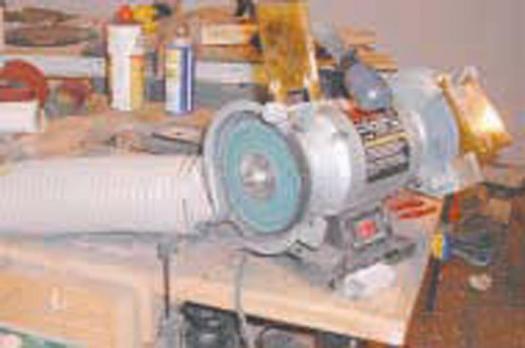
To clean the nickel-plated lever cap, buff it. I put a 6″ buffing wheel on my grinder and bought some white rouge buffing compound (Delta part #23-008). I hadn’t buffed metal since high school shop, but it’s pretty simple. Lightly push the white rouge bar into the running buffing wheel to load it up with compound. Always buff in the downward direction (lower part of the wheel) and be very careful not to catch an edge. I also buffed the remainder of the steel and brass components to clean them up.
Pliers are handy for holding the small parts when buffing. I used a Dremel tool with small buffing wheels and cylinders to get into the rim of the brass adjusting nut and other nooks and crannies. Everything buffed up very well, especially the brass. I was doing the buffing indoors, so I used my dust collector to collect the debris off the buffing wheel. Normally dust collection on a grinder is a very bad thing (dust and sparks don’t mix), but there was no danger here.
Now check the plane body for flatness. I took the #5 body over to my stationary jointer’s cast iron bed (which I know is flat). The plane body rocked from corner to corner, so I needed to lap it flat. I used 3″ wide 80-grit sandpaper from a roll, held flat onto the wing of my table saw with clamps, and I lapped my #5 plane flat. The other two were not nearly as bad, but I decided to lap them as well. I scribbled all over the bottom of each plane with a black marker before I started so I could track my progress of how flat the plane was becoming.
Before I masked off the cast iron parts for spray painting, I went over all the cast iron plane parts with a wire wheel (on a Dremel) to make sure they were absolutely clean and every last bit of loose japanning was removed. The last part of the cleaning process is to rub all parts down with lacquer thinner to remove any dust or oils. Masking is quite simple: use an X-Acto or Stanley knife to trim the tape to sharp edges. All machined surfaces should be masked; all raw casting surfaces should be painted.
I don’t know a lot about paint, so I went to my local, full-service paint store and asked what they recommended for my application. They suggested black reinforced resin urethane enamel, which I then asked them to load into a spray can in black. I gave all of the cast iron parts (including the little yoke) three light coats of paint. It was fun peeling the masking tape off, revealing the strong contrast between the cleaned up metal and the satin black paint.
When I bought these three planes, I was sure to buy ones with intact rosewood handles and totes, as I didn’t want to have to repair, buy or make new ones. I didn’t care that they were a little dinged up, just that they were whole. To remove the old finish I soaked the handles in lacquer thinner for about half an hour and then cleaned them with a grey Scotchbrite pad. To refinish the knobs and totes I used Deft spray lacquer.
The most important part of the plane is the plane iron or blade. Restoring it is important, but it can be tedious. Don’t expect a 100-year-old plane iron to be in good shape. Expect pitting, a chipped bevel, or even an iron that no longer has enough length to be sharpened anymore. If the iron is a total write-off, don’t worry, just buy a new one. I find that most irons can be salvaged, it’s just a matter of how much effort you want to put into bringing them back to life.
The first thing to do is to re-grind the iron. Set the angle on your grinder tool rest to 25º and grind the iron until all the nicks at the end of the blade have been removed.
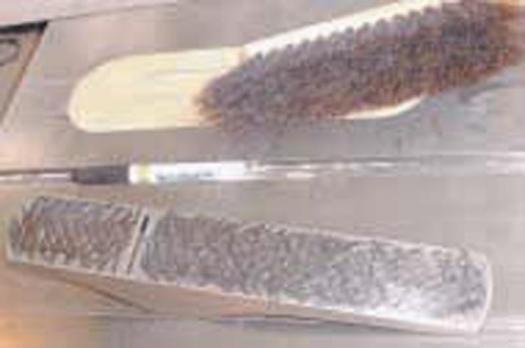
Be very careful not to overheat and blue the blade while grinding. Cool the iron often in water. Next, lap the back of the blade perfectly flat. I started with an 80-grit sanding belt clamped to my table saw top, then to 120, 220, 320 and 600-grit sandpaper on glass. What takes the most time is trying to lap out all of the pitting with the 80-grit tool. With other irons, I have started much lower down the grit scale (as low as 36 grit) but it leaves very deep scratches that are time consuming to remove later. I finished up on my 1000, 4000 and 8000-grit Samona Japanese water stones. There is no need to lap the entire back of the plane iron, just do about the bottom half inch or so.
As much as I have tried sharpening a thin Stanley type plane iron free-hand, I cannot do it. I still rely on my Veritas precision honing guide. I set the guide so my plane iron is held at 25-1/4° and start sharpening on my 1000-grit water stone. When I can see that I have sharpened all the way across the iron (about 1/16″), I crank up the guide 2-1/4° to 27-1/4° and finish up with a very small micro bevel on an 8000-grit water stone.
When assembling the iron and iron cap, make sure the lower edge of the iron cap sits flat and flush on the back of plane blade. If it does not, fit it so that it does. The cap iron should be set back from the edge of the blade about 1/32″. Standard bench planes have their irons installed bevel down. When installing the frog, test-fit the iron to see how large a throat opening there will be for the various frog positions. On smoothers, I like a very tight throat; on jacks and jointers I open the throat more. Re-assembly of the remainder of the plane is fairly straightforward.
So there you have it. You can now turn around and sell your newly restored hand plane on Ebay for a handsome profit; add it to your own hand plane collection; or start using it to create wonderful wooden projects.
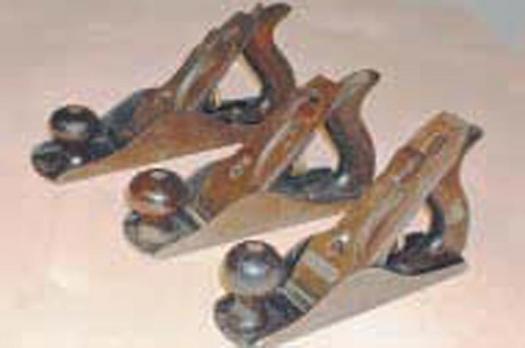
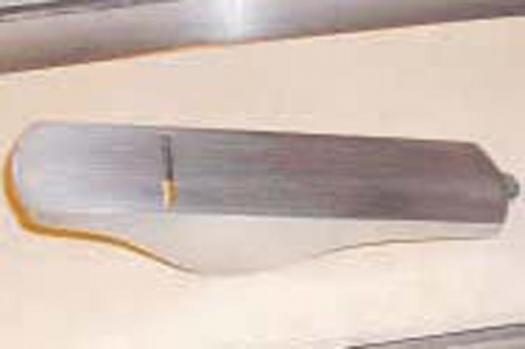
As bought
Taken Apart

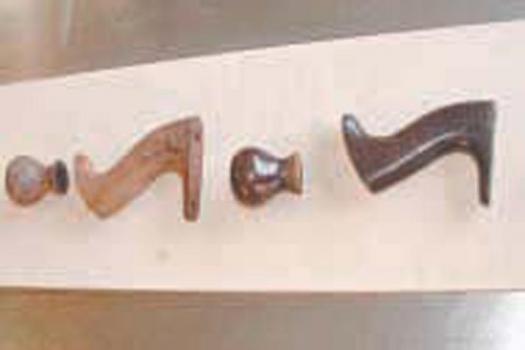
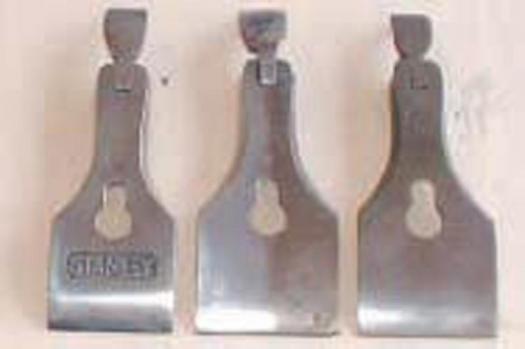
Kidney and Keyhole lever cap styles
All set up to pour in electrolyte
Electrolyte in action
One stripped, one not
Starting to lap #5
#5 lapped
Buffing setup
Buffing lever caps. #3 done, #5 half done, #4 not touched
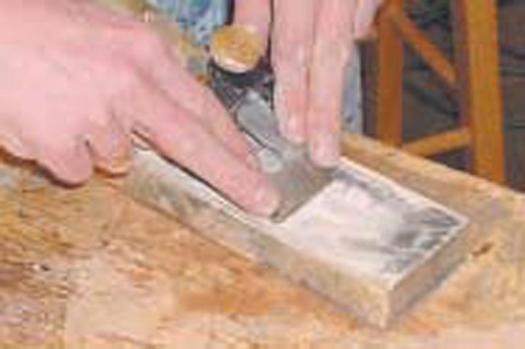
Sharpening iron

Lapping iron