PROJECT
Sunrise

Henriette Corbeil

Find more Intarsia, Inlay & Marquetry projects
The Laurentians is a vast region of Quebec known for its lakes, valleys and mountains. For the intarsia artist it provides countless design opportunities.
This intermediate level project contains 137 pieces of wood of various species. The pieces vary from ¼” to 1” thick, with the final project size measuring 16” by 30″. You can photo-enlarge the pattern to customize the size of the project, but bear in mind that some of the pieces are quite small, so don’t reduce the pattern too much. On the pattern, I have indicated wood grain direction (arrows), wood shading, and wood thicknesses in eighths of an inch.
Sunrise
Initial Preparations
As with any intarsia project, I begin by making four or five copies of the project pattern, and label one of them ‘Master’. Tape a sheet of waxed paper on top of the master copy; you’ll assemble the project on this sheet, and the waxed paper will help keep it from getting too scruffy.
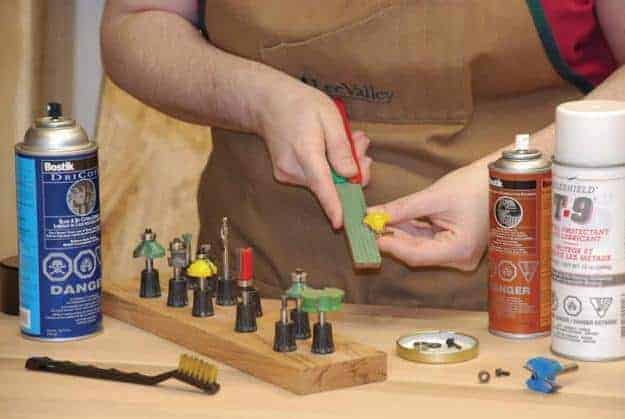
The selection of wood will have a tremendous impact on your project finish. ‘Pure’ intarsia is made by using woods in their natural colour (without applying a stain). I personally don’t mind using a little bit of stain or acrylic paint in order to get the colour I am looking for, or simply to enhance a specific area of the project. Sometimes, just a little touch-up can make a huge difference. In this project, I wanted to tint the lake, so I selected cedar for that piece, as it works great with acrylic paint. Along with colour, you need to consider grain direction. Different woods will suggest different kinds of movement. For the boat on the shore I selected a piece of grey maple that had the perfect curves in it, while for the mountain at the top, I used ash; its distinctive grain pattern suggested hills and valleys. Cedar and poplar are usually very good for suggesting water, while I have a preference for Brazilian lacewood for deer fur. Even though I have suggested some wood species you should make your own choices depending on the wood that you have at hand.
When choosing wood thickness, keep in mind that you can use shims on the pieces that are not part of the contour, as the shims will be invisible underneath. Using shims can reduce material cost for more expensive species, but it does take more time because you have one extra piece to cut and glue underneath the top piece. I try to purchase most of the wood I use at building supply stores as I can select pieces with unique grain patterns. Unfortunately such stores tend to stock only domestic wood species. For exotic woods you will need to purchase from specialty wood suppliers; fortunately many of these will ship small quantities direct to you. Wood shows are also a good place to stock up on smaller exotic woods.
Transferring the Pattern to Wood
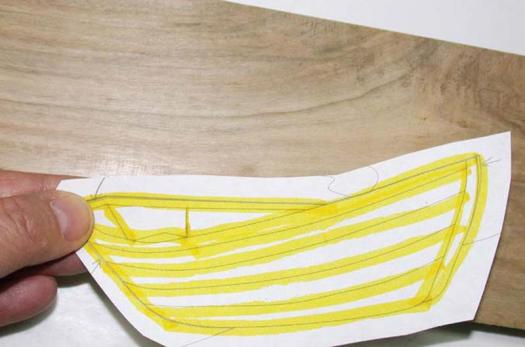
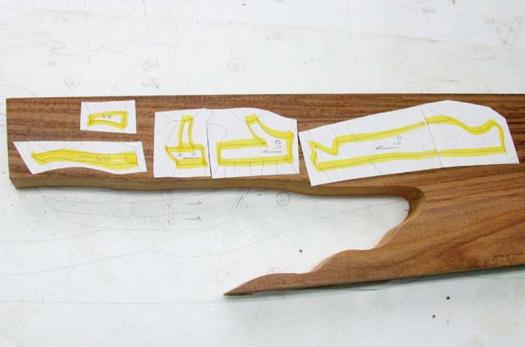
Rather than using the tracing method with carbon paper, I use the cut and paste method, gluing each pattern piece onto the wood, to eliminate tracing variations from the original pattern. I begin by using a yellow highlighter to mark the lines I want to cut on the pattern copies. This helps reduce cutting mistakes, as there are a lot of surrounding lines from adjacent pieces on the pattern. I cut the pattern pieces along the lines I have marked, and then I regroup them based on wood colours and thicknesses required. I attach the patterns to the wood with a glue stick or with spray adhesive.
Cutting the Pieces
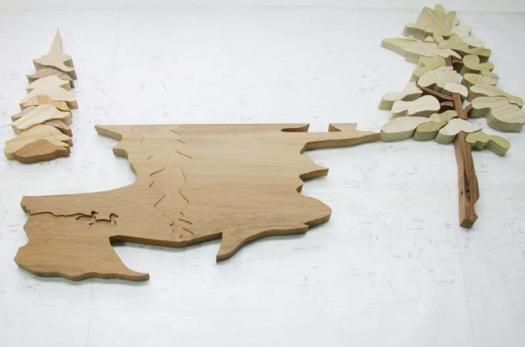
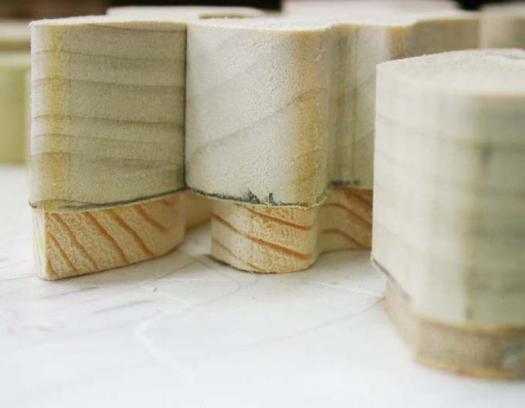
I like to cut many pieces of wood at the same time or even the entire project all together when it is not too complex. For a large project like this, I cut a smaller area first and fit the pieces tightly together before cutting other pieces around it. Breaking the project down into more manageable areas makes it less intimidating. I usually start toward the middle of the project and work my way out. In this case, I started by cutting the lake, the pine tree on the right side, and the fir tree on the left side. I worked around these three areas until they were all connected together.
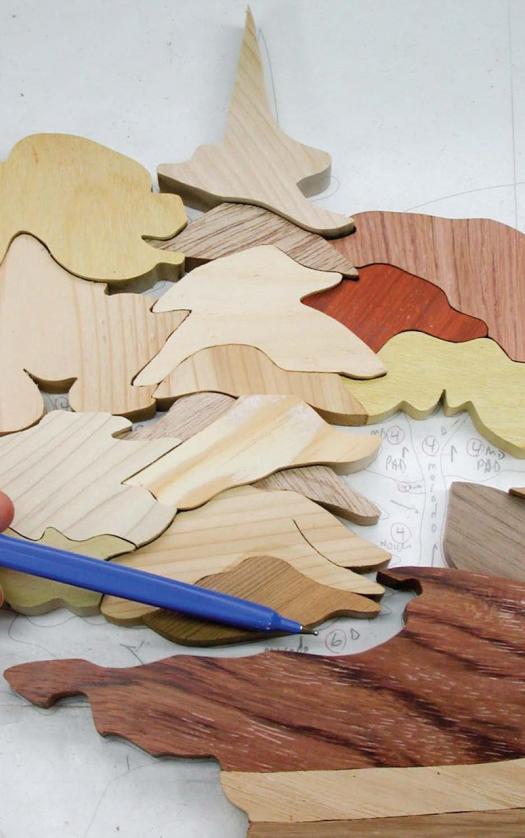
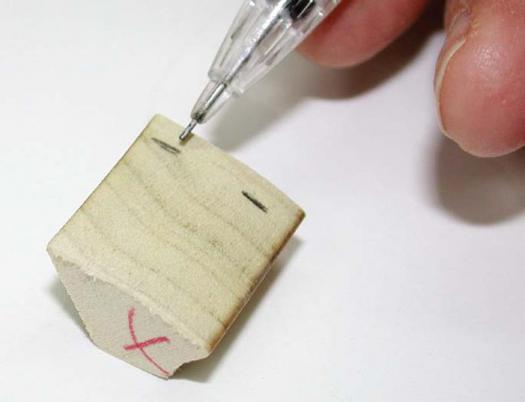
Before cutting I identify the pieces to be cut at the end of the project – the buffer pieces. The idea is to allow you to redraw the buffer piece pattern using adjacent pieces already cut as guides to ensure a tighter fit. For example, on this project, I marked the piece at the bottom of the fir tree as the buffer piece. I started by cutting the trees, then I completed the area by cutting the buffer piece last.
Make sure your scroll saw blade is perpendicular to the table, and cut right on the line. Be careful not to push too hard on your blade because your cut edge may not be straight. This is more likely to happen with thick hardwood such as bubinga or oak. When a lot of pieces are similar, I number them with a red pencil on the back. The boat side pieces are a good example of this. If I do not intend to fit the pieces together right away I will tape them together – this saves a lot of time trying to figure out what goes where.
Fitting the Pieces
Fitting the pieces of an intarsia project together is much like doing a puzzle. When complete, the project will be perfectly assembled on top of the master plan.
Sand the bottom of each cut piece to remove the irregularities (fuzz) left by the blade, and then remove the paper on the top surface with a sander. So that you don’t inadvertently get the two sides confused, mark the bottom of each piece with a red pencil, which will show up on both pale and dark woods.
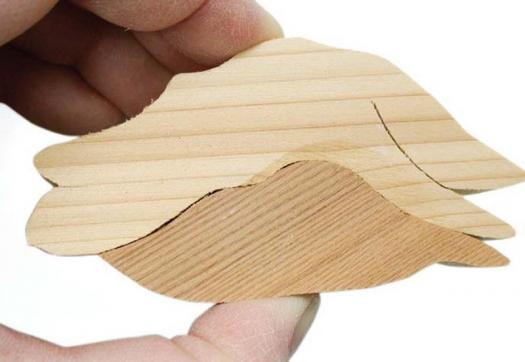
Check the pieces for fit, ensuring that the edges are square. This is essential for a good fit. If a cut needs to be adjusted, you can use an oscillating spindle sander to make the cut edge square. Be careful if you use a rotary tool, such as a Dremel, as it is more difficult to keep the edge perpendicular to the wood piece. You may have to do a little bit of sanding here and there to improve the fit. Small gaps of 1⁄32” are usually acceptable as they won’t be visible on the finished assembly. A large gap equally spaced is much better than a gap that varies in width.
If you see that you have deviated too much from the plan, you can trace new lines based on the adjacent parts that are already cut (as I do for the buffer pieces). For better precision, I take a mechanical pencil with 0.5mm lead to make sure I follow the edges very closely. I also use a homemade light box, which makes it easy to see the gaps between wood pieces. I put the pieces on the light box, find any gaps, determine where I need to sand, and then mark the piece on top with a red crayon where it needs sanding. It is very hard to eliminate all the gaps.
Raising and Lowering the Pieces
Once the pieces all fit together nicely, it’s time to raise or lower individual pieces where necessary. Shims can be made from any scrap wood, veneer or plywood, and are glued to the bottom surface of a piece. To lower a piece measure how much you want removed from the piece, place a reference line around the bottom of the piece, and use a sander to remove the excess material. It isn’t a good idea to shim contoured pieces as the shim will be visible from the side when the piece is finished. If you absolutely must shim, use a shim of the same wood species that was used to make your piece.
Shaping, Sanding, Texturizing
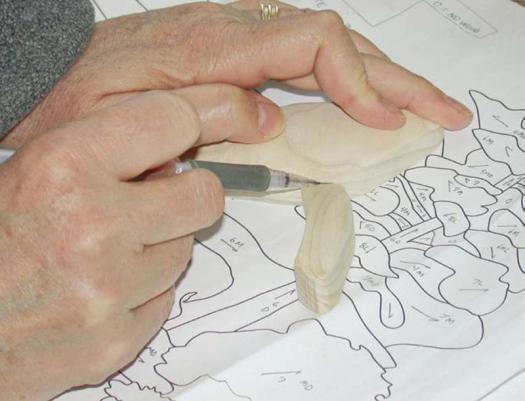
To remove a lot of wood fast you can use a belt or disc sander equipped with coarse sanding paper (60 – 80 grit). Complete the shaping using an inflated drum sander, or a rotary tool with a finer grit paper (100 – 120 grit). It’s good practice to frequently compare a piece’s thickness against the other pieces; this will help ensure you don’t remove too much material. Reference lines, which let you know when to stop shaping, are also a good idea. Identify the edges that should not be rounded on the pattern. Water is a good example. You don’t want to round any of the water piece edges. When you have a tree in front of mountains, you round the tree edges but not the mountain edges.
The more time you spend shaping your pieces, usually the better three dimensional effect you are going to get. Intarsia is not just a matter of cutting pieces and fitting them together like a flat puzzle. I used a bow sander to sand edges of narrow curves (i.e. the bushes). Once pieces are shaped, you may need to do finish sanding to eliminate any visible sanding marks. Remember to sand in the grain direction, progressing up to 220 grit, or until any scratches disappear. If you plan to stain the wood, this step is critical. The wood surface needs to be as smooth as you can possibly make it, as stain will highlight any sanding marks.
For this project, I decided to give the bushes, long grass and pine tree needles some texture instead of leaving them with a plain surface. You can do so with a variety of tips on a rotary tool, with sanders or carving tools. For the pine needles, use a 1⁄16” cutting disk on the rotary tool to make some marks on the surface. You can use the same tool for the long grass bush on the left side of the project. For the bush on the right side I used a sanding tip to do the texture.
Applying a Finish
Apply one coat of clear wood sealer on pieces you don’t want to stain or paint. I prefer to do this step before gluing because it will protect the wood from unwanted glue stain afterwards. Make sure you allow the sealer time to dry. Always test your staining or colouring on a scrap piece of wood. Hardwoods and softwoods do not react the same way when stained. You don’t want to destroy your project at this late stage.
I decided to paint both deer faces, some white dots on the baby’s back, and also their hooves, as I felt that the pieces were too small for me to cut and sand properly. On the water I used yellow highlights to show that the water is not deep close to the shore and also to show the sun’s reflection on the lake. To make the yellow I blended crocus yellow and golden brown acrylic paint. I applied midnight blue acrylic paint in the deep water area first and blended gently with the yellow towards the shore, using a clean dry rag. Acrylic dries very fast so I mixed it with a little bit of water and quickly wiped it off with the rag allowing the wood grain to show up through the acrylic coat.
Gluing and Final Assembly
Place a piece of waxed paper on the master pattern if you haven’t already done so. Position all of the pieces on the full pattern. Waxed paper can be easily peeled off the bottom of the assembly once the glue is dry. Put glue on the bottom 1¼” of the pieces you are assembling, starting with the lake (center of project) and moving towards the outside parts. Use a toothpick to spread the glue more evenly at the bottom of each piece. A toothpick can also be used to remove the glue that squeezes out between adjacent pieces. Apply sufficient pressure to make sure the bottom remains flat. Once the project is dry, clean the glue from the bottom edges, if necessary.
Put your project on a ¼” thick backing board, which will add strength and provide a nice surface for the final touches. Trace around the perimeter of the project onto the backboard. Don’t forget to also mark the areas inside the perimeter that you also want to remove. Drill holes for blade insertion where necessary, and cut the backboard about ⅛” inside the lines you draw. You can also tilt your blade when cutting the backing. Remove the fuzz by sanding the edges, and then put your assembled project on the backboard to see if any area needs to be re-cut. The backboard should not be visible. I use a rotary tool to sand the edges at an angle providing a nice smooth transition from front to back.
Paint the edge of the backboard in black using acrylic paint or a black marker. Once the paint is dry, glue and clamp the project to the backing board, cleaning up any glue that may have squeezed out. After the glue has dried, apply a finish. I apply three to four coats of a spray varnish. Sanding is generally not required between coats. I use a thin black Sharpie pen to sign and date each piece on the front, and glue a label to the back that shows the different types of wood used in the project. Attach a hanger wire to the back of the piece and it’s ready to hang on the wall.
This is an enjoyable project to make. While there are a lot of pieces, and it takes time to cut and assemble everything, it isn’t an overly difficult project. On a landscape like this you can remove or add details here and there to better match your taste or to adjust the amount of effort you are prepared to devote to the project. I am more than happy to answer your questions or receive your comments.
Light Box
A light box is simple to make. Make a frame of ¾” x 2 ½” softwood, the length of the pieces depending on how large a box you want. Using the table saw or router table, mill 3⁄16” grooves about ¼” down from the top edge on three of the frame pieces. The Plexiglas top slides into these grooves. Cut the top of the fourth frame piece so that it fits under the Plexiglas. To assemble the frame I simply screwed the sides together, and then screwed a ¼” piece of plywood to the bottom. I also drilled some air holes and an access hole for the light fixture cord.
Match wood grain for boat
Glue cut paper templates on wood
First three areas cut and ready to fit
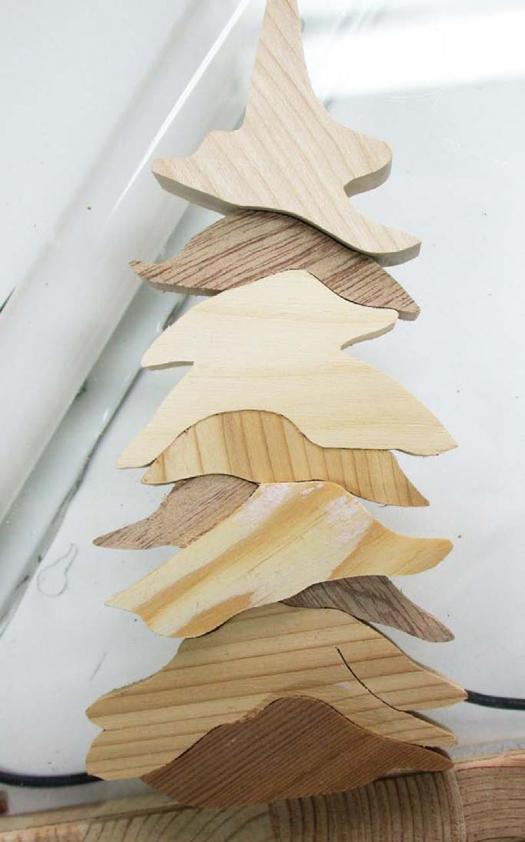
Pine tree fit completed
Keep buffer zone for last piece
Example of acceptable fit
Mark contour before cutting next piece

Side view of raising shims
Mark piece for lowering
Mark adjacent piece thickness to shape
Use rotary tool to make round edges
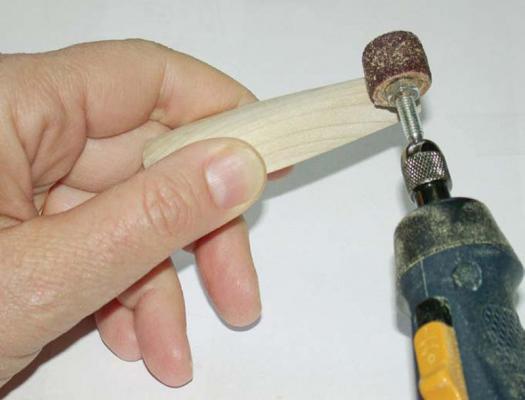
Illustration by James Provost