PROJECT
Shaker Bentwood Box

Dorothy Dearborn

Find more Boxes projects
The Shaker tradition of simplicity in design continues to hold sway in Hampton, New Brunswick where Brent Rourke makes traditionally inspired oval boxes.
Shaker bentwood boxes were originally made in a random choice of sizes, often on the whim of the maker or the availability of materials. While the sizes have gradually become standardized over time, you can make a box of any dimension you choose. The wood you select must be straight and even grained so that it will bend and tack without splitting. Maple, walnut and cherry are all suitable choices.
In this article I’ll take you through the steps that Brent follows in making his bentwood boxes. The box is essentially made up of two ‘bands’ (pieces of thick veneer), one for the body and another for the lid band, and two flat pieces, one for the lid top and one for the base. The bands are typically ⅛” thick, with the lid top 5⁄16″and the base ¼” thick. You can mill these pieces using a bandsaw and then thickness plane them to final dimension. Make sure you square the stock before re-sawing it, and, to avoid a mishap, don’t run stock shorter than 12″ through your planer.
The most popular Shaker box sizes are show below. The first time you try making a box, concentrate on following the steps involved in the box making process, rather than on making a box to the exact sizes in this chart.
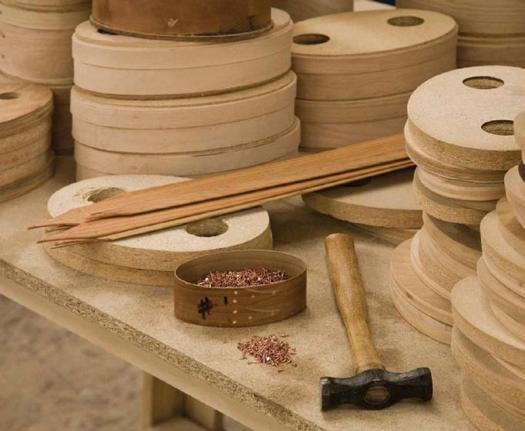
Typically these boxes have two ‘fingers’ on the end of each body band, except for the #4 size, which can have three fingers. Copper tacks (leevalley.com) hold the fingers in place, while pegs made from toothpicks secure the bands in place on the lid top and base.
The bands will be wrapped around forms to create their shape. Before you can wrap the bands around the forms they must be softened. The easiest way to do this is to boil the veneer in water; alternatively you could use a steam box. You will need a small anvil or convex shaped piece of metal (a length of train track comes to mind) to assist in nailing the tacks in place.
Shaker Bentwood Box
Make the Forms
You will need three oval bending forms, the same size as the base, around which to wrap the bands (two for the body band and one for the lid band). The forms can be made from pine, basswood or MDF.
Rough cut the shapes on the bandsaw and then sand them smooth. Then drill a couple of finger holes in the forms so that you can easily remove them from the box and lid after they dry.
Prepare the Bands
Begin by tracing and cutting out the finger pattern and mark the locations for the tack holes on one end of each band. The ends of the fingers are about 3⁄16″ wide, and they range from 1″ (for the #1 box) to 2″ long (for the #4 box).
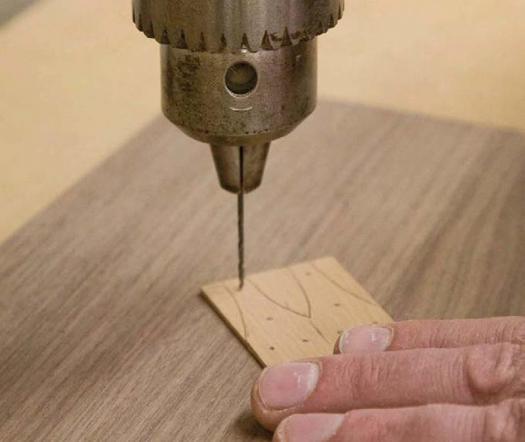
Drill 1⁄16″ holes on each of the tack hole locations, and then taper the opposite end of the bands to a fine point. This will eliminate a ridge on the side of the box and lid where the band ends. Tapering can be done with a stationary belt sander, oscillating sander, or portable belt sander. Depending on the length of the band the taper will be about 1″ to 2″ long. You will need to slightly bevel the fingers at the tips and the outside edges (5º to 10º).
Make the Lid and Base
You can use the same wood for the lid and base as you used for the bands, or you can use a softwood such as pine or fir.
Draw the appropriate size oval on the lid and base and cut it out on the bandsaw. Using a stationary belt sander or block of wood and sandpaper, sand the edges smooth. The base should be about ⅛” smaller than the lid.
Assemble the Box
In a metal tray bring water to a boil, and then reduce the heat slightly. Place the finger ends into the water for 15 to 20 minutes. Remove the bands and with a sharp knife cut a bevel on the inside of the band between the fingers and towards the end of the band. Turn band around and bevel cut towards the center. The two bevels will meet in the center of the fingers.
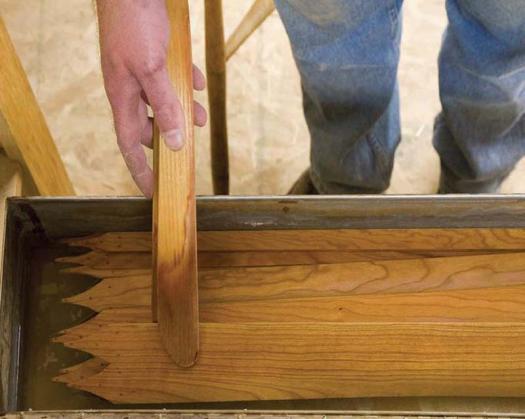
Place the body band completely in the boiling water for 15 to 20 minutes. If the water discolours, replace with fresh water. You’ll want to use gloves or tongs to work with the bands at this time. Working quickly, wrap the band around the form and mark, with a pencil, where the end of the fingers align on the side of the bands. Be sure to hold all the fingers all the time otherwise the band could split up the middle between the fingers.
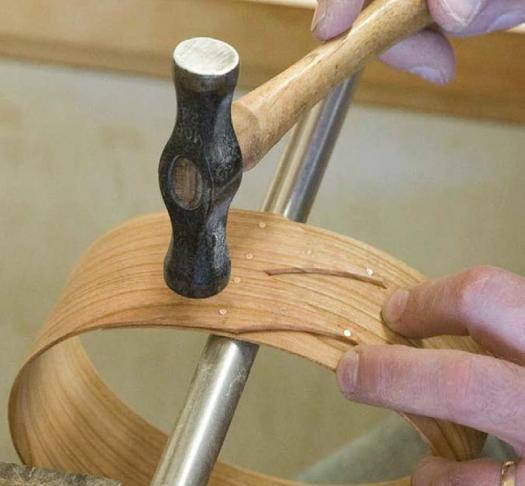
Remove the band from the form, realign the fingers with the pencil, and slide the band over the anvil. Drive tacks through the band until they strike the anvil and clinch on the back of the band. Now you can place the drying forms inside the band to hold its shape. Follow the same steps to bend the lid band as you did for the body band.
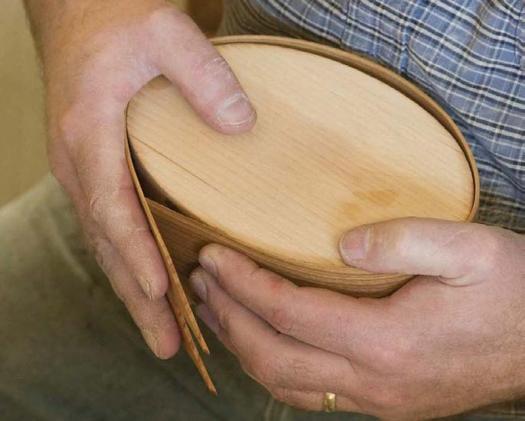
Insert the lid into the lid banding, and the base into the body banding. You may have to lightly sand the edges of the lid or base to ensure a snug fit. Drill 1⁄16″ holes every two to three inches along the top edge of the lid and bottom edge of the base. Drive wooden pegs (toothpicks cut in half) in the holes and cut off the protruding ends with a saw or wire cutters. (Note: the fingers can face either to the right or left). Allow the boxes to dry for two or three days.
Finish the Box
Sand the completed box by hand with 180 grit sandpaper. You can leave the box unfinished, and it will develop its own patina over time. If the box will be subject to a lot of use then you might want to apply a finish. Options include a penetrating oil, varnish, a water-based finish, lacquer or shellac.
As you can see, making a bentwood box is not overly difficult, nor time consuming. And, you don’t have to be constrained by the traditional box sizes – you can make them to just about any size to suit your storage requirements.
Photos by James Wilson jameswilson.ca
Forms ready for assembly
Drilling tack holes
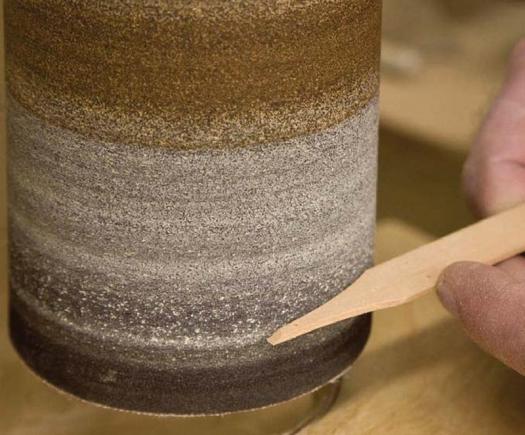
Shaping lid band
Soaking bands
Wrapping bands around form
Driving in tacks
Form inserted into box

Box maker Brent Rourke
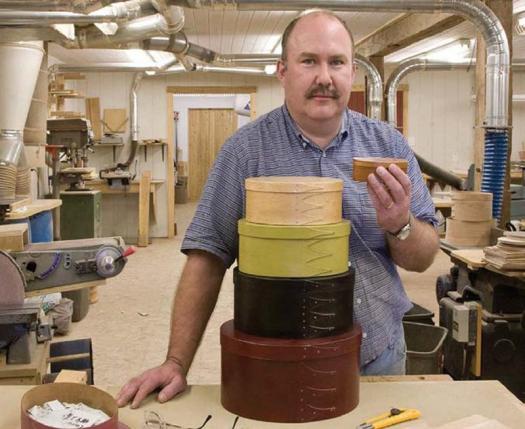
Illustration by James Provost


Can I purchase wood from you for a #5 Oval Box in Maple?
Good morning, I’m from Colombia. I’m a retired architect and I have a carpentry workshop. I just wanted to write to admire your work. Congratulations.