PROJECT
Two-drawer freeform bandsaw box

Brian Knodel

Find more Boxes projects
Band sawn boxes can be as easy, or as difficult, as you care to make them.
I am fascinated with the bandsawn boxes that are designed and constructed in shapes that are more ‘free flowing’ and less square.
Try the methods mentioned here to come up with some interesting shapes of your own.
To make this bandsawn box:
• Prepare a suitable blank
• Cut a ¼” strip off the back
• Cut out the drawers
• Cut off ½” from the front of drawers
• Cut ¼” from the back of drawers
• Cut out the drawer compartments
• Glue fronts & back, backs to drawers
• Glue back of box, back onto box body
• Cut out the body
• Sand and finish
Two-drawer freeform bandsaw box
Prepare the Blank
For this project I used a laminated blank, rather than a solid block of wood.
If you choose to do the same, begin by laminating as many boards together as you will need for the size of box that you want. When deciding on the size, keep in mind the working clearances of your band saw.
Lay out the boards prior to glue-up, and look at the grain orientation. Try to picture which board would look best next to others, keeping the best board for the front. For this box I used six poplar boards, for a blank measuring 5 ½” thick, 6” high and 13 ½” long. This blank just fits the working dimensions of a Delta 14” bandsaw. After the glued up blank has dried, remove the glue drips with a chisel and if necessary, square up the blank using your jointer and planer. Only take off what you need, keeping your final dimensions in mind.
You will have to choose whether you want to make the drawers from material cut out of the blank, cut from a new lamination, or from a solid piece. If you choose to use a new lamination, you can make drawers from different types of wood to give the box a whole different look. For this box I chose to make the drawers from a new lamination, selected from the same species of wood.
The Pattern
You can draw your pattern directly onto the blank. If you prefer, you could draw your pattern on cardboard, cut it out, and transfer it to the blank; use carbon paper and trace it out; or even glue the pattern directly to the blank using spray adhesive. For your first box I would suggest keeping the pattern simple.
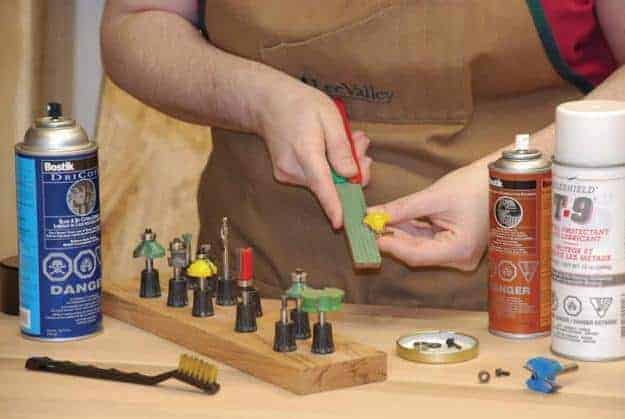
Choosing Blade
For cuts that involve curves, I use a 3/16” 10 tpi blade. It enables me to cut tighter and smoother curves, and makes the sanding easier. For cutting the front and back of the drawers I used a ¼” 6 tpi blade. For cutting the back of the box, I chose a ½” 3 tpi blade. You could of course, use a single small blade for all the cutting, but it would take longer to make the cuts.
Cutting the Drawers
If you are going to use the material you cut from the blank for the drawers, then cut a ¼” piece off the back of the drawer block, and ½” off the front. To keep the back piece from warping, place it on dowels or sticks to allow for even air circulation on both sides.
If you will be cutting the drawers from a new lamination, place the back of the box on the new lamination and trace the outline for the drawers. Cut out the drawers from the new lamination, and then cut off the ¼” back and ½” front pieces. I find that using a new blank for the drawers is a bit more work, but produces tighter fitting drawers.
To cut out the drawer compartments, place the drawer on its side on the bandsaw table.
I leave a minimum of 3/16” thickness at the thinnest area of the drawer, so that I have enough gluing surface to glue on the fronts and backs. Don’t use too much glue or the excess squeeze out will show up in the drawer compartment. Try to keep most of the glue on the outside edges; once its dry it can be carefully sanded off. Place a 1” dowel against the sides and the bottoms and trace around the dowel to round off the corners. This is the minimum radius that I can cut through on a 5 ½” thickness of wood. If you have an oscillating spindle sander, a ¾” sleeve fits into these round cuts very nicely.
Cutting and Sanding the Body
Once the drawers are cut, glue on the back and front pieces(that you cut off previously). Then cut the outside shape of the body. Bear in mind that this cut will largely determine the final look of the box. Sanding takes a fair bit of time, but it too will have its effect on the final shape of your box.
On the inside of the drawers and the outside of the box, sand to you heart’s content. Round off corners and edges and expose even more grain. You can even use a router, with a round over bit, to shape the edges.
On the outside of the drawers and the inside of the drawer cavity, be careful. Any excess sanding will make for poor fitting drawers. Although not essential, a spindle sander would help a lot. I use various sizes of dowels and rulers, with self-adhesive sandpaper, to get into awkward places.
Handles or Pulls
You can use handles or pulls for the drawers. They can also be self-made or purchased. I make mine, to accentuate the shape of the drawers. You can glue or screw them on.
Finishing
When making boxes like this, remember that you have to deal with both end grain and long grain, and they accept finishes differently. I use Wipe On Polyurethane, a durable finish available in satin, gloss or semi gloss.
I use a 1” fine artist brush and apply the first few coats liberally, both inside and out. Make sure to get into the corners. Then use a haemostat (a surgical clamp) attached to a small folded cotton wiper, to finish the rest of the inside of the box. I usually apply eight or nine coats.
I hope that my piece inspires you to make your own bandsawn box. Try different sizes and shapes. Remember, such boxes are limited only by your imagination.
Resources
One of the best resources I have come across is “Building Beautiful Boxes with Your Bandsaw” by Lois Keener Ventura (ISBN # 1558705228). It’s a great place to start learning and is considered the “how to book” for making bandsaw boxes. It also contains numerous tips and plans.