

I have used both left- and right-tilt table saws over the years but when it was time to purchase a saw I would spend the rest of my life with, the choice was easy: right tilt.
There are pros and cons to both but unless you are doing things most woodworkers would consider out of the ordinary, I think the choice is simple. The three advantages the left-tilt saws have can be easily overcome by machining bevels with one specific set-up on a right-tilt saw. Once you realize how fast, safe and easy this technique is, you will kick yourself for purchasing a left-tilt saw. Not only will bevelling be improved in every way but you will also enjoy the added benefit of always having your cursor reading accurately.
This set-up machines bevels on all the straight edges for a project, regardless of the width, length or angle of the work pieces. I have to readjust it for different thicknesses of mate rial but it s rare to have multiple thicknesses in need of bevel cuts in the same project. It takes a bit longer to set up (three to four minutes) vs. a left-tilt saw (30 seconds). However, with this one set-up, I bevel every edge that needs it, no matter what size, shape or angle the piece is, so it s time well spent. If I only need to make one mitre cut, this might not be the fastest method, but if even three or four cuts are required, it s a no-brainer. Make sure you cut all the pieces in need of bevelling to exact finished size before you start this set-up. This operation will simply machine the bevel on the edges that need it.
Another thing I like about this set-up is that the blade remains virtually buried in the sacrificial fence the entire time. It s not out in the open where a momentary lack of concentra tion could be disastrous.
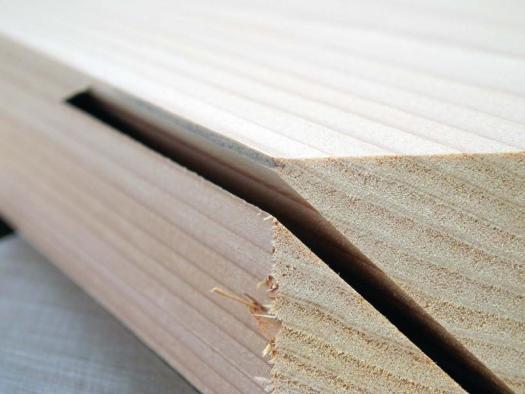
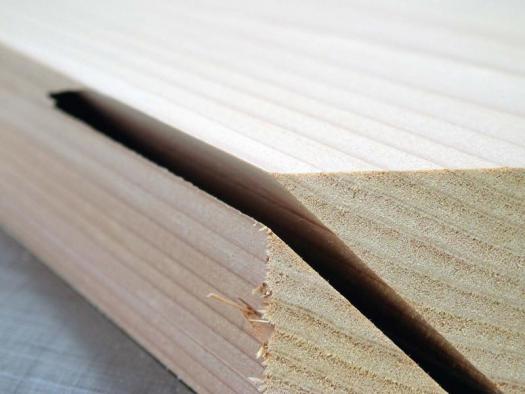
The final advantage is in the actual quality and crispness of the bevelled edge being cut. With any other bevelling method, the first cut (with the full thickness edge against the fence) often goes okay. It s when you turn the piece around to cut the opposite side that you run into trouble. This is mainly because you re now asking a razor thin edge to run against the fence and keep the entire panel perfectly aligned with the fence at all times; a tall task for less than 1/32″ of material. This method has about .” against the fence before being cut by the blade and this makes all the difference in the world. After the piece is cut, the same 1/32″ edge will be asked to help keep the panel from shifting.
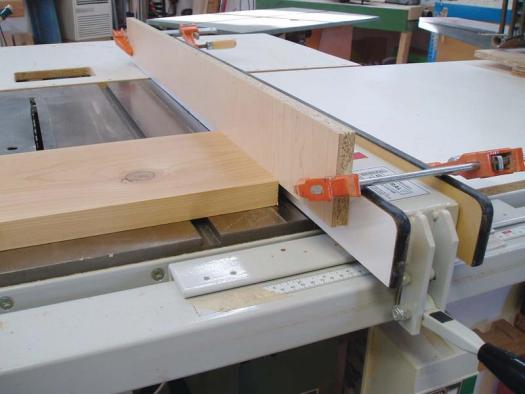
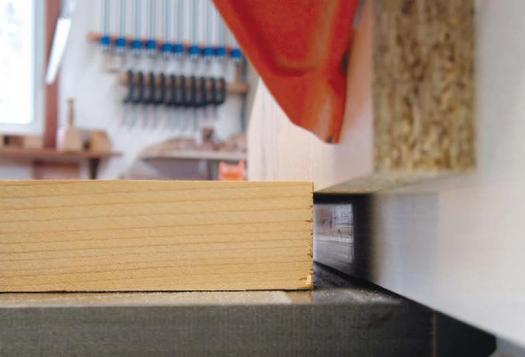
1. Clamp a sacrificial fence to the main fence so the bottom of the sacrificial fence is about 1/16″ to 1/8″ lower than the top of the work piece.
2. Angle the blade to 45 (assuming you want a 90 finished corner) then raise the blade until the top of it is about 1/16″ below the top surface of the work piece.
3. Slide the fence (and sacrificial fence) over until it is about 1/16″ away from the blade.
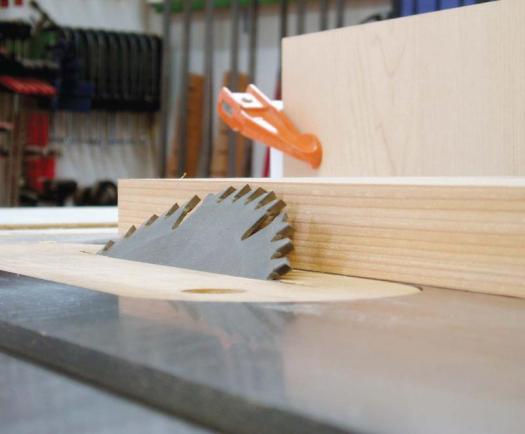
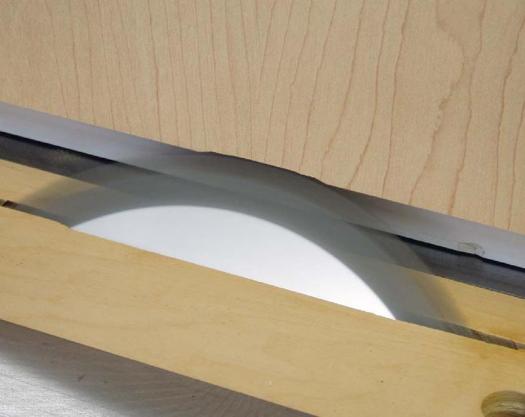
4. Turn the saw on and raise the blade until it protrudes into the sacrificial fence about 1/4″.
5. Make a test cut with a scrap piece. With a bit of practice you will only be about 1/16″ off.
6. Readjust the set-up by moving the fence away from or closer to the blade. Re-test until perfect.
7. With the set-up dialled in, make passes wherever you want a bevelled edge. This works for an edge measuring any angle. The offcut stays in the cavity until the next work piece pushes it through during the next pass.
There’s enough room for it in the cavity, and unless you didn’t follow any of the first steps properly, the chance of it flying anywhere is virtually non-existent.
One of the nicest parts of this set-up is that you can do any angle or shape (other than circular) with no additional set-ups.
I know what some of you are saying right now: I can do that same operation on my left-tilt saw! You’re right, you can. But the work piece will need to be placed to the right of the blade and fence and this is something most people will not be familiar or comfortable with. Not the perfect situation. And if you’re machining a large work piece, the use of an outfeed table and side supports are very helpful.
This operation may seem finicky at first but after you set it up a couple of times it will become second nature and will take only a few minutes. Now, with the bevel cuts taken care of, what else can a left-tilt saw do that a right-tilt saw can t? Nothing. I thought so.


Great to hear, K! I bought my right tilt saw on purpose and am very glad I did. Enjoy.
Thank you so much for this. I am inheriting a right tilt Unisaw from my father. Two factors made me hesitant about taking it: it’s not a SawStop, and it’s a right tilt saw. You’ve helped me feel more comfortable in accepting this saw. Now, on to deciding how to wire my shop for the voltage…
Hi Mike,
It’s simple and works very well, doesn’t it!? Glad you like this technique.
Enjoy.
I’m a fairly new woodworker and I have a right tilt blade. I wasn’t sure how to cut bevels cleanly and repeatedly until coming across your article. I wanted to say thank you very much, I love this method.