Some hand planes get used faithfully in the shop to do common tasks, but what about those specialty planes designed to do one thing and do it well? Here are three planes that do singular tasks with incredible efficiency.
Some hand planes get used faithfully in the shop to do common tasks, but what about those specialty planes designed to do one thing and do it well? Here are three planes that do singular tasks with incredible efficiency.
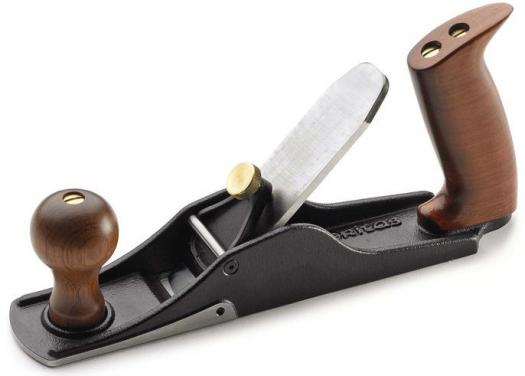
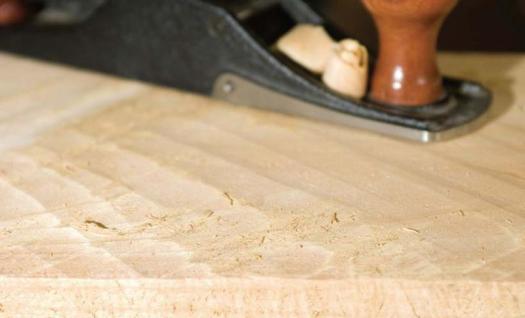
Have you ever wanted to remove a lot of wood in a short time? If so, the scrub plane is the tool for you. Designed to remove large amounts of wood in a hurry, these tools are very sturdy and feature thick irons. If you do not own a jointer machine, you can use a scrub plane as your tool of choice for coarse fattening of boards. The finish is rather rough, so remember that this is for coarse work only, followed then by clean-up using a jack or smoothing plane. Heavier is better in a scrub plane to reduce chatter. These planes usually run about 10 ¾” long, and use a 1 ½” wide iron.
The iron is installed bevel down, similar to a smoothing plane, and there is no chip breaker on this tool. The iron is a stout 3/16″ thick and typically 1 ½” wide. The leading edge of the iron sports a significant camber with a three-inch radius. The plane body is a rather simple design using a fixed bed rather than an adjustable frog assembly. The mouth is massive by comparison to smoothing planes, allowing thick shavings to pass through without clogging. Iron adjustments are manual. Set the depth of cut by sighting the iron projection with the plane inverted. Clamp the iron in place by tightening the thumbscrew on the lever cap. I often use a tiny Japanese plane hammer to make slight depth adjustments by carefully striking the rear end of the iron. Iron preparation is the same as other plane irons (to refresh yourself with sharpening techniques, see Apr/May ‘09, Issue #59) with the exception of grinding the three-inch bevel. You will have to incorporate a hand rotation like a windshield wiper motion during grinding to re-establish a clean grind at approximately a three-inch radius. The three-inch radius is a starting point and you may wish to modify it to better suit the type of work you are doing.
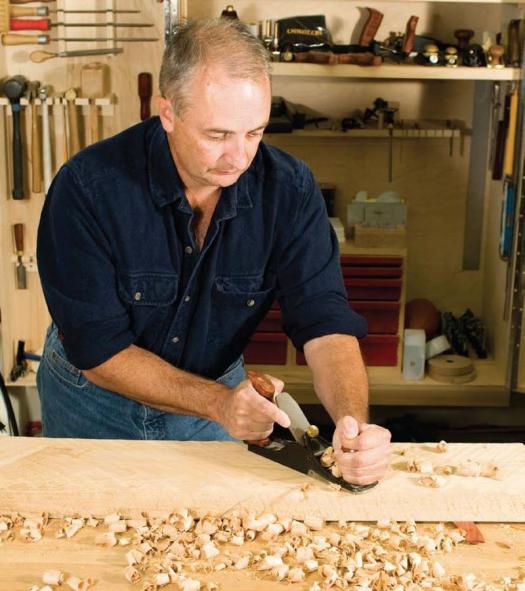
To surface a rough plank, first survey the plank for flatness using a four-foot rule over the length to identify high points; mark those with a wide carpenter’s pencil. Place the same rule across the plank at several locations to identify raised areas for removal. Clamp the plank on your bench between bench dogs and place shims beneath the warped plank to keep it relatively flat, and to keep it from rocking while you are planing.
Starting at the far end of the plank, make cuts at 30 to 45° to the edge of the plank. Work your way up the plank overlapping successive cuts. Remember that you still have to consider grain direction, so try to plane with the cathedral-shaped patterns on the inside of the plank, the side of the plank that was innermost on the tree. Conversely, plane against the direction of the cathedral pattern on the outside of the plank.
Change direction and plane perpendicular to the first set of cuts you made. Once you have made a set of plane passes from both directions, survey the new surface with your four-foot rule and continue planing until you have flattened the plank. Once your plank is flat you can refine it further by using a jack or smoothing plane. At this point you should have a plank that is flat enough to be used as a reference surface for a planer or you can continue working it by hand.
Scrub planes are also quite useful for removing the bulk of the waste material when shaping a bevel for a tabletop or for tapering a table leg by hand. If you have large amounts of stock to remove, the scrub plane should be your choice.
Today you may view this tool as a very specialized tool, but a little knowledge about its origins may just change your view of this lovely tool. When we think of a rabbet, most of us think of using it at the back of a cabinet, or as part of a frame. In fact, these tools have a broad variety of uses, cut cleanly, and avoid the noise inherent with motorized routers.
These planes were made of wood in the 1800s, with a large snail-shaped opening on the outside face for lateral shaving ejection. Cutting the sole completely across to accommodate a full-width blade made it challenging to construct wooden skew rabbet planes. The large cutout forced the designers to bulk up the area above the mouth to keep the toe section from flexing.
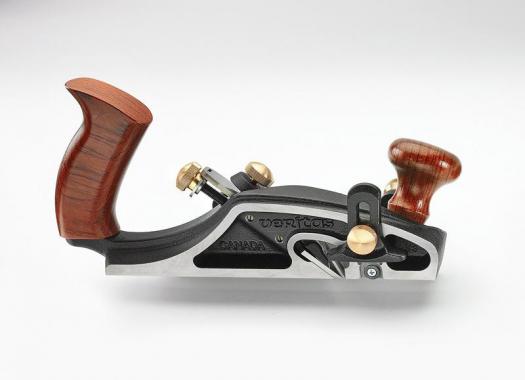
Modern iron planes are very strong, and are machined and ground to exacting tolerances. One of the intriguing aspects of the skew rabbet design is that the 30° skew angle pulls the plane tight against the shoulder of the rabbet as you cut. The planes are fitted with an adjustable fence for the width of the rabbet, and an adjustable shoe to define the depth of the rabbet. As with other rabbet planes, these planes use a scoring spur to reduce tear-out at the intersection of the horizontal and vertical walls of the joint.
The modern planes still use side ejection of the shaving. The side of the blade that runs against the vertical wall of wood is relieved to make up for the skew angle, such that it does not protrude beyond the inside face of the plane. The iron bed is set at a typical bench plane angle of 45°. The Veritas plane is 9 ¾” long and weighs in at 3 ½ pounds.
The skew in the blade also provides a lower effective attack angle, and a very clean cut. The skew also directs the shaving out laterally, and reduces the amount of force required to push the tool. Veritas makes this plane in left- and right-hand versions to ensure that you aren’t forced to plane against the grain.
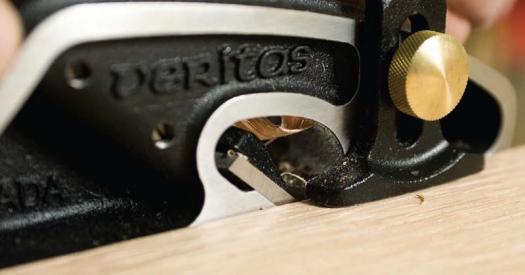
Another sweet refinement is a spur that is adjustable for depth, and lateral position. If you remove the forward fence post and look into the hole, you will find a screw that will adjust the lateral position of the spur. Just behind the front knob, there is another locking screw. Release the tension on this screw, and then you may rotate the spur for more or less cut depth. Mounted eccentrically on a shaft, the spur adjustment is a nice piece of engineering that works well.
Grind your blade at about 25°, and then micro bevel the leading edge to a couple of degrees higher. Honing and backside polishing are the same as for bench planes – all you need is two stones; a set of 1000 and 4000 grit Japanese water stones.
To set your depth of cut, place the plane on a test piece and lower the blade until it just touches the wood, across its entire width. Adjust the blade laterally until the right side of the blade is flush with the side of the plane. To assist in the lateral adjustment, clamp a block on top of your test board, place the inside face of the plane against the block, and then adjust the blade laterally until it too is flush to the block. Snug the lever cap to hold the blade in place. At this point, you can advance the two blade position setscrews until they just touch the blade. These screws allow you to place the blade in the same lateral position after honing. The key is to get the bottom of the blade parallel to the sole, and the side of the blade parallel to the inside ground face of the plane body. You may now make slight adjustments in the lateral tilt of the blade with the setscrews. To keep the setscrews in place, but not permanently, I suggest using some removable screw thread locker to keep the screws from drifting over time.
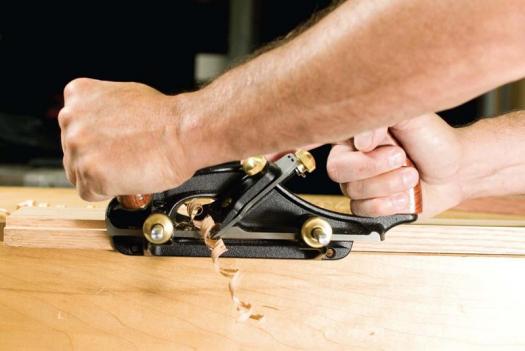
Back the blade out of the cut slightly using the depth of cut adjuster. Adjust the fence to width and lock the collets. Adjust the shoe for the maximum depth of the rabbet, and you are ready to cut. Move your plane back and forth on the wood as you gradually increase the depth of cut. Once you have a desirable shaving thickness, tighten your lever cap down to reduce chatter. You want to remove material quickly, but stop short of tearing the fibres. As you approach the final rabbet depth, reduce your blade extension for a finer, cleaner cut. Remember to make the last adjustment in the clockwise direction to eliminate backlash.
As with all hand tools, take care to keep the plane vertical during the cut. If you want to keep the rabbet square to the face of the board, keep that tool absolutely vertical during the cut. Apply some inward force on the fence to keep it flush with the edge of the board. I find it useful to check the rabbet shape just before my last few passes – this allows for some minor correction to the shape of the rabbet that creeps in due to biases applied by the user during planing; yes, it happens to all of us.
The Stanley #20 (pictured here) and the Stanley #113 are examples of metal circular planes. The advantage of the metal versions is that you can create variable curves in either convex or concave forms. The curve created is a circular radius. The Stanley #20 is about 10″ long by 2 ½” wide and uses a 1 ¾” wide blade.
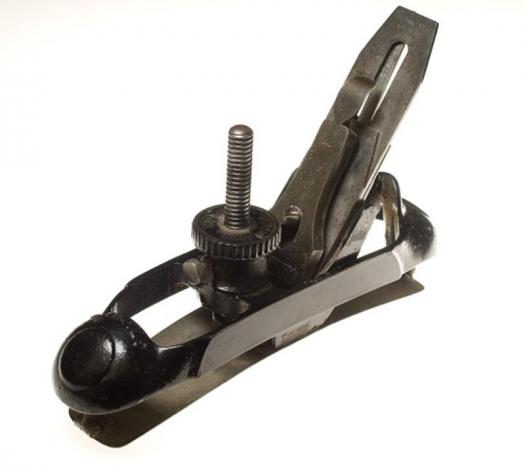
These are great tools when you need them, but are obviously a specialty plane. Whereas the metal plane is adjustable over a wide range due to its flexible sole, it also suffers from the flexing of said sole. The older planes also used a thin iron, which tends to chatter due to flexing. Nonetheless, if the iron is sharp and the cut is light, these tools will perform reasonably well.
These are typical metal planes, with a frog angle of 45° and a grind angle of 25°, the same as those used for standard bench planes. The tool uses a cap iron, lever cap, depth of cut hand wheel, and a lateral adjustment lever that is essentially the same as other bench planes.
Adjustment of the sole is an iterative process, but once you have matched the radius of, say, a round table top, the work becomes fun again. Simply unlock the forward thumbscrew, and then adjust the large forward located hand wheel to change the shape of the sole. With the frog attached to the sole, it moves up or down in unison with the sole. With the flex in the sole, a small mouth opening, and a thin iron, these tools are not well suited to deep cuts. Keeping the cut light also tends to reduce clogging.
The tool cuts a wide variety of curves for the cost of one plane, but it suffers from chatter, some tearing, and clogging. If you view the tool as a shaping tool, rather than a finishing tool, you will have a better relationship with the circular plane. Remember that we want to plane downhill, or with the grain, so you will have to change directions when the wood objects and begins to tear. If you experience tear out, use a spoke shave, card scraper, or block plane on gentle convex curves to clean up the cut after using your compass plane. The key to obtaining finishing shavings with the compass plane, however, is keeping the cut light, the sole ahead of the blade in contact with the wood, and the iron sharp. I think that a Stanley #20 is the bee’s knees when you need it. Try to find a used one for $100 or less and you will have a tool that is of good value.


These three specialty planes are great additions to any woodworker’s tool kit. They allow you to work more efficiently in some cases and provide an alternative to using loud power tools all the time. As with any new tool purchase, try them out on some scraps first before you work on the real thing.
Mastering them takes some practice but the reward is well worth it.