A pocket combination square is pretty much a ‘do-all’ marking and measuring tool. In addition to fitting easily into the palm of your hand, and storing handily in your shop apron, it is incredibly helpful for a variety of shop tasks.
Carpenters and cabinetmakers require large capacity measuring tapes, large framing squares, and oversized straight edges and levels. However, for those of us who primarily build small and moderate size projects, proportionately sized tools are much more convenient to use.
I’ve found that a pocket-sized combination square is just the right size for the majority of my measuring and marking needs. It provides the same functionality (albeit in smaller format) as a try (or engineers) square, double square, mitre square, depth and height gauge, and ruler and straightedge (by removing the blade).
Most combos also contain a level and scriber (awl). That’s pretty good service from a single tool.
A combo square does a lot more than simply laying out 90º and 45º lines.
Use it to:
- check that the ends and edges of boards are square (on stock up to 5″wide)
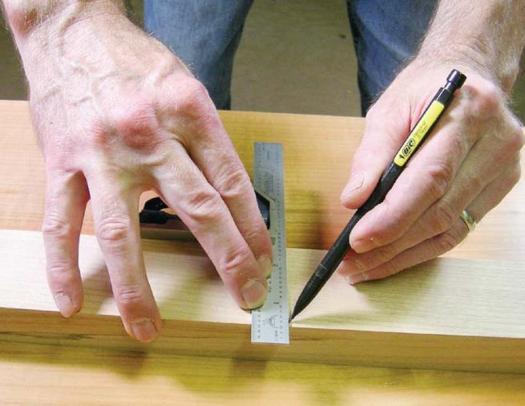
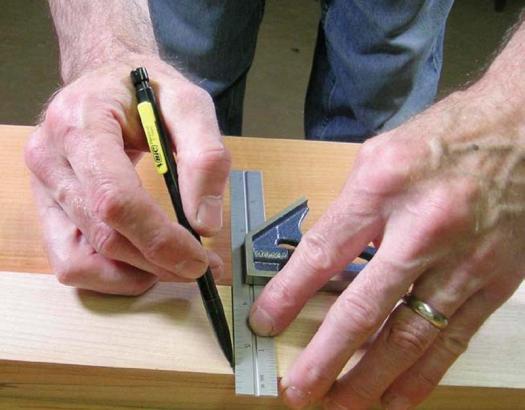
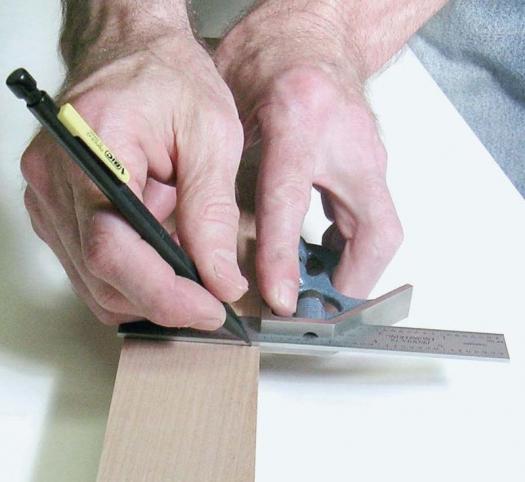
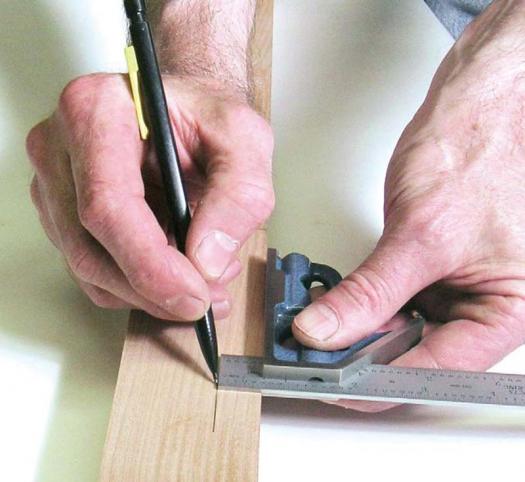
- lay out cut lines (the scriber does a good job; a marking knife does a better job)
- set router bit and saw blade heights
- check the depth of mortises, tenons, rabbets, dados and the like
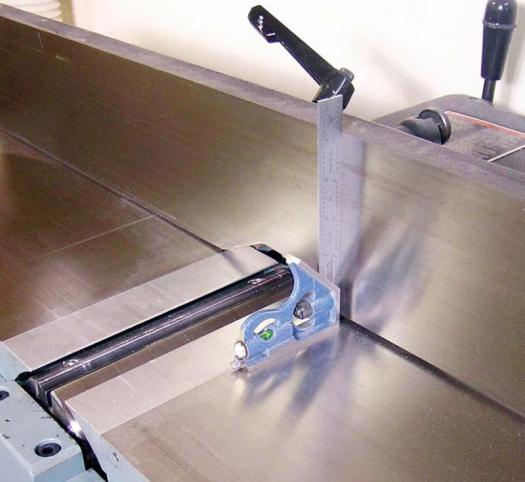
- ensure your table saw blade and fence are square before cutting material
- lay out mitres (on stock up to 4″ wide)
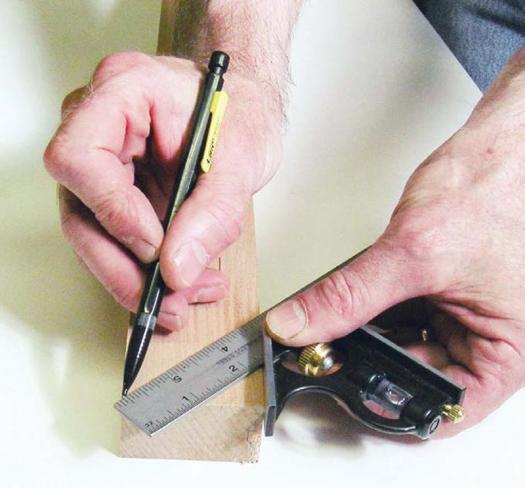
- lay out lines parallel to the edge or end of stock (up to 5″ wide)
- find the center of stock (up to about 7″ wide)
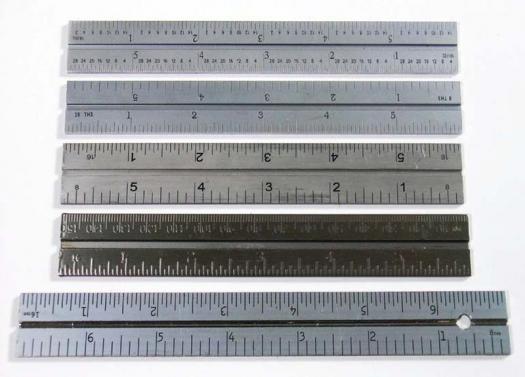
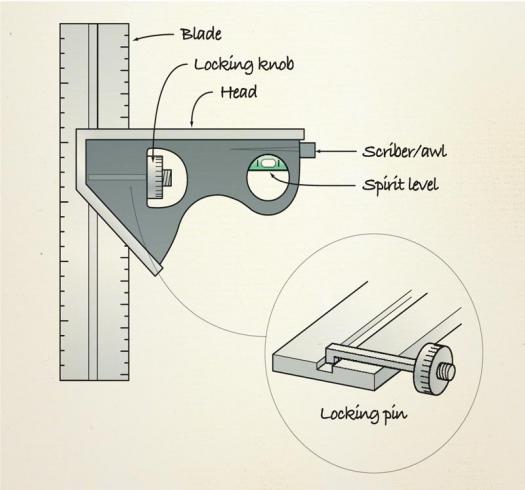
The blade is the most important part of the combo square; your eyes will typically be focused on the blade and scale rather than the head. You want the scale to be easy to read in a range of lighting conditions. A matte or satin finish will have less glare than a bright, glossy finish. Thin, sharply defined etched lines are much easier to see and use than thicker stamped or pressed lines. The edges of the blade should be square rather than rounded over, so that the lines you cut with a scriber or marking knife don’t waver. The edges of the blade should also be parallel to each other, and the blade should be flat or else it will bind as it moves along the head. All the blades have a channel running down one face; the head holds the blade in place by means of a locking pin that glides along the channel.
Blades come in a range of scale markings from 8ths to 64ths, while some have both imperial and metric scales. Often you’ll find different scales on either side of the blade. I find a blade with 16ths and 32nds on both sides is more convenient to use. I never use the 64ths markings while the 8ths are generally too large for precision work (and easy to see on the 16th scale).
Likewise, blades come in a variety of widths, though most are 5⁄64″ thick. This thickness makes them superior to steel rules (typically 1⁄32″ thick) for use in scribing lines with a marking knife. The 23⁄32″ wide blades are perfect for laying out ¾” wide mortises; I like to chop mortises a tad narrow so that I can fine tune them with a chisel for a perfect fit (assuming I’ve cut the tenons a perfect 3⁄4″).
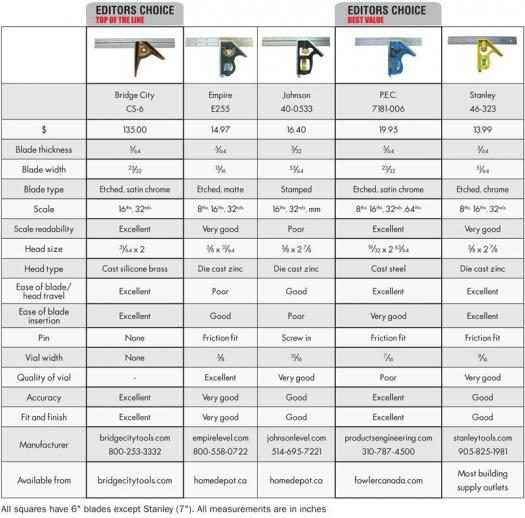
The etched blades on the Bridge City and PEC combos were the easiest to read, with square edges, parallel sides, and perfectly straight. The etched blades on the Empire and Stanley were almost as easily readable. The edges were square and parallel, though the Empire blade was bowed sufficiently that it interfered with the smooth movement of the head, while the Stanley blade had a slight bow that didn’t interfere with head movement. The stamped Johnson blade was difficult to read in all but the best lighting. The edges were rounded though the blade was straight and the sides parallel.
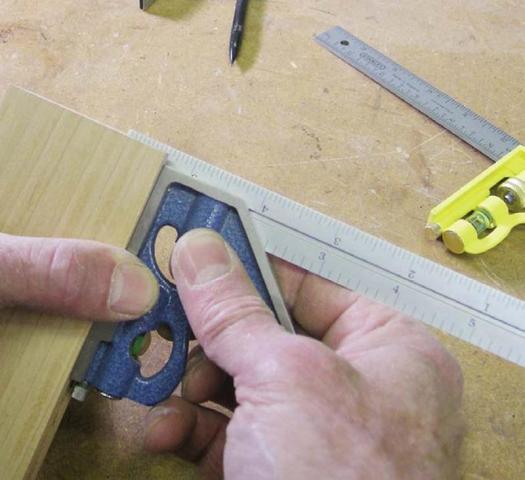
A precisely milled head is important if the square is going to deliver accurate 90º and 45º readings along the full length of the blade. The head is held onto the blade by a locking pin that runs along the channel in the blade. A knurled knob on the end of the locking pin enables you to loosen or tighten the head in place. A large knob that is easy to turn is obviously desirable, as is a well-formed pin that glides smoothly. You should barely have to turn the knob to loosen the locking pin, and you shouldn’t have to apply a lot of torque to lock it in place. The weight of the head is a matter of personal preference. Most combos have heads made of die cast zinc, which is lighter than steel or brass.
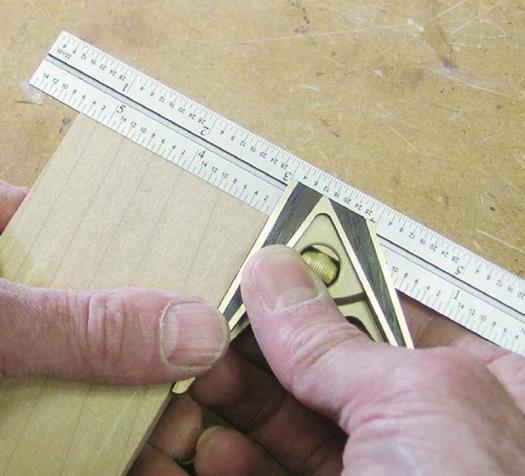
When assembled, the Bridge City and PEC squares were at 90º and 45º. The Empire, Johnson and Stanley squares were all out of square by less than 1/10º. The cast silicone brass head with rosewood inlays on the Bridge City is gorgeous. In fact, it’s so nice that you might be overly cautious in use for fear of scratching or denting it. The head glides smoothly, though I did find the locking nut a tad small. The PEC head is the only one made of cast steel. It’s very well machined with crisp edges and it moves smoothly across the blade. The knurled locking knob is also cast steel, but rather on the small side. The die cast zinc heads on the Empire, Johnson and Stanley look very similar. All have large brass knurled knobs that are easy to use. The edges on the Empire are slightly bevelled, a nice touch, but the head doesn’t move smoothly across the blade. The Johnson head travels slightly better, while the Stanley head moves freely. There was a slight burr along the edges of the Stanley head that needed to be sanded smooth.
Spirit vials and scribers are of varying usefulness. I personally don’t have much use for such a small level, but I do find scribers to be very handy. They produce a more accurate line than a pencil (though less so than a marking knife). I also use it to mark out and start screw holes.
Except for the Bridge City, all the squares had a spirit vial and scriber incorporated into the head. The vial on the PEC, at 7⁄6” wide, is just too narrow to be of much use. The vials on the other squares are easy to read. The True Blue® vial on the Empire square is guaranteed accurate to within .0005 “/inch and it carries a lifetime guarantee. The Johnson square has a screw-in scriber, which I find less convenient than friction fit scribers. On the Stanley square the scriber doesn’t fit very snugly.
My choice for the best of these combination squares is the PEC. It’s well machined, accurate, has an easy to read scale, and at just under $20 is a bargain. The Bridge City square is to die for. But at $135, it would be the equivalent of purchasing a Porsche. Still, if money wasn’t an object, I would definitely buy the Bridge City. For the cost conscious consumer who just wants a combo square, no frills please, then either the Empire or Stanley would be a good choice.
It’s easy to confirm if your square is square. Joint one edge of a board, and then scribe a line 90º to the edge. Flip the square 180º, place it directly against the scribed line, and scribe another line square to the edge. If the lines match, the square is aligned accurately.