

The Kreg MortiseMate is a well-built and practical loose tenon jig that offers a cost-effective alternative to high-end mortising systems.
For small projects requiring only a few mortise and tenon (M&T) joints, I find hand-cut joinery the most rewarding. The process of laying out the mortises, drilling out the bulk of the waste, and then refining the cuts with chisels and a mallet is quite satisfying. Similarly, hand-sawing the tenons adds to the enjoyment. Once you find your rhythm, it’s a truly pleasurable experience.
However, when a project demands numerous M&T joints, efficiency becomes paramount. In these cases, I opt for loose tenon joinery. Milling matching mortises and connecting them with pre-made or shop-made loose tenons is significantly faster. The resulting joints are every bit as strong as traditional M&Ts, offering a robust and reliable connection.
For those new to woodworking, or anyone looking for a streamlined approach to mortise creation, the Kreg MortiseMate will likely be a welcome addition to their shop. This economically priced tool offers a quick and easy way to mill precise mortises, simplifying the process and making it accessible to all skill levels.
Manufacturer: Kreg Tool
Model: KLTJ100
Price: $299.99 US
Warranty: 3 year limited
Made in: Canada
Source: Where to buy
Features:
- Stainless steel and precision-machined anodized aluminum construction
- Auto-indexing step-down mechanism lowers cutter tip in 1/16″ increments
- Center mortises in stock from 1/2″ to 1-1/2″ thick
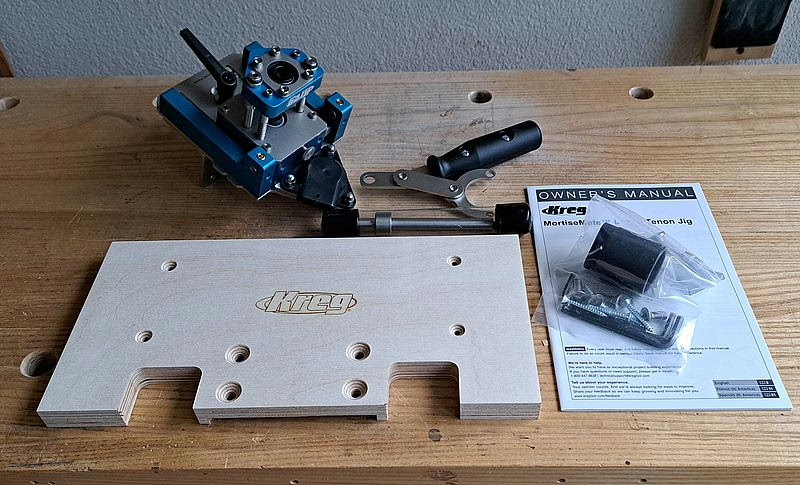
- Includes: Carbide-tipped 6 mm mortising cutter (8 mm and 10 mm cutters optionally available); stop collar; plywood mini work surface; dust collection adapter (for 1-1/4″ vacuum hoses); hex wrenches (5/32″, 1/8″, 3/16″); owner’s manual
The Kreg MortiseMate is, in many ways, similar in design and functionality to the JessEM Pocket Mill Pro loose tenon system. Both require the workpiece to be clamped to the jig and are used with a power drill equipped with an end mill bit to cut the mortises. The cutter moves in a side-to-side direction relative to the stationary workpiece.
The MortiseMate is solidly constructed of aluminum and steel — only the handle and dust hose adapter are made of plastic. Assembly is straightforward and takes only a few minutes. I mounted the mini work surface that comes with the jig onto a wider sub-base, making it easier to clamp the jig to my workbench while also allowing for quick removal when not in use. Additionally, the sub-base helps keep the clamps farther away from the jig.
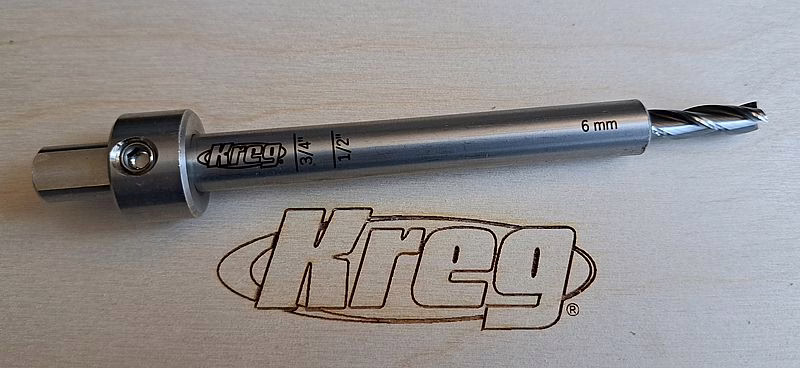
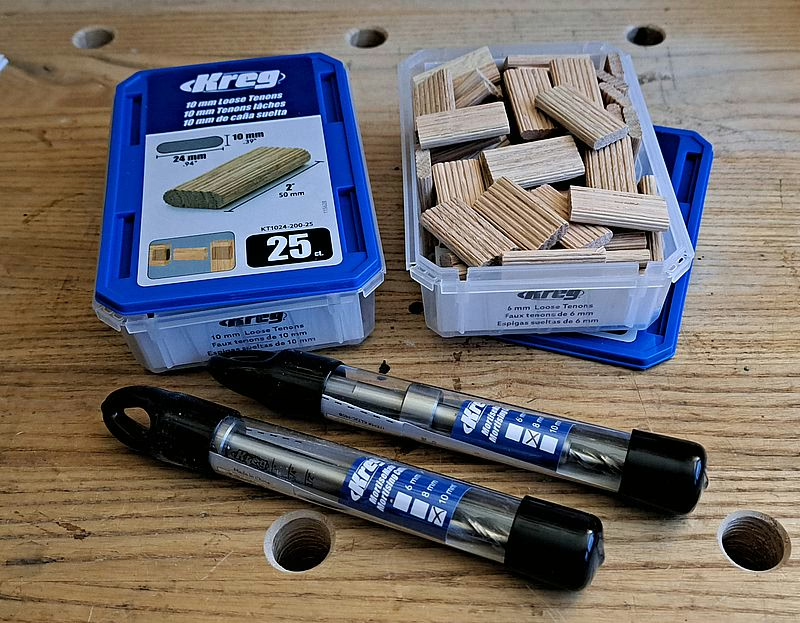
The jig comes with a premium-quality 6mm carbide end mill cutter, and 8mm and 10mm cutters are available for purchase from Kreg. I found that these cutters performed exceptionally well for milling mortises. They seemed more than capable of withstanding the side-to-side stress exerted by the jig, and I didn’t notice any overheating, even when drilling batches of a dozen or more mortises at a time.
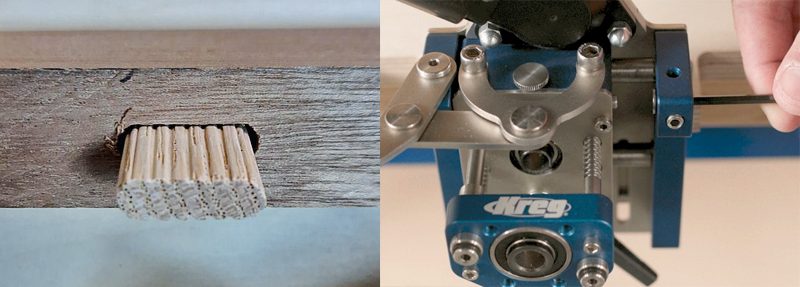
You can make your own tenon stock to use with the MortiseMate, though it’s more convenient to purchase pre-made tenons — either from Kreg or a local retailer.
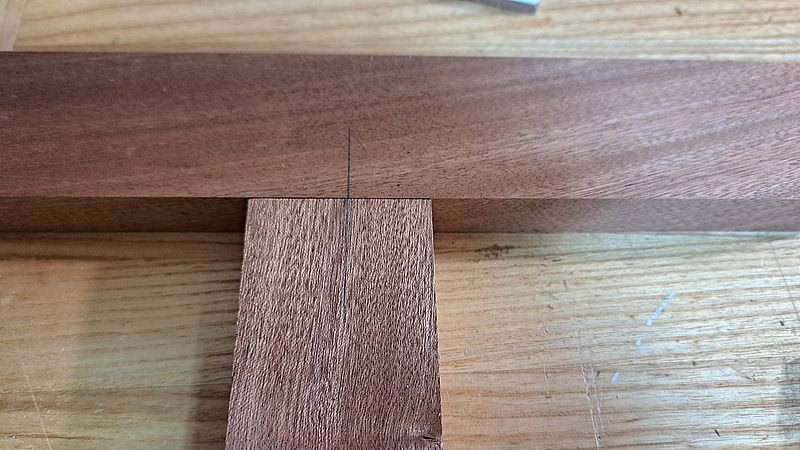
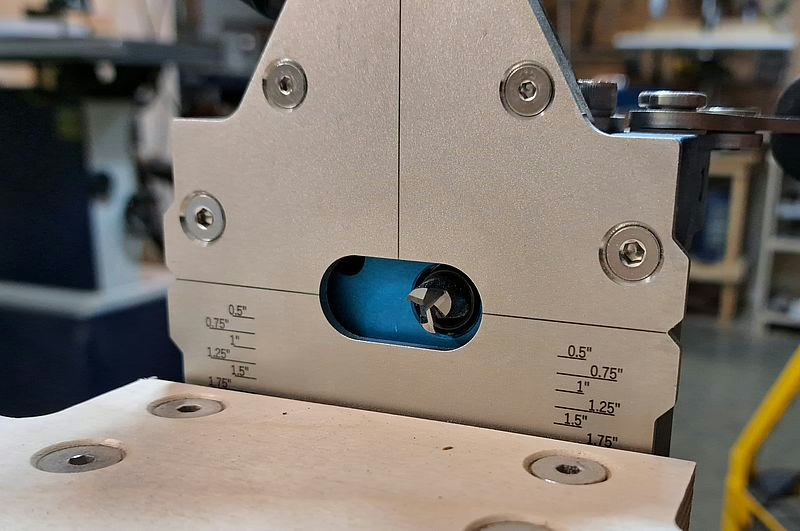
Using the MortiseMate is quite easy. Begin by marking vertical centerlines on your stock at the midpoints of the mortises. Then clamp the stock onto the mini work surface, aligning it with the registration marks on the jig. Alignment is made easy with the imperial measurement scale on the jig. With this jig you can center mortises in stock from 1/2″ to 1-1/2″ thick. The depth of cut is adjusted by setting the stop collar on the cutter. Before drilling, be sure to move the jig body forward to avoid cutting into the mini work surface. Chuck the cutter into your drill-driver, set the drill to its highest speed, and you’re ready to go.
Insert the bit into the jig, turn the drill to its highest speed setting, and, while pulling the trigger, move the jig handle side to side. Each side-to-side pass lowers the bit by approximately 1/16″. It takes about 20 or so back-and-forth movements to complete a mortise. Once finished, press the carriage release button to return the carriage to its starting position. Getting used to the technique doesn’t take long — after a dozen or so test cuts, I found I could rout a mortise in about 15 seconds.
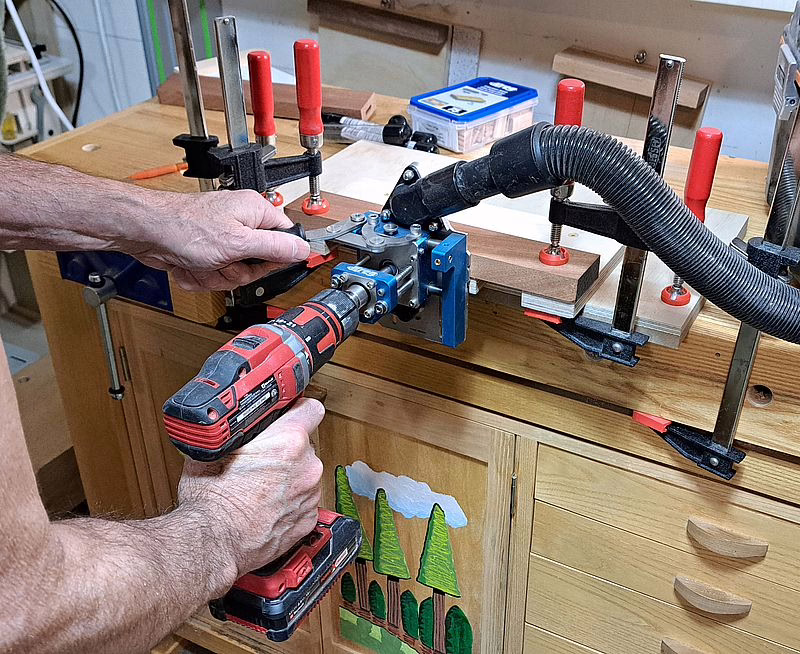
The MortiseMate includes a vacuum port, and for efficient use, you’ll need to attach a shop vac or dust extractor; otherwise, debris won’t clear from the mortise as it’s cut.
Overall, I am quite satisfied with the performance of the MortiseMate. The tenons don’t fit as snugly as they do on some other mortising machines, though this doesn’t affect the overall strength of the joint. You can adjust the side-to-side play by turning two set screws on the jig — you just have to remember to apply the same number of turns to each side. The cutter measures 27/128″ in diameter and mills a 31/128″ mortise. The floating tenons are 29/128″ thick, leaving a 1/64″ gap between the tenon and the faces of the mortise. Once you apply glue to the tenon, it begins to swell and locks firmly in place.
When drilling, the weight of your drill driver can cause the MortiseMate to deflect slightly, pulling it away from your stock, and causing the mortise to be slightly angled. To avoid this, maintain perpendicular pressure against the jig when drilling.
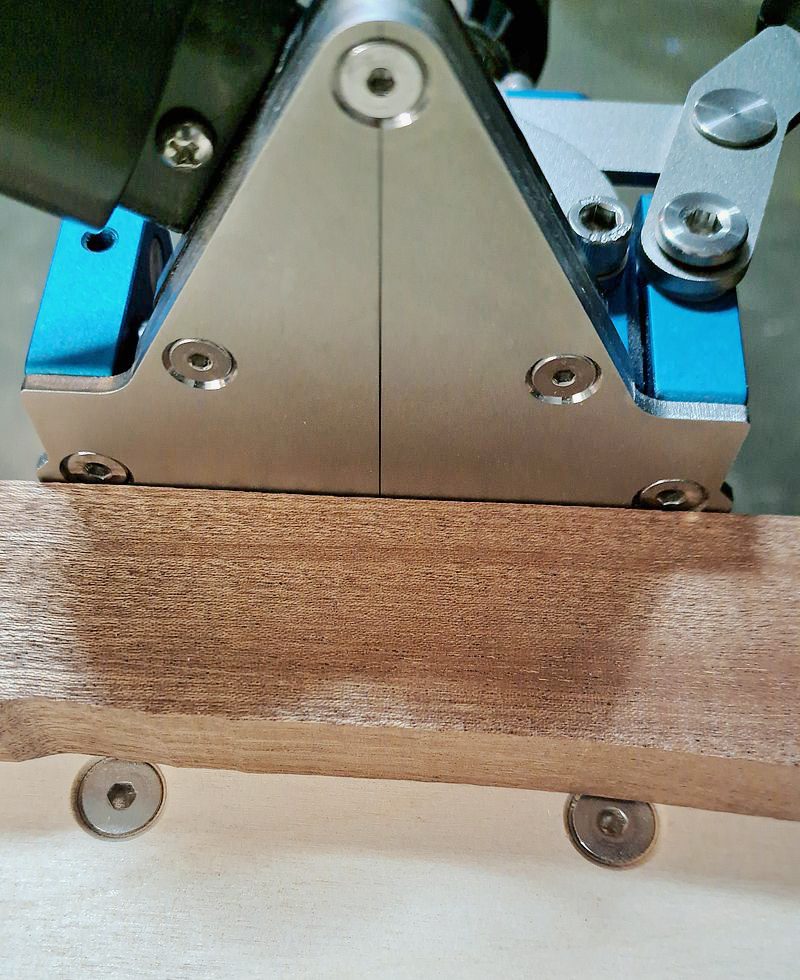
The only other issue is that you can’t drill mortises on beveled stock. For me, this isn’t a concern, as I rarely need to cut mortises on beveled pieces.
Inevitably, there will be comparisons to the Festool Domino, though this is somewhat like comparing a sliding panel saw to a contractor saw — they’re designed for different uses. For a professional woodworker who cuts mortises on a regular basis, a high-end mortising system makes sense. But for someone like myself, who rarely needs to cut more than a dozen mortises at a time and perhaps only a few times a month, the MortiseMate is a logical and cost-effective alternative.
Strengths:
- Solid construction – Primarily made of aluminum and steel, ensuring durability and stability.
- Affordable – At around $329, it’s significantly cheaper than the Festool Domino ($1,725+).
- Ease to use – Straightforward setup and operation, with a relatively short learning curve.
- Quality cutters – The included carbide end mill performs well, and additional sizes are available.
- Versatile – Centers mortises on stock from 1/2″ to 1-1/2″ thick and allows you to make your own tenon stock.
- Dust collection – Built-in vacuum port helps with debris extraction when connected to a shop vac.
Limitations:
- Slower than other options – Since it relies on a drill and manual side-to-side movement, it’s not as fast or effortless as a Domino.
- Requires a power drill – Unlike dedicated mortising machines, it depends on an external drill for operation.
- No angle attachment – You can’t cut mortises on angled stock.
- More effort needed for precision – While accurate, it doesn’t have the same refined repeatability and ease of adjustment as a high-end mortising system.


Thanks Carl
Very much appreciated. I will take a look at the Jessem.
Mike
Good morning Carl
Where did you get your mortise mate for $329 in Canada? Like you, I would only use it occasionally in a hobby shop so can’t justify the cost of a domino (to my wife anyways) so am interested in the Kreg version but can only find in the US for $299 (but US dollars) or on Amazon for $600 Cdn. Wondering where we can find it retail in Canada. Usually get most of my Kreg stuff at Busy Bee but the are not carrying it yet. Thanks Carl
Mike
Hi Mike: I’ve updated the info on the MortiseMate – as far as I know, it’s only available from the US. A lot of companies aren’t bringing new product into Canada from the US right now courtesy of Trump’s Tariffs. You might want to wait a while to see how things pan out over the next few weeks. An alternative is the JessEM Pocket Mill Pro – which is very similar to the MortiseMate, and in my view, a higher quality product – though a bit more money. All the best.