TIPS & HOW TO
Tuning your knife

David Bruce Johnson

When you buy a new tool, it is reasonable to think you can use it right out of the package. In many cases this isn't the case.
Unfortunately, in many cases, modifications are needed to prepare the tool for the safest and most effective use. This necessity certainly applies to a carving knife.
It is probably safe to say that a knife is the most useful tool a carver can have. It is simply amazing how many times and in how many different ways a knife can be used when other tools prove impractical. To be most useful, a new knife requires “tuning”. Just as a concert musician must have a well-tuned instrument, a good carver needs a well-tuned knife.
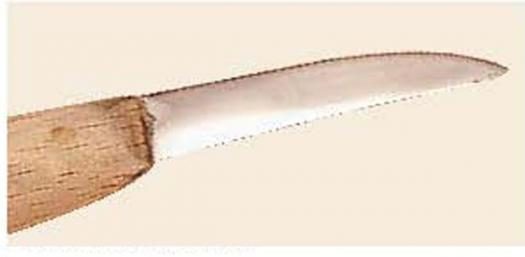
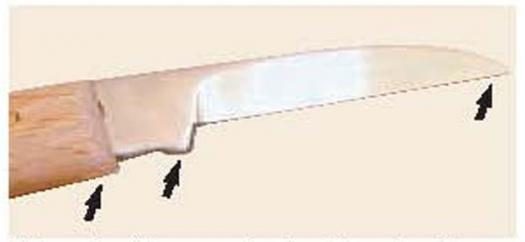
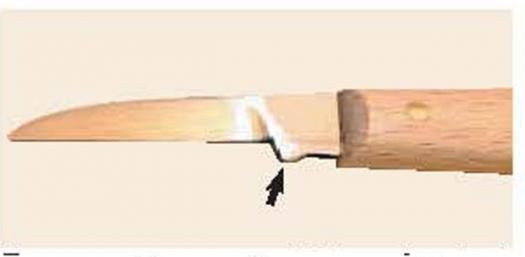
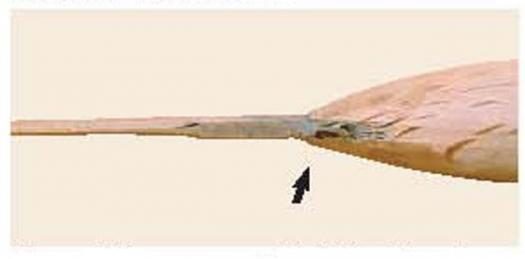
This knife is probably a worst case example since all new knives do not have the three features, indicated by the arrows, that need to be altered:
- To make it fit your hand, it must be made the right length;
- To provide maximum useable blade length, the heel of the blade needs to be removed; and
- To prevent possible damage to your wood during the carving process, the handle needs to be reshaped.
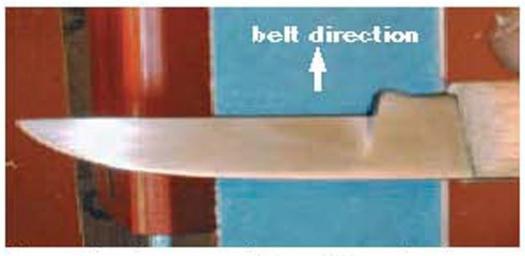
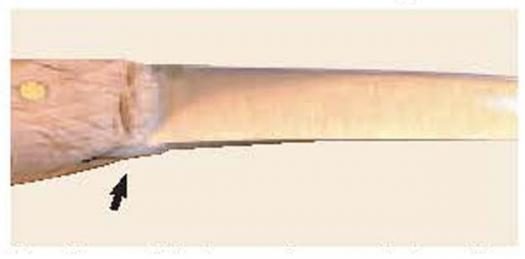
The first step is to remove the extra metal from the heel of the blade. I suppose the stop at the end of the blade would serve some useful purpose if you were a sword fighter. Being a carver, however, it is better to have as much blade as possible to work with. I use a one-inch belt sander with a 120 grit belt to remove the extra metal; however, any grinder can be used for this task.
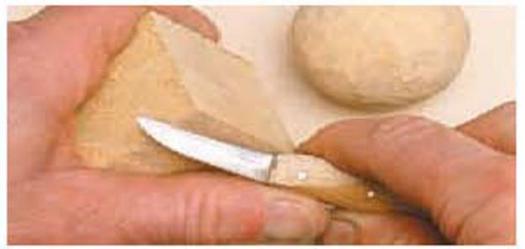
To test how well your new knife works, here is a small exercise. Using only your knife, carve a 2″ cube into a 2″ ball. This exercise is a great way to practice your two-hand knife carving technique. Hold the cube firmly in one hand while using the thumb of the same hand as the pivot for your knife. With practice, you will find that you can carve all day without tiring your hands. And, with a knife that is tuned for your personal use, it is highly unlikely that you will carve yourself.
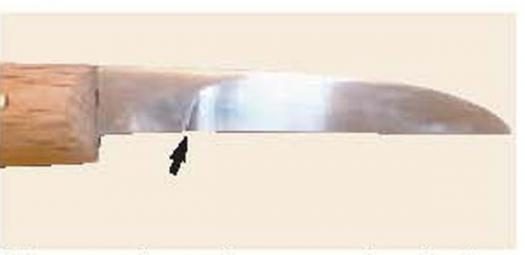
After the handle has been refined and is no longer an obstacle, the blade can be reshaped right to the base of the handle. You will notice that the length of the useable blade has been increased significantly. Now it is essential, for your own carving safety, to fit the knife to your hands. Usually this means shortening the blade. When you use a two-handed carving technique with one thumb acting as a pivot, the blade must fit comfortably between the pivot point and the base of your index finger, to prevent cuts. If the blade is left long, you must pay constant attention to the location of the blade tip. This distracts you from concentrating on your carving.
Again, a one-inch belt sander can be used to reshape the tip of the blade. To prevent ruining the temper of the blade, start grinding from the tip of the blade and roll the knife toward the back. This approach prevents overheating the very narrow cutting edge at the tip. Once you have finished shortening the blade, your “tuning” is essentially complete. Following your normal sharpening and honing, your fine new custom-fit tool will be ready for your personal use and enjoyment.
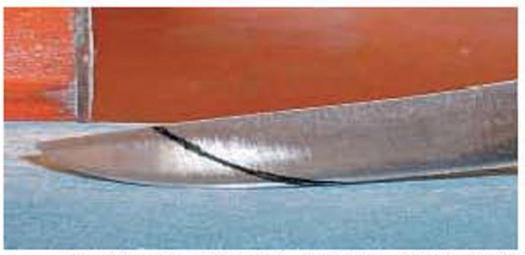
It is important that the new cutting edge you are creating is in line with the manufactured edge. The excess metal is removed equally from both sides of the blade. As with the sharpening of any tool, this step demands a little patience and a slow, cautious approach.
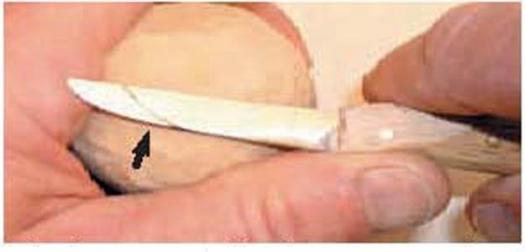
While the coarse belt is on the sander, it is a good time to round and taper the blade-end of the handle. Round the bottom and sides but leave the wood on the top where your thumb is used as a pivot point. This reshaped handle has two main benefits. The sharp wood corners that could damage your carving-in progress have been removed; also, the narrower shape will permit much greater access to parts of your future carvings that can be difficult to reach.
New knife needs tuning in these three areas
Remove extra metal from heel of blade
Use belt sander or grinder to remove extra metal
New cutting edge must be in line with the manufactured edge
Round and taper the blade-end of the handle
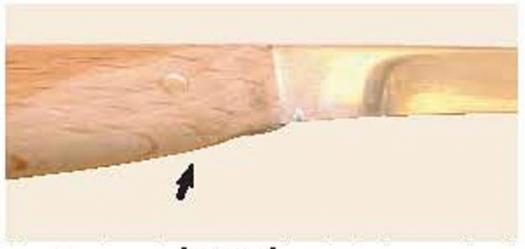
Round bottom and sides but leave wood on top
Reshape blade to base of handle
Bldae must fit between pivot point and base of index finger
Grind from tip of blade and roll knife toward back
Hold cube in one hand and use thumb of same hand as pivot point for knife
Fully tuned knife