TIPS & HOW TO
Strong Curved Panels

Nicholas Brygidyr

Use this technique, combining a coopered solid wood and store-bought veneer, to build strong curved panels.
The most popular way to make a curved panel is to build a big, heavy MDF form, and use bending plywood as the substrate. A better way is to cooper poplar strips together and hand-plane the curve, then press a layer of commercial veneer on perpendicular to the poplar grain to minimize any wood movement, apply solid-edge banding and a final show veneer layer. This method avoids having to spend a few hours routing and gluing together MDF, saving your router bits and lungs for another project. It also produces a much stronger panel.
Prepare the core
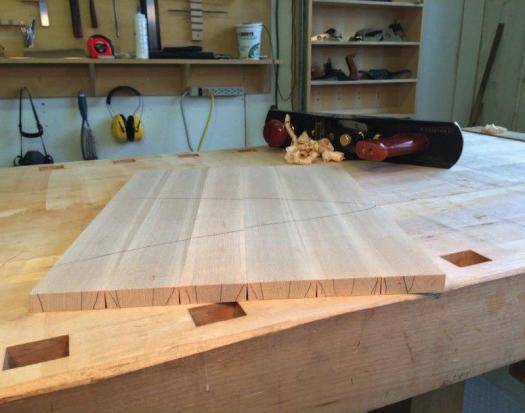
Start with some 8/4 poplar, as it’s stable, widely available and cheap. Next, rip and flip each piece to make a quarter-sawn core. I would suggest ripping on the bandsaw, because the thinner kerf means more wood is left for the project, and there is no chance of a kickback. Here a little math is required. Let’s say you want a 3/4″ thick panel. You would need to subtract the thickness of the outer layers of veneer (about 1/16″ each, depending on how thick you cut them), and the commercial cross-grained layer (two sheets at 1/32″ each) from the final panel thickness. In this case you’re left with a board thickness of 9/16″. Finish milling the poplar about 3/32 thicker so you can plane down the board, and in case your staves move during glue-up.
A nice touch is to taper the panel in thickness; this works especially well for a pair of doors as they thin out as they meet in the middle. If you choose to taper the panel in thickness, I would plane the last stave down about 3/32″ or 1/8″ to give you a reference for shaping. Mellow details add elegance to a piece. Begin to shave angles into the edges of the staves, checking against a full-scale drawing as you go. You could tilt the table saw blade to each angle, but it is often faster to just use a hand plane, if you’re comfortable with one.
Glue up and shape
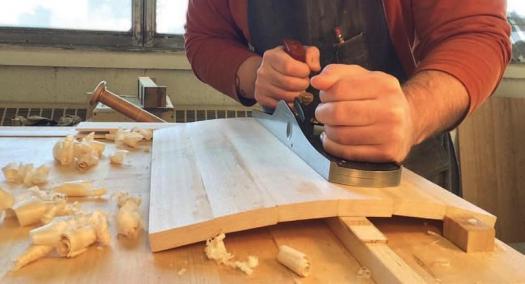
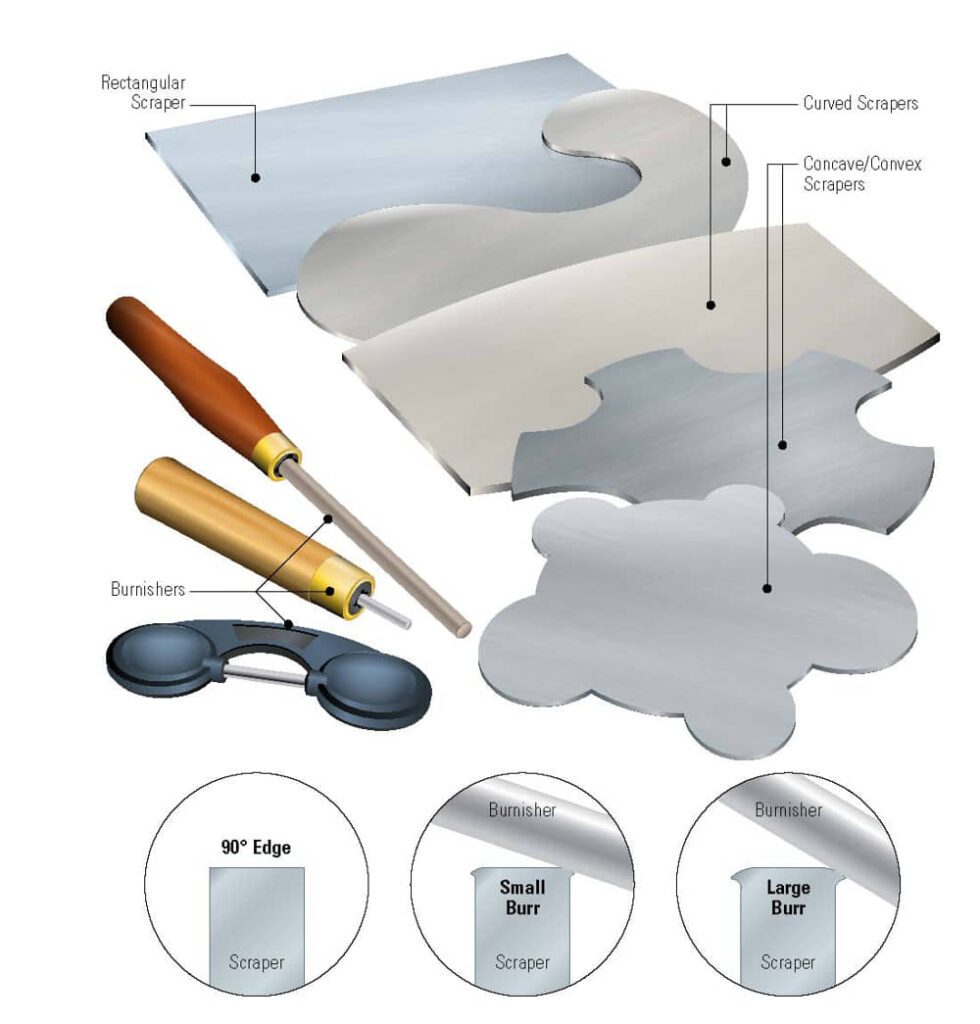
Glue up the panel, ensuring the staves stay in line with each other – if the curve is extreme, glue it up in stages. Cross-cut the panel and draw the finished curve on the end grain. Using a hand plane, start removing waste until you reach the lines on either end. I use a round bottomed plane for the inside curve, but you could use a curved scraper and sand paper to achieve the shape, what matters most is to produce an accurate surface, no bumps or lumps, straight and even without twist. Remember, this is your substrate for veneer so it must be smooth.
Cross-grain veneer to reduce movement
Once your substrate is smooth and even, and you’re happy with the shape, it’s time to press on the cross-grain commercial veneer. I would suggest buying the cheapest veneer your supplier carries. This veneer is being used only to minimize movement in the panel – it will be covered by a layer of show veneer.
Cut the veneer with a sharp knife, then use blue tape to stitch the pieces together to make one big sheet – you will need 1/16″ overhang all around. When pressing the veneer, the panel is the form, so all you need is a vacuum bag, 1/8″ thick MDF cauls, and some breather mesh to evenly draw out the air. The secret to a successful veneered panel is not getting carried away with the glue. Apply too much glue and you’ll be introducing excessive moisture into the panel, causing the veneer to bubble and possibly warp the panel. Use blue tape to hold the veneer in place with the MDF cauls and place it into the bag. I use white PVA glue, so 2-1/2 to 3 hours is enough time in the bag, but I always allow the glue to cure overnight.
Cover the core
Next, mill up some 5/16″ thick solid wood for the four outer edges. I typically use the same species of wood as the outside veneer. Clean up and square the end grain then apply the top and bottom edges. Once the glue has dried, using a spokeshave, file, card scraper, or whatever else you have available to you, flush it up to the panel. It’s very important to take your time and not add any slight dips to the edges while flushing them‚ as gaps between the solid edging and the show veneer will be seen. Next, glue on the side edge banding, carefully following the curve while trimming.
Back in the bag
Now you’re ready to apply the final layers of veneer. I like to cut my own veneer on the bandsaw at 3/32″ thick and remove the bandsaw marks to end up with a 1/16″ thick sheet. As with the commercial veneer, apply just enough glue and place the panel into the vacuum bag for a couple of hours. Once the glue has cured, clean up the panel and admire your work.
Photos credit: Nicholas Brygidyr
Stable, Curved Panel
Brygidyr’s first step is to rip a flat-cut board into narrower strips that are quarter-cut. This reduces movement as the seasons pass. Notice in this photo that the growth rings are running up and down, and the slight angles on the edges of each of the pieces, so when they’re glued together the resulting panel will be curved.
Smooth the Curves
Hand tools will help smooth the faces, as any imperfections will be mimicked by the two layers of veneer.
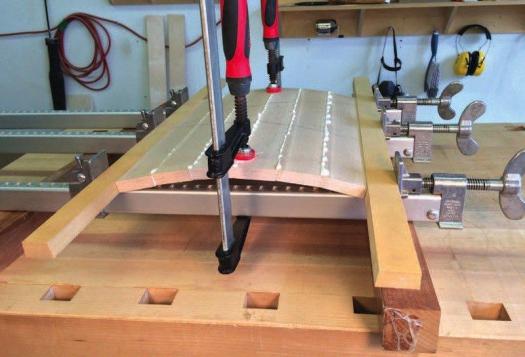
Glue it Up
This panel could be glued up in one go, but if there was more curve, or the panel was wider, it would have to be glued up in stages.