TIPS & HOW TO
Making Raised and Stacked Inlays

Chris Kubash

Inlays are often installed flush to a surface, but this is a process that can be used to add a real three-dimensional sense to your work.
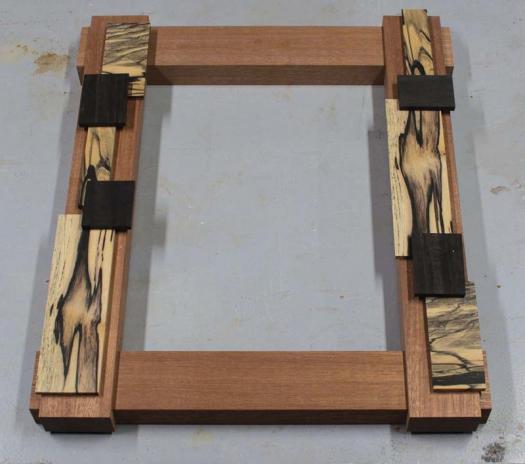
The multi-coloured ebony surfaces on this notice board frame are about 3/16″ above the surface of the mahogany and the black ebony is an additional 3/16″ higher again. In fact, portions of the black ebony are not supported at all, which makes for a very interesting side view.
I won’t go into the construction of the frame itself, but suffice it to say I made it very simply, with bridle joints cut on the table saw a tad tight, and then planed the sides until the bridle joints fit perfectly. I glued the frame and put it aside while I started working on the inlays.
Preparing Inlays
Sorting through some scraps of ebony, I selected some that would be harmonious with each other and the mahogany frame. I jointed one face and one edge and re-sawed a few 1/4″ pieces on the bandsaw. I find that an inlay depth of 1/16″ works well. It was also helpful to cut a three-degree angle on the ends of the inlay, narrowing towards the glue face of each piece. I set my table saw to this angle and cross-cut the ends of the inlays. The tapered sides of the inlays will help when fitting them into the mahogany field.
With the cross-cuts made, I then ripped the inlays using a combination of jointer and table saw, adding the three-degree angle on the sides of the inlays. The inlays don’t need to be square, so have fun with shapes other than squares and rectangles, but stay away from curves, at least for your first project.
You can get away with not performing the next step, but I like to plane the long-grain edges of the inlays to remove the milling marks. As long as you used a sharp cross-cut blade the cross-cuts are usually very clean, and don’t need improvement. I make a simple jig to support the inlays, and then take a couple of passes with a block plane. Make sure to preserve the three-degree angle on the edges. Viewing the finished edge with raking light will confirm the clean surface.
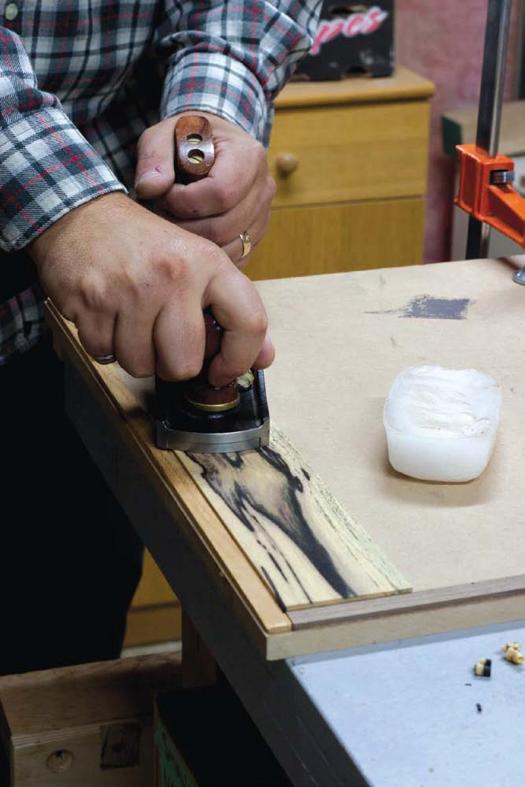
The next step in preparing the inlays is to plane their top and bottom surfaces. If the bottom has already been jointed, you can skip this step, unless there is snipe present. I find the ebony can have difficult grain, so I use a bevel-up plane, with an effective angle of about 57º. I also keep a stick of wax nearby, and regularly wax the sole of the plane. This helps immensely.
The last step in the preparation of the inlays is to ease their sharp edges with sandpaper.
Preparing the Field
With the inlays prepared, it is now time to prepare the inlay field. Start by arranging the inlays onto the frame in a pleasing way. I have arranged them so that the black ebony will sit above the multi-coloured ebony inlays. Some of the inlays overhang the frame, while the black ebony straddles two other inlays.
We now start working on the first level of inlays. Make a note of which side is up on each inlay piece. Using a ruler and tape, mark where each inlay should sit, and mark each inlay and inlay space with a unique letter. Record these letters on a simple drawing of the frame, so you remember exactly where each inlay goes, and which way is up.
Now that all the inlay positions have been marked, attach the lower level of inlays temporarily to the field with a couple small dabs of glue. Keep the glue away from the edges, particularly wherever the inlays may be overhanging. Rub the inlays into the field, paying attention to the tape guides. If the surfaces are well planed, the glue should stick fairly quickly.
When the inlays are stable (not shifting around with light finger pressure), you can go ahead and mark them with a striking knife. I recommend a striking knife because there is less flex than a thin blade knife. It is also sharpened to a lower angle, which helps to prevent it from cutting into the edges of the inlays.
Press down on the inlay with one hand to stabilize yourself, and mark around the edges of the inlay with the striking knife. I usually do a light pass, then another heavier pass. You want to have a deep enough line to register your chisel, but not so deep that it creates an overly wide line. Practice on a few scraps to get a feel for how deep to mark the edges. Pop off the inlay with a chisel, and clean off the glue from the inlay and the field. Mark lines about 1/16″ inside the cut lines with a fine-tip marker in order to be able to see them more clearly.
Routing the recess
With everything marked, you are ready to rout each inlay field. I used a 1/8″ up cut spiral bit, but I would recommend using a down-cut bit. The up-cut bit produced a lot of fuzz on the edges, which slowed the operation down. With a downcut bit, this work goes a lot faster. Set the bit depth to 1/16″. Route out the waste within the marker lines; don’t try to go to the knifed edges.
The areas where the inlays overhang the edges deserve special consideration. Start these areas by routing the overhang edge first, and pass the router in the direction opposite to normal, in order to reduce tear-out at the edge (AKA a climb cut).
Next, rout out the entire marked area, but leave a strip adjacent to the overhang. This strip gives the router base something to sit on, so that the router won’t cut deeper than expected.
Finally, you can rout out the remaining strip, carefully ensuring that the router base doesn’t tip down where it is unsupported. Don’t worry if the bit does dig deeper than expected, since the majority of the field will be at the correct depth. Take care to stay away from the overhang, or you will remove wood that will show.
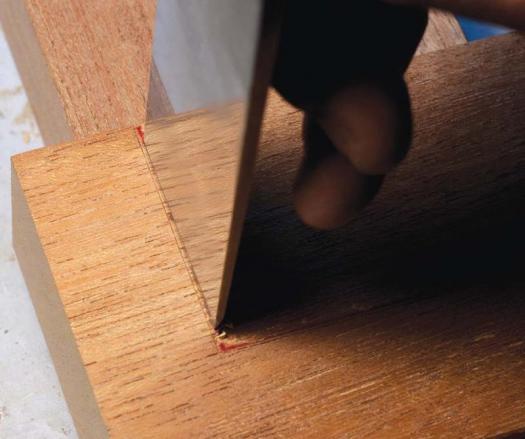
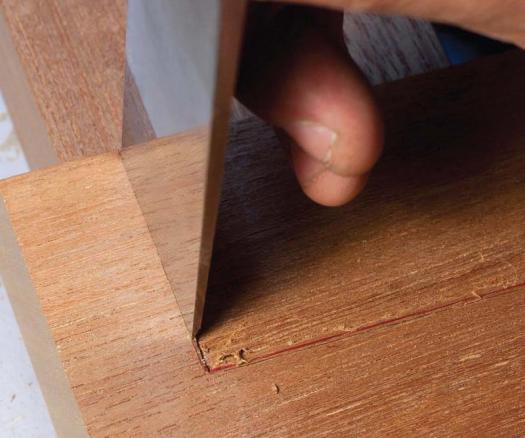
Chiseling the recess
When you routed the field to the marker lines, this left about 1/16″ of additional material that must be removed by hand to ensure a perfect fit with the inlay.
Using the widest and sharpest chisel possible, make cuts towards the cut lines, with the bevel away from the cut lines as shown in the images. The bevel tends to force the chisel towards the cut lines, but taking small chunks at a time reduces this effect. For the last cut, locate the chisel into the knife lines and remove the waste. The chisel should be vertical while making the last cut. Make the cross-cuts first, following up with the cuts along the grain. Clean up the corners and edges so there are no stray slivers of wood in the path of the inlay. The cross-cuts can be difficult on a chisel, so sharpen it regularly.
Take one of the inlays and slide two edges into its field to test the fit. Don’t push it all the way home, because it will be very difficult to remove, and the field edges could be damaged. If it feels like it could go in properly when pushed, then that is a good fit. Test the fit in all the corners in turn to confirm that the field has been cut cleanly.
If the inlay is too small, your marking knife could have strayed during layout. It needs to be pressed against the inlay edge as the mark is being made. Or perhaps your chiseling was too vigorous. Take small bites with the chisel, as you work towards the knife line.
If the inlay is too big, adjustments can be made on the inlay piece with some sandpaper, or a block plane. In very hard woods (compared to the mahogany I used), the sides of the field have virtually no give, which may necessitate cutting the inlays at a steeper angle (one or two degrees, as opposed to three). A test run with a single inlay piece and field board may be in order.
Install the inlays
When all the inlay fields have been cleaned up, the inlays can be inserted. Spread a little glue on the bottom of the inlay and the field, and press the inlay in. Protective pads and clamps can be used to press the inlay home. You may get a bit of squeeze-out (I did), which can be cleaned up with a damp rag.
The proceeding process is identical to that used to install flush mounted inlays. In this case, you use an inlay slightly thicker than the router bit depth (typically 1/16″ to 1/8″). The inlay, when glued, is planed flush with the surrounding surface. However, in our case, we have another round of inlaying to perform.
When the clamps are off, you are ready to repeat the entire process for the second level of inlays (black ebony in my case). The steps are pretty much the same, and serve as a review:
• Arrange the inlays in a pleasing way
• Mark the inlay position with tape, and identify with unique letters
• Secure the inlays temporarily with glue
• Mark inlays with a striking knife, and remove inlay with a chisel
• Marker lines 1/16″ in from the knife lines
• Create the recesses with a 1/8″ downcut router bit, cut to marker line
• Chisel the recess to the knife marks and clean up the recess
• Glue the inlays into place
This second level of inlays relies on the lower set of inlays being fairly level. If they are not, you may want to use a hand plane to get them level. This is particularly important for any inlay on the second level that straddles two inlays on the first level. This will help ensure that the router base is not rocking when routing out the field for the second level of inlays.
This is a fine project to introduce you to the joy of inlaying large shapes and stacking them. The result is a piece of work that has a very distinct look and will elicit many comments – and questions – from your friends and family.
Photos credit: Chris Kubash
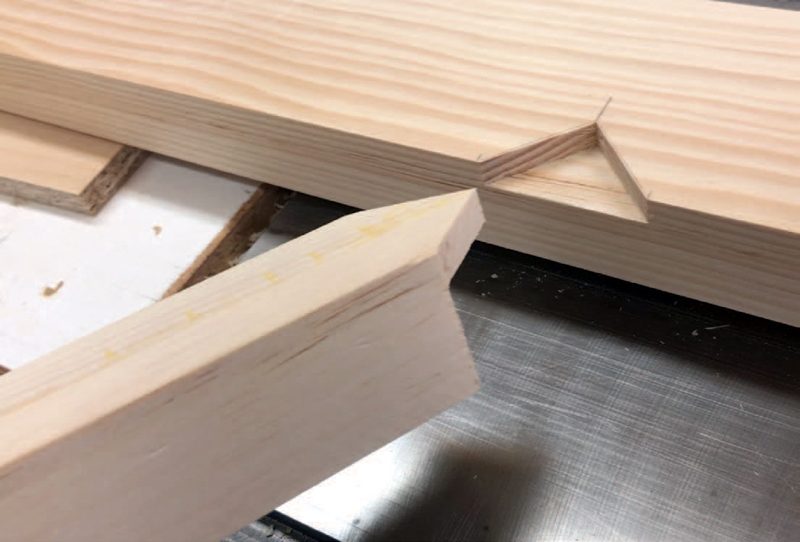
Slight Angle
Kubash uses a mitre gauge to cross-cut a three-degree angle into both ends of each inlay.
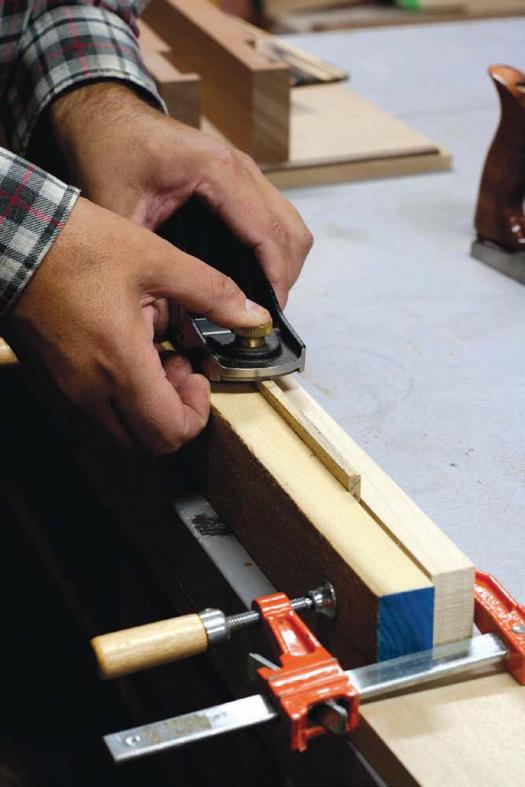
Clean Surfaces
To ensure the edges of the inlay have no machine marks on them, you can use a plane to clean up the surfaces.
Time to Plane
Depending on the species, and how figured it is, you may have to experiment with different cutting angles to produce a smooth surface.
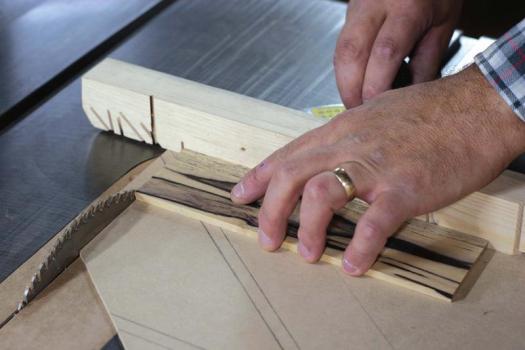
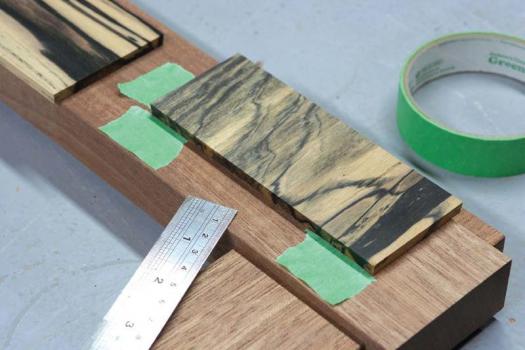
Just for Looks
Experiment with placing the inlays until you find something that looks good to your eye.
Mark the Locations
Once you have decided on an exact location for an inlay, use tape to quickly mark it.
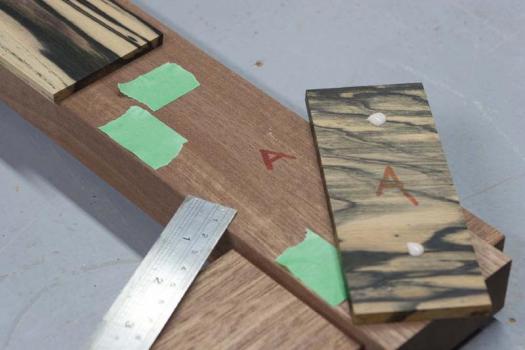
Quick Fix
Once you have added matching letters to the inlay and field, you can use a couple of small drops of glue to temporarily fix the inlay in place while you mark its edges.
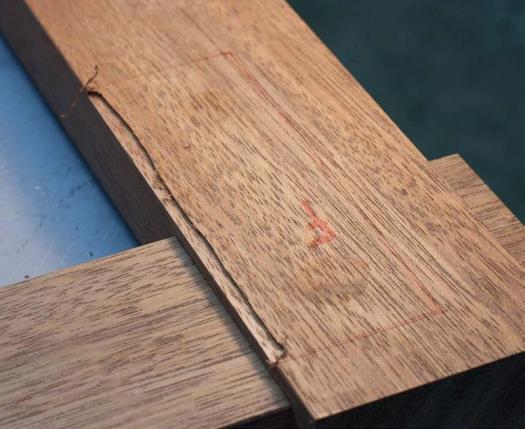
Mark Each Edge
Mark each inlay edge with a knife. A few light passes, followed by a deeper pass, will give you the best results.
Add Letters and Lines
Matching letters on the back of the inlay and the field will ensure the right inlay makes its way into the correct recess. Kubash also marks a line about 1/16" inside the knife mark to make it more visible for the routing operation.

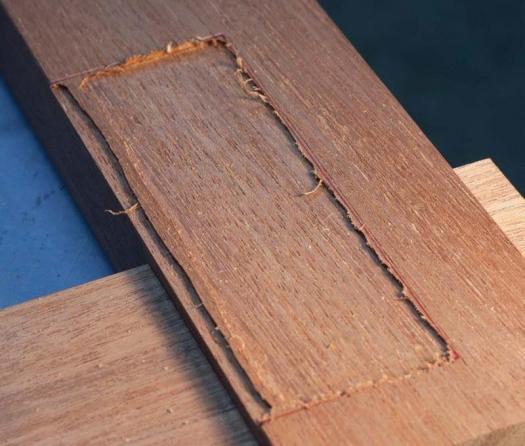
Rout the Recess
First, use a climb cut to remove material from the outer edge of the recess (above). This will ensure no visible blowout will happen. Then remove all but a small strip of material next to the initial cut (below). This material will help support the router and can be removed last.
Very Light Cuts
For the first cut with the chisel, leave a small amount of material intact (above). The final cut should only remove a very small amount of material, and should leave a clean, splinter-free edge (below).