TIPS & HOW TO
Lock mitre joint

Michel Theriault

In addition to using the router to help make traditional joints you can use the router and a single bit to make unique joints that solve specific joinery issues.
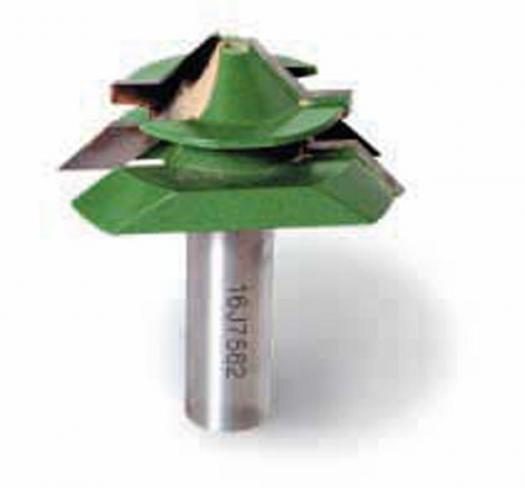
The Lock Mitre is a good example. Made with a Lock Mitre bit, you can create joints in box construction that don’t show end grain and are much stronger than traditional mitre joints due to the larger glue surface and the interlocking characteristics.
The Lock Mitre bit is available at most woodworking stores, and is very easy to use in a router table. However it should never be used hand-held. The bit creates two mating edges using the same set-up. It’s trial and error the first time you do it, so be sure to have some scrap stock of the same thickness as your project pieces to test the set-up. Once you have it set-up, you can rout scrap pieces to use as set-up blocks the next time you use the bit.
To set-up the bit, you need to set the height of the bit and the router fence to create matching edges.
Set the bit so that the centre of the bit’s height is aligned with the centre of the work piece, flat on the router table. Set the fence so that it is aligned with the point where the top surface of the work piece meets the router bit.
Make a test cut on two pieces, flat on the router table. Flip one piece over, and keeping them flat on the router table, fit them together. If they are flush with each other, the depth of the bit is correct. If not, adjust the bit slightly and cut new test pieces until they are flush.
Next, rout another test piece vertically, with the piece against the fence. Fit this test piece with one of the others to see how they fit. If they don’t line up perfectly at the corner, adjust the fence and try again until they present a sharp edge.
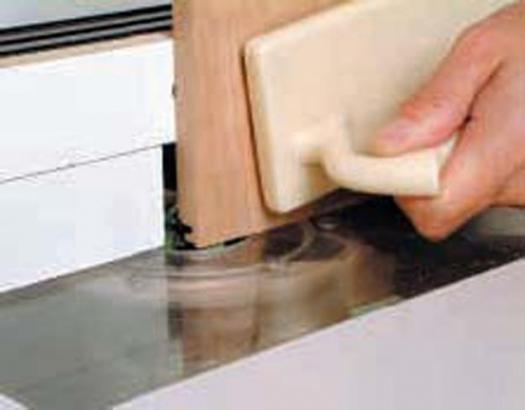
With the set-up finished, rout matching joints with one piece held flat on the router table and the matching piece held against the fence. Apply glue to the joints and clamp together until dry to get an elegant, strong, easy to make joint.
Lock mitre bit
Rout one piece flat on table
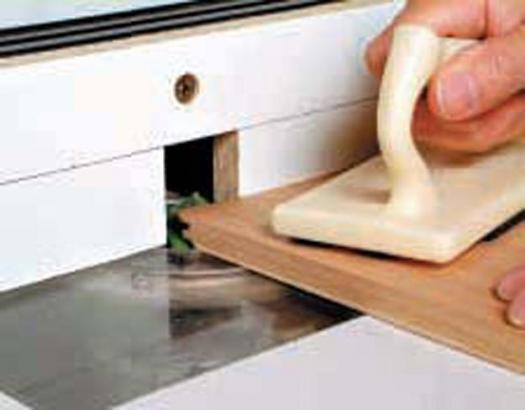
Rout matching piece against fence