TIPS & HOW TO
How to handle your tools

David Bruce Johnson

Golfers have been known to say that the more they play, the greater their chance of getting a hole-in-one. Something similar can be said of carvers.
Golfers have been known to say that the more they play, the greater their chance of getting a hole-in-one. Something similar can be said of carvers (although not so optimistic) – the more you carve, the greater your chance of cutting yourself. The big difference though is that golfers are trying to get a hole-in-one whereas carvers are trying their best not to cut themselves.
In this article, I will show you a technique for using your carving tools safely and effectively.
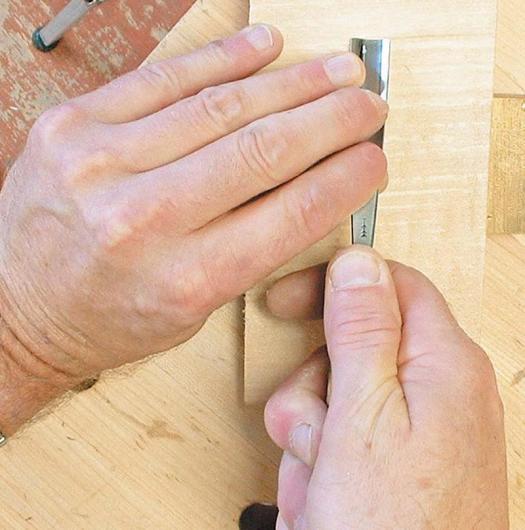
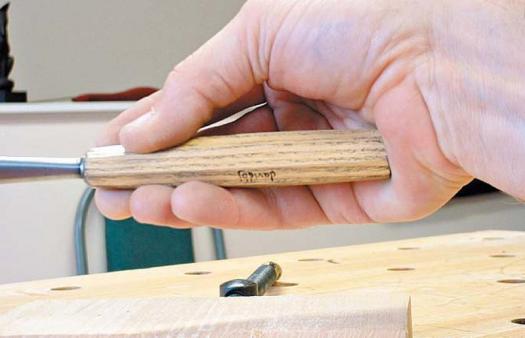
First, you are unlikely to cut yourself if your hands (and/or other parts of your body) don’t come in contact with the cutting edge of your tools. Therefore, when using a gouge, the best way to do this is to keep both hands on the gouge.
When using a gouge with two hands, each hand performs a specific function. (NOTE: The following explanation is for right-handed persons.) The left hand provides “control” and guides the cutting edge of the tool. The right hand is the “power” hand and provides whatever force is required to remove the wood shaving. All carving should be deliberate. By using both hands in this manner, every cut can be made purposefully and under complete control.
There are many benefits to using this technique. Here are just a few. Your fingers and hands are never in front of the gouge, making it impossible to push the gouge into them. By resting your control hand on your carving or a nearby surface, it can also serve to limit the amount the gouge travels. And, you can tell when your gouge is dulling because it will require more power to remove wood.
Cuts are not the only hazard when carving. When using a two-handed technique with your gouges, your power hand is susceptible to a more subtle form of damage.
With the widespread use of computers, the affliction known as “Carpel Tunnel Syndrome” has gained considerable notoriety. For bicycle enthusiasts, this affliction is called, “cyclists’ palsy”. The damage is caused by repeated pressure being placed upon the ulna nerve. That nerve is in the middle of the heel of your hand where there is little muscle. To help prevent this potential problem, it is wise to avoid pushing the butt of a gouge with that part of the ‘power’ hand. Instead, use any of the positions shown in these pictures and vary the position frequently as you carve.
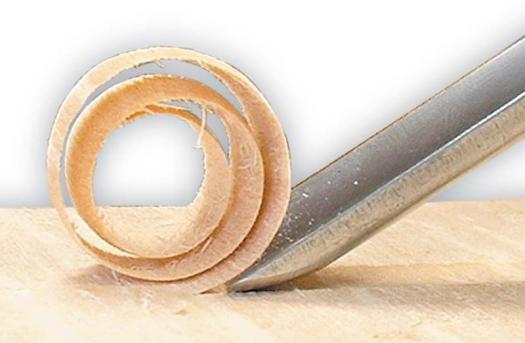
Here’s a little exercise to practice this technique. Get a scrap board a few inches wide. With each of your straight gouges, carve a straight groove across the board. (It is best to go across the grain.) The objective is to carve a straight line, non-stop, from edge to edge. If your tools are sharp, your hands are steady, and your pressure even, you should be able to create a shaving like the one shown in this picture below.
(If you made a tool holder, as described in the last article, carve a groove for each tool parallel and corresponding to each hole. This will come in handy when we talk about sharpening in a future issue.)
There is a similar two-handed technique for using a carving knife. The technique is called “carving away” because the cutting edge of the knife always slides away from the control hand. The control hand also holds the wood. The power hand rocks the knife over the pivot of the thumb on the control hand.
As with the two-handed technique for gouges, the basic idea is to control the amount the knife blade moves and to keep the cutting edge away from you. A big advantage of this technique is that it takes very little effort. Learning this technique takes a little practice but, once you’ve mastered it, you will be able to carve all day without tiring your hands.
To practice this technique, get a scrap piece of wood more than 8 inches long and approximately 2 inches square. Using only your knife, carve a ring around the middle. To do so, it will be necessary for you to carve from both ends toward the center of the ring. You will find this carving action is used very often in carving, so it is an excellent exercise.
When carving with the two handed technique, there is the problem of holding your carving. In the next issue, I will discuss holding devices, and provide plans for making a simple, inexpensive holding device that compares with commercial alternatives.
Keep both hands on the gouge
Control the cutting edge

Right hand is power hand and provides force

Full grip

Thumb pad
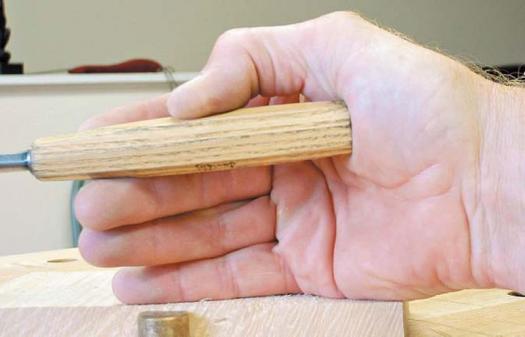
Heel Pad
Pencil grip

Thumb pivot

Create a shaving like this one.