TIPS & HOW TO
Buying and Restoring Used Machines – Part 2

Rich Keller

In our last issue we covered some tips on how to choose whether to buy a piece of used machinery. Here we will give you some practical pointers on how to make those used machines you purchased look nice and run properly.
We are going to look at cleaning up rust, paint techniques and replacing belts and bearings, all so you can make your newly purchased used machine look and run nicely. You will also find this information useful if you’d like to freshen up some of the older machines you already own.
Start with some cleaning
The first job is always cleanup. I like to start by blowing the machine off and wiping it down. I’ll spend the time to clean off any caked on dirt and sawdust. Any moving parts get extra attention, even using an old toothbrush or bottle brush where necessary to get out any dirt. Depending on the state of the machine you may or may not want to go any farther in terms of cleanup, but I will outline here the general procedure for a complete rebuild.
One of the most common issues that I find on used machines, even in shops where machines are looked after, is rust. Rust doesn’t take much to form in most of our climate in this country. One of the worst causes is our weather going hot and cold routinely in the spring and fall. Having a proper heat source controlled by a thermostat to keep the shop from freezing goes a long way in preventing rust. Most tool owners find that they get some surface rust, and I will share with you my method to clean it up.
There are a lot of different products on the market geared for rust removal, some expensive, some even more expensive. After years in a professional environment, having to make this happen both quickly and cheaply, this is the best method I’ve found: Scotch-brite. Yep. The same stuff you clean your pots and pans with. Scotch-brite is the brand from 3M of what is technically called non-woven abrasives. Most major abrasive manufacturers make it, and it comes in pads, belts and sometimes discs. If you plan to do only one tool ever, you can buy it in small pads and invest some elbow grease to clean your rust. Even a fairly rusty top will clean up like new with a little bit of time. In the repair shop, I used a non-woven abrasive belt on a belt sander and this is much faster. Belts are available online and sell for around $20. One belt will do many machines. Very deep rust can be cleaned up in five to ten minutes.
There are a few little secrets to keep in mind with this technique. First, non-wovens are abrasives, but not nearly as aggressive as sandpaper. I would not recommend trying this with sandpaper. Non-wovens are designed more for polishing than for removing material, but the coarser grits will remove surface dirt and rust, and even deeper rust given enough elbow grease. Non-wovens also come in varying grits. The green pads that are sold for cleaning pots and pans are usually around 60 grit, and too coarse in my opinion for machinery. The second most common color is maroon, which is around 100 grit and also too coarse. I start with 150 grit (blue) for heavy rust removal, and then move to 600 grit (grey) for final polishing. I find the fine polishing makes the top slick and especially for machines like a jointer, planer, or table saw, where you are feeding the material, it makes a big reduction in the effort required to feed the tool. I also recommend using a spray oil to lubricate the polishing action. The two I recommend are WD-40 (WD-40 Company) or All-4 (Aervoe Industries, Inc). I’ve used both with good results. I also recommend a linear motion, either by hand or belt sander. I do not recommend a random orbit or rotary tool as it will leave swirl marks. I find that a linear motion in the direction the iron was originally ground tends to mimic the look of the original grinding and make the rust spots and clean up efforts much less noticeable. Also, this is a messy process, so have lots of clean rags and gloves around for working and cleaning up afterwards. Sometimes it’s not just the top of a machine that needs rust removal, sliding parts may also need to be disassembled and cleaned too.
Considering painting?
If I decide I am going to repaint a machine, the first thing I do is take it apart in as many pieces as possible. I always take great care of two things; first, not to break anything by over zealous disassembly, and second, I make note of where everything goes. In our digital age it is easy to take lots of pictures to help refresh your memory later. If the manual is available, of course I have the parts breakdown open in the shop to show me how the machine is supposed to come apart. Once disassembled, I will spend more time cleaning and then begin to prep for paint.
Painting a machine is actually not a lot different than finishing a wooden project. Good preparation is key to good results. Just like wood, the machine surface needs to be smooth and clean for paint to adhere and look good when dry. For areas of the machine that are to be painted I use a random orbit sander, and usually start with 120 grit and work up to 180 grit unless there are any unusually bad areas of paint damage or rust to remove. I don’t try and take all the old paint off. You just need to have a surface that is mechanically sound with no flakes or rust spots, and make it smooth. Any scratches get sanded until they are smooth. Dents get a little auto body filler and then more sanding when dry to smooth them out into the surrounding areas. Once everything is sanded smooth, it gets cleaned again with a clean rag and some degreaser so the paint sticks properly.
The final step before painting is to mask off any bare metal areas that are to remain bare, such as the top of a table saw. The best way to accomplish this is to first outline the area in masking tape and then fill in large areas with paper, taping it to the masking tape outline. Smaller areas can just be covered with tape. You can buy rolls of paper made for paint masking at automotive stores, but a few layers of old newspaper work just as well. Any irregularly shaped parts like knobs and handles can be wrapped in tape.
If you’re set up with spray equipment in the shop, then I would recommend using a quality rust-proofing paint and spraying it on according to the manufacturer’s directions. The advantage to using a can from a paint store is that you can have it tinted to match the original paint. If you don’t have any spray equipment, I would recommend using a spray can, rather than a brush. Metal is not very forgiving with brush marks and you will get a much smoother finish with a spray can. Practice your technique on a scrap piece of cardboard or wood with the can moving in a smooth motion. If you start to get runs, move a bit faster, but no faster than necessary. Several light coats will give a better result than one heavy coat. Once you have the technique down, go ahead and paint your machine parts. Once done all the masking material can be removed.
Move to the mechanics
Once any rust and paint work is dealt with we can move on to the mechanics of the machine. At this point, if the machine has been disassembled, I begin the reassembly work. I like to check over all the moving parts and lubricate them with a Teflon (Chemours/DuPont Inc.) based dry spray, such as Performa PTFE (Jig-A-Loo Inc.) or Dry Film Lubricant #6075 (Aervoe Industries, Inc.) Be careful that you do not get a silicone-based spray as this will react with most wood finishes. Also be sure to get a dry spray, there are PTFE based sprays that are oily and will attract dirt, which is not desirable in a wood shop. If there are any suspect bearings I replace them. It would be impossible to describe every possible machine here and how to replace the bearings. I will give some basic ideas how to go about the work, but if you feel that this is beyond your ability, there are many professional tool repair shops across the country, which can be contracted to do the work for you.
Almost all bearings are pressed into some sort of housing or bearing cap to hold the outside, and then have a shaft pressed in the inside of the bearing. Fairly often, bearings will be held into bearing caps with snap rings, and shafts often have snap rings or threaded nuts to hold them in place in the bearing. The exploded parts diagram in the manual is a great source of information as to how a bearing goes into a machine. An appropriate sized bearing puller will be a necessity to replace most bearings.
Bearings come in a few different types. If at all possible, I use sealed bearings. Many machines are assembled using shielded bearings mostly because it saves a few cents on the manufacturing cost of the machine. Sealed bearings are superior at keeping contaminants out, but are not suitable for as high an RPM as shielded ones. Generally speaking, for woodworking machines, anything that’s running less than 8,000 RPM will be able to use sealed bearings. If you’re in doubt, you can always Google the speed rating for your specific size (ratings do vary by size) and see if you’re going to be okay to switch a shielded to a sealed bearing. Open bearings are usually found inside of gear boxes, and for that application open bearings should be used. I also frequently see open bearings on band saw guides, not because that was what was installed on the machine, but because guide bearings frequently get beat up and the seals or shields fall out of them.
You can also use a puller to replace a bearing on a band saw guide. First, the snap ring holding the bearing on is removed with snap ring pliers. Then the old bearing is removed with a small puller. A new bearing is pressed onto the shaft in a vise with a socket. The socket is used to apply pressure to the inner race of the bearing, which is a friction fit on the shaft. Pressing on the outside of the bearing in this case can result in bearing damage. Bearings should always be pressed on the race that is moving, so the inner race when pressing on a shaft and outer race when pressing into a bore.
Bad belts are a common problem with machines, but usually belts go bad long before they break or visibly look deteriorated. Guidelines vary for different manufacturers, but as a general rule any belt over five years in age is due for replacement. After this time, the rubber gets hard and will not transmit power as well as it should. Older belts will also generally begin to get hard spots and deformations resulting in excess vibration when running. For the cost of a V-belt (if your machine has one) why not just replace it with a nice new one?
What if something is broken?
All the above makes rebuilding a machine sound easy and even fun, but what happens when you have an unexpected snag? Sometimes you find a part that you don’t anticipate to be broken is broken. I will share with you one such problem I encountered with an infeed roller in a 24” planer. The inside hub and outside serrations were connected with flexible rubber. The rubber had dried up, and several sections had detached from the center hub. This ended up being a costly extra during a rebuild project. Unfortunately sometimes these things happen and have to be dealt with because you are already committed to an extensive amount of expense and work on a machine. All of these things are fixable, just annoying.
Broken parts can be a setback during the restoration of a machine. If parts are still available for purchase from the manufacturer of the machine, this is probably the most cost effective solution to the problem. However, many older machines are no longer supported by their manufacturer, or the manufacturer may no longer be in business. There are several ways to deal with this problem.
First, it can prove to be worth while to search online for parts. Many vintage machines which are not repairable end up being broken down and the good parts sold on ebay, so this is one place to check. Another option is to look for a local machine shop to make the part you need. It may be necessary to show the broken part to several shops and get quotes to repair it or manufacture a new one. Most shops will charge an hourly rate, so you want to make sure you are clear on what they will charge up front. You will also want to ask any shop you deal with if they are experienced in the type of work that needs to be done. For example, cast iron can be welded, but only with special equipment, so you would want to make sure that a shop you hire to weld a cast iron part has the right setup. Lastly, you may consider making a part yourself. Simple parts will be within your capabilities to make. Most cities will have a store which sells metal in sheets and bar lengths, and some parts are simply cut to size and have a few holes drilled in them, so they may be easy to make yourself.
Once the messy hard work of cleaning, painting, repairing and re-assembly are done, I can turn my attention to a final setup and tune-up of the machine. Before rushing to cut the first piece of wood, I like to make sure everything is square and blades are aligned properly, and all the adjustments work smoothly. Now is the time to do this, before sawdust gets in there and makes the job of setup more difficult. I also like to go over the whole machine and make sure each bolt is present and tight, as it isn’t uncommon to find missing or loose bolts in older machines. I hope that you have found this informative and are ready to take on the restoration of an old machine.
Photos credit: Rich Keller
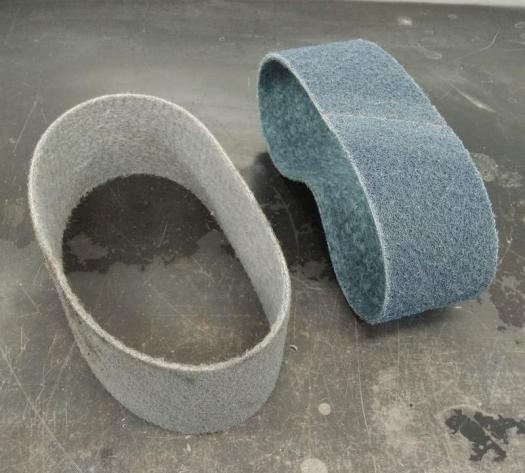
Non-Woven Belts
To speed the process, Keller uses non-woven abrasive belts to remove larger areas of rust. Small pads and some elbow grease are a cheap alternative, but take some elbow grease.
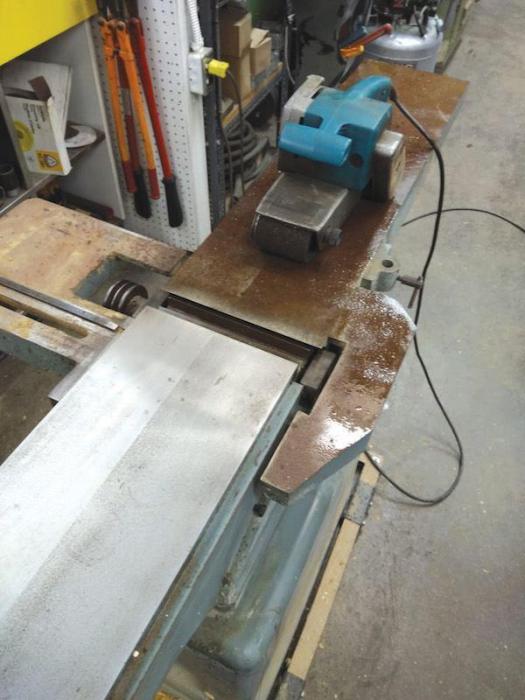
Rust Just Disappears
The rust on this jointer was fairly deep. You can see the impressive difference between the two halves after only a few minutes of work with a non-woven belt on a belt sander. It's not visually perfect, but the jointer bed is very usable at this point.
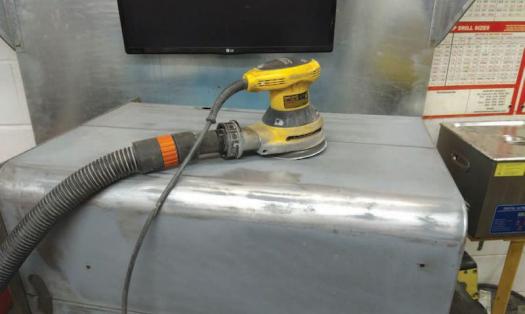
Sanding Metal
Sanding work is done on machines much the same as on wood. Keller often uses a 5” random orbit sander to hit as much of the surfaces that will be painted as possible. He also makes sure to use a vacuum, as any old paint will contain some sort of nasty stuff that shouldn't be inhaled.
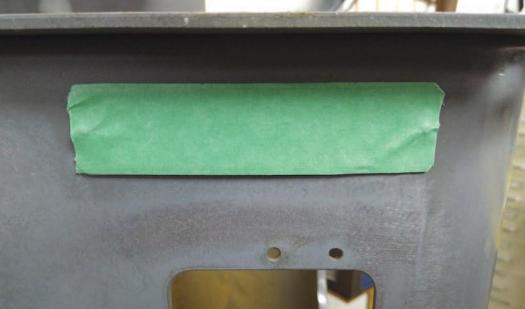
Mask it Off
Parts that aren't easy to remove, yet shouldn't be painted, can be masked off. Large areas require you to mask the perimeter, then cover the remainder of the area with a few layers of newsprint.
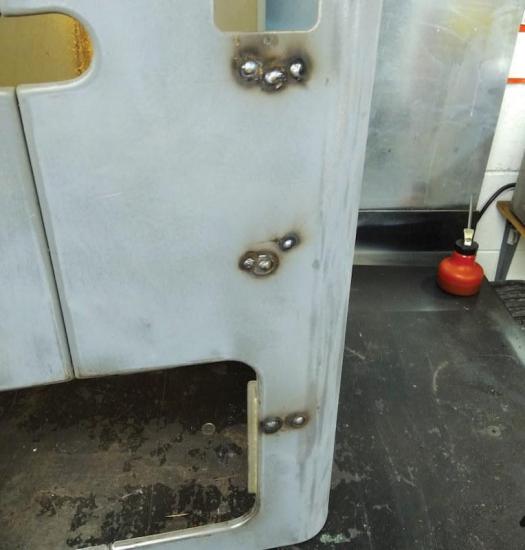
Common Fixes
It’s common on old machines to see many extra holes drilled in the cabinet from mounting various different parts over the years. These holes can be filled with auto body filler, though it usually takes a few applications. Keller usually welds the holes then grinds them flush for speed.
Lots of Bearings
Bearings come in a few different types and sizes. If at all possible, Keller uses sealed bearings. The largest bearing here is a sealed bearing. Many machines are assembled using shielded bearings like the middle size example shown in this photo. Open bearings, like the smallest one in this photo, are usually found inside of gear boxes.

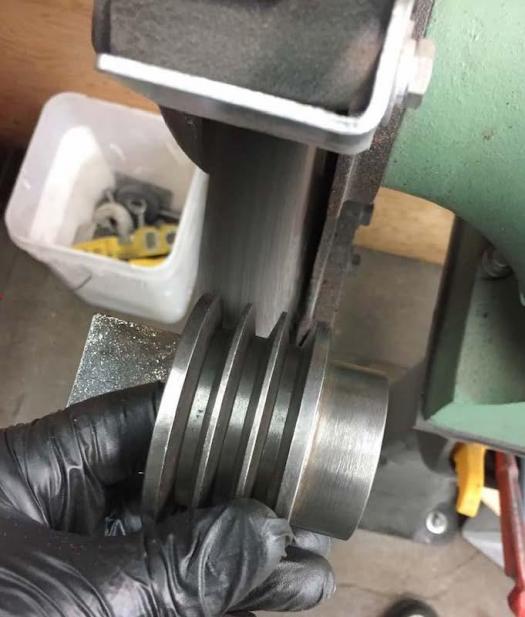
New Bearings
Keller recently replaced bearings for an arbour assembly for a 14” table saw. First, he disassembled and replaced the parts (above). Then, while the pulley is off of the arbour, he cleaned it up with a wire wheel on a bench grinder. A clean smooth pulley is ideal as it causes less belt wear (below).

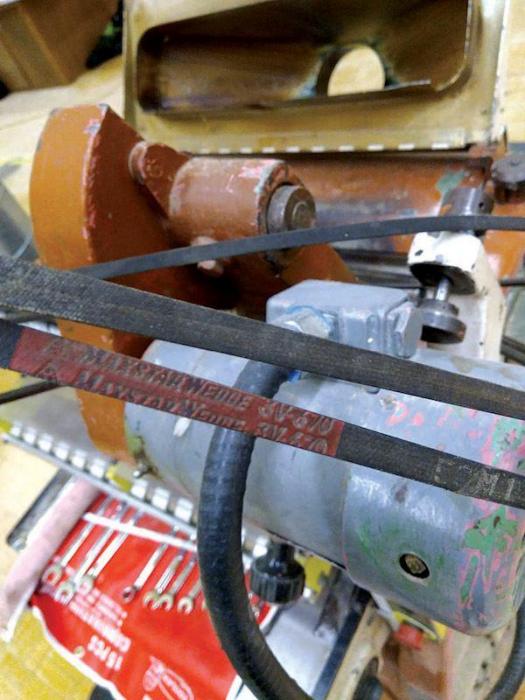
Replace Your Belts
Here are some old belts that are due for replacement. While these belts are completely intact, they are quite hard and inflexible and therefore past the end of their service life. The standard belt number 3V-670 gives the necessary sizing information to order new ones. There are a variety of number sequences in use, but for woodworking machines you will likely run into 3V, A, or B belts as they're the most common.
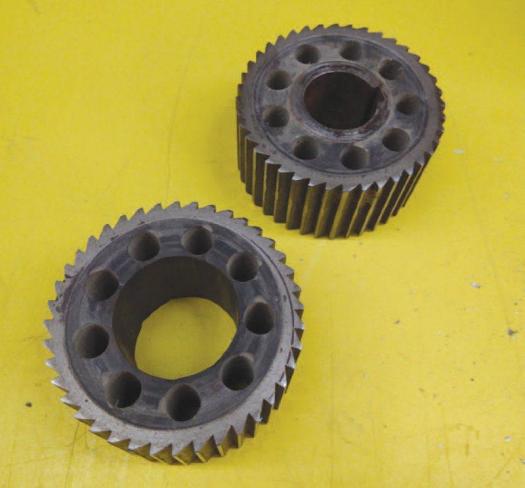
Unique Problems
These two segments came from an infeed roller in a 24” planer. The inside hub and outside serrations are connected with flexible rubber. The rubber had dried up, and several sections had detached from the center hub. This ended up being costly during a rebuild project for Keller. Unfortunately sometimes these things happen and have to be dealt with because you are already committed to an extensive amount of expense and work on a machine. All of these things are fixable, just annoying.
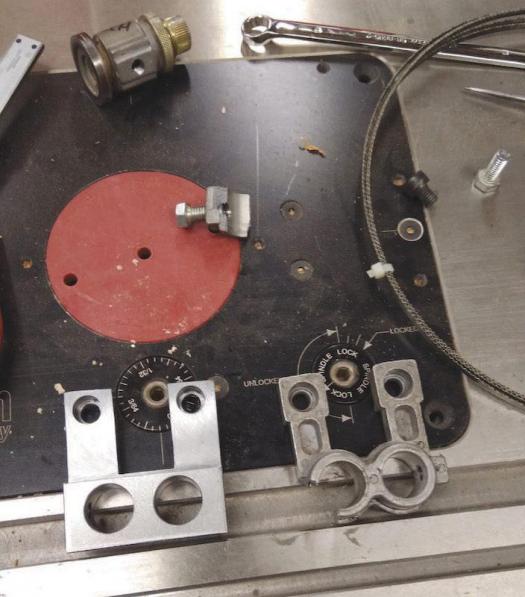
Make a New Part
The broken band saw blade guide on the right was from an older machine. The part was not available, but the machine was in great shape otherwise, so a part had to be made. The new part on the left was manufactured even stronger to make sure this wasn’t an issue again.