TIPS & HOW TO
Building confidence with hand tools

Clive Smith

Have you ever associated using hand tools with gaining confidence? If you haven't, I would like to suggest to anyone thinking of taking up woodworking seriously, that they consider the confidence issue.
Most newcomers lack confidence in their ability because they have little or no experience. This condition was common to us all! The first experience of woodworking is therefore the most important. Much the same as the idea that you only have one opportunity to make a first impression, primary experience leaves an indelible mark.
The beauty of using hand tools at the beginning is that they slow down the process. The slower the process is at the beginning, the greater the opportunity for observing and learning. Remember, you will be learning as much about yourself, as the tools and the wood.
Woodworking fundamentals are deceptively simple, but if you do not follow them, the results will be disastrous. You cannot construct a successful piece of furniture with crooked pieces of wood. If crooked wood cannot be used, how do we know it’s crooked? This aspect needs to be clearly understood because it affects all the steps that follow, especially because woodworking is largely a preparation of pieces, which will be assembled into a project. The primary geometry consists of understanding a flat and a square relationship between pieces.
The best exercise to understand this is to start by trying to make a piece of wood flat and square. I suggest that you start by planing a piece of wood flat, using a hand plane. The best plane to use is a jack plane. This first piece of wood might be a 1″ x 3″ x 14″ piece of rough pine. I suggest pine because it is easy to plane. The piece of pine could be laid flat on the bench top and restrained by two bench dogs. Alternately, the piece of wood could be held flat in a long bench vise.
Assuming you have mastered the task of sharpening, setting and adjusting the plane blade, you are now ready to start planning the flat surface. After a few strokes, you will notice that a smooth clean surface is appearing. But how will you know if the surface is flat? If you are using a plane that is longer than the piece of wood, you can use the long edge of the plane as a straight edge.
By holding the wood up to the light and positioning the plane across, along and diagonal from corner to corner, you will be able to see your progress. At first, it will seem almost impossible to make the surface flat in all directions. The most illusive condition to remove is twist in the surface you created! When you hold the plane across, it shows light through the center portion, but when you try the opposite diagonal, it shows a high point in the middle. Through trial and error, you will gradually master the use of the plane and will even be able to plane where the wood needs to be removed. You will learn how to adjust the plane knife, your stance and your grip in order to get the controlled results. If you started with a 1″ piece, it may well end up being 1/2″ thick by the time you can see no light anywhere between the edge of the plane and the wood surface. At this point, you have achieved not only an understanding of how to use the tool but also the geometry of a flat surface. When I first tried this exercise, I was amazed how long it took before the plane learned to make the wood flat!
Although this sounds like an incredibly simple aspect of woodworking, it is the most profound. A flat surface presents the opportunity to plane one edge so that it is 90º or square to the face. You will use a set square to show you whether the edge is square with the face.
One flat face and one square edge is the basis for all of the other stages of preparation, which will culminate in the assembly of the project.
The next requirement is the thickness of your piece of wood. Working from the flat face, a marking gauge set at the desired thickness is used to scratch the thickness on all four edges of our trial piece of wood.
Back to the bench or vise: you are now planing the second flat surface parallel to the first one. This is more difficult than the first task, as you are now trying to plane the surface flat, but also end up with the correct thickness. Remember that without an even thickness, the first flat surface cannot be parallel to the second flat surface. If the surfaces are not parallel, you will have trouble later when joining and assembling the pieces.
After you have successfully planed the piece to an even thickness, repeat the process with the remaining edge. You have now planed four surfaces – 2 faces and 2 edges. You should be very proud, when you reach this stage, no matter how many pieces of wood were discarded in the process!
You have learned the primary relationship between parallel and flat surfaces. You have convinced yourself that you are capable of bringing this piece of rough wood to a useful, component level. You now understand what the conditions of twist, cup and bow are in a piece of wood. Whether your piece of wood is going to be a leg, drawer side, back, front rail, style, panel or framing member, the same basic rules apply.
How have you increased your woodworking confidence? Firstly, you have mastered a simple hand tool (the plane), which has given you the ability to take a piece of rough wood and transform it into a component part of your project. You have also learned to appreciate the geometry of this first piece and how these rules apply to all of the pieces. During this process of preparing a simple piece of wood, you have learned to have confidence in your newly acquired ability.
You now have a measure of the time, effort and concentration that is required to proceed to the next level. The next challenge is gaining the skill to join the pieces together.
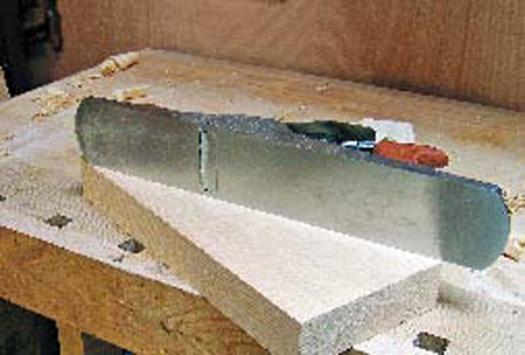
Four passes with Veritas Bevel Up Smoother Plane
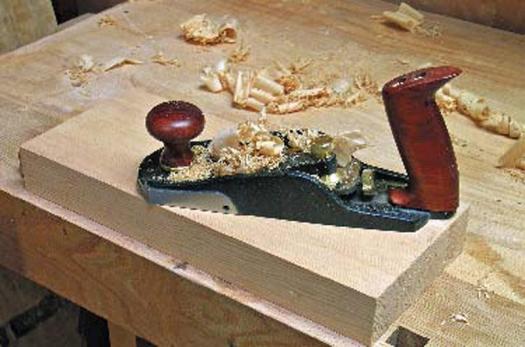
Jointing edges with Veritas Fore Plane
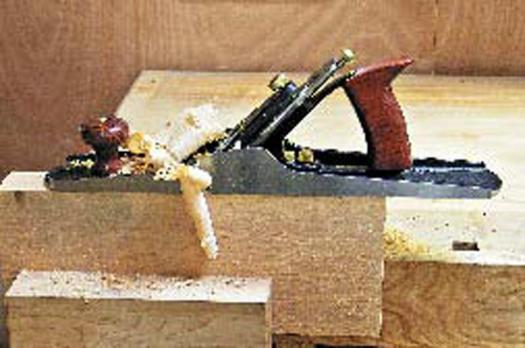
Checking for square with Veritas Fore Plane