PROJECT
Wave-Edge cedar deck

Christian Jensen

Find more Home Improvement projects
Make some waves: Add beautiful curves and solid craftsmanship to a backyard deck that you'll enjoy with family and friends for decades to come.
After living in our house for two summers we realized that most of the yard, while quite beautiful, really wasn’t being used; not an uncommon situation. We had a solid concrete patio and a basic dining set, but it just wasn’t too inviting. In rethinking the space, the main things we desired were: 1) a permanent social fire pit; 2) a dining area with umbrella; and 3) an area for lounging.
Wave-Edge cedar deck
Design
The basic design of the deck we decided on was the product of style and necessity. If the deck edge was straight, either the fire pit or the dining area wouldn’t have been workable. Perhaps angled corners might have worked, but that aesthetic wasn’t right for the space. However, by using a “three circles” approach, the deck would harmonize spatially, not only with a circular fire pit and round dining table, but also with a curving path to the garage.
Material choices
While composite materials are nothing short of miraculous in many ways, natural products offer a different attraction, and there are fewer common woods more beautiful and appropriate for outdoor use than cedar. Regardless, standard treated lumber wasn’t an option for the wave edge we wanted due to its unsuitability to being planed or significantly sanded. With the house and garage being vinyl sided, cedar would give a warm organic contrast that would be worth the few hours of re-staining every few years. The structure of the deck, of course, uses standard treated lumber, deck blocks and ties. The focus of this article is the curved front edge of the deck.
The plans
Being a graphic designer, I have the Adobe suite of software, and I used Adobe Illustrator to draw up the plans for this project, although there are a number of other software options that people could utilize. I always use a computer for even the smallest projects as it takes out all the guesswork and allows me to factor in every possible consideration down to the millimetre. This project, being very geometrical and large, lends itself to accuracy from the start. This software, in combination with Microsoft Excel, was also invaluable in compiling a materials’ list.
The build
The first step of the build was to prepare the yard. We removed the topsoil from the entire area to accommodate the gravel for the fire pit and provide space beneath the joists. This is essentially a “floating deck,” so its primary structure is deck blocks, 2×8 beams and 2×6 joists; pretty basic.
The next step was trenching a recess for the blocks and beams. After the beams were positioned and levelled, they were temporarily removed from the blocks, and landscape fabric was installed on the entire area and gravel brought in. The gravel application was approximately 3″ to 4″ deep in the fire pit area, and approximately 1″ under the deck as best practices dictate.
Once the beams were replaced, the joists were then installed with extra length being left at the wave edge to be trimmed to fit later. Because there was no traditional end joist, secondary concrete blocking was placed under every second joist at the wave edge. One important thing about a project like this is don’t even think about doing it without an impact driver, preferably a decent one. They drive and remove screws far better than your drill, weigh much less and clip to your belt with ease
Planning the wave edge
It was far more efficient to use a single curved form for the three sections required for the curved edge. To plan this out required much experimentation by trying out various sizes and radius options that would suit the functional requirements and join smoothly. Once the right combination was found, it was transferred to a 3/4″ sheet of plywood and the curved-edge lamination form was made.
Fabricating the wave edge
The final wave edge uses three sections of curve. Each curved section measures 3-1/2″ × 1-3/8″ × 10′ before being trimmed. The 3-1/2″ width of the sections are made from 1/2″ thick laminated strips that were ripped from clear cedar 2×4 stock. It’s important to note that clear cedar is not the same as the cedar deck boards; this is much more expensive, but the absence of knots really was mandatory for this wave edge. Each of the three sections was made from seven strips, so 21 were required in total. Taking into account the kerf, four 10′ 2×4s were needed for the three final curved sections.
Making the curved-edge lamination form
With the curve specifications determined, the curved form needed to be built. The profile of the curve was drawn out on 3/4″ plywood and cut out with a jigsaw. The waste removed from the area where the lamination would be clamped up was discarded. Because the final part would be 1-3/8″ thick and the plywood was only 3/4″ thick, supplemental edging blocks were added on both halves of the press every few inches or so. These were nailed and glued. Another option would be to glue two layers of plywood together to form the full thickness needed. The second layer of plywood could be flushed up with a flush trim router bit.
As the two halves of the press needed to be brought together with some force without bending, 2×4s were added as stiffeners and guides to keep the two halves in line. Three 6′ bar clamps along with a few other smaller clamps were used to keep the two halves aligned where required.
Pre-bending the strips
Even though the individual strips used to laminate the wave edges would be only 1/2″, I decided to do a pre-bend process so that there would be as minimal stress on the laminations as possible; this would also minimize spring back. I soaked the strips for 24 hours, then pressed them into the form without glue for another 24 hours. They would need to dry thoroughly so the moisture content would be low enough to not compromise the bond of the epoxy, but I needed to maintain the bend I had created so far.
To achieve this, I placed the strips across my garage door rails and strapped suitable weight to the middle so they would have the approximate bend needed, and they were left to dry. This could be done in tandem with work on the deck structure so the final parts would be ready when the joists were complete. Not a quick process, but critical for long-term success and ease of laminating.
There’s a chance that soaking the laminations wasn’t needed, which would have sped up the process a great deal. Although 1/2″ thick softwood will bend somewhat easily, everyone has their preferences as to how to best bend wood.
Time to press the strips up
After the laminations were all pre-curved and dry enough, I moved on to the actual laminating. Each strip was first wiped with acetone (isopropyl alcohol could also be used) to remove oils from the surface. A respirator and gloves were used for this step. I also sanded the surfaces with some 80-grit sandpaper to give a slightly textured surface for the epoxy to better adhere to. West System slow-cure epoxy resin was applied, and the strips placed in the press.
Once the bar clamps were tight, I looked for any gaps and tapped in shims where required. To prevent any potential damage due to epoxy being trapped under the shims, I cut some small pieces of thick poly to use as barriers. Epoxy is used to laminate the strips instead of traditional carpentry glue as it is perfectly suited to exterior carpentry. It’s waterproof like Titebond III, but its gap-filling properties also mean it doesn’t need a super-tight, cabinetry-level fit for a strong and permanent bond. In addition, the extended working time of the slow-cure resin (several hours depending on temperature) was very welcome and might well have been a critical factor to success. I sure didn’t want to find out the hard way that carpentry glue had dried on the first boards before I could get all of the laminations in the press.
Go back outside
Once all three sections were laminated, they were taken out to the deck area to work out the final positions according to the plans. I thought it was best to do this before planing and sanding them, as it seemed a good bet that they would get inadvertently battered a bit in the positioning process, which turned out to be (most likely) a self-fulfilling prophecy.
The process of finishing the sections involved belt sanding the top and bottom to remove most of the epoxy to help prevent damage to the planer blades. A little elbow grease while going through the planer was required with the curved profile. From here, the two mid-deck butt joints were cut while the outside ends were left untrimmed for now. I added biscuits to the two mid-deck butt joints, mainly to assist with aligning the joints once I was eventually able to assemble and epoxy them. The final position of the edge nearest the house could now be marked on the joists.
Decking
Just a few notes on the decking as this portion of the project was fairly standard, with a couple of exceptions.
As with any deck, planking begins from the front and works toward the back of the deck so as to not wind up with thin strips of decking at the front. Obviously, the same applies here, and I didn’t want to wind up with, for example, a very narrow board adjacent to any point on the curved edge.
The solution was to take about half a dozen deck boards and some actual gap spacers that I would be using, then placing them tightly together to get a measurement. This “real-world” measurement would then allow me to have complete control over where the curve would have to end up to ensure the end planks were of suitable width. I was aiming for a minimum of 3″ wide for the front-most board.
The reference datum for this measurement was decided as follows: I wanted the point on the wave edge nearest house to cut into a deck plank by about a third the width of the plank. The plank was placed as such and its position marked. It was this plank that all the others were referenced from, and the final positions of the left and right of the curves could now be manipulated to ensure the desired plank width.
It’s for this reason that I was able to deck almost the entire surface and plank the front edge last. In the photos you can see how I’ve planked up to the last board before the datum board. All decking screws were pre-drilled and countersunk to give a clean appearance. This also reduced the risk of slivers and tear-outs.
Trimming and notching the joists
With the curved profile marked, each joist was notched and trimmed at the marked angle. The notches and end cleats provide a solid bed and take the primary loads for the wave edge.
As variances can occur in joist height, and because the top of the curved edge needed to be very accurately aligned with the decking tops, I wanted to keep my options open. As a result, I cut the bottoms of the notches 1/8″ deeper than required. This ensured I could precisely manage the variance with epoxy and a spacer. With a selection of different spacer thicknesses, it was simple to ensure accurate alignment of the future finished decking and the top surface of the wave edge by using a sample of the 5/4″ decking for test fitting.
Scribing the wave edge onto the deck planks
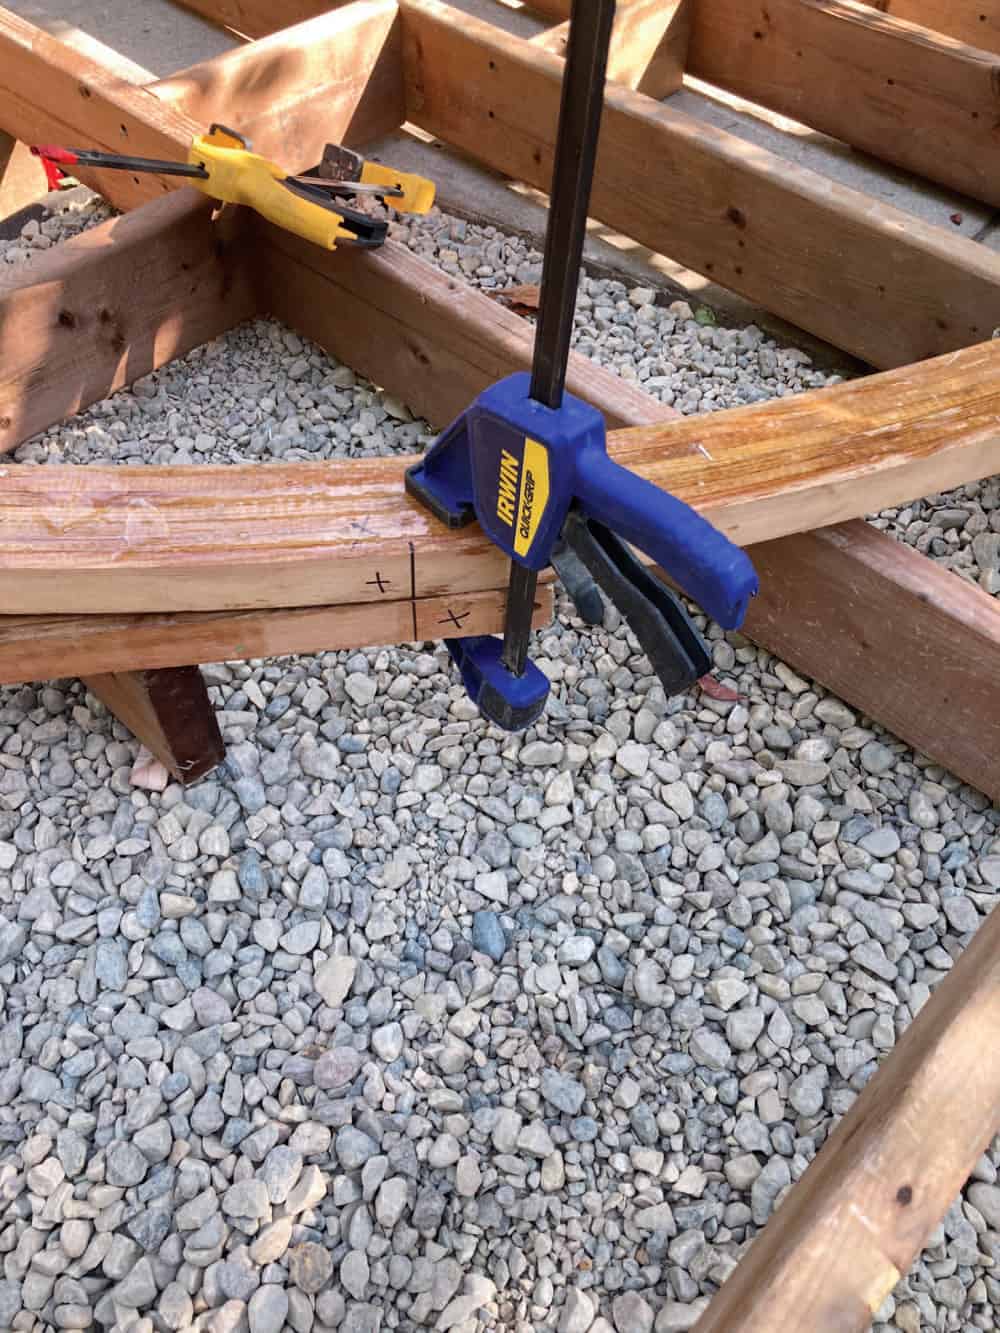
I wasn’t sure how I was going to cut all the deck edge pieces to cleanly match the edge curve without spending many days custom fitting all the pieces. The method I came up with was quite simple and very accurate. What I decided to do was raise the wave edge exactly vertically in place in order to slide the corresponding decking piece(s) underneath to enable an accurate profile transfer.
I created simple jigs that butted up against the wave edge, and were perfectly vertical. These were temporarily attached to selected joist end cleats. The wave edge, resting against the jig, could then be raised vertically and clamped as required to the jig. Using a 1/8″ spacer to represent the board gap, a quick pencil line was made, and that deck board was ready for the jigsaw and edge sand. These shaped edge planks were then numbered and set aside for installation after the wave edge was installed and secured.
Curved edge skirt
Like the wave edge, this portion is also made from three sections. Each section is 5/4″ stock and, due to the sloping yard, ranges in depth from 8-1/2″ to 12″. The 5-1/4″ wide boards were laminated with Titebond III. Once the sections were laminated and planed (face side only), kerf cuts were made on the back to accommodate dry bending. These were cut with a circular saw approximately every 1/2″ keeping a minimum 3/16″ away from the front face. These didn’t need to be spaced carefully or perfectly straight; there would be plenty of opportunities ahead where obsession with perfection would actually pay dividends.
You’ll notice there are spots where the skirt board has no kerfs. This is so screws can be driven into solid material near the ends of the joists. Note that approaching each solid area, the kerf depths are graduated, being made increasingly more shallow leading up to the solid area. This prevents the board from snapping from a sudden change from thick to thin.
For attaching the skirt to the joists, I wanted to have a clean front face showing no fasteners. The joists don’t contact the skirt, but rather they facilitate a cleat plate that, in turn, fastens to the skirt from behind. This format allows for hidden fastening with the screws (supported by epoxy) being driven into the skirt from the back. This cleat plate format is also required because where the skirt sections meet end-to-end, a substantial backer is required to fix both skirt boards. A joist-end alone would be insufficient.
Holes for LED deck lights were then drilled and each section test fitted, particularly to be sure of ground clearance. Once installed and secured with screws and epoxy, I used Great Stuff Pro expanding foam underneath the skirt to keep the deeper gravel on the fire pit side from migrating under the skirt.
Completing the wave edge
Once the edge deck planks were all cut and numbered, I was able to install the wave edge. With the wave edge position fixed, I marked where the left and right trims would be. I could have done a simple mitered butt joint for these, but I settled on an epoxied mitered half-lap with a biscuit for good measure.
I also wanted to use matching clear cedar for the straight edge sections, but due to its enormous cost, I was willing to put in some extra work to economize. The edge pieces only needed to be 1″ thick to match the decking thickness. (Remember, the wave edge is 1-3/8″, plus 1/8″ spacer, and sits in a 1/2″ notch in the joists). I ripped 2×4 clear cedar lumber in half, giving me two 5/8″ × 3-1/2″ pieces after a pass through the planer.
I then used Titebond III to laminate each of these to 3/8″ × 1-1/2″ spruce pieces to give me a final 1″ × 3-1/2″ edge piece. It wasn’t a concern that the dissimilar lamination would be seen as the sides of the deck have no cosmetic considerations. These pieces were installed using 16-gauge 2″ toenails and PL Premium Construction adhesive.
With the edging now permanently in place, the last thing to do before completing the decking was to add blocking between the joists immediately adjacent to the wave edge. This was needed not only for extra lateral stiffening, but primarily as a bed for planking that terminated between joists. I then installed the remaining pre-shaped deck planks at the wave edge and finalized fitting.
Finishing
Before staining, any edges that hadn’t received smoothing were dressed. I sanded the entire deck with 80 grit where required and then finished with 120 grit.
I applied two coats of stain by brush and after a week or so was enjoying a beer on our new deck.
Photos by Christian Jensen
The Bending Form
A 4'×8' sheet of 3/4" thick plywood makes a good form. A few 6' long pipe clamps bring the two halves of the form together once the laminations are glued and inserted between the halves.

Pre-Bend the Strips
In order to make the bending process go more smoothly, the laminations are clamped up in the form long enough to “pre-curve” them slightly. This stops the laminations from fighting against you when the epoxy is applied to the strips.
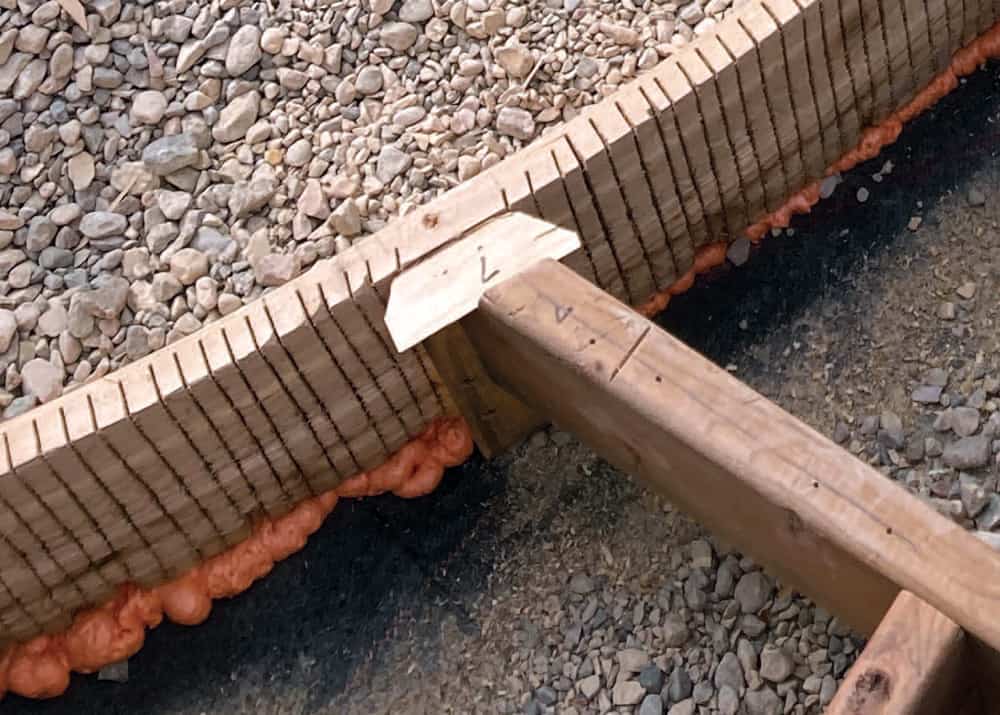
Cut to Length
With the epoxy dry, Jensen brought the three wave-edge laminations to the deck to mark where they would be trimmed to length.
Notched Out
The deck boards are thinner than the wave edge, so Jensen had to notch the joists to accept the wave edge. Since slight variations can occur between the joists, he cut the notches about 1/8" deeper than needed so a customized shim could be used to account for any variations.

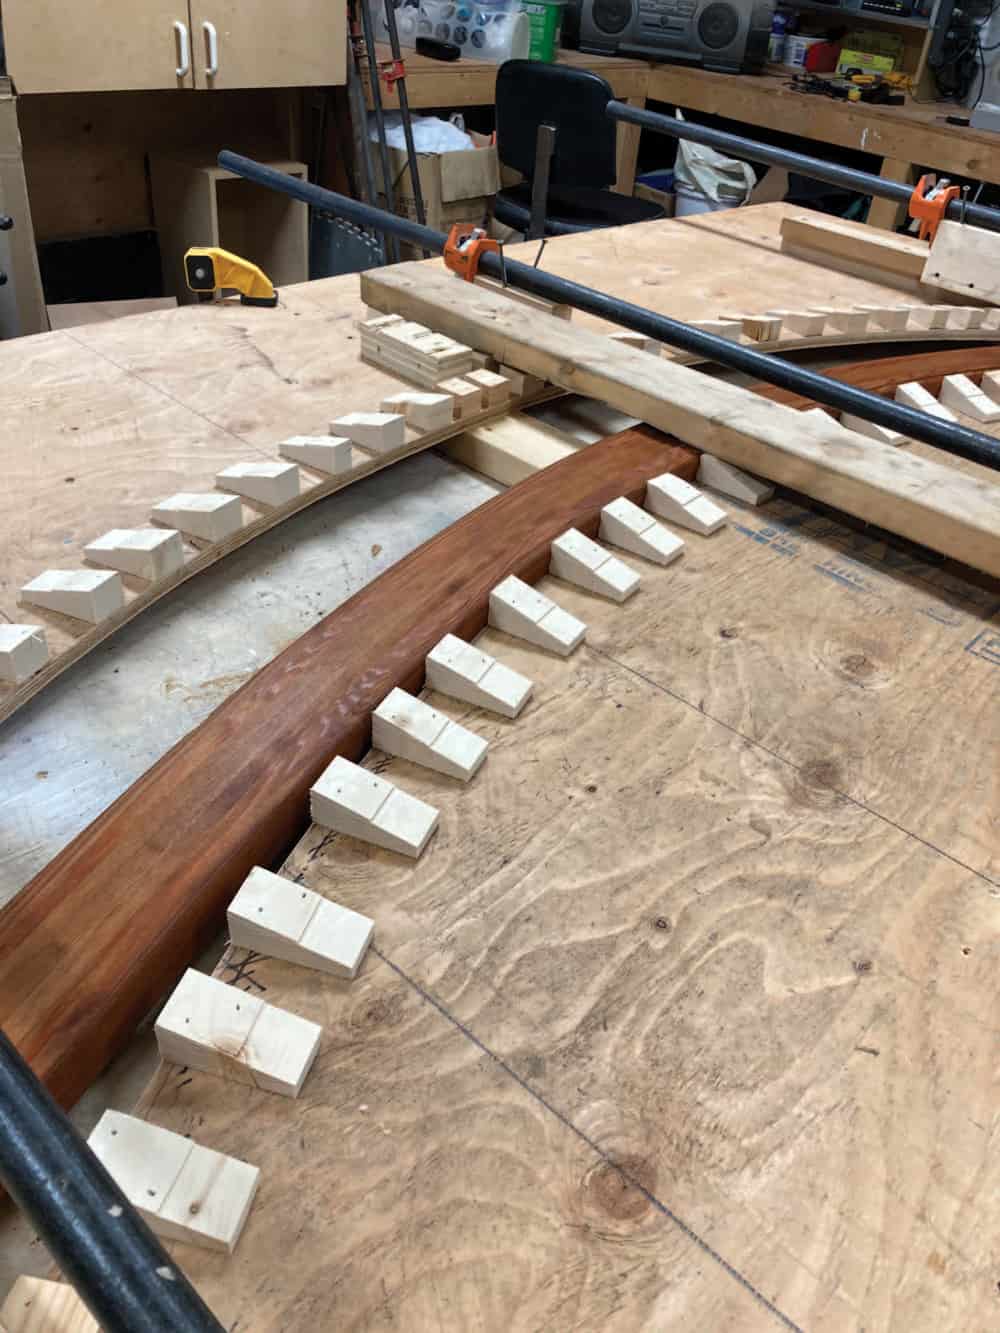
Perfect Match
A few short pieces of lumber were all it took for Jensen to raise the wave edge directly upward, slide the deck boards underneath the wave edge and mark the curve on to the deck boards. Once the deck boards were cut, they matched the curve of the wave edge perfectly.

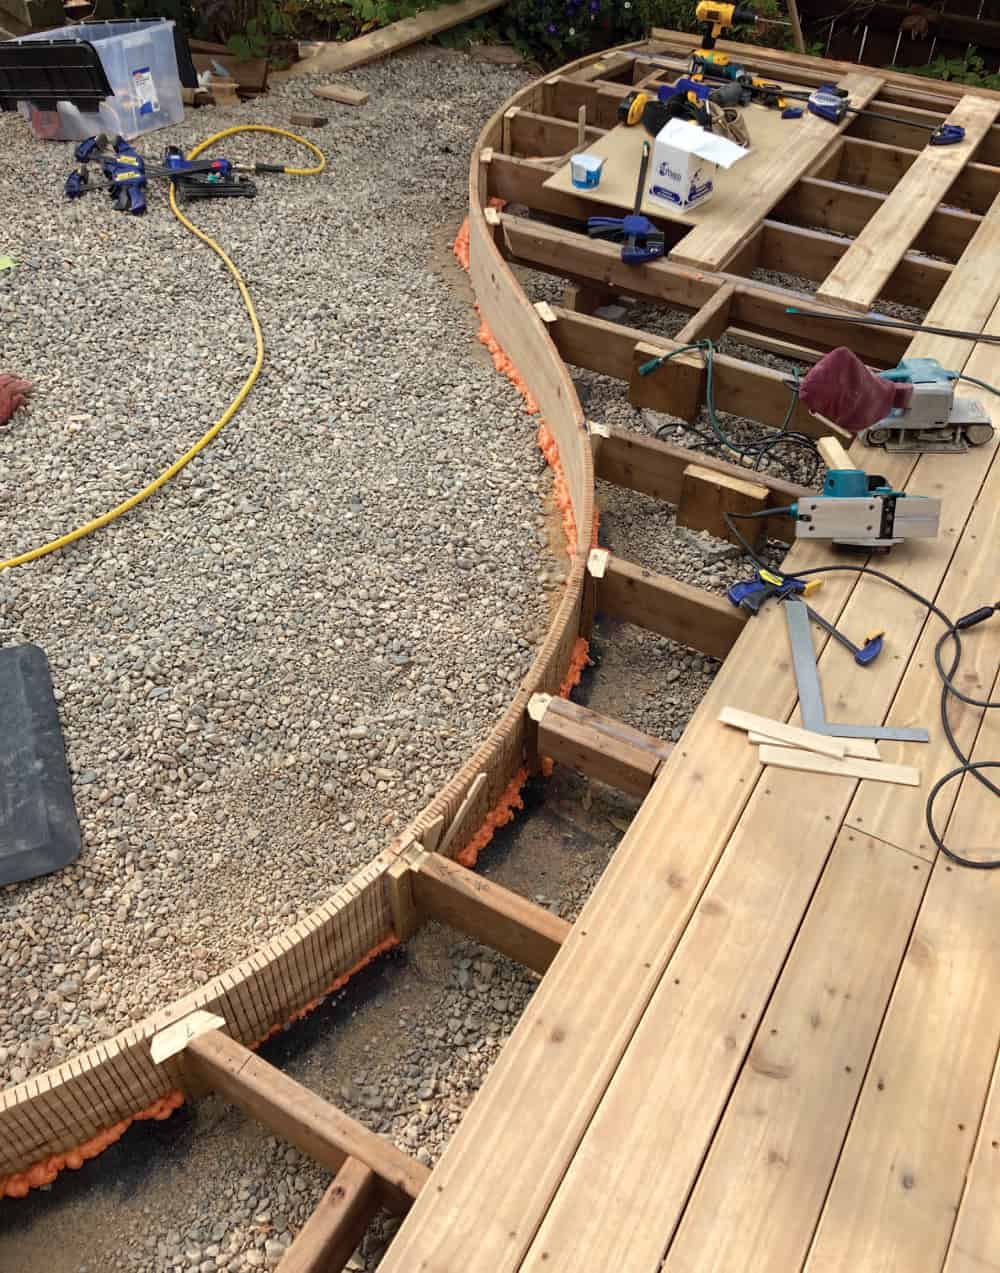
Overall Details
This view gives a good idea of the overall construction approach. Here, the wave edge is positioned and traced onto the deck boards below it without ending up with a deck board that is too narrow where the wave edge protrudes into it.
Kerfs for Easy Bending
A series of kerfs cut into the rear faces of the skirt boards will allow them to bend to the required curve. The closer and deeper the kerfs, the more the board will bend and the weaker it will become.
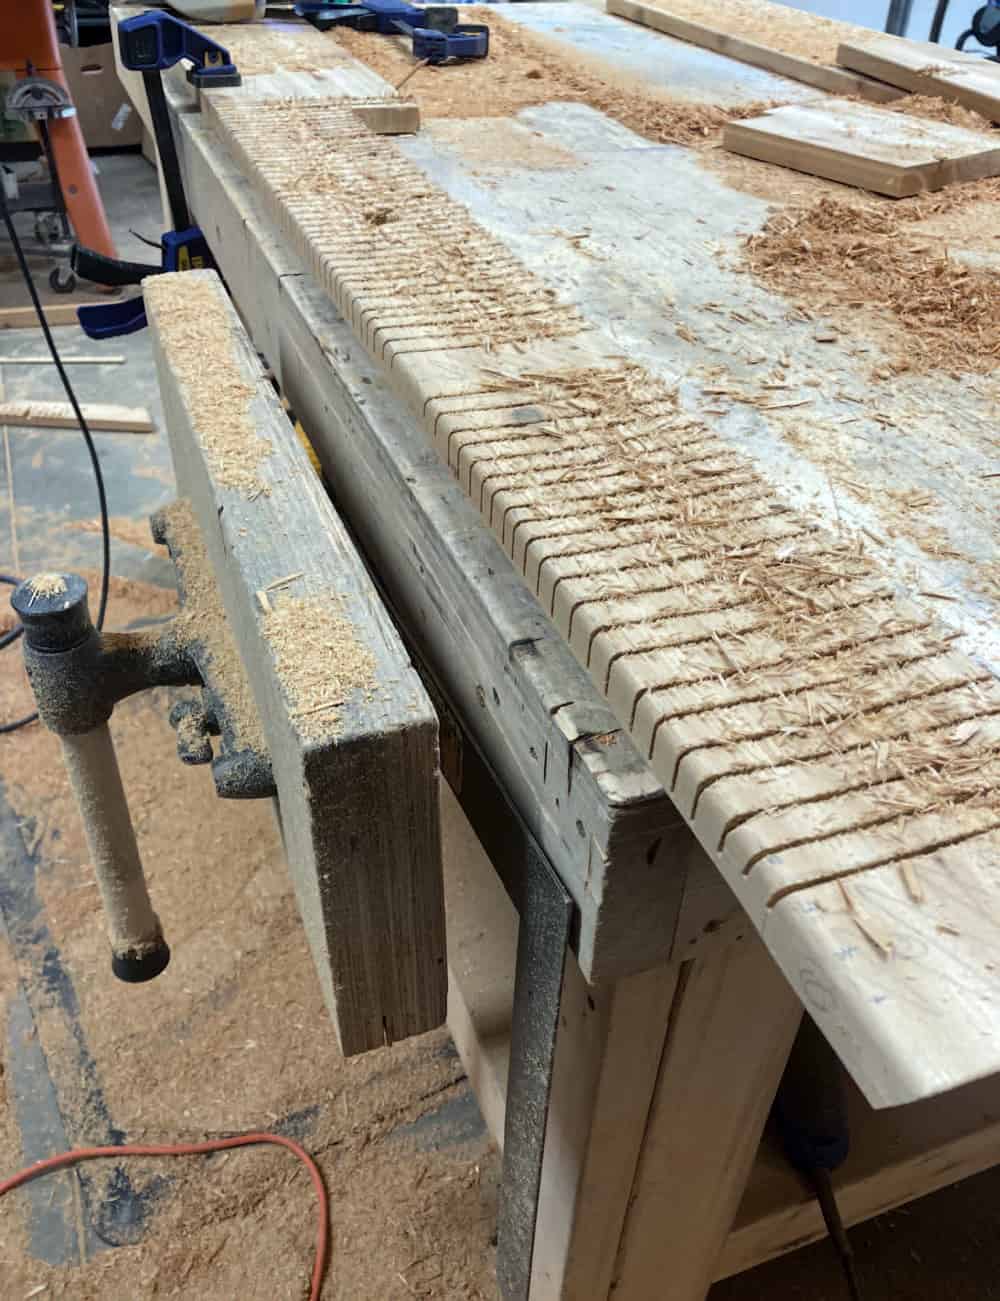
Leave Some Solid Sections
Kerfs aren’t added where the skirts meet with a joist, as the extra material is needed for securing each skirt. Also, Jensen cut fewer and shallower kerfs near the solid area to avoid a specific weak point in the skirt.
Lots of Joint Options
Jensen used mitered half-lap joints with biscuits where the wave-edge corner joints met the straight trim pieces. Many other joints would also work here.

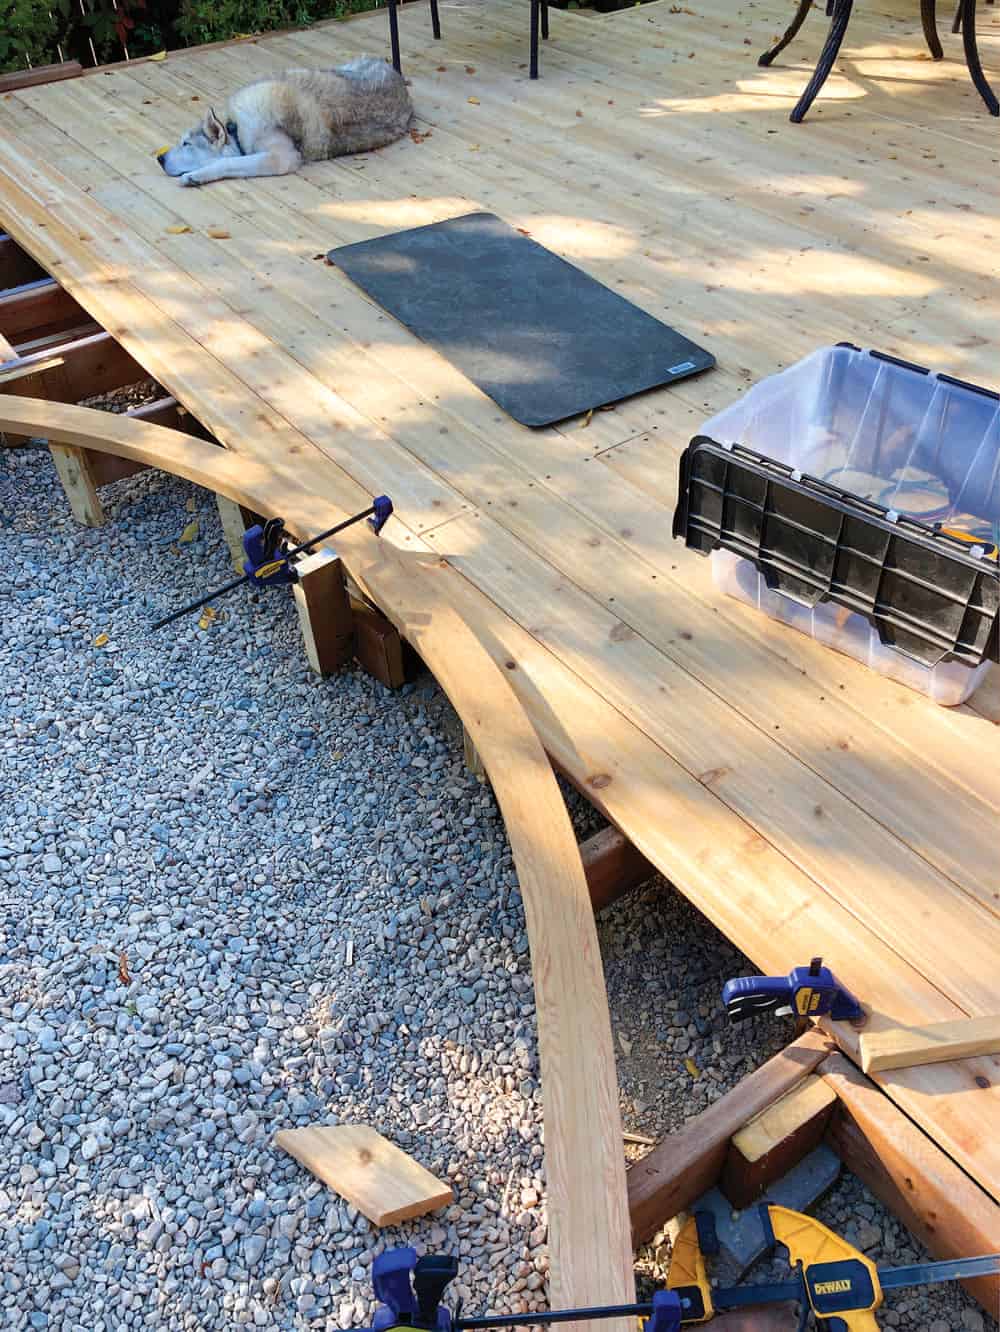
Almost There
Here, the deck boards have been installed from the datum board back towards the house and the skirt is fixed in place. Installing the wave edge and final deck boards are next.
Final Check
Though it’s not installed yet, the wave edge fits perfectly. It will be toenailed through its 1-1/2" thick edge into the joists and epoxied in place shortly.

Light It Up
Before the rest of the deck boards were installed, Jensen drilled for and installed small lights.

All Finished
A stain was applied to the exposed parts. This will help protect the wood from UV rays, water and snow. Future applications of the finish will maintain the look of the deck.

Illustration by Len Churchill


