PROJECT
Turn an Eccentric Pedestal Bowl

Allan Cusworth

Find more Woodturning projects
Follow the steps properly and you will open your eyes to the wonderful world of eccentric turning. Once you finish this piece, and have a good command of the process, you’ll be able to design all sorts of interesting and unique eccentric turnings.
Eccentric woodturning is a technique that creates a finished piece with an element, or elements, that are offset from the true center, which is parallel to the ways (bed) of the lathe. The scope of this project keeps it simple by using only two different axes. Eccentric turning is also called multi-center turning. This process can yield some very interesting results depending on the location and number of sets of axes used. The wood grain (end grain) orientation of the block used in this project runs in the same direction as the lathe axis.
Some intermediate woodturning skills are required to complete this project. Safety in the workshop is paramount, and sharp turning tools are imperative.
This eccentric pedestal bowl is turned on two axes with the true centers being used to round the blank to a cylinder, and to shape the bowl and base sections. A second axis is used to shape the middle of the pedestal.
Turn an Eccentric Pedestal Bowl
Design
When a person looks at a turned piece, the first thing they see is the shape, or form. When designing this bowl I used a modified Rule of Thirds (1/3:2/3), which is close to the Golden Mean ratio (1:1.618034), for some of the dimensions. The Golden Mean design ratio appears naturally in many places and is used by many artists and craftsmen when designing furniture, buildings, etc. to create results that are pleasing to the human eye. Some photographers also use the Rule of Thirds when composing their pictures. I rounded the calculations to suit my eye. You can use this ratio or just design the bowl using your own dimensions.
The design lines of the bowl need to flow smoothly. All curves transition into each other, and where a line changes direction, I like to create a filet. This stops your eye movement and prepares your brain for a change. All this makes for an interesting finished piece.
Selecting the Wood
I selected a 5-1/2″ long dry block of big leaf maple cut from a log. Though the finished bowl is only 5″ tall, the extra 1/2″ is needed to allow for truing and creation of the chucking tenon.
Mounting the Block
Review the grain pattern in the block and select which end will be the top of the bowl. Locate and dimple the center of the block on both ends and mount it between centers on the lathe with the bottom towards the tailstock. At about 1200–1500 RPM, or a speed comfortable to you, turn it to a round cylinder a little larger than the finished outside diameter of the top bowl. True up the bottom end of the blank. Make a tenon to fit your chuck jaws. The depth of the tenon needs to be as long as possible without touching the bottom of the jaws. This ensures that the block aligns true in the chuck. The piece will be offset later and as much tenon length as possible will be needed.
Reverse the blank and mount it in a four-jaw scroll chuck. Bring the tailstock up to center the blank using the dimple in the end. Mark the location of chuck jaw number one as a reference point for offsetting the cylinder and in case the piece has to be re-chucked later. True up the cylinder and make sure the top is flat.
On the outside of the cylinder, mark= the location of the bottom of the bowl section at 2-1/2″, and the approximate location of the offset disk at 3-1/4″ from the top of the bowl. You may want to make these marks a little more visible by cutting a shallow groove with a skew or parting tool.
Mount a Jacob’s chuck in the tailstock. With the lathe speed at about 250 RPM, drill a 1″ diameter by 1-7/8″ deep pilot hole in the center of the bowl. I used a Forstner bit with a piece of green masking tape on the shaft to indicate the hole depth. Remember to allow for the drill point. This hole not only creates a depth guide but also provides a starting surface for your gouge for hollowing out the bowl.
Shaping the Inside of the Bowl Section
Hollow out the inside of the bowl section of the piece to its final dimensions with a 1/2″ bowl gouge. To make a smoother cut and reduce tear-out, follow the grain of the wood fibers. To illustrate, consider sharpening a pencil with a knife; you always cut with the grain towards the tip, which creates a smooth surface. The same principle applies when you cut wood with a bowl gouge. This process is described as cutting with the grain supporting the bevel on the gouge. To follow the grain here, cut from the center of the bowl towards the rim. If you cut backwards from the tip to the center, the wood will splinter and cause almost unrepairable tear-out. If you still get some tear-out, it can be minimized by using a sanding and cutting compound. I use Clapham’s Sanding and Cutting Compound, a beeswax product that is readily available. I have found it compatible with any finish I have used to finish my bowls so far.
Confirm the depth of the bowl using a depth gauge and mark this dimension on the outside. This mark will soon be removed but will create a mental image. True up the surface of the rim.
Rough-sand the inside of the bowl through the abrasive grits from 120 to 220 to remove any tool marks and scratches. Finish-sanding to 400 grit will be completed later.
Shaping the Outside of the Bowl
Remove the sharp point and bring the tailstock up into the bowl using a pad of paper towel to protect the surface. This will provide support while shaping the outside. Turn the outside shape of the bowl to the finished 5″ outside diameter following the contour of the inside shape. Check the wall of the bowl often to maintain a consistent thickness. Shape the pedestal stem to its 3/4″–7/8″ finished diameter at the base of the bowl section and the top of the surface of the offset disk. During this process you will need to reduce the diameter of the disk and base area of the cylinder to about 3-3/4″ to provide clearance for the gouge. These dimensions will be approximate since measurements will change when the cylinder is offset in the next step. Follow the grain direction to maintain support of the gouge bevel. You can create filets at points where the design direction changes if desired. Roughsand these surfaces to 220 grit as before. Finish sanding will be completed later.
Offsetting the Center Section
With the lathe turned off, and chuck jaw #1 facing up, hold the cylinder in the chuck and slowly loosen the jaws just enough to offset the base 1/4″ at jaw #1 by tilting it towards jaw #3 – the opposite jaw. Mark the location of the front of jaw #1 on the tenon. Place a 1/4″ x 1/4″ x 1-1/4″ long piece of scrap wood between the jaw front and the cylinder to create a firm seat. Pull the tailstock back and tighten the jaws securely while holding the cylinder firmly against the chuck jaws and the 1/4″ spacer. Remove the spacer. The cylinder is now offset in the lathe and will spin off-center. Revolve the lathe very slowly by hand while positioning the tool rest to make sure that the bowl does not hit it. If you decide to make any changes to the measurements suggested here, it’s a good idea to keep a record of them for future reference.
Since the bowl will be spinning off-center you will not be able to use the tailstock for support. Start the lathe at a slow speed, about 500 RPM. Use a sharp detail/spindle gouge and very light cuts to round off the next 1/2–3/4″ of the center section where the offset disk will be about 2-1/2″ diameter. Create a curved transition towards the base section.
Notice the ghost image as the lathe is turning and be aware of where your fingers are at all times. Stop the lathe frequently to inspect your progress. Whenever you move the tool rest with the cylinder mounted offset, always slowly turn the lathe by hand before you turn it on to make sure the piece does not hit it.
Shape the bottom of the offset disk and the top surface of the base section. Carefully sand this section, using the same sanding procedure as before. This part has to be sanded to the finish grit at this time since this section will always be spinning off-center after the next step.
Shaping the Base
Stop the lathe and loosen the chuck slightly and return the cylinder to its original position flat against the base of the chuck. Tighten the jaws securely while holding the bowl firmly in place. Bring the padded tailstock up against the inside bottom of the bowl. The lathe speed can be increased to 800–1000 RPM for the next step. Turn the base to its final 3-1/2″ diameter using a spindle gouge and very light cuts.
Sand the base section and complete the finish sanding of the inside and outside of the bowl, as well as the top of the offset disk.
Finishing the Project
Stop the lathe and apply an even coat of salad bowl beeswax to all surfaces. If you use a soft cloth, most of the surfaces can be carefully rubbed with the lathe spinning at a slow speed.
Completing the Bottom Surface
Remove the bowl from the chuck. Reverse the bowl on to a jam chuck. I prefer jam chucking the vessel on the outside rim surface and adding some painter’s tape straps for security. A vacuum chuck will also work. Bring the tailstock up for support and line it up with the dimple on the bottom of the base. Using a sharp spindle gouge and light cuts, remove the tenon and refine the bottom of the base. Make it slightly concave so the bowl will not rock on a table. Back off the tailstock for the last few cuts. Sand the base through the grits as before, add any desired decorative rings, sign your creation and apply the salad bowl beeswax to complete the project.
Remove your eccentric pedestal bowl from the jam chuck and admire your handiwork. You can polish or buff the beeswax after it dries. People are sure to ask you how you got the center disk so off-center.
Have you used any eccentric turning techniques before? Share your ideas, as well as photos of your finished pieces, to the end of this article.
Photos by Allan Cusworth
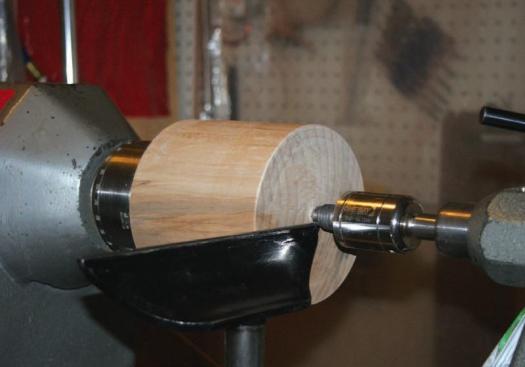
Rough it Out
Once the blank is chucked in the lathe, Cusworth turns it round on the main axis.
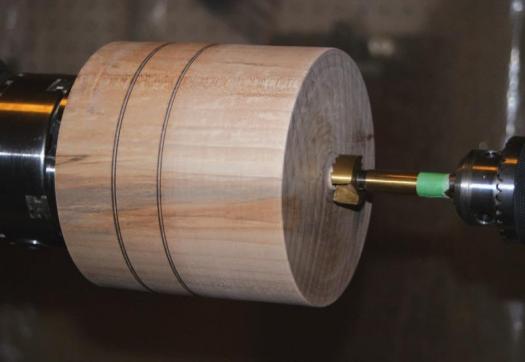
Start With a Hole
Start to create the cavity of the bowl with a Forstner bit. Cusworth wrapped a piece of green tape on the shaft, at the correct distance, so he would know how deep to drill. Notice the layout lines on the blank. They will come in handy while you turn the base and offset center.
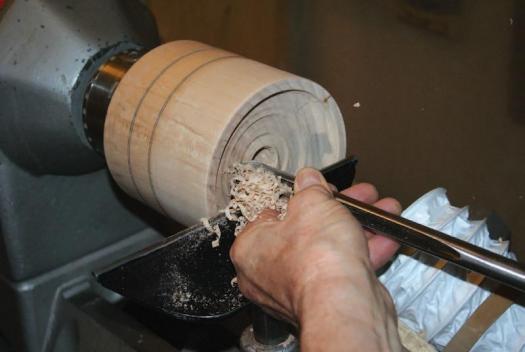
Hollow the Bowl
Use a 1/2" bowl gouge to hollow out the main bowl, stopping when the bottom surface of the bowl is flush with the drilled hole.
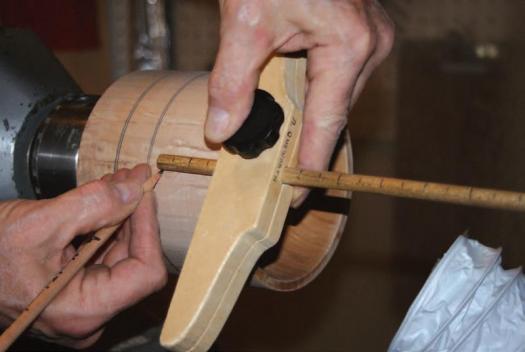
Bowl Depth
Measure the depth of the bowl with a depth gauge, then transfer than dimension to the outer surface of the blank. This will ensure you don’t turn into the bowl area.
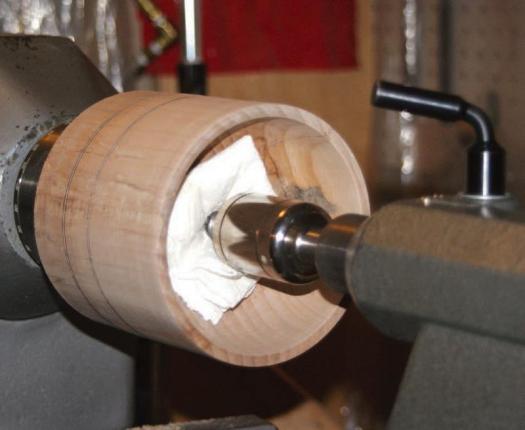
Cushioned Support
A wadded up piece of paper towel will help support the blank while you turn the outside surface of the bowl.
Turn the Bowl’s Exterior
Shape the outer surface of the bowl portion of the project, being careful not to remove any wood past the first layout line.
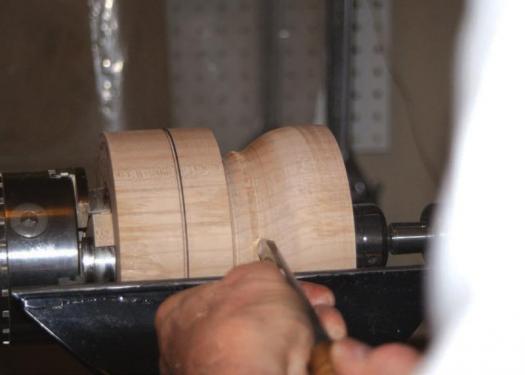
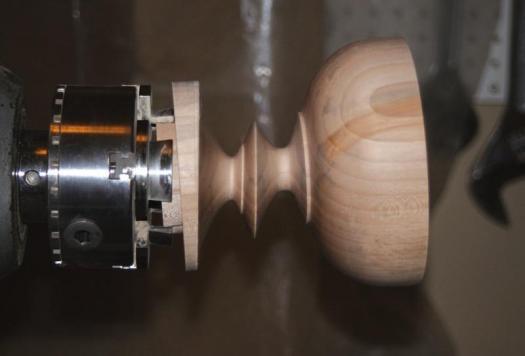
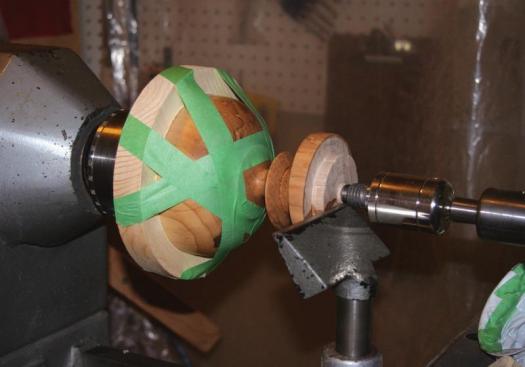
Tilt the Workpiece
Now that the workpiece has been tilted on an angle, and tightened in the chuck, you can turn the offset portion of the base.
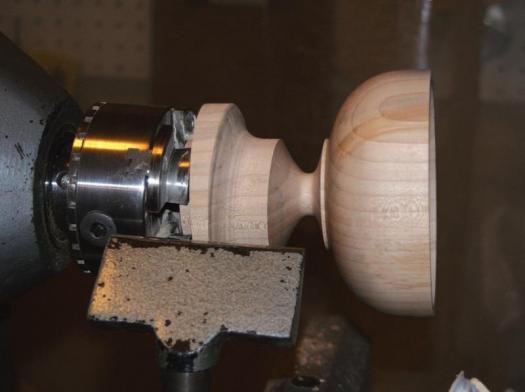
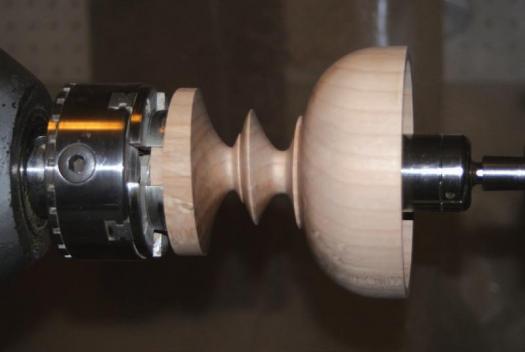
Offset Complete
This is what it will look like when the offset portion of the base is complete. Notice the bottom of the workpiece isn’t sitting flush against the chuck.
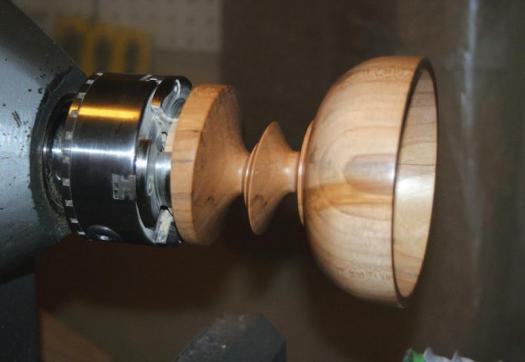
Final Base Diameter
Now Cusworth has turned the bottom of the base to its final diameter. The workpiece was repositioned in the chuck so it was rotating true again before he finished the bottom of the base.
Beeswax Finish
With the piece still in the lathe Cusworth adds a layer of beeswax finish to the outer surface of the turning.
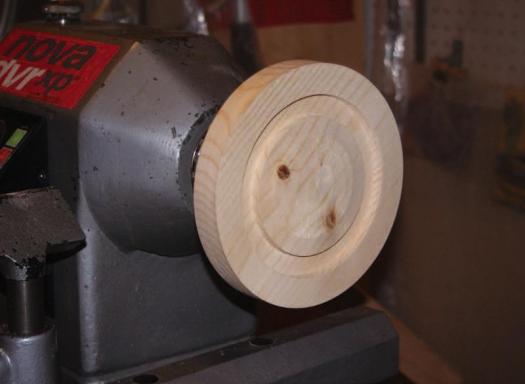
Jam Chuck is Ready
Cusworth prefers a jam chuck to support the piece while he turns the underside of the base. Here it is ready to receive the workpiece.
Secured
Some masking tape will ensure the workpiece will stay put during the final operation.
All Done
With the base turned to a slightly concave surface, lines added to visually complete the piece and beeswax applied to the bottom, the piece is ready to be removed from the lathe.
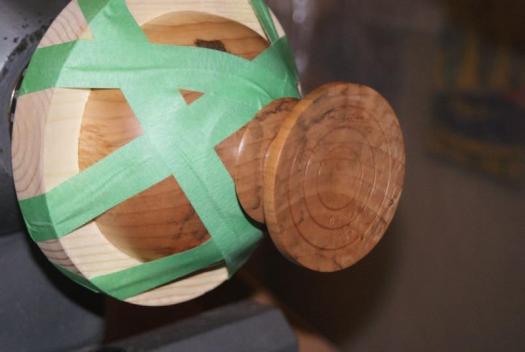
Illustration by Len Churchill