PROJECT
Turn a four-sided hollow vessel

Trent Watts

Find more Woodturning projects
If you want to take your hollow turning to the next level to create something unique this approach will intrigue you. And don't stop here – try your hand at creating an eight-sided vessel, or possibly cut the turning across the grain, rather than with the grain.
Have you ever wondered how to make a four-sided hollow turning? After making many hollow turnings of various sizes and shapes I wanted to add the effect of making one with four distinct, yet uneven, sides. The process is simple enough in theory, and the steps involved didn’t prove too difficult. Start with a regular hollow turning, remove a section from the center, glue it back together, rotate the piece 90 degrees and repeat the cutting and gluing process.
Turn a four-sided hollow vessel
Turn the basic shape
I had an idea of the final shape I wanted, so started with a square piece of Weeping Birch that was 4 ¾ ” square by 9″ long. A block this size gave me ample room for the design of the final piece with enough waste to facilitate safe use of the bandsaw afterwards. The two waste areas in the center of the piece, at 90 degrees to each other, are marked on the end grain of the blank. When laying out the two waste areas I wanted to remove unequal amounts of material to create a pleasing dynamic in the final piece.
I mounted the block between centers and started removing the square corners on the portion that I wanted to make round. You’ll see why it is important to leave one end square later.
Turn a tenon
I then turned a tenon to hold the piece in the chuck during hollow turning. With the tenon deep enough, and at the correct diameter to fit the chuck I set the jaws on the Talon chuck to receive the tenon, and secured the blank in place. Now the fun of creating the profile for the piece begins.
Turn the general shape
It’s important to decide on the size for the hole used to hollow the inside before you get too far into your design. For this piece I decided to use a 1-¼” Forstner bit and drilled the center out. After I remove the ¾” slice of material in one dimension and the ½” slice perpendicular to the first slice, the remaining hole will be quite small, and perfect for the design I’m looking for.
Be sure to drill to the correct depth to allow for the appropriate thickness in the bottom of the piece. In this case I plan on texturing the outside so I left the wall thickness at about ½”.
Hollow out the piece
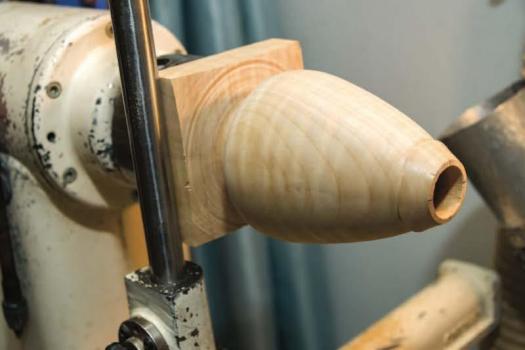
With the final shape of the turning complete you’re ready to hollow it out. You will notice in the images that I left a fairly large amount of wood at the base to help avoid chatter during the hollowing process.
There are numerous methods used for hollow turning. This piece is short enough that you can do it with uncomplicated hand tools. In this case I used a hollow tuning tool made by my friend Elio Menis, from Lloydminster, Alberta. The articulated arm uses bearings to support the cutter and a laser pointer to gage thickness. The laser shines on the turning, and as material is removed the light moves closer to the edge of the piece. If the light were to disappear off the edge of the piece that would mean I’ve turned too far. This unit takes most of the manual labour out of hollow turning and allows you to concentrate on the shape.
Once you are satisfied the piece is hollowed to an equal thickness, all the way to the bottom of the piece, you’re ready to mark the cut lines in preparation to make the bandsaw cuts.
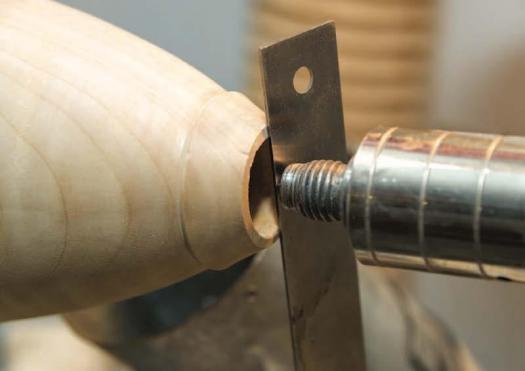
Add layout lines
I start by rotating the turning until one side of the base is flush against a rod in the tool rest to ensure my marks will be in the correct location. Then I use the live center and a square set on the lathe to identify the center of the piece. Rotate the turning 90 degrees and use the same technique to mark the perpendicular lines on the piece. Once the center lines are drawn I mark a line on the center of the square base, on all four sides. Now I can offset the lines the appropriate distance on either side of the line, giving me a starting point for the four bandsaw lines.
The four lines can be extended across the body of the turning using one of two methods. The first approach involves a flexible straightedge and a pencil. With the straightedge aligned with the marks on both ends of the vessel I contour it to the vessel as much as possible, and draw a pencil line from bottom to top. It’s not perfect, but it’s close enough to make the cuts on the bandsaw.
The other approach involves a profile gauge. Align it with the pencil marks on both ends of the vessel, push the metal teeth so they touch the vessel, and mark your pencil lines on the piece. Whichever approach you use, the first two lines were drawn ¾” apart, while the next two lines were ½” apart.
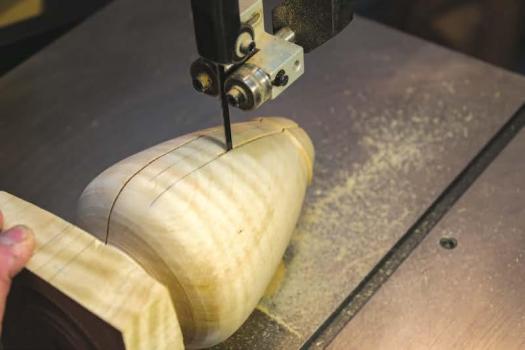
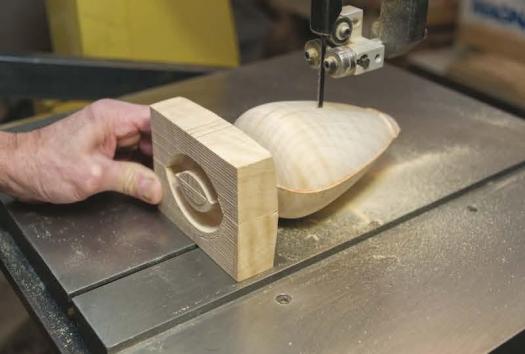
Removing the waste
The square base of the turned vessel is used to give stability while cutting with the bandsaw. A well-tuned bandsaw, with a sharp blade, will give you the best results here. Cut most of the way through the piece but leave enough material to support the next cut. Turn the bandsaw off and back the piece out of the cut. Make a parallel cut on the other side, this time cutting completely through the base. Now you can safely finish the last few millimeters of the first cut. Without the square base it would be nearly impossible to safely make these cuts on the bandsaw.
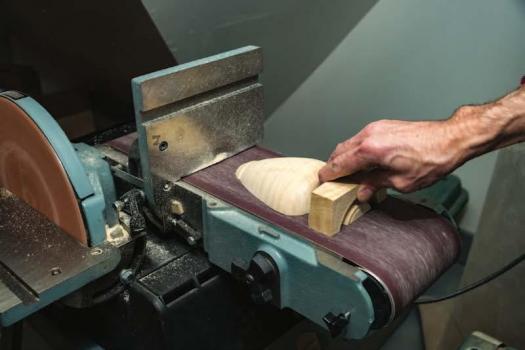
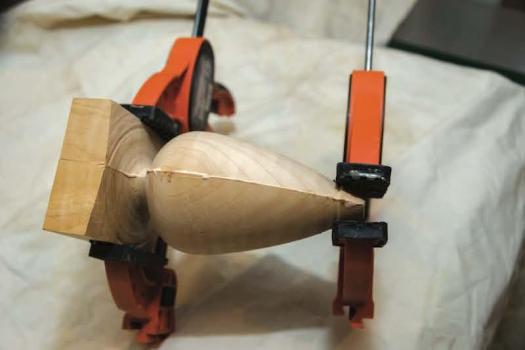
I use a belt sander to remove uneven and rough areas left from the bandsaw. If you don’t have a belt sander, or don’t trust yourself with a machine that removes material this quickly, adhere sandpaper to a flat surface like a table saw or jointer and manually flatten both halves. Continue to sand, checking often to ensure the two halves fit together evenly. When the two halves fit together nicely, apply glue to the rim, clamp the halves together and let dry. Once the glue is dry you can rotate the turning 90 degrees, repeat these two cuts, flatten the freshly cut edges and glue the two halves together. After the second glue-up has dried the piece is ready for final turning.
Final turning
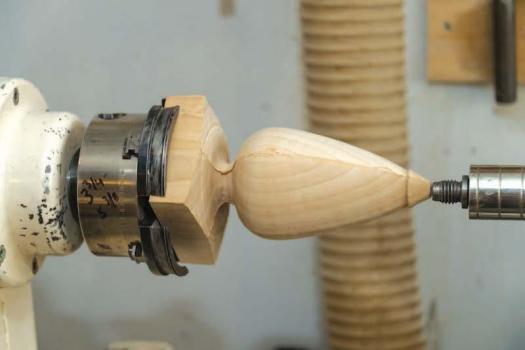
Now you can remount the piece on the lathe in order to refine the base. Due to the deliberate removal of two different thicknesses of material the base is no longer square. In this case I used a chuck with larger jaws that grasped two opposing edges of the base, and used the live center to support the top of the vessel.
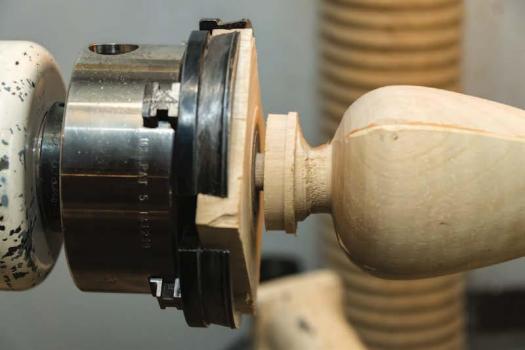
Using this setup allowed me to reduce the size of the base and make a tenon. This new tenon will be used to hold the piece in a chuck for final carving and texturing. To learn more about how I added the texture to this vessel see the sidebar.
Texture: Giving Your Vessel It's Own Fingerprint
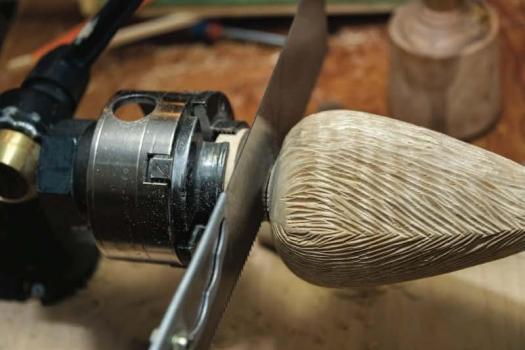
With the texturing complete I used a handsaw to cut the vessel away from the base. I then smoothed the base with a random orbit sander so the transition between textured face and base flowed evenly. I also ensured the piece stood up properly at this stage.
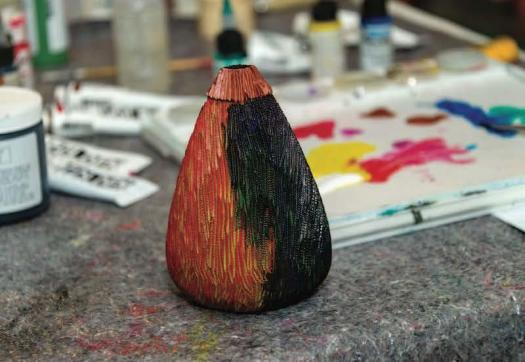
Before I added some colour to the vessel, I used a woodburning tool to add small V-groves perpendicular to the carved V-grooves. I worked my way around the entire piece, leaving a somewhat even burnt look to the piece. Although the burnt look was going to be covered by the finish, the texture it left would still come through the finish loud and clear. The only portion of the exterior I left free of burn marks was the upper tip.
Finishing
Because multiple glue lines on this type of turning interrupt a clean visual entity I feel it is an ideal candidate for coloring and texturing. After the texturing and burning is complete I want to unify the burnt and non-burnt areas. On this piece I used black gesso made by Golden Acrylics. The gesso works into the textured surface more easily if it is diluted with water or Golden Fluid Medium.
Once the gesso is dry I begin applying layers of Golden Acrylic paint. Like the gesso, the paint should be thinned with Golden Fluid Medium or water to allow easier application. I used Golden Iridescent Acrylic Colors for some of the layers, and regular acrylics for other areas. I apply different colors in non-defined, random areas to give different color hues when the piece is viewed from different angles. When applying acrylic paint I have found that many layers of paint will ultimately give a more interesting surface with depth of color that you cannot achieve with one or two layers.
The final layers consist of washes with diluted paint covering the whole piece to unify all the colors. On the final layer I use Acrylic Glazing Liquid to give the desired sheen.
Photos by Trent Watts
A Tenon for Turning
Once Watts has the shape of the vessel roughed out he adjusts his tool rest so he can create a wide tenon near the base of the piece. This tenon will fit into his Talon chuck so he can turn the rest of the exterior of the vessel, as well as hollow out the interior.
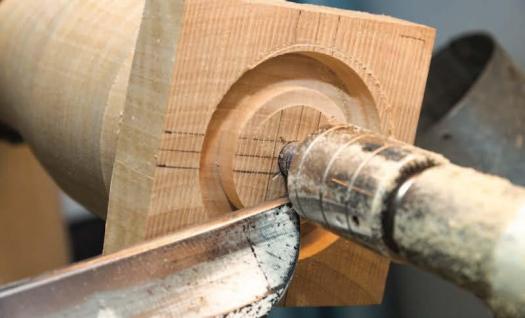
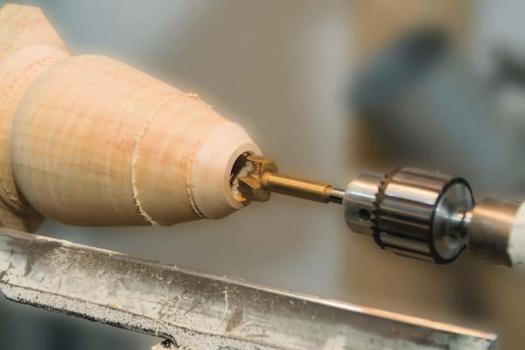
Hole for Hollowing
A 1-1/4" diameter hole is bored into the end of the piece. This hole allows Watts to start hollowing the inside of the vessel.
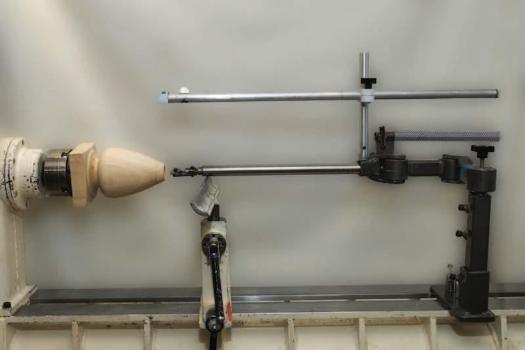
Laser Precision
This setup allows the user to hollow out the center of a vessel with a high degree of accuracy. A laser pointing downward from above the turning shines a light on the outer wall of the vessel. When the light shines on the outer edge of the vessel the walls are a certain thickness.
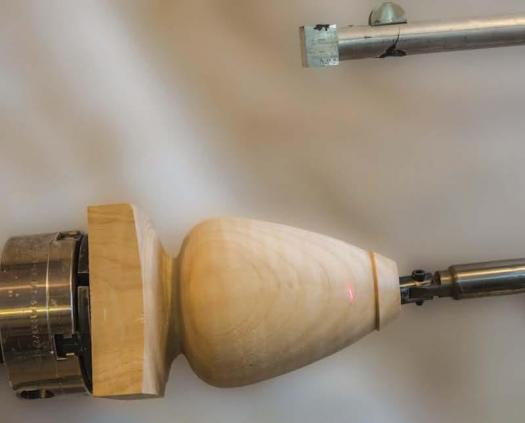
Precision Alignment
With a rod in his tool rest, Watts rotates the vessel until one flat edge is flush with the rod. He then uses a square on the bed of his lathe against the live center to mark a centerline on the end of the piece. The vessel can then be rotated 90 degrees, and positioned with accuracy against the rod to draw another centerline.
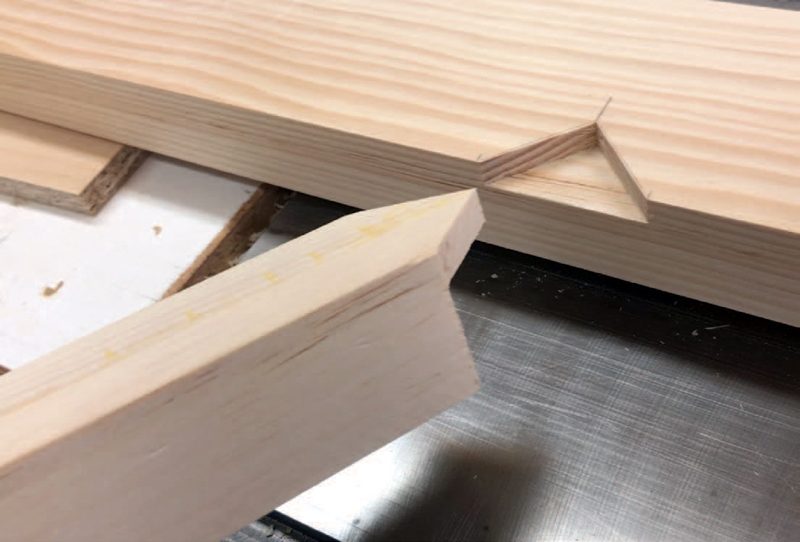
Split it in Two
Once the marks are transferred along the faces of the piece, the waste in the center of the piece can be removed with a bandsaw. The flat section of the base can be used to help stabilize the vessel during the cut.
Two Flat Edges
With the vessel split in two, the mating edges will have to be smoothed so they fit together nicely. Watts uses his stationary belt sander, though a piece of sandpaper adhered to a flat machine surface will also work.
Glue Them Together
Once they mate nicely, apply glue to the rim of one half and clamp them together. Ensure the joint is closed all along the piece.
Two More Cuts
With the first joint dry, you can bandsaw the waste from with the piece while it's rotated 90 degrees.
Remount the Piece
Now that the base of the piece is no longer square, only opposing faces of the base will come into contact with the chuck. Watts uses a live center for additional support.
Create Another Tenon
To provide something to grip the piece while he's adding texture to it, Watts turns a tenon onto its base, and uses a handsaw to cut the piece from the square portion of the base.
Remove the Base
With the texturing complete Watts cuts the base from the rest of the vessel so he can prepare it for finishing.
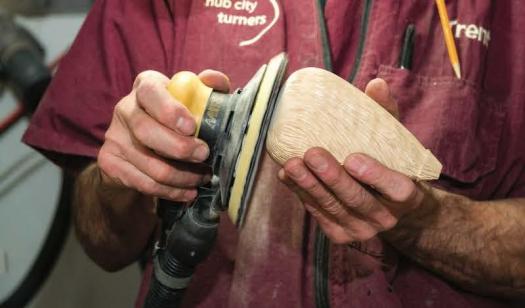
Smooth the Base
A random orbit sander fairs the transition between the textured area of the piece, and the flat base.
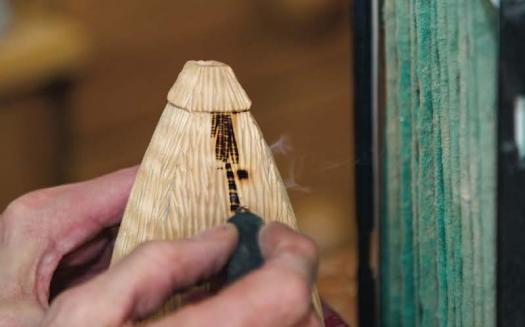
Burn More Texture
In order to add more texture to the vessel Watts uses a woodburning tool to add small grooves perpendicular to the V-grooves covering the visible portion of the piece.
Black is First
The first layer Watts applied to the vessel was a thinned black gesso. On top of the black, he adds layers of coloured paint to randomly colour the surface of the vessel.
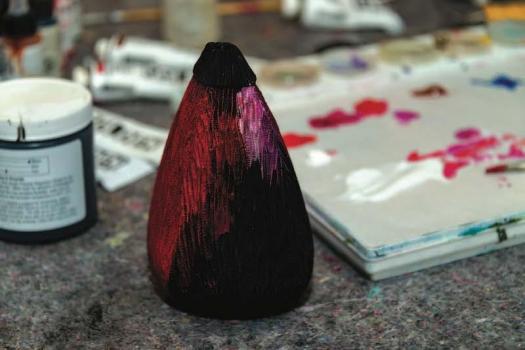
Many Colours
Watts finds many layers of colours provide the best look. He also uses iridescent paints for some layers, and regular paints for other layers.