PROJECT
Turn a Corkscrew and Bottle Stopper Combo

Gavin Villa

Find more Woodturning projects
If you like wine and pizza, this turning project is for you. Fire up the lathe, then get ready to uncork the wine.
- 7 mm long mandrel
- • 3 pc bushing set (#BS6-BU)
- • 7 mm drill bit (#PK-7mm)
- • Barrel trimmer system (#PKTRIMKIT)
- • Two-part epoxy glue or cyanoacrylate glue
- Learn more about the corkscrew bottle stopper kit here:
penblanks.ca/instructions/english/BS7-THandleStopper.pdf
I was able to get all the supplies for this T-handle bottle stopper from William Wood-Write (penblanks.ca), which saved me a lot of grief. Though I picked up a stainless steel bottle stopper kit and a deluxe jumbo pizza cutter kit as well, they were too simple to make to include in this article. If you order through their website, be sure to click on the “Related Products” tab and it will list the required bushing set, 7 mm bit, and 7 mm mandrel shaft.
You’re going to need two blanks of the wood of your choice that are at least 3/4″ square and 2″ long. This is a perfect project for that piece with the wild grain you tucked up in your secret stash (yeah, you know the one I’m talking about). I chose a piece of zebrawood.
Turn a Corkscrew and Bottle Stopper Combo
Cut the blanks to size
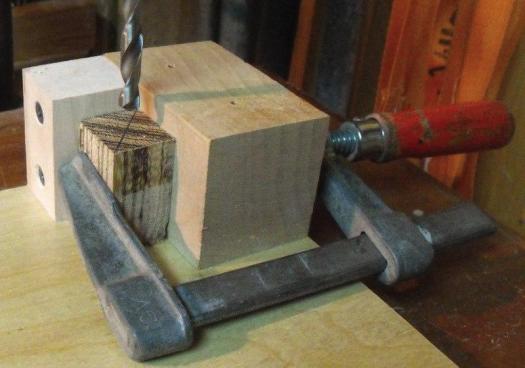
To start, cut two blanks that are the length of the supplied brass tubes plus add an extra 1/16″. Next, drill the hole for the brass tube. Find the center by twice marking corner to corner diagonally, creating an X. Chuck up a 7 mm bit in your drill press and drill completely through the center of both blanks. To accurately drill the holes, I used a very simple jig, which allowed me to clamp the blank in place to hold it steady and square. The jig is nothing more than a plywood base and two blocks screwed together. Another option would be to use a drill press vise.
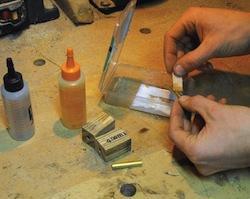
Once you have your holes drilled through your blanks, glue a brass tube in each blank. You can use either an epoxy or cyanoacrylate (super glue). Epoxy gives you a longer open time to finesse the tube right where you want it, but most kinds take a few hours to cure enough to be able to turn. Super glue, on the other hand, dries and is ready to turn in a matter of seconds. The downside is that this also only gives you a few seconds to insert the tube. The potential of it possibly ruining my precious blank and me having to order a replacement tube to start over prompted me to decide on a quick-curing epoxy.
It is important to only glue the outside of the brass tube. If you put glue on the inside of the blank hole as well, you run a very high risk of getting glue inside your tube while you insert it. This can be a real pain when you try to mount the blank on your mandrel. Keep in mind it only requires a very small amount of glue to bond the blank and tube.
Twist and wait
As you insert the tube, use a twisting motion to help distribute the glue and prevent plunging it all out the other end. Position the tube in the blank so you have the same amount of excess wood on both sides (1/32″) and then leave it be for the glue manufacturer’s recommended cure time.
When the glue is dry use your 7 mm barrel trimmer to square up the ends of the blanks. This step is very important to get nice seamless joints when the project is assembled. If you do not have a barrel trimmer (as I do not), I was able to carefully use a mitre gauge with an auxiliary fence on my disc sander. To able to do this, your hole must be drilled parallel with the registering face of your blank. If not, you will end up with unsightly gaps. Having done it the hard way, I would definitely recommend investing the $15 on a barrel trimmer.
Now set up your 7 mm mandrel on your lathe. If you cut both blanks from one piece of wood, be sure to keep track of the order when mounting them so the grain will match up upon final assembly. Working from left to right, first slide 3-4 spacer bushings, followed by a cap bushing, one blank, then the center bushing, the second blank, the second cap bushing, then finally however many spacer bushings needed to fill the space to the threads. Bring the tailstock in and lock it in place and advance the live center then tighten the locking nut on the mandrel to secure all the parts.
Start turning
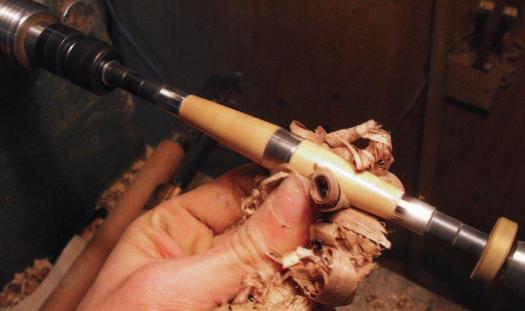
I used a medium gouge to rough out the shape and followed up with a large skew to even out any high spots. The bushings are the same diameters as the end caps and body of the corkscrew, so turn the wood as close in diameter as possible to them. Finish up by sanding with your method of choice. For me, the finish off the tool was fine enough that I was able to start at 220x and decided to end at 600x. As a final step, burnish the surface with shavings to create a nice silky smooth finish, and then remove all the parts from the mandrel.
Finish then assemble
It is important that you finish the wood before assembly. You may use whatever finish suits your fancy. Since the corkscrew isn’t going to be eaten from and is going to be subject to having a noxious red liquid dye (wine) occasionally come in contact with it, I chose to finish it with three light coats of wipe on polyurethane to give it a durable finish.
To assemble the corkscrew/bottle stopper, put a small drop of either epoxy or super glue on the shaft on either side of the head and press on the barrels. Put a drop on each end cap and press them in on either end. I carefully used a small brass hammer with a softwood block to prevent marring the chrome to initially seat the pieces, then put the whole assembly into my front vise (with wood jaws, as not to mar the surface) and slowly pressed everything together. Be sure to clean up any glue squeeze-out now.
After the glue sets, the final step is to open a nice bottle of your chosen beverage with your new opener, pour yourself a drink, cork it with your new stopper and sit back and appreciate your work.
Photos by Gavin Villa; Lead photo by Rob Brown
Drill the Blanks
Villa made a simple fixture out of a piece of 3/4” plywood and two wood blocks to secure the blanks while drilling them out for the brass tube.
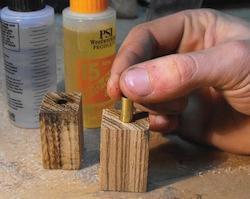
Glue it In
Epoxy allows for a more relaxed assembly, while CA glue makes for a quick but unforgiving assembly. Villa chose epoxy for his stopper, just to be on the safe side. He lightly applied it to the outer surface of the brass rod, but didn’t apply any to the inside of the drilled hole. This ensured epoxy wouldn’t end up inside the brass rod, causing problems down the road.
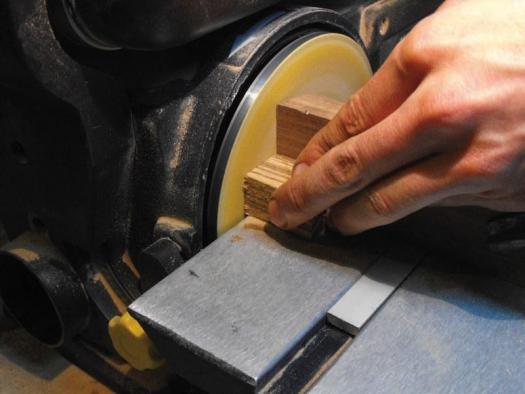
Flush the Ends
If you don’t have a barrel trimmer you can sand the ends of the blanks flush. Just be sure the ends of the blank finish perpendicular to the brass rod.
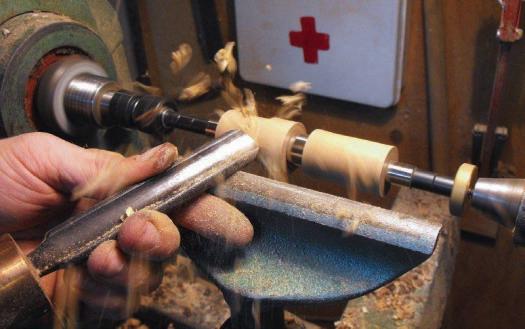
Rough it Out
With the parts assembled, Villa roughs out the blank with a gouge.
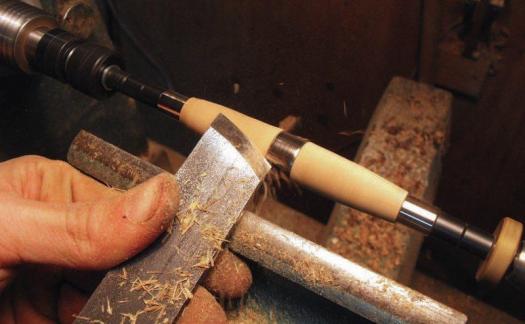
Smooth it Out
Villa uses a skew to even out the surface of the blank, and to bring it down just about flush with the bushing.
Ready for a Finish
Once the overall shape has been determined, sand the wood smooth with your desired grit. You can then take some shavings and burnish the surface of the wood while the part is still turning on the lathe.