PROJECT
Tea box

Michael Kampen

Find more Boxes projects
I make a variety of different boxes, each with their own design and purpose. This box was designed to contain our collection of herbal teas.
The style and dimensions were chosen to suit and fit our kitchen.
Your first task is to decide on the final look you wish to achieve. Do you want the grain and colour of the wood to carry the visual interest or do you want to stain the wood?
The boxes shown are made of hemlock. The natural ones are finished with a mix of wipe-on poly thinned with turpentine, applied over boiled linseed oil thinned with turpentine. I find this finish easy to apply and it gives a nice amber cast to the wood. The coloured boxes have an intermediate step involving some stain.
Tea box
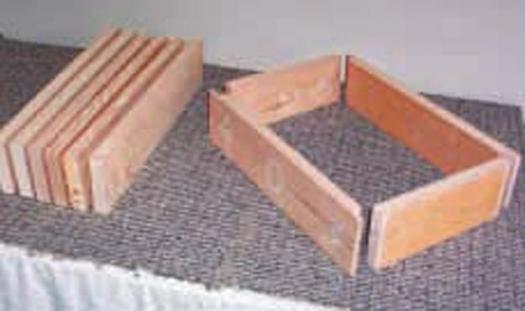
Parts for the Tea Box
All the stock is milled to 3/4″. If you don’t have access to a jointer and thickness planer you can buy your stock dressed to the correct dimensions. I begin making the top and bottom from three pieces measuring 3 3/8″ x 16-1/2″, glued into two panels measuring 10 1/8″ x 16- 1/2″.
The front and back, measure 3-3/8″ x 14-5/8″, and the sides measure 3-3/8″ x 8-5/8″. Mark the outside faces and cut a 1/2″ by 13/16″ rabbet on the inside edge of the front and the back using a dado blade or a router.
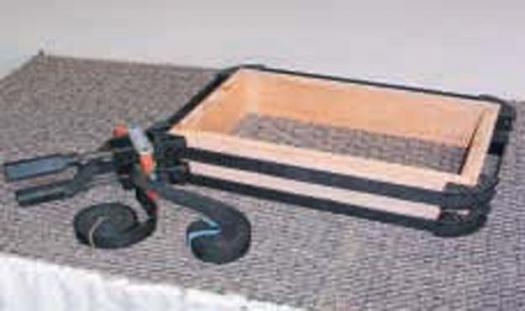
Inside Finish and Centre Glue-up
Sand the inside faces through to 220 grit, being careful not to round the edges. Apply a few coats of mineral oil to the inside faces at this stage, which is an easily renewable food-safe finish. It also makes any glue squeeze-out easy to clean up. Now you can glue the centre part of the box together. I find a pair of band clamps works best for this. Check the diagonals to be sure your frame is square.
Finishing the Top and Bottom
Now trim both panels to the final dimensions of 10″ x 15-5/8″. Sand them through to 120 grit. Don’t proceed to the finish sanding just yet. Select your best face on each panel and decide which will become the top. From here on, the top and bottom will get the same treatments, but as mirror images of each other.
Rout a profile on the inside faces of the top and the bottom using a 1/4″ Roman Ogee bit with a bearing. Begin by doing the end grain first and finish with the long side. This will clean up any tear out you may have had on the end grain. Next, set up a 45° chamfer bit in the router table and in the same order as before, rout a 1/8″x 1/8″ chamfer on the outside faces of the top and bottom. A sandpaper wrapped dowel makes it easier to finish sand the ogee profile.
Once the curved profile has been sanded, finish sanding the top and bottom to 220 grit. Be careful when sanding the profiles.
Cutting the Centre and Gluing on the Bottom
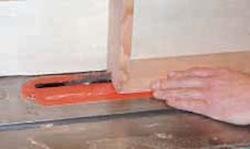
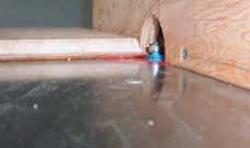
Remove the center from the clamps, and sand the outside to 220 grit. It is important not to round the corners, since that will affect the bead that is routed next. Before routing the beads, cut the center in half on the table saw. I use a tall auxiliary fence and raise the blade just a little higher than the wood is thick. I cut the ends first, then lower the blade just a hair so that it doesn’t cut all the way through, leaving a paper-thin amount of wood behind. This will hold the box together as you make the two long cuts. Afterward, using a sharp utility knife, separate the two halves.
Optional Stain and Routing the Bead
If you wish, apply stain at this point. I used a Behr water based stain in a dark blue (Behr #641 cashel). Using 1/4″ painter’s tape, mask off the outside edges of the two rings, and apply the stain to the exposed wood. When the stain has dried, remove the tape, and using a 1/4″ beading bit rout a bead on the outside edges. The purpose of the bead is twofold. The first is decorative, but the second is practical. By routing a bead on the outside edges of the ring, it visually softens the edge, and tricks the eye, making the accuracy of the joint less critical.
Assembling the Box
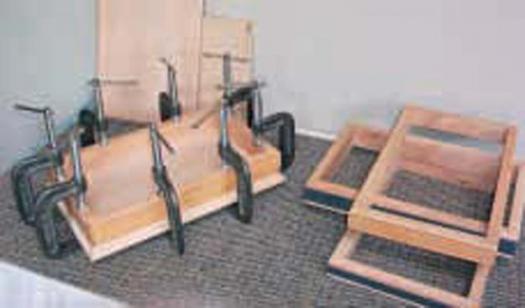
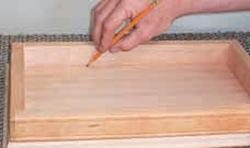
Once you have completed the two rings and the top and bottom, match them up and trace the outline of the ring on the corresponding panel. You should now have an outline on the inside of the top and bottom. Using a glue/water mix used on the end grain, paint a light coat of glue between the two outlines. This prevents the finish from wicking along the grain and weakening the glue joint. Use heavy mineral oil to pre-finish the inside square.
Finish the area outside the outline with whatever finish you have chosen. I used 2 coats of boiled linseed oil cut 1:1 with pure turpentine. I followed that with 3 coats of wipe-on poly that I cut with pure turpentine in the same manner. Once the finish has dried, apply some glue to the ring, center the two rings on the top and bottom and clamp them in place.
Adding Hardware
Once the glue has dried, remove the parts from the clamps, and give everything a quick rub with 0000 steel wool. All that is left to do is to mount the hinges and other hardware. I also add four silicone bumpers to the bottom corners to make it less likely to slide on a table. It also raises it off a potentially damp kitchen counter.
Now, the only thing left to do, is to gather up your stash of herbal tea, fill your new tea box, and sip on a cup of tea as you contemplate your next project.
Cutting the frame apart
Parts for the tea box
Centre glue-up
Gluing the centre to the bottom
Chamfer the top
Mark top and bottom
Routing the bead
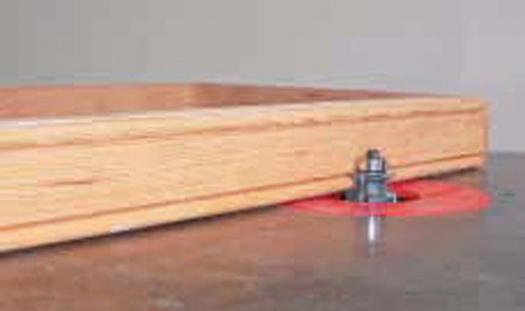
Illustration by Lee Gabel


