PROJECT
Sierra Wooden Pen

Bill & Lilian Collier - Schaer

Find more Gifts / Crafts projects
Regardless of what the computer manufacturers say, handwriting is far from being a lost art.
Hand crafted pens and pencils are still very popular among consumers and crafters. In fact, pen turning is one of the fastest growing woodworking hobbies.
It’s relatively easy to get started – if you have a mini or full size lathe and a set of chisels, you’re halfway home to making your first pen. You won’t have to invest in a lot of expensive tooling, and it provides almost instant gratification – you can finish a simple project in a couple of hours.
Sierra Wooden Pen
Gearing Up
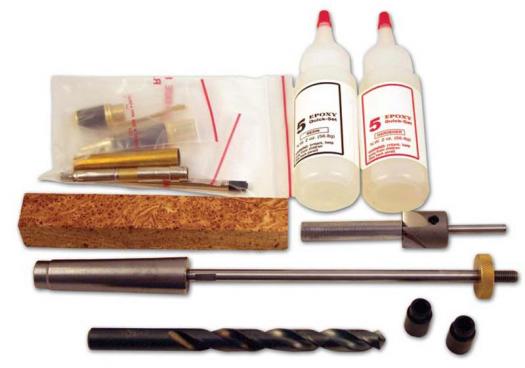
Before you begin to turn your first pen, you’ll need to purchase some basic tooling. You’ll need an arbor that slides into the headstock of your lathe – a Morris Taper (MT) #2 fits most lathes; a mandrel with brass nut that screws into the arbor and fits between the headstock and tail stock; the appropriate size drill for the kit you’re making (in this case 27/64″); appropriate bushings to determine the final size and mount on the mandrel for the kit you are using (in this case a 20A bushing); glue to secure the brass tube inside of the blank (either a cyanoacrylate (CA) or two part epoxy); a pen mill for squaring the ends of the blank and of course, the wooden blank (for this pen we used black ash burl) and kit itself. All totalled that makes the cost of getting started around $85.00.
The various parts that you need to make a pen, with the exception of a blank, are included in a ‘pen kit’. This kit contains the final/clip assembly, the nib assembly, a brass tube to fit inside your blank, the twist assembly and the ballpoint refill.
The Sierra pen is one of the easiest kits to make, and perfect for your first pen project. It’s a great looking pen and its size and weight make it ideal for almost any hand size.
Preparing the Blank
• A standard pen blank is approximately 5″ long. For a Sierra, you will need only half of that length. Cut a pen blank slightly longer than the brass tube, approximately 2 ½” long.
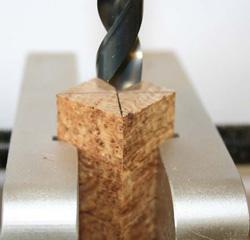
• After you have cut the blank to the correct length, mark the center point on one end of the blank. The blank is now ready to be mounted on your drill press in either a special pen vise or a simple wooden hand clamp.
• With a 27/64″ bit, drill the blank all the way lengthwise through the center. Go slow and clear the debris often.
• Scuff the brass tube with 220 grit sand paper to roughen the surface, clean off oxidation and give the glue better surface adhesion.
• Thoroughly mix two-part 5-minute epoxy on a paper surface– wax paper or Post-it Notes work well. Thick CA glue can be used instead of epoxy, but the drying time is very fast so you will need to be quick during the next step.
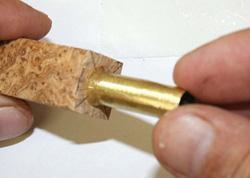
• Roll the tube in the glue and insert it into the blank using a twisting motion to ensure even glue coverage. Make sure the tube is equidistant from both ends of the blank and wipe excess glue off the ends. Be sure you don’t get any glue inside the tube; if you do, clean it out immediately. Set aside for five minutes to dry.
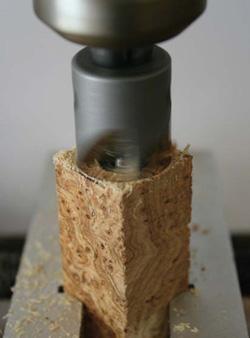
• Use a Sierra pen mill, also known as a barrel trimmer, mounted in your drill to trim the ends flush with the brass tube. The pen mill comes in two parts: the ¾” cutter head at the top, and the pilot shaft, which fits inside the brass tube and keeps the trimmer perfectly square to the end of the barrel when trimming. The cutter head is interchangeable with all the different sizes of pilot shafts required to do various styles of pens. Be careful not to trim beyond the surface of the open edge of the brass tube – accurate tube length is crucial for the pen to work properly, so do not trim away any of the tube’s length.
Turning and Finishing the Blank
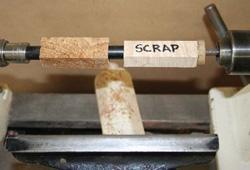
• Mount the mandrel/arbor assembly into the headstock of your lathe. Slide one of the two bushings on the mandrel, followed by the blank, then the other bushing. These bushings have a shoulder; the smaller diameter shoulder fits inside the brass tube.
• Place spacer/spacers on the mandrel in order to take up the space to the threaded portion on the end of the mandrel. To make a quick and easy spacer, drill a 7 mm hole through a piece of scrap wood measuring 2 ⅜” long. Alternately, extra 7 mm bushings from other kit styles also make excellent spacers. Once you have your spacer in place, tighten the brass nut on the mandrel up against the spacer. Be careful, over-tightening can cause the mandrel to bow and may damage it.
• Bring the tailstock up to the center of the mandrel and lock it down.
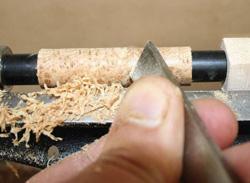
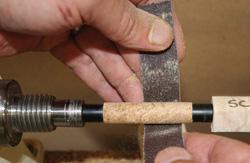
• Turn the blank, starting with a gouge to round the blank and then use a skew to make the cut smoother as you approach the finished diameter. It is very important to use very sharp tools and to take light cuts. If you are too aggressive in your cutting, you may split the blank. When the blank is close to the finished diameter, begin sanding with 120 grit and progress though to 400 or 500 grit until the blank is turned to the size of the adjacent bushing.
• If you desire a higher quality finish, continue sanding with Micro Mesh, which ranges from 1,500 to 12,000 grit. Micro Mesh is a long lasting, cushioned, and abrasive that does a terrific job on pens.
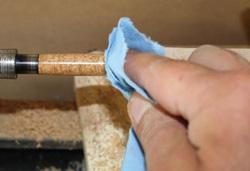
• With the lathe turning, apply the finish of your choice and polish. The choices of finishing products are nearly endless, but some of the more popular are Renaissance Wax, Mylands friction polish and even thin CA glue. The pen in this article is finished with Renaissance Wax.
• Remove the blank, bushings and spacers from the mandrel.
Assembling the Pen
• Carefully lay out all the pen kit parts. Take care here as the small parts are easily lost.
• Using a hand clamp or bench vise, press the finial/clip assembly into one end of the finished blank until it’s snug up against the adjacent metal part. Do not over press the parts or the excessive pressure could crack the blank.
• Insert the refill into the nib assembly.
• Screw the twist mechanism over the refill and into the nib assembly.
• Slide the blank, finial/clip assembly over the twist mechanism to complete your pen.
This pen is very simple to make and is an easy introduction into pen turning. Pens can be made out of an almost endless supply of materials, including figured domestic and exotic woods, acrylics, and resin impregnated stabilized and dyed woods. Pen kits come in a wide range of styles and finishes, including gold, chrome, titanium and platinum.
Bet you can’t make just one!
Tooling and supplies to get started
Ready to drill
Insert glued-up brass tube into blank
Trim blanks with pen mill
Properly trimmed blank

Blank, bushing, and spacer on mandrel
Use skew to smooth the blank
Sand barrel
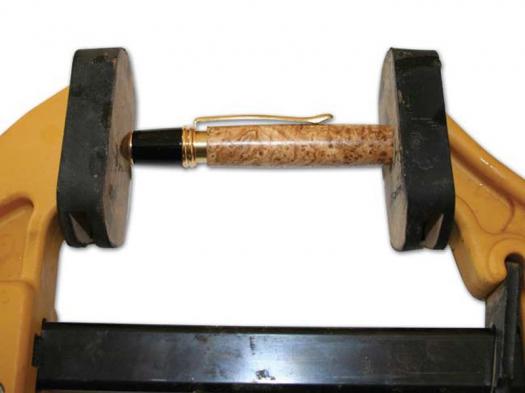
Polish barrel
Press finial/clip assembly onto barrel