PROJECT
Shipswheel nutcracker

Paul Ross

Find more Woodturning projects
This is a great project to use as a holiday gift for when you are visiting friends and relatives. It is an especially effective gift when presented with a nice selection of nuts in the shell.
Pairing the nuts with the nutcracker establishes that this work of art is not just for looking at and admiring, but for practical use as well. Adding nuts to the gift also gets the party going, because no sooner than the gift is opened, good friends are sitting around snacking. I’ve made many variations of this bowl and nutcracker combination. As in the one shown here, one possibility is to singe the rim and an inside ring. I used spalted beech, but you might prefer using your favorite wood for this project. Your choice of wood can give the piece the look and feel you want to achieve.
Shipswheel nutcracker
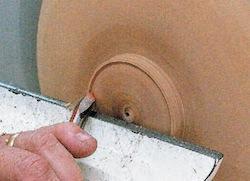
Mount the Stock and True the Outside
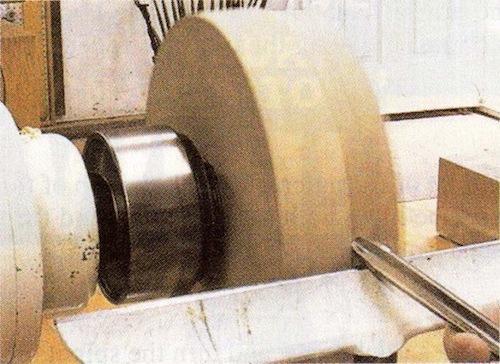
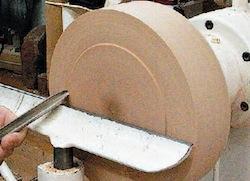
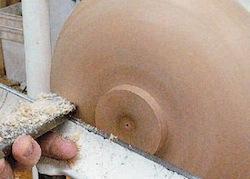
Mount a 12″ by 3″ blank using a screw chuck. If you vary the stock size, remember that the nutcracker requires a minimum of 1 ½” for the recessed base and spigot. Because the surface of the stock is flat, the screw chuck will make a tight, secure connection between stock and chuck. True the outside with a ⅝” bowl gouge. Push with your body behind the gouge, towards the headstock, which is the mass of the lathe. Mass absorbs vibration, so when you push towards the mass, you use your body to absorb the vibration.
True the Face and Cut the Spigot
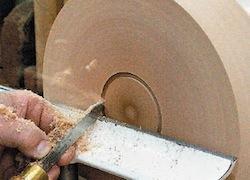
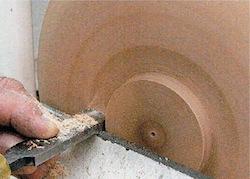
Using the same ⅝” gouge, true the face. Push with your body behind the gouge, from the outside into the center. The center is spinning slower than the outside edge, so go slower as you approach the center. Also, lift the handle of the gouge in order to bring the tip of the tool to the center. Use a ¼” parting tool to cut the spigot. As you lift the handle of the tool, the cutting edge falls into the wood.
Shape the Bottom
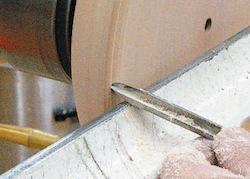
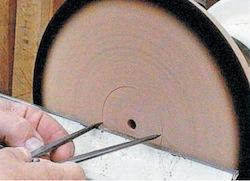
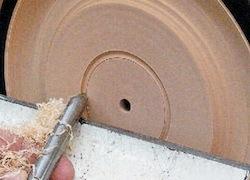
Using a bowl gouge, shape the bottom of the bowl. Your tool should be traveling with the grain, cutting in the direction of the center to the outside. With inboard turning, the bed is in the way of your body getting behind the gouge. So with this cut you must pull; you will have less control of the gouge and a lot of the shavings are going to fly right at you. Ensure that you rub the bevel of the gouge so that the cutting edge of the tool is supported. If you don’t rub the bevel, the tool will grab, or skate, across the finished piece. Use a 3-in-1 tool to mark the center before removing the piece, in case you need to find the center again.
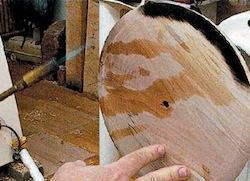
Scrape the bottom surface, using a large heavy scraper. Go with the curve of the bowl. Use a ½” square-end scraper to create a flat area around the spigot, so that the jaws of the chuck sit ‘bang’ on. Power sand the bottom of the bowl, using grits 120, 180, 240 and 400.
Shape the Top
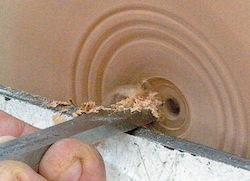
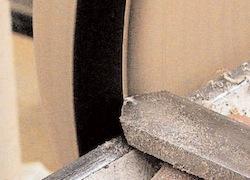
With the bowl flipped into the chuck and a facing cut completed, take a chamfer cut using a 3/8″ bowl gouge. Use a propane torch to singe the edge. Don’t try to burn the whole rim in one pass. Instead take several slow, light passes. Don’t hold the torch too close, keep it back a good distance and keep it moving. You can control the burn by lightly rubbing the burned area with a 3M Scotch Brite Pad dipped in water. You may want to practice singing the edge on a piece of scrap material. Transfer the diameter of the base of the nutcracker to the bowl with a pair of dividers. With a spear point scraper, make a V-cut right where the burn stops.
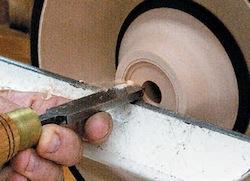
Shape the inside of the bowel. For this you will use two cuts done from opposite directions, blending the two cuts together in the middle.
Finish the Bowl
Make a recess to fit the base of the nutcracker into the top of the pedestal. Cut inside the scribed line with a parting tool and then scrape the recess with a small square-end scraper.
Sand to Finish Grit
Turn the piece over, fit into a jumbo jaw, and turn the spigot off. I like to cut the spigot towards me, until I get the majority off. Then I turn the gouge around and cut towards the center. This ensures that I don’t run into a big chunk of wood. Note that at this stage, the piece is held with rubber bungs on the chuck – it doesn’t have tremendous holding power. Take only light cuts to finish the bottom.
Make a recess for the bolt by scraping it with a ¼” scraper, or drilling it out.
Finish
An excellent finish for this bowl is General Finishes ‘Salad Bowl Finish’. It is an edible finish of oil and beeswax that is ideal for salad and fruit bowls, cutting boards, butcher’s blocks, kitchen cabinets, and children’s toys. It is a durable, food-safe product that can be used immediately after application.
Mark Your Calendar
Now that your bowl is complete, all you need to do is decide what kind of nuts you want to include with your ‘party starter’, and mark your calendar. Oh yeah, you’d better make a few extra bowls as back-ups, because once word gets out that you give these as gifts, your calendar is sure to fill up with invitations. Party on!
Ship’s wheel nutcracker mechanism available at:
Woodchuckers – www.woodchuckers.com
True outside
True face
Cut spigot
Rub bevel
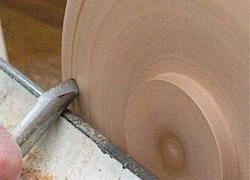
Mark center
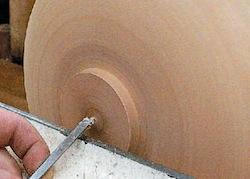
Scrape bottom
Create flat area around spigot
Make chamfer cut
Singe edge
Transfer base diameter of nutcracker to bowl
Make V-cut
Shape inside
Make recess for nutcracker
Remove spigot
Make recess for nutcracker bolt