PROJECT
Segmented butterfly

Toni Burghout

Find more Intarsia, Inlay & Marquetry projects
Intarsia and segmentation – two words often synonymous with creating mosaics with wood.
For many of us, our first tastes of these two styles of scrolling came with Patrick Spielman’s work and his many books on scroll sawing.
There are some similarities between intarsia and segmentation, with the most noticeable being that the same patterns may be used for both styles. The assembly procedure is also remarkably similar, but there are some distinct differences between the two styles that serve to make them each unique.
If you have tried intarsia before, then you should have no difficulty doing a segmentation project. If you are relatively new to scroll sawing, then I recommend you try both intarsia and segmentation styles to see what suits you the best.
Segmented butterfly
Segmentation Is Distinct From Intarsia
Intarsia is a style of scroll sawing that relies solely on the natural properties of the wood to define a picture. Each part of the pattern is positioned separately on a piece of wood using grain direction, texture and colour to create a one-of-a-kind piece of art. After the initial cutting is complete, each piece is contoured with sanding equipment to add depth. The pieces are then re-assembled on a backer board. Using several species of wood, with each piece of the pattern cut from wood that best suits that particular part of the picture, is what makes the most remarkable intarsia projects.
While segmentation is often considered the beginning step in learning intarsia, I suggest that it should be recognized as it’s own unique style. Segmentation projects are cut from one board, making it more forgiving for beginners who may deviate from the pattern line. This allows the use of what is most economical and readily available to the scroller. It provides for much more creative freedom since most segmentation projects are coloured with paints, stains or dyes to define the picture. Contour sanding is not necessary because projects can either lay on a flat surface or be shimmed from underneath to add depth and dimension. This is ideal for scrollers who have sensitivities to the dust generated from the extensive sanding and contouring of intarsia.
Wood and Skills
Since segmentation is cut from one board, the pieces will typically fit beside each other more easily. If you waiver off the cut line, the joining piece is automatically altered to fit. Having an eye for selecting wood can add a great deal to any project and is very important when it comes to segmentation. You will need to have patience in sanding and contouring each piece if you choose to define your project with depth.
Equipment and Safety
Basic equipment for segmentation, as for intarsia, includes a scroll saw, a drill or drill press, palm sander, and a rotary tool with a variety of attachments. Using attachments such as a drum sander and mop wheel on your drill press are effective ways to deal with contouring and sanding. Although a scroll saw is not the most intimidating saw in the workshop, it is important to remember it is still potentially dangerous. Use caution and wear the necessary protective equipment such as a dust mask and safety glasses. Keep your workshop clean and free of debris. Since contour sanding generates a good deal of dust, work in a well ventilated area and use a dust collecting system.
Basic Steps to Segmentation
- Decide on which method of pattern transfer you are most comfortable with – tracing or gluing.
- If tracing the pattern onto the wood, make three copies of your pattern, one for tracing, one for assembly, and a back up copy. When tracing, use a coloured pen or pencil so you can easily see the lines you have traced on the pattern.
- If gluing the pattern onto the wood, make three copies of the pattern, since the entire project is cut from one board. You will also need one copy to cut your backer board, plus one as a master copy to use for re-assembly of the project.
- Number each of the pieces of the pattern to help you re-assemble your project as you cut. Put this pattern aside.
- Since segmentation is usually coloured with paints, stains, dyes or other mediums, the grain direction may not be as important as it would be with intarsia. Once you have one board that will accommodate the entire pattern, transfer your pattern onto the wood.
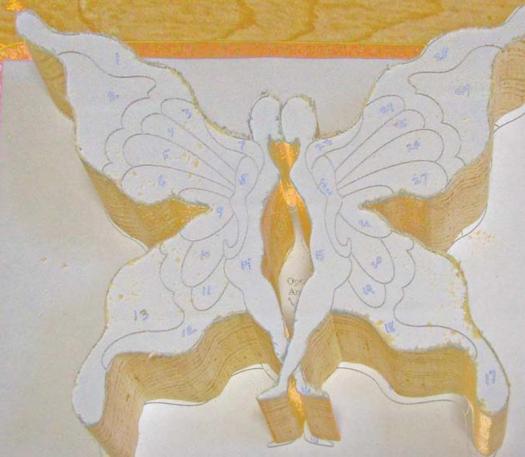
- If using the tracing method to transfer your pattern, position your tracing copy of the pattern over the wood. Tape the pattern in place, and slide graphite paper or carbon paper under the pattern. Using a coloured pencil, trace the entire pattern onto the wood, including all interior parts of the pattern. While tracing, remember to trace the entire outline of the pattern onto 1/8″ plywood to cut out a backer board to use in assembly.
- If you decide to glue your pattern onto the wood, apply a light coating of temporary spray adhesive to the back of the pattern and firmly press onto the wood surface. While gluing, adhere a copy of the complete pattern to 1/8″ plywood to cut out the backer board to use in assembly.
- As is the case with intarsia, you must begin cutting by checking to make sure your saw is square with the table. With your blade tensioned, make sure your blade is 90º to the table. Take your time and cut directly on the lines.
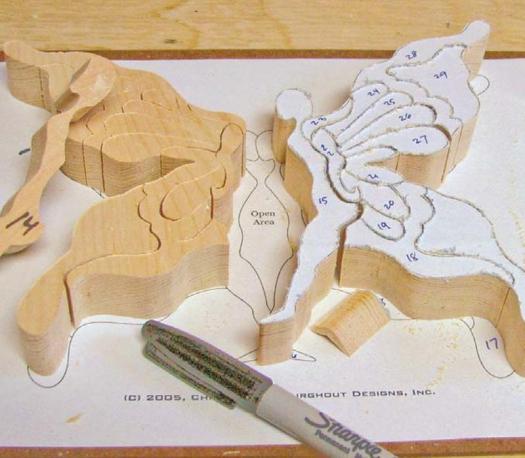
- As you work your way through the pattern cutting each piece, remember to number each piece on the bottom and mark the position on your assembly copy of the pattern.
- Cut out the backer board and set aside.
- Lightly hand sand away any burrs from the bottom side of the cut edge. Using your sanding equipment, sand, shape and contour each individual piece to your preference. Wipe off any dust from your contoured piece.
- Contour sanding is not necessary if you wish to have all your work lie flat. To elevate some pieces higher than others, you can cut a small shim by outlining the pattern piece onto a thin piece of plywood. Make sure the cutline is slightly inside the outline so the pieces alongside will not be obstructed from fitting together with the shimmed piece. Cut the shim and glue it to the bottom of the pattern piece. When gluing up your project, glue the shim to the back of the pattern piece first, before gluing the pattern together.
- Using whatever colour method you prefer, colour each of the sections of your pattern as you would like them to appear. This step allows scrollers the most creativity because of the variety available. Acrylic paints, paint wash, wood burning, sand shading, staining, or the use of dyes can all make each segmentation project a one-of-a-kind creation.
- After your coloured pieces are all dry, position all the pieces of the pattern on the backer board. Glue one piece at a time in place on the backer board, clamp and allow each to dry completely. Continue working through the entire pattern.
- When assembled, apply the finish of your choice. This project was cut on 1″ x 10″ x 12″ clear pine and stained with leather dye. There are no shims in this project, but using your imagination, you can make your butterfly soar.
Excess wood cut off
Number the bottom of each piece
Ready to colour
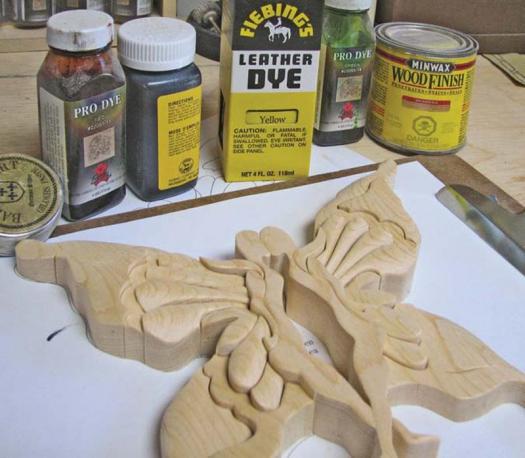
Illustration by Pattern: 2005 Chrestensen Burghout Designs, Inc.