PROJECT
Reversible mortise jig

Dan Barrett

Find more Jigs projects
There is still hope for those of us who don’t have a commercial jig for cutting a mortise and tenon joint.
There are countless different ways to cut a mortise. You can cut them by hand, using only chisels (my preferred method), you can drill out the mortise and then clean it up with chisels, and of course you can cut them out using a router. Once this shop-made jig is set up, this method is very quick and repeatable.
Having used routers for everything imaginable, and some things unimaginable, I would recommend keeping it simple. The more complicated you make something, the greater the potential is for failure. This jig is suitable for making a connection between a leg and an apron on a table or simple chair. The jig is reversible, which makes it possible to cut on the left and right sides of a leg.
Reversible mortise jig
I prefer to use either 1/2″ plywood or MDF for the deck of the jig. Either material is strong and thick enough to make a jig that will produce many mortises. Using 3/4″ material will limit the depth of cut because of the extra thickness of the board.
Let’s start by preparing the 1/2″ plywood deck. We will be cutting a mortise in a small table leg, with the dimensions of the mortise being 3/8″ wide x 3/4″ deep x 2-3/8″ long. The jig is based on the use of a 1″ outside diameter guide collar, and a 3/8″ straight bit. We need to cut an opening in the deck that has a final dimension of 1″ x 3″. When you factor in the difference in size between the guide collar and the 3/8″ bit, there is a 5/16″ offset all around.
You will have to decide the amount of offset you need the mortise to be on the leg. This will be worked out for your specific needs. I will set the offset at 3/8″, which will provide the distance needed for the tenon shoulders to rest on and still leave a 1/4″ reveal on the front of the stretchers to the front of the leg.
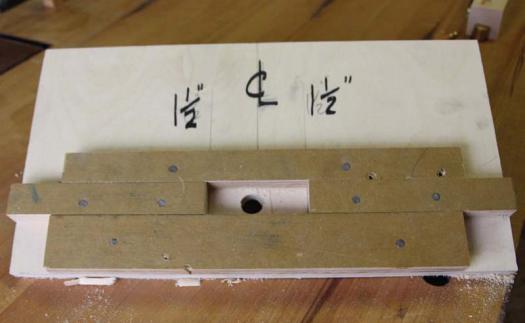
Start by laying out a center line on the deck, then measure left and right of center 1-1/2″ and strike parallel lines to the center line. Mark the center of the 1-5/8″ plywood batten. Place this batten on the deck aligning the center mark with the center line previously marked on the deck board. Be sure that the edge of the batten is flush with the edge of the deck. Temporarily fasten it to the deck using common nails or screws. Be sure the nail or screw you use is not too long and doesn’t break through the other side of the deck.
Next, take one of the 1″ wide battens and cut it in half. Place the two halves on each of the 1-1/2″ lines and tight to the 1-5/8″ batten. Again using either screws or nails and ensuring that the fasteners of choice are not long enough to break through the deck, temporarily fasten the two battens to the deck.
The last batten will be centered on the assembly and temporarily fastened with screws or nails. Again make sure that the batten is tight to the previous battens, to ensure an accurate mortise in the leg.
With a 5/8″ Forstner bit, drill a hole through the plywood in the cavity that has just been created. This will provide clearance for a 1/2″ bottom-bearing bit to rout the opening in the deck to the final size 1″ x 3″. Flip the deck over and rout the opening. When you are done, flip the deck back over and remove the temporary battens.
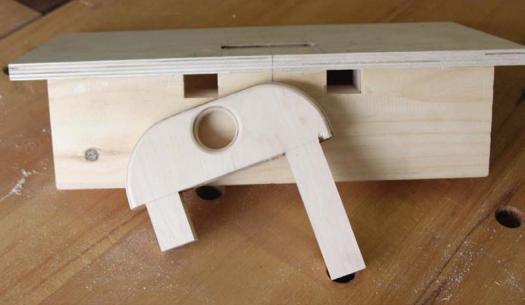
Now take the 6″ x 6″ plywood and layout the reversible stop. Carefully and accurately cut out the described size and shape. To create a finger pull, drill a hole in the stop. This allows you to remove and flip it when needed. I like to rout the edges with a small round-over bit.
The last thing to do before assembly is to cut two 3/4″ x 1″ gains, which are through cuts that you make in the pine to hold and guide the reversible stop perpendicular to the edge of the jig. Once again, mark the center of the pine piece and measure out from the center line 1-9/16″ each way. Strike these lines and then measure a further 1″ on each side. Cut these two gains carefully and dry fit the stop piece into the gains. Adjust the fit if necessary to ensure a smooth snug fit.
It is now time to assemble the jig. Match up the center lines of the plywood deck and the pine. Glue and place the pine flush with the edge of the deck and screw it into place.
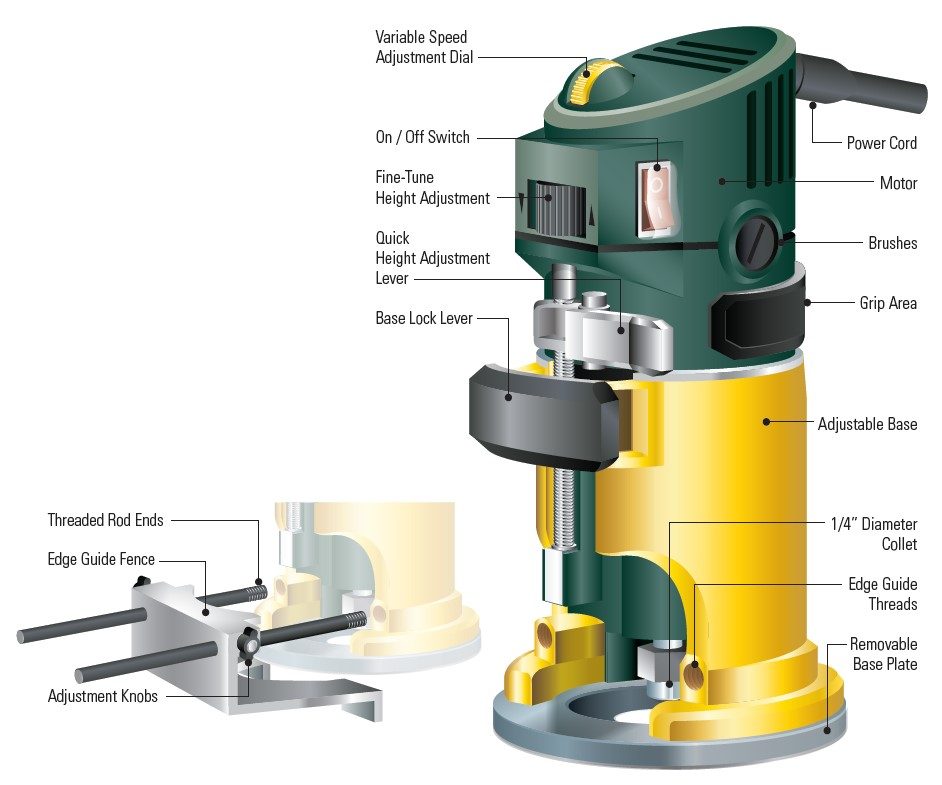
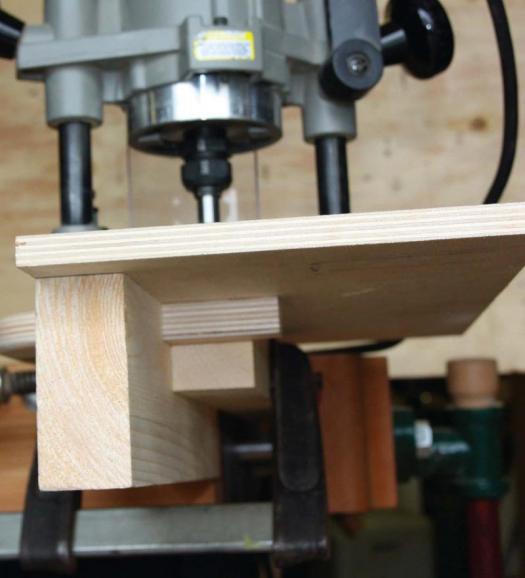
By now, you probably have about an hour or two invested in the jig, so why not put it to work? Place a leg blank in the vise or clamp it to the bench. Be sure to leave enough room for the jig to fit on the leg. Unless grain orientation is important, the side you place in the jig first is inconsequential. Securely clamp the jig to the leg and set the depth stop to allow a 3/4″ deep cut. Place the guide collar in the slot, start the router and begin removing the material from the mortise. Do not remove all of the material in one cut. Plunge the bit gradually, moving from side to side each time until you reach the depth set on the router.
Now that you have cut the first mortise, take the jig off and pull out the reversible stop, rotate it 180 degrees and put it back in. Rotate the leg to the appropriate orientation, clamp the two together and proceed with routing the second mortise.
This jig provides you with a great low-cost option for routing mortises. While mortising by hand is a great experience, doing many can get quite laborious. This jig will speed things up while giving you the accuracy you need.
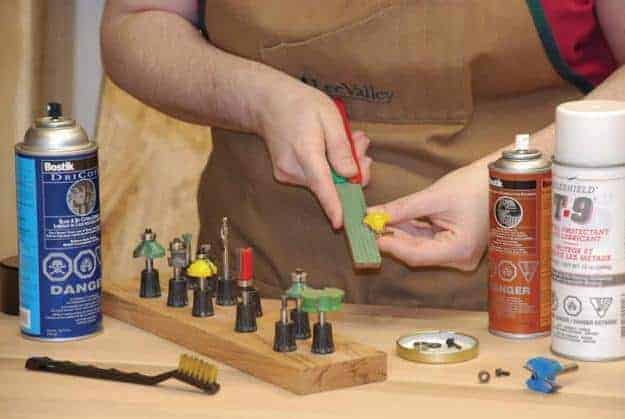
Photos by Dan Barrett
Accuracy is Key
Ensure that you mark out the jig precisely to ensure accurate results.
Assembly
The jig does not have many pieces but they need to be assembled with care.
Start cutting
Clamp the jig securely to the work piece. This will ensure that the mortise is cut in the correct spot.
Round mortise
This method produces round mortises. You can choose to either round your tenons or square-up your mortises to make it all fit.
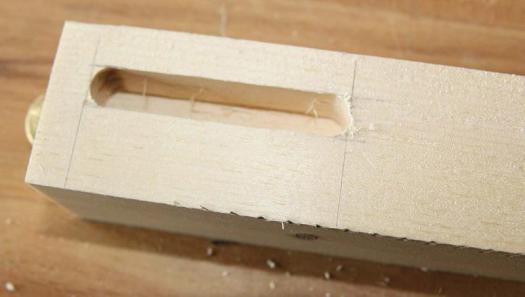
Illustration by James Provost