PROJECT
Miniature Clock

Wolf Moehrle

Find more Woodturning projects
I like to give gifts that are hand made, and because I’m a notoriously cheap person, it’s a good thing I’ve got a little wood shop! Personally I don’t think there’s anything nicer than things made from beautifully figured wood.
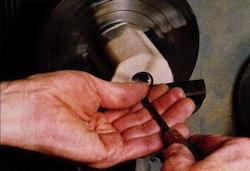
I was in the jewelry and watch department of a local department store and saw some little figurines with very small clock movements in them. I was intrigued with their size so I bought four of them. Such movements just pop out and can be easily installed into your own project. You can also purchase movements through any clockwork supplier.
Miniature Clock
Constructing the Blank
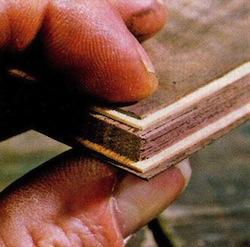
• Using some small pieces of curly maple, each about 2″ wide, by about 1″ thick and maybe 10″ long, sandwich some darker and lighter woods in between, which will be seen as light and dark stripes. The center is a piece of walnut, about 3⁄16″ thick, and with the addition of the walnut and maple veneer, it comes to about ¼” thick.
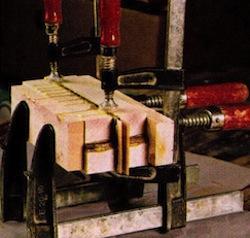
• When you glue up the sandwich, use some scrap pieces of wood over the actual parts, to distribute the pressure evenly. Put some smaller clamps crossways on the parts to keep them lined up while applying pressure to the main clamps.
• When this is dry, cut the sandwich through the center and repeat the gluing and clamping process the other way.
• Trim the ends of the glued-up block square. Also trim the sides, making sure that the veneered core remains centered.
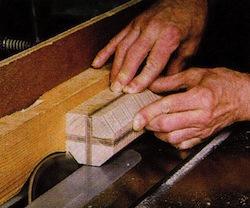
• Tilt the blade on the table saw and cut the block into an octagonal shape.
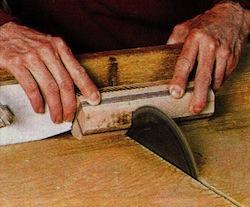
• Cut the block into 2½” blanks using a cross-cut jig on the table saw.
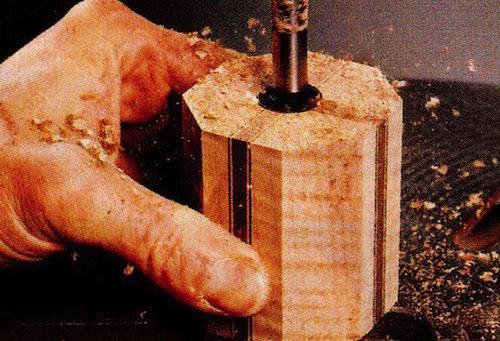
• Mark the exact center of each blank, and drill a 1½” deep hole with a ¾” Forstner bit. This hole will be used to hold the blank on the lathe. It will later be used to hold the piece when you are finishing it
Turning the Clock Body
• With your newly made arbor, (see Sidebar: Arbor) clamp the blank into the lathe chuck, making sure that the hole is running as true as possible.
• Measure the inside diameter (base) of the clock movement with a caliper and transfer that measurement to the blank.
• Using a very small chisel cut straight in about ⅜”, being very careful to stay just inside the pencil line. Stop the lathe and try the clock movement for fit. When it looks like it’s just about to go in, move the tool rest away about an inch because the next step is done by hand.
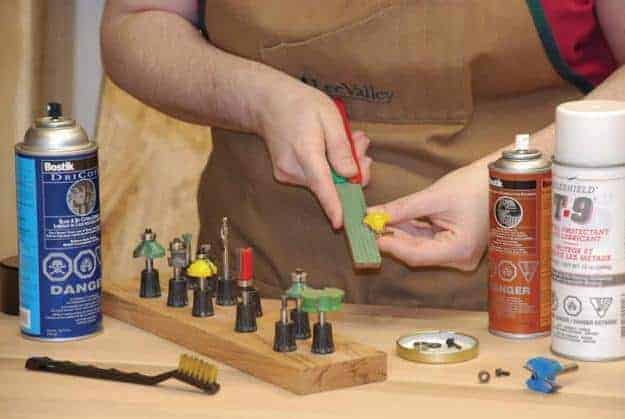
• Wrap the shank end of an old ½” straight router bit with some 120 grit sandpaper.
• Hold the bit against the inside of the cut just made and, very carefully, widen the opening. It is important to stop the lathe periodically and check the fit of the clock movement. When it just goes in, but is still a little snug, you’re done.
• Clean up the front face of the blank with a flat scraper, and sand it with a flat sanding block. First with 120 grit, and then 240 grit paper.
• Start turning the front face of the clock because this part will be hard to reach later.
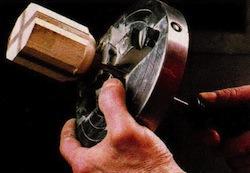
• Clamp the wooden arbor firmly into the chuck making sure not to over tighten and crush it, as it is hollow.
• Turn the blank around and slip the front face over the split end. Drive the screw into the chuck’s mounting hole. As the screw goes in it will spread the split end of the arbor and securely hold the part from the inside.
• With the chuck back on the lathe, turn the outside of the body of the clock. It is very important to use a scraper and take light cuts. If you use a gouge you could get a catch, and this will almost certainly break the wooden arbor and send your project flying.
• When the desired shape is achieved, sand with 120 and 240 grit paper. Normally I don’t go to 240 grit paper, but because I want to bring out as much of the figured wood as possible, and because I’m putting on a very thin coat of lacquer, I opted for a polished finish.
• Sand a flat spot on one side that will form the base of the clock. For this I wore rubber dishwashing gloves (for a good grip) and held the part against a sanding disc on my table saw. Whatever way you use to sand the base, you’ll want to shape the flat spot so the clock is facing up just a little. To ensure the clock sits exactly upright, you’ll also want to have the veneered stripe center on the flat spot.
Finishing
• Cut a square piece of soft wood about a foot long to act as a handle for holding each clock body. The size is big enough to allow you to push the square end all the way into the ¾” hole.
• Apply your chosen finish. I sprayed each piece with a coat of nitro cellular lacquer, mixed with a small amount of brown NGR dye.
• Set the time on the movement, pop it in and you’re done! When I give clocks such as these away I put a spare battery, wrapped in a tissue, in the hole behind the movement.
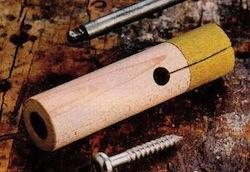
Arbor
This handy little arbor will hold your work in the chuck. It can be made easily from a small piece of hardwood, like maple.
• Turn a maple dowel to ¾”, and made sure that it just fits inside the ¾” hole on the blank, with clearance room for some sandpaper. The sandpaper is used to grip the part from the inside of the hole and help prevent it from spinning on the arbor.
• Drill a hole in the other end of the arbor to accommodate a screw. The hole should be slightly larger than the head of the screw, which will act as a wedge when driven from the inside towards the split end of the arbor. I used my drill press to cut this hole, but you could use a drill chuck on the lathe tailstock if you have one.
• Cut a narrow 1″ kerf at the other end of the blank. I used my scroll saw because I wanted this cut to be as small as possible.
Veneer sandwich
Glue up sandwich

Cut sandwich in half
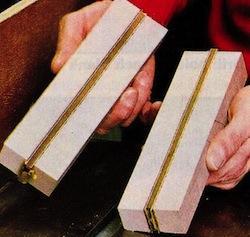
Reglue sandwich
Cut block into octagonal shape
Cut block into blanks
Drill hole in each blank
Turn arbor
Transfer clock movement diameter to blank

Turn recess for clock movement
Sand recess for tight fit

Turn front face of clock

Front face of clock mounted on wooden arbor
Turn clock body

Sand body
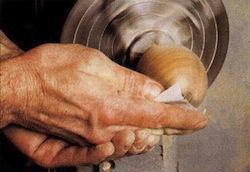
Illustration by Mike Del Rizzo