PROJECT
Make a smartphone case

Rob Brown

Find more Gifts / Crafts projects
Technology is often shiny and cold to the hands and eyes. Pairing these modern objects with wood is a great way to visually and physically warm them up.
This project, while it’s quite small, and only has a few parts, is more difficult to make than it first appears. Because the tolerances need to be tight in order for the smartphone to not only fit into the case, but to also not fall out easily, this is a great project for someone who can work accurately.
Make a smartphone case
Design
The overall design is fairly standard; though everyone’s case will vary, my finished case is 3/8″ wider, 3/16″ taller and 3/16″ thicker than my phone. If you want to modify your case, that’s fine too.
Where you have a lot of options for customizing this project is with the type of veneer you use, and if you add any designs to the exterior of the case. From Technology is often shiny and cold to the hands and eyes. Pairing these modern objects with wood is a great way to visually and physically warm them up. chip carving and wood burning to adding texture or laser engraving, there are many options.
Materials
I chose not to use solid wood for the front and back of this case. Instead, I opted to use a two-ply surface that I created in my shop with veneer and slow-cure epoxy. The two-ply veneer is going to be very stable, while a thin strip of solid wood will not only be less stable and prone to warp, but it won’t be all that strong.
When selecting veneers I would suggest using either a straight-grained piece or a very densely figured piece. If you use a piece that isn’t densely figured you will likely not get a good idea of what the figure is doing, as the pieces for this case are quite small. There’s also nothing wrong with using multiple species and creating some sort of a pattern.
I went with a straight-grained wood called tineo for the show faces of the front and back panels. I used maple for the cross-bands and back veneer that made up the front and back panels, and cherry solid for the edges, as cherry matches the tineo very nicely. The benefit of using species with contrasting colours is that you’ll be left with a thin strip of the lighter species showing through, creating a pin stripe.
Laminating with epoxy
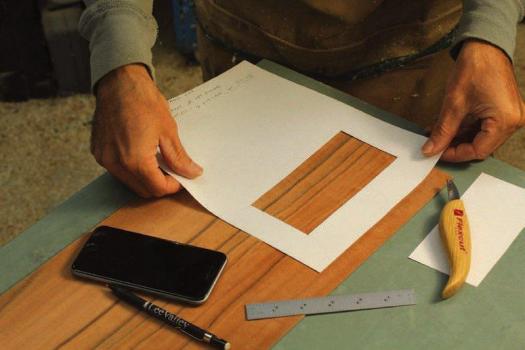
Mark a window the size of your finished case on a piece of paper, then cut this window out. You can position this opening over the veneer you’ve selected to see what grain pattern looks best. When you’re happy with the grain pattern, mark and cut out two pieces of veneer for the show face of the back and front. Next, cut two pieces for the back veneer. Finally, cut two pieces of veneer, with the grain running perpendicular to the show face. These pieces will be the cross-bands.
I first used two layers of veneer – one show face and one cross-band – for the front and back, but it was too weak and flexible. A third layer added a lot in terms of rigidity.
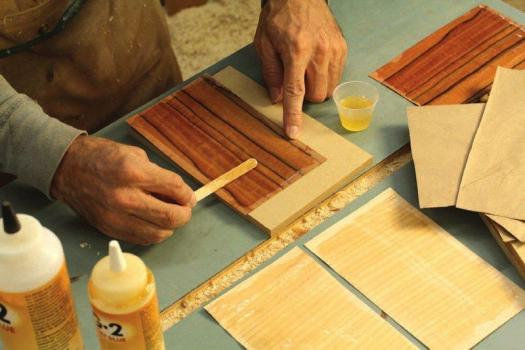
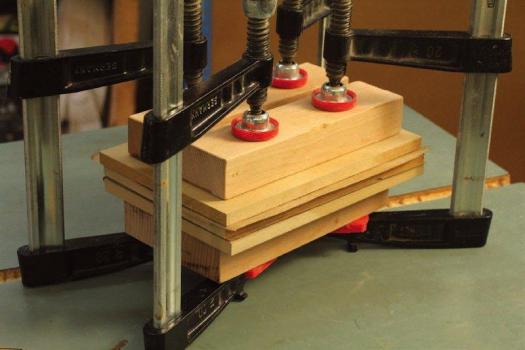
Mix up enough epoxy to cover eight surfaces then let it sit for about 10 minutes. While it’s sitting, cut out three pieces of material to act as cauls; one for between the front and back, and one on the top and bottom of the stack. You’ll also need to cut out four pieces of paper the same size as the cauls to ensure the epoxy doesn’t stick the workpieces to the cauls. If the paper you’re using is extra-thick I would consider using two plies of paper against each section, as the epoxy soaks through paper that isn’t overly thick.
Give the epoxy a final stir and apply a light coat to the four surfaces that will be adhered together. Let this sit for 20 minutes so it can soak in a bit, then reapply a bit more epoxy to be sure there is light, even coverage on all surfaces. Bring the veneer, paper and cauls together in the proper order and apply medium clamp pressure, before letting the epoxy cure thoroughly.
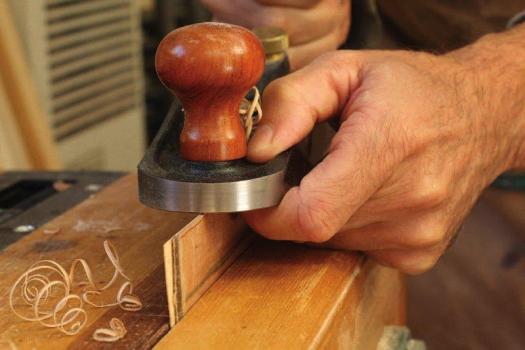
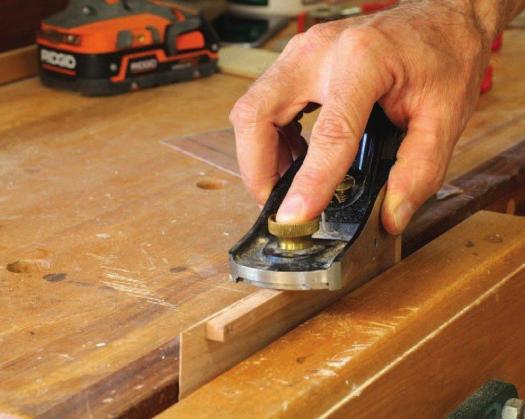
Straighten one long edge on the front and back panel with a hand plane. Don’t use a jointer or table saw to trim any of these edges, as the part is so thin and small it’s not only hard to handle, but it can get caught under your rip fence and shift during the cut.
Add three strips
A strip of solid wood will be sandwiched between the front and back faces to keep them a certain distance apart, and give the case some rigidity. Cut them slightly thicker than the thickness of your phone. Keep in mind to also add the thickness of some flocking or adhesive felt, if you plan on adding some to the inner surface of the case. Some trial and error is necessary here, as you plane, dry-assemble, test-fit your phone, then plane the strips some more until you have the perfect fit you’re looking for.
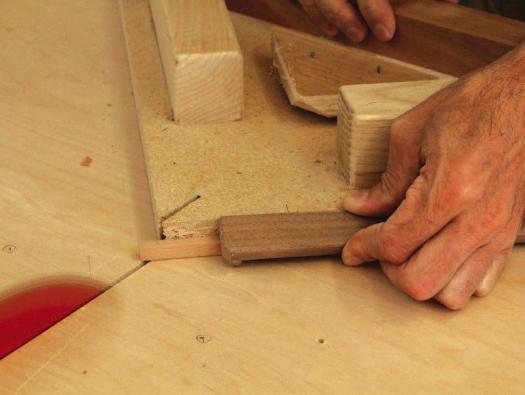
The three wood strips will meet with mitres at the bottom two corners. I ripped the strips to 1/4″ wide, then cut a 45 degree angle on one long piece and trimmed it to rough length. I glued it in place along the long edge of the back panel, and when it was dry I cut and added the last two strips. Because I was going to add adhesive felt to the inside surface of the back, and have it curl up against the sides of the solid wood strips, I made sure to account for the thickness of the felt when cutting the short solid strip to length.
When the strips were dry I trimmed the back panel flush with the strips, and cut it to rough length.
Functional recesses
You should customize the front panel, and any other area of your case, to function how you want it. You can add no openings in the front for maximum protection, though you’ll have to remove the phone from the case every time you want to use it. I chose to add enough openings so I could answer the phone without removing it, but I would have to remove the phone from the case to do anything else. This provided me with a fair bit of protection, and a medium amount of functionality.
I planed one straight edge on the front panel, then traced the outline of the back panel/side strip sub-assembly onto the face of the front. I then measured the size and location of the areas on my phone I needed access to, and transferred them to the front panel.
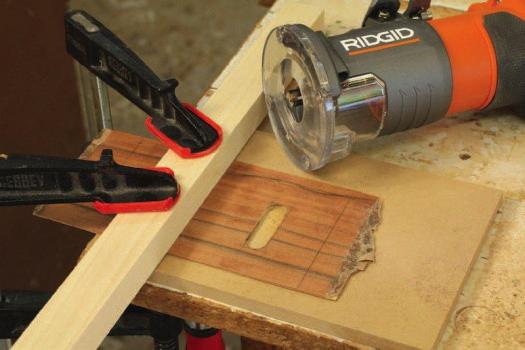
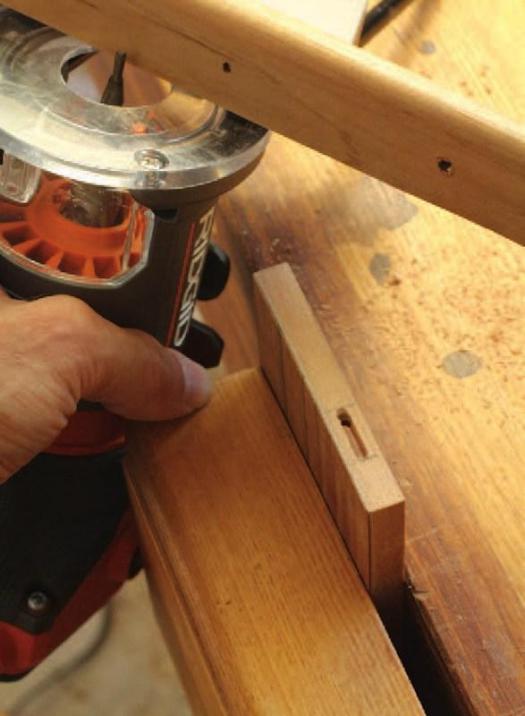
With a 1/2″ diameter straight bit in my trim router, I clamped a straight edge to my front panel and routed the groove to allow me to slide my finger across the screen in order to answer a phone call. Next, I drilled a 7/16″ hole with a brad point bit near the bottom of the screen to allow me to access the main button on my phone. In order to allow my voice to be picked up by my phone while I talked I routed a 1/8″ wide groove in the end of my case. I used an edge guide in my trim router, and created the groove with a few passes, deepening the cut each time. The final groove was so I could hear the other person on the line. It was also 1/8″ wide, and I cut it with a straight edge clamped to the front.
Attach the felt
It would be impossible to fix the adhesive-backed felt in place, or to flock the area, after the case front is attached. I cut the felt to size so it was slightly shorter than the interior height of the case, but wide enough to barely cover the inner surfaces of the two longer side strips. This extra width cushions the phone while it’s in the case, and gives a better friction fit.
Assemble the case
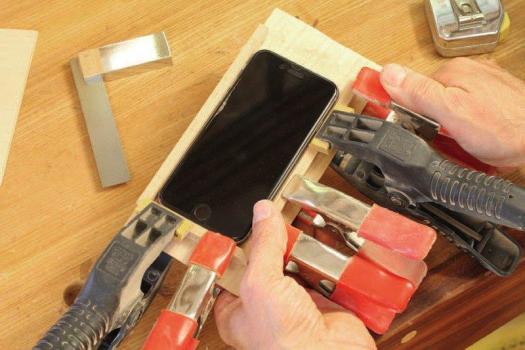
I trimmed the overall size of the front panel to fit the rest of the case accurately. The grooves and holes in the front panel were cut very accurately and need to be located directly over the areas of the phone precisely in order for the phone to work properly. To ensure the front panel is glued to the rest of the case accurately, I trimmed the front panel flush on all four sides of the rest of the case. This meant I could use a few clamps side-to-side and top-to-bottom to ensure the front panel didn’t slide around during glue-up.
I applied a small amount of glue to the solid strips and carefully positioned the front panel in place, added some light clamps to keep the front panel positioned properly, then added some spring clamps to close the glue joints. Once dry I used a block plane to ensure the edges were smooth. Although I chose not to, you can radius the four corners with a belt sander, to make it look a bit sleeker.
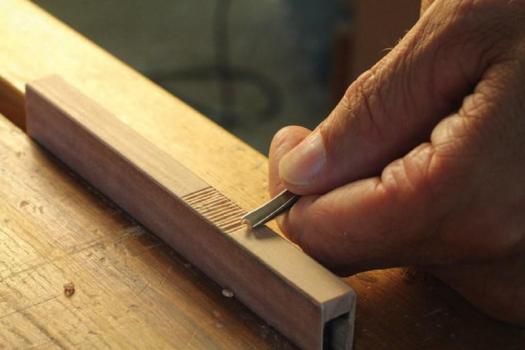
Once the finish was applied, this case was going to be very smooth to the touch. The thought of the well-polished case, with phone inside, slipping out of my hands during use flashed through my mind. I decided to add a series of shallow V-grooves on either side of the case to offer some grip. The imperfectly spaced and cut grooves add lots of friction, as well as give the case a great visual that only a hand could create.
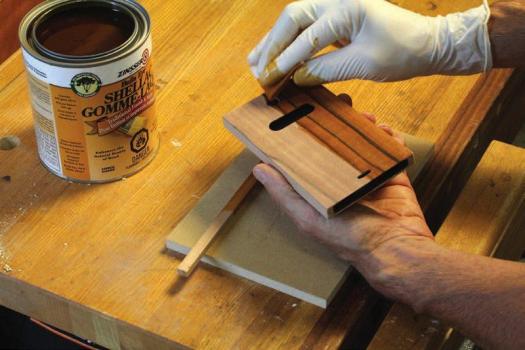
Apply a finish
After sanding all the surfaces, and easing all the edges, it was time for a finish. How I saw things, there were two options: either apply a very durable finish and hope the case doesn’t get damaged, or apply a finish that is very easy to touch up so when the finish does look tired it will be easy to bring the case back to life. I chose the second option, and went with an amber shellac. It’s very easy to wipe one with a lint-free rag, dries very quickly and can be touched up down the road with only a few minutes’ work.
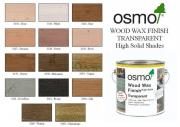 If you’re looking for an easy-to-apply all-in-one stain and finish, check out Osmo’s Wood Wax Finish. It’s a satin-matte wood finish tha combines all the advantages of oils and waxes in one unique product. Resistant to water and dirt, very durable and smooths wood surfaces. Resistant against liquid spillages and the dry finish is safe for humans, plants, and animals. Osmo.ca If you’re looking for an easy-to-apply all-in-one stain and finish, check out Osmo’s Wood Wax Finish. It’s a satin-matte wood finish tha combines all the advantages of oils and waxes in one unique product. Resistant to water and dirt, very durable and smooths wood surfaces. Resistant against liquid spillages and the dry finish is safe for humans, plants, and animals. Osmo.ca |
I wiped on two quick coats, then allowed the finish to cure for about an hour. I then sanded the finish with 320-grit paper, applied two more coats and let it dry again. After another hour I did a thorough sanding with 320-grit paper and applied the final coat. After the finish fully cured overnight I rubbed it out with #0000 steel wool and wax, buffing the finish to a nice, even sheen that felt great in my hand.
Polyurethane spray finish from a rattle-can would also have been a good choice for this case, as it’s durable and easy to apply on a small project. I slid my phone in place and quickly asked my wife to call me. I let her know that she sounded even better on the phone when I used my new case.
What sort of details did you add to your smartphone case to give it a custom look? Share your project with others at the end of this digital article, on our website.
Photos by Rob Brown
Look through a Window
In order to see just the grain that will visible on the final case, use a paper cut-out the same size as the finished case. Move it around until you’re happy with the grain pattern that appears, then trace the location and cut out the veneer. Be sure to cut out the veneer oversized to allow you some room to work.
Apply Epoxy
Apply an even coat of epoxy to all the mating surfaces, allow it to soak in a bit, apply a little bit more and bring the parts together.
Clamp it Up
Light and even clamping pressure is needed to press up the front and back panels. At least one layer of paper between each part and the caul is essential, as the epoxy bleeds through and is very strong.
Trim it Straight
Once the epoxy has dried you’ll find it’s quite easy to plane the long edges of each panel, even though the middle layer in each part is end grain. The epoxy is great for keeping the part from chipping out.
Cut Mitres
With the solid wood strips cut to width and height, use a mitre sled or bench hook and handsaw to mitre the strips. You can leave the two sides long, but make sure to cut the bottom piece to length carefully as it determines how wide the interior cavity of the case will be. Take the thickness of the felt or flocking into account when doing this.
Glue the Strips On
Once the first long strip and the shorter strip are glued to the back panel, you can put your phone in place to help out with positioning the second long strip. Again, take the felt or flocking into account.
A Quick Trim
A hand plane will flush the case back to the side strips. It’s best to not use a table saw to rip this sub-assembly to size, as it’s small and can be hard to control during the cut.
Add Some Face Openings
With the final dimensions marked on the front panel, and the location of the cutouts laid out, Brown clamped a straightedge to the workpiece and routed a 1/2" diameter groove between pencil lines. This groove allows him to slide his finger across the touch screen to answer his phone.
Microphone Access
In order to allow his voice to be picked up by the phone, Brown routed a small groove in the end of the case that was aligned with the microphone on his phone. An edge guide installed in his trim router allowed him to make a few passes until a through cavity was created.
A Good Grip
To offer some friction to the case, Brown added shallow V-grooves in both sides of the case where his fingers were most likely to grasp the case while in use.
A Simple Finish
Though a durable finish would have also worked well, Brown selected a finish that was very easy to apply and repair – shellac. The fact that it brought the grain out nicely was also a consideration.