PROJECT
Make a pizza peel

Rodger Nicholson

Find more Gifts / Crafts projects
A pizza peel is a great way to move a fresh pizza into and out of a hot oven without burning yourself. This peel was made entirely from shop offcuts, and best of all, it can easily be made in a single weekend.
To start your pizza peel, raid your scrap bin for any hardwood offcuts that are at least 2″ wide, and 5/8″ to 3/4″ thick. The center pieces need to be about 30″ long, while the outer pieces only need to be about 19″ long. Mill all your edges and faces flat and square, and then plane down your material to just over 1/2″ thick (this will allow for final sanding and flattening). Rip each piece to its final width.
Square up one end of each piece, and then cut all your inner and outer pieces to 18-1/2″. Next, cut your handle piece to 29″ long. Arrange all the pieces in a pattern that is pleasing to your eye, and then glue up the blank with water resistant glue. I used TiteBond III for this project. Because the pieces are so thin, use some clamping cauls to keep your blank flat as it cures overnight. The width of your blank should be about 18″ wide. Having said that, it also depends on the size of pizza you plan on making. During the gluing process do your best to ensure each strip of wood is aligned as evenly as possible with the piece beside it, as only scraping, hand planing and sanding will be used to flush up both surfaces of the pizza peel. That is, unless you have a thickness planer wide enough to dress your blank to final thickness.
Make a pizza peel
Make a template
While the glue is setting, start to form your template. I make templates from 1/4″ MDF, but 1/2″ would work just as well – avoid any material that is less than an actual 1/4″ (for safe routing later). Dimension your template to 26″ long by 17″ wide.
Using a drawing bow, lay out a gentle convex curve on the end of the template. Adjust the bow and create some smaller concave curves on the handle sides, and a slight convex curve for the handle’s end. There is no right or wrong design here, so experiment a bit to get a design you like. After you are happy with the design, use a thin Sharpie marker to go over your pencil lines for clarity. If you don’t own a drawing bow, then a 1/4″ thick strip of hardwood (3/4″ wide) and a helper will get the job done.
Cut your template out with a jigsaw or band saw, staying about 1/16″ outside your lines. Then sand down the blank right to your lines, using a combination of power sanding and hand tools and sanding. Take your time and be careful – this template will be the final shape of as many pizza peels you choose to make. Once your template is ready, set it aside and turn your attention back to your glued up blank.
Template routing
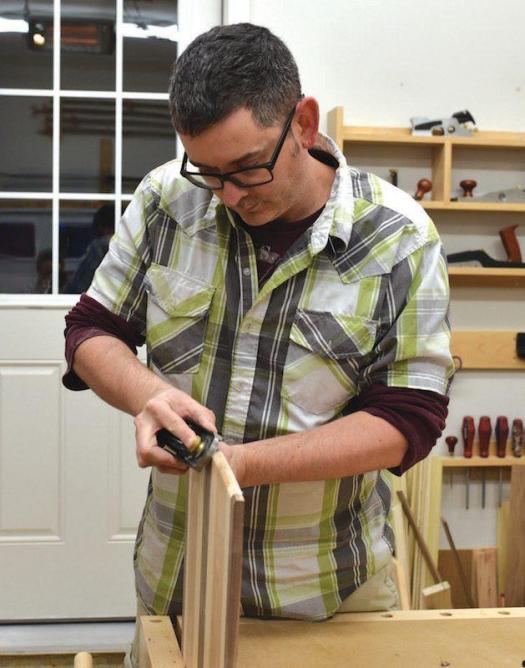
The next step is to prepare the hardwood blank for routing. Remove the clamps, and get rid of any residual glue squeeze-out. Using a sharp card scraper or hand plane will make short work of leveling out the joints and preparing the surface at the same time. Alternatively, you could use a random orbital sander, progressively working your way through the grits.
Once the blank is flat and smooth, trace the template onto the blank and then set the template aside. Cut away the waste using a band saw or jigsaw, again staying 1/16″ away from your line (use a fine tooth blade to minimize tear-out). Next, using a generous amount of double-sided tape, stick the template to the trimmed blank. Ensure the template does not overhang the blank in any location.
Chuck a bearing guided pattern bit into your router (preferably with a 1/2″ shank). Set the height of the bit so the bearing will ride on the template. Set up a starter pin in the router table so you have a place to begin your cutting. Using push pads (never bare handed), slowly move the work into the spinning bit while using the starter pin as a fulcrum. Take a very light cut. Rout all sides, being especially careful on the end grain so the router doesn’t grab and ruin your workpiece. Like most routing operations, it’s best to take a few light passes to get to your final dimension.
After the template routing is complete, remove the template and tape. Store your template for future use.
Create a bevel
Using a small combination square or marking gauge, draw a line 1/2″ in from the end of the peel (on both sides). Reset your square to a 1/4″ and draw a centerline on the end grain of the peel as well. Clamp the peel vertically in a vise, and use a block plane to remove about 1/8″ of the material on each side, feathering out the bevels. Use your layout lines to guide you. Follow up with some hand sanding and scraping to get a nice smooth bevel. This bevel will make it much easier for a pizza to slide on and off the peel.
Finishing up
Scrape off the tape residue, and do a final sanding of all faces and edges. Break all edges using a sanding block, or a 1/8″ radius round-over bit. Finally, drill a 3/8″ hole in the handle for easy hanging.
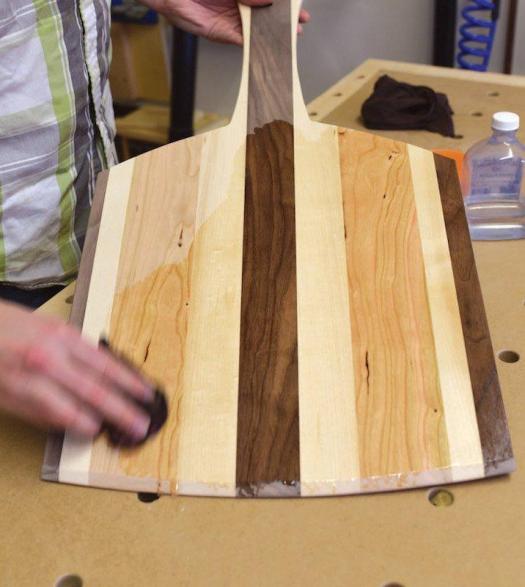
For finish, I applied three coats of mineral oil (also marketed as “Butcher Block Oil”), which makes a great food safe finish that is easy to apply. Flood the surface with oil, wipe off the excess, and repeat the process again in a few hours.
To use the peel, preheat a pizza stone in the oven at 450 degrees. Lightly dust the peel with flour, and place your raw pizza on it. Open the oven door, and slide the pizza off the peel and onto the stone. After your pizza is cooked, slide the peel under the crust (this takes a bit of practice), and lift your fresh pizza out of the oven. Let your pizza cool for a few minutes before serving.
Photos by Rodger Nicholson
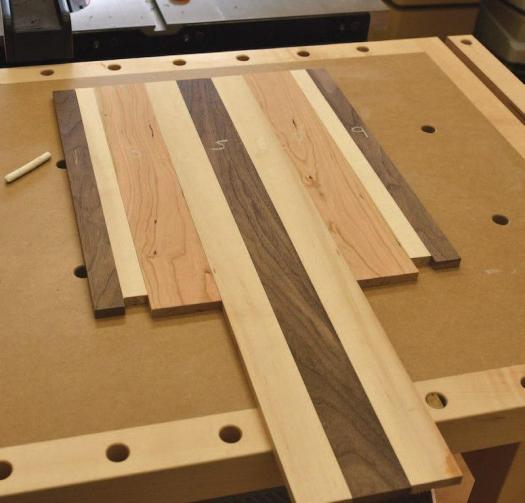
Time for Glue
With your parts cut to rough dimension it's time to glue them together. This is only one of many pleasing species and board width patterns.
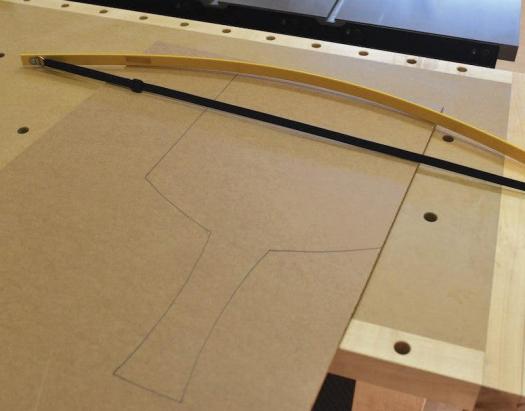
Use a Drawing Bow
Pleasing curves will add to the look of your pizza peel. Draw the shape of the peel onto 1/4" thick stock then cut and sand it to size.
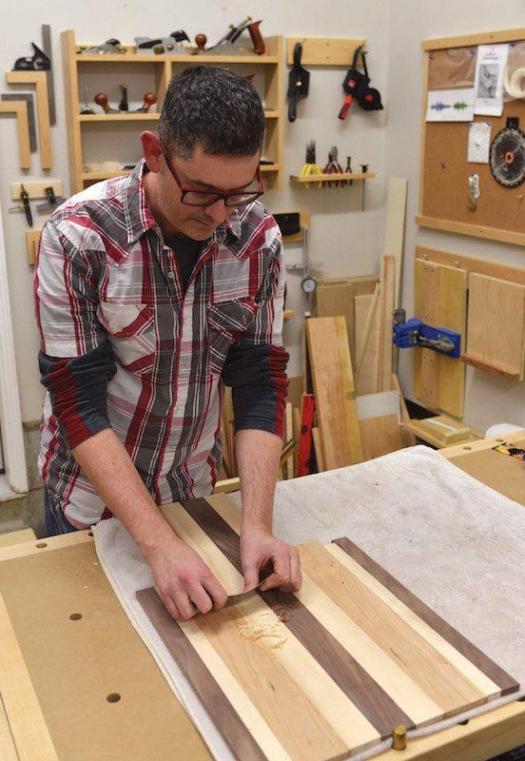
Scrape it Smooth
Once dry, scrape or hand plane the surfaces of the blank even.
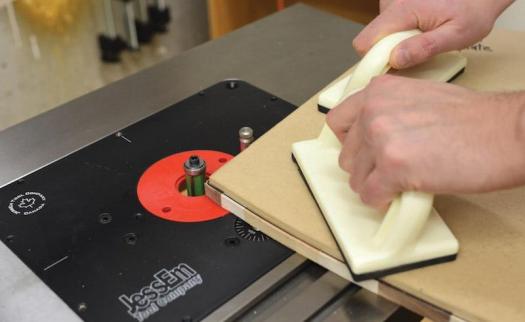
Pattern Routing
With ample double-sided tape securing the template to the workpiece you can safely rout the peel to size and shape. Ensure your hands are kept away from the rotating bit, and move the workpiece in the right direction.
Bevel the Edges
Bevelling the edges on both faces of the peel will allow you to more easily slide the pizza on and off of the peel.
Apply a Finish
Nicholson opted for three coats of mineral oil, but most finishes will do. Generally speaking, once a finish has cured it's safe for food contact.


As a retired teacher, I can appreciate a beautiful lesson plan and a thorough but concise explanation of your entire process. From materials to tools and their safe use, along with some clear photos, you get an “A” from me. I look forward to making my own pizza peel now that I have no more questions on how to pull it off. Thank you!
Thanks for writing this article. I was thinking about making one of these after seeing one on the Lee Valley site. I was also thinking of making a Rocker as well using the process you created.