PROJECT
Design an elegant coffee table

Paul McCuish

Find more Tables projects
The graceful lines of this coffee table will dress up your living room, yet its sturdy construction and durable finish will invite you to put your feet up and get comfortable.
The top and legs of this coffee table aren’t overly challenging for a novice or intermediate builder. The curved stretcher underneath is more difficult to construct, but it could be changed to a simpler one without diminishing the appeal of the table.
Design an elegant coffee table
Design and materials
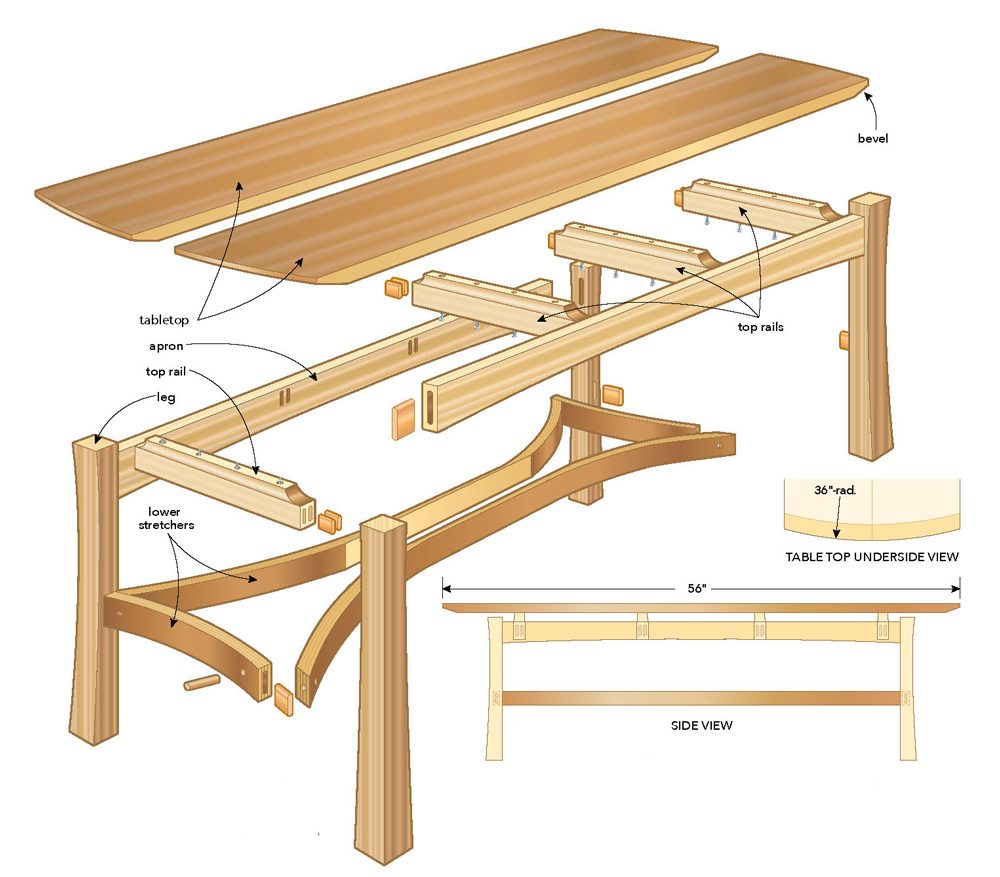
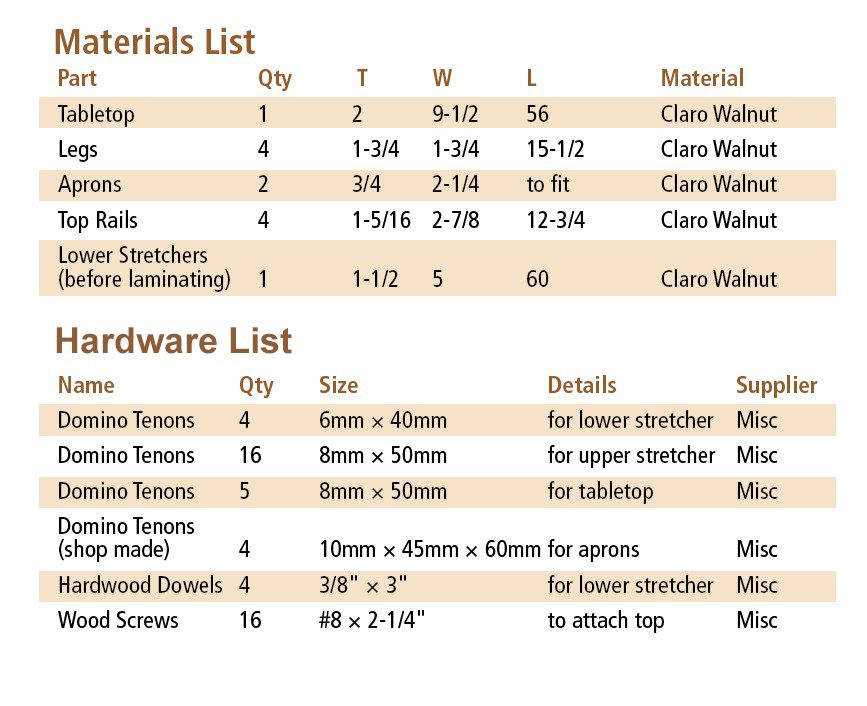
The client for this project wanted a modern design with a floating top. She browsed through my collection of hardwoods and chose a claro walnut plank for the top. The 2″ thick, slightly more than 9″ wide plank dictated the size of the tabletop, making the finished dimensions just over 3/4″ thick × 18-1/4″ wide and 56″ long.
The top
I ripped and planed the 8/4 walnut plank, squared up all four sides and bookmatched the two pieces. Five Dominos mortised into the adjoining surfaces helped to keep the surfaces of the pieces flush, simplifying the glue-up and finishing.
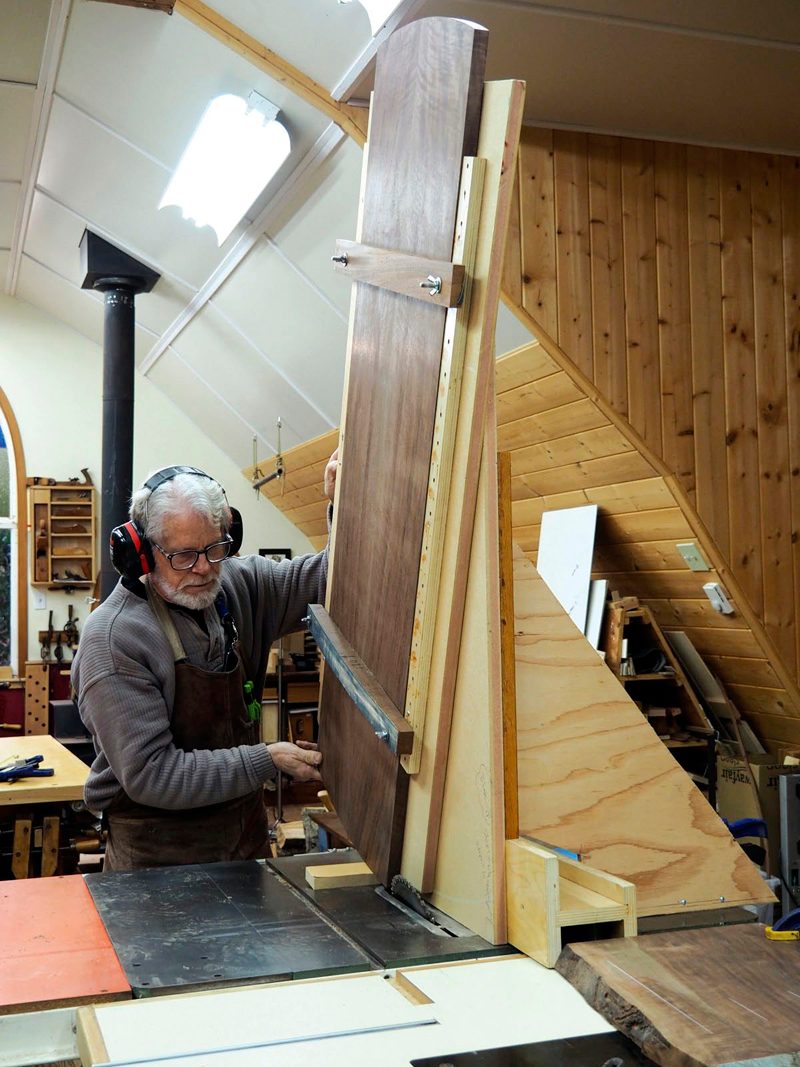
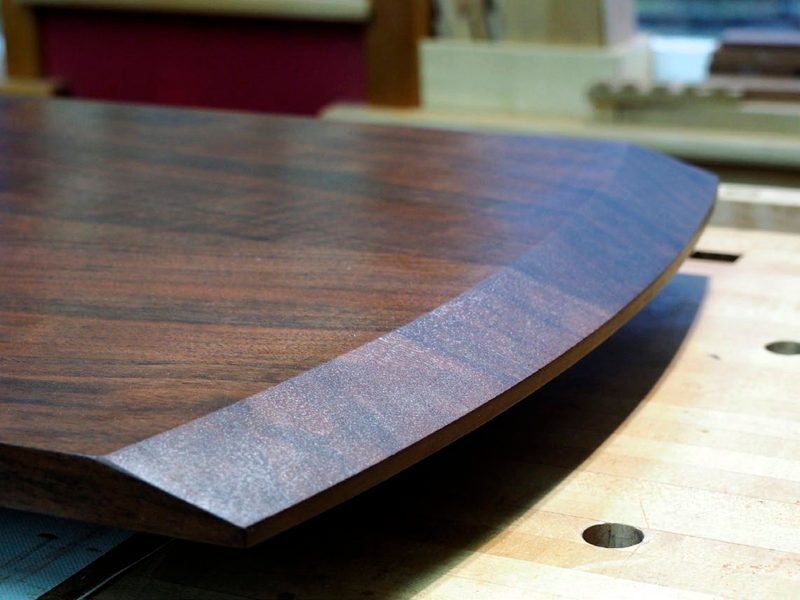
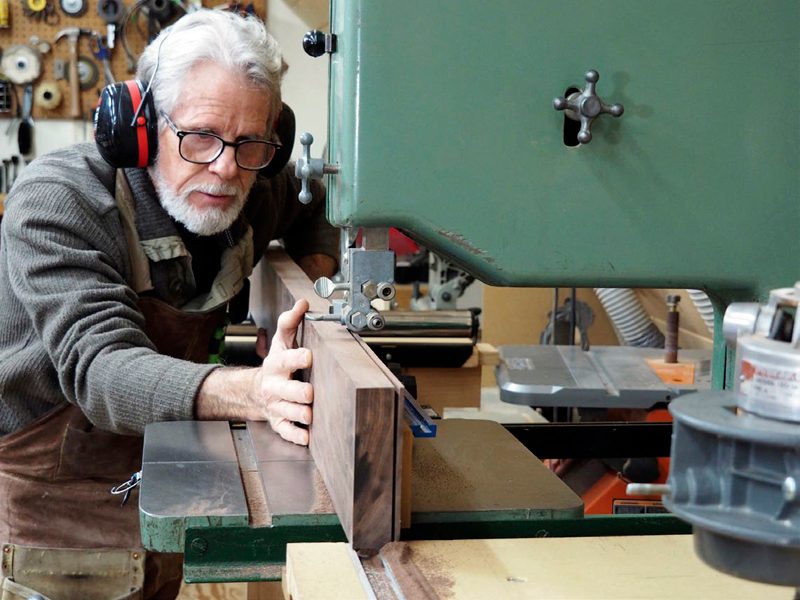
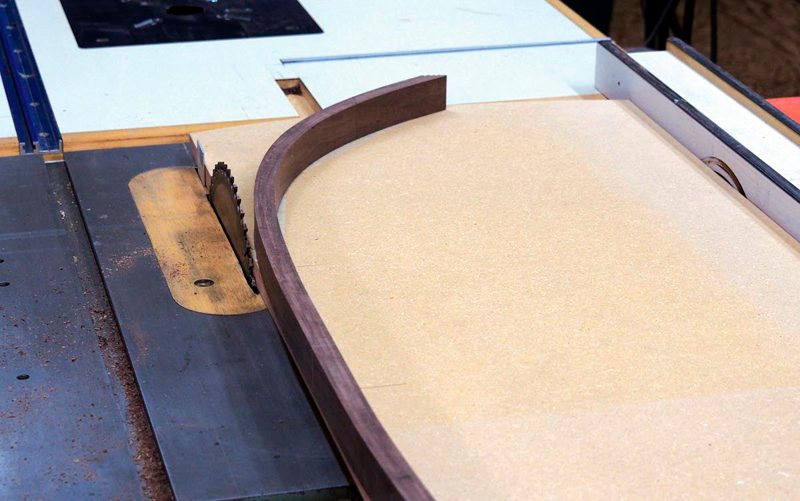
The bevels on the curved ends of the tabletop help to create the floating effect the client was looking for. I built a sturdy jig to cut the bevels. Because the radius of the curve is 36″, the portion of the jig that carries the walnut top through the table saw blade must be attached to the stationary portion of the jig 36″ above the surface of the table saw. The walnut top is securely attached to this swinging portion with cauls and clamps. A practice cut with a plywood or MDF scrap will ensure that the jig is set up properly. A little work with a sharp block plane and sandpaper cleans up the burn marks. You may wish to simplify your own project by cutting the bevels by hand or by building the top without the bevels or without the curved ends.
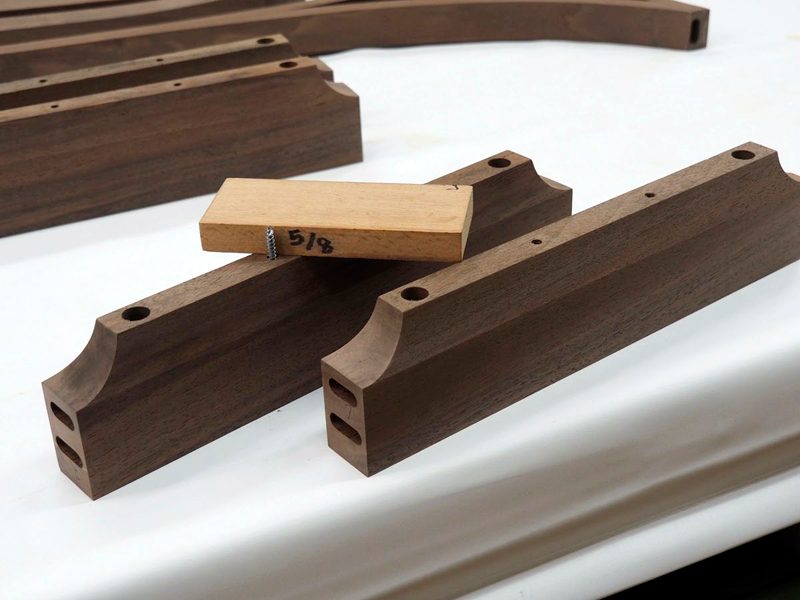
The legs
One end of the plank used for the tabletop had a curve where the trunk of the tree widened out of the roots, making the grain pattern ideal for the curve that I wanted for the legs. I scribed each leg using an MDF template, cut close to these lines on the bandsaw, then used a flush cutting bit to cut each leg exactly to the lines. The two outside profiles are the same, so the same template is used for each. The insides of each leg are square to one another, making it easy to cut the mortises for aprons and spreaders. I used a jig with clamps to cut the legs with the flush cutting bit, but a spoke shave would work as well.
Bent laminations for the lower stretcher
The lower stretcher was inspired by the work of Edward Barnsley, an important English designer and furniture maker in the 20th-century British Arts and Crafts movement.
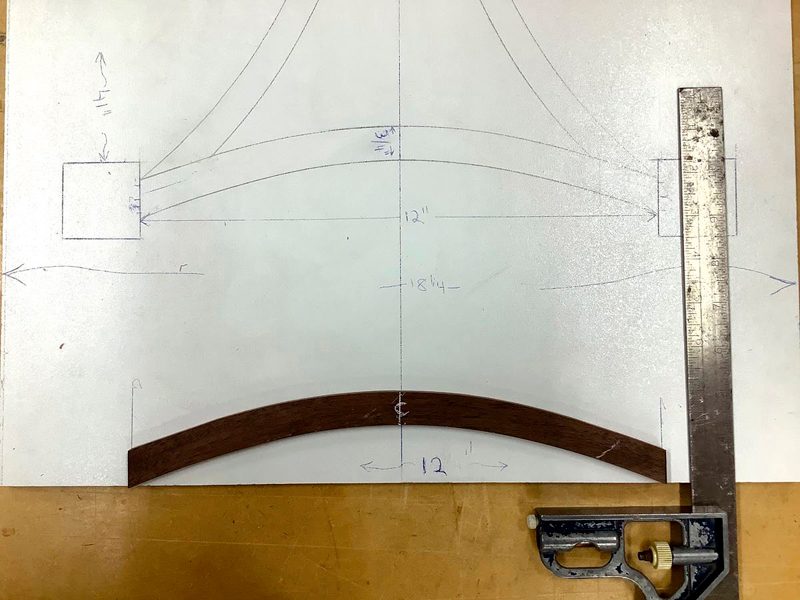
Make a full-size drawing on 1/4″ MDF or similar material. Be careful to draw the four legs the correct distance from, and square to, one another. It doesn’t matter if during the build the distances between the legs change a little. However, to make clean joints where the stretcher meets the legs it’s essential that the legs remain square to one another.
Rather than cutting three narrow pieces of walnut for the three pieces that make up the stretcher, I used a bandsaw to cut a single 1-1/2″ × 5″ × 60″ board into five laminations, each 1/8″ thick. Before cutting, I marked the edge with a “V” to help keep the laminations in order.
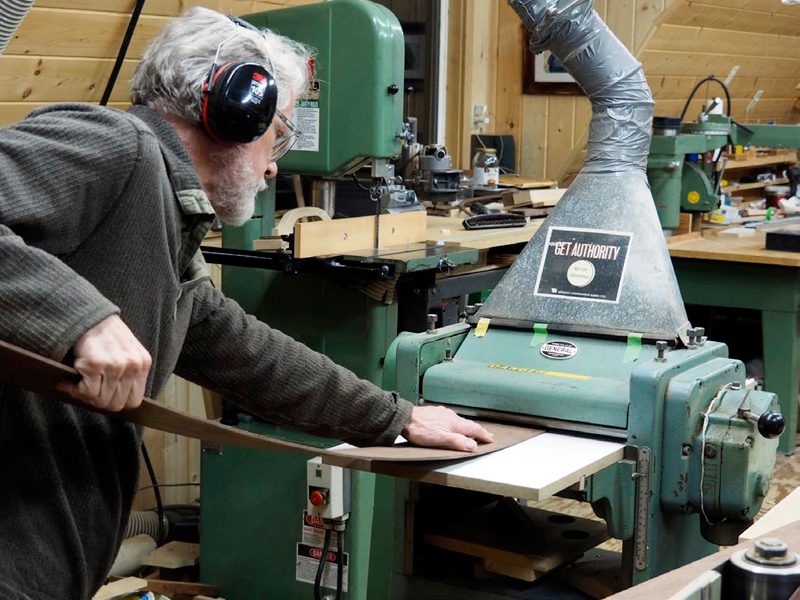
Joint both edges of the 1-1/2″ thick board. Dress one face with the jointer and the opposite face with the thickness planer. After ripping each lamination on the bandsaw, smooth the rough face of the thicker board on the jointer. When you have five laminations, smooth the rough surface of each using the thickness planer. Each lamination should be planed to 1/8″ thick. I used 3/4″ vinyl-covered MDF in my planer to surface the thin pieces. This process can result in tear-out and having some of these thin laminations breaking or chipping when they’re being dressed. Sharp blades help, as does taking very light passes. Reading the grain direction also goes a long way to ensuring the parts make it through the thickness planer intact.
Using masking tape, bind the laminations together and rip them to three equal widths on the table saw. The third bundle will be used for the short pieces on the ends. Now that you have three bundles, two of them will need to be marked with a “V” to ensure they are kept in order when they’re glued up.
Bending form
Create a template for the bending form from 1/4″ MDF. The curved section is longer than what this table requires, but making it a little longer will allow you to use the same bending form for somewhat larger projects you might build in the future (a matching desk perhaps.)
Bandsaw and sand to your line to create a smooth, flowing curve, then transfer it to 3/4″ × 12″ × 46″ MDF, keeping the bottom of the template flush with the bottom of the 3/4″ MDF. Scribing one half of the shape and flipping the template to scribe the other half ensures your stretcher will be symmetrical. Mark the centre line on your 3/4″ MDF for later reference. Cut carefully to the line on the 3/4″ MDF. Draw a parallel line approximately 4″ inside of your cut and cut to this line. Now, make another cut identical to it.
Finally, glue the two pieces of 3/4″ MDF together and screw them to a 3/4″ × 14″ × 48″ MDF base. Apply packing tape to the surfaces that might get squeeze-out when gluing the laminations.
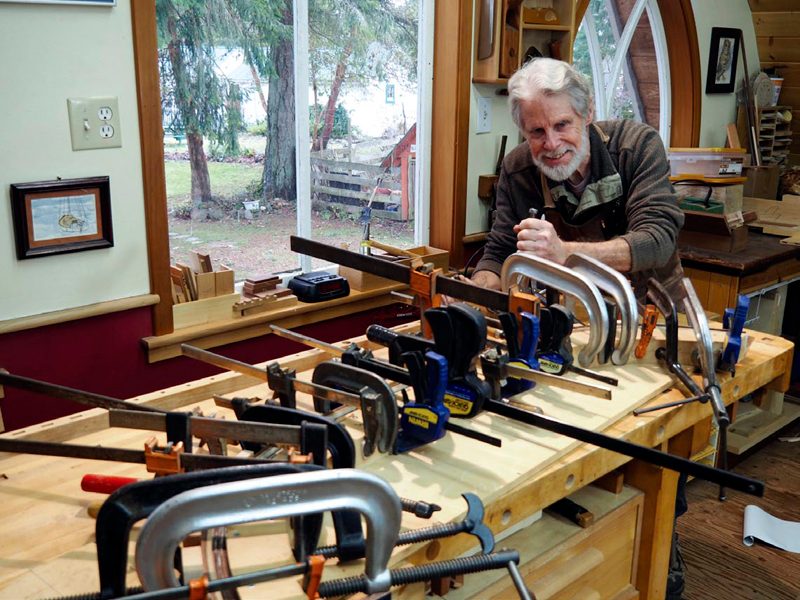
I applied PVA glue to all adjoining surfaces, though a plastic resin or urea formaldehyde glue also works as well and allows less spring-back. Use at least three 1/4″ MDF cauls between your laminations and clamps. I also used blocks to spread the pressure from each clamp. Keep your laminations in order using your “V” to ensure your finished stretcher pieces will blend into a seamless whole once laminated. Once in the form, draw a centre line on the laminations, referencing the centre line on the form. Allow lots of time for each of your three pieces to cure before removing the clamps.
Once out of the bending form, clean up most of the squeeze-out with a block plane. Joint one edge of each of the three pieces, then rip each to 1- 3/8″ wide on the table saw.
Assemble the lower stretcher
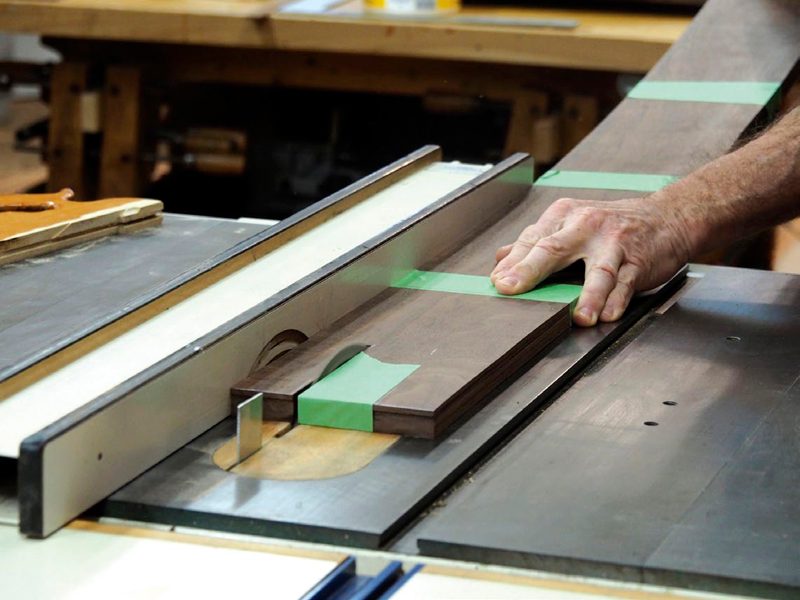
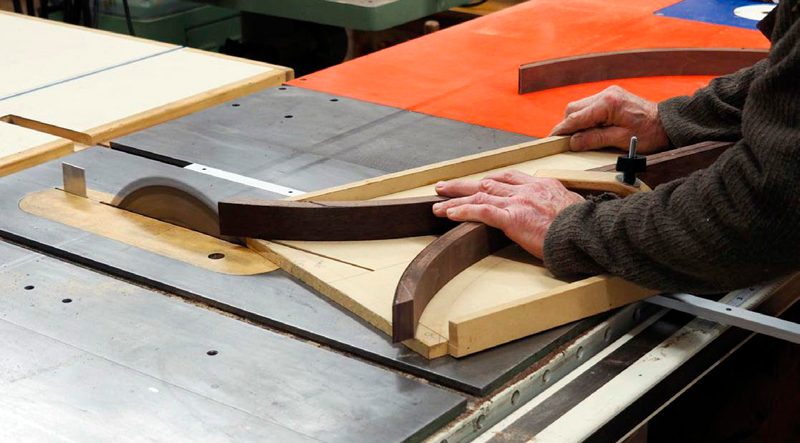
To create straight edges where the longitudinal portions of the stretcher go together, I used double-sided tape to attach the pieces to an MDF sled. Position the first piece on the MDF so 3/8″ will remain in the middle section after it’s ripped on the table saw. When the first piece is positioned correctly, mark its centre and trace its outline on the sled so the second piece can be located in exactly the same position. The third piece will be used later for the stretcher’s end pieces.
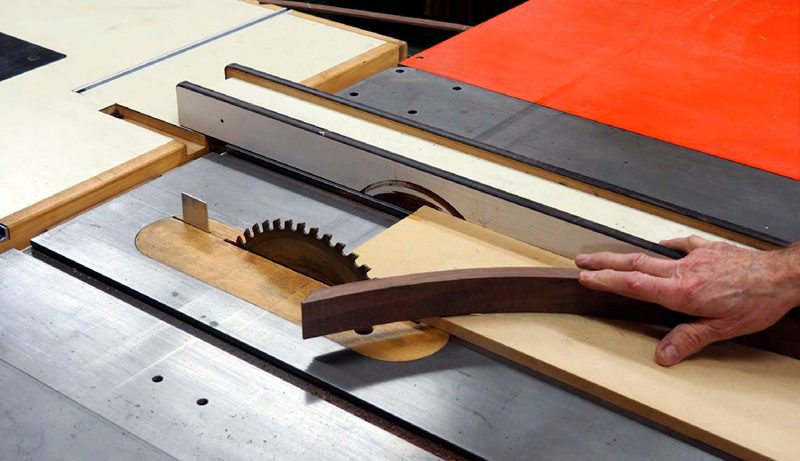
Leaving the second piece of the stretcher on the sled (or attaching it to a narrower piece of MDF), set your fence to 6″ and cut the ends so they will be square to the legs. Cut the second piece as well. If you’re unsure, it will be a good idea to add some hold-down clamps to the 6″ wide board to keep the ends of the workpiece stable during the cut.
You can modify the same sled for cutting the bevels where the longitudinal pieces of the stretcher meet the curved end pieces. Fasten a runner to the bottom of the sled at an angle of approximately 72°. My sled has raised borders to ensure the stock doesn’t move when being cut. Again, additional hold-down clamps can help keep the workpieces stable during these cuts, if needed.
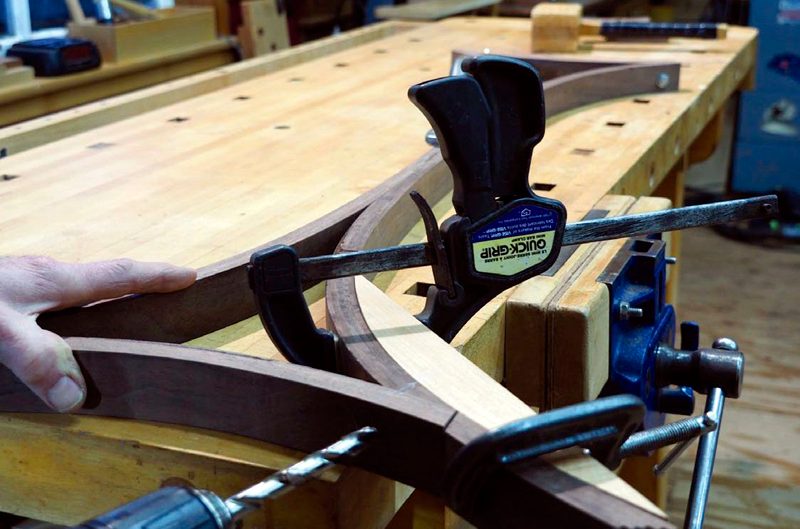
Dry-clamp your stretcher pieces together, keeping your centre marks aligned. Place the clamped assembly on your full-size drawing to be certain it’s square. If it’s a bit longer or shorter than your drawing, that’s okay, as the legs can be moved to compensate. However, it’s critical it be square. When you’re satisfied with the fit, sand, glue and clamp up these parts.
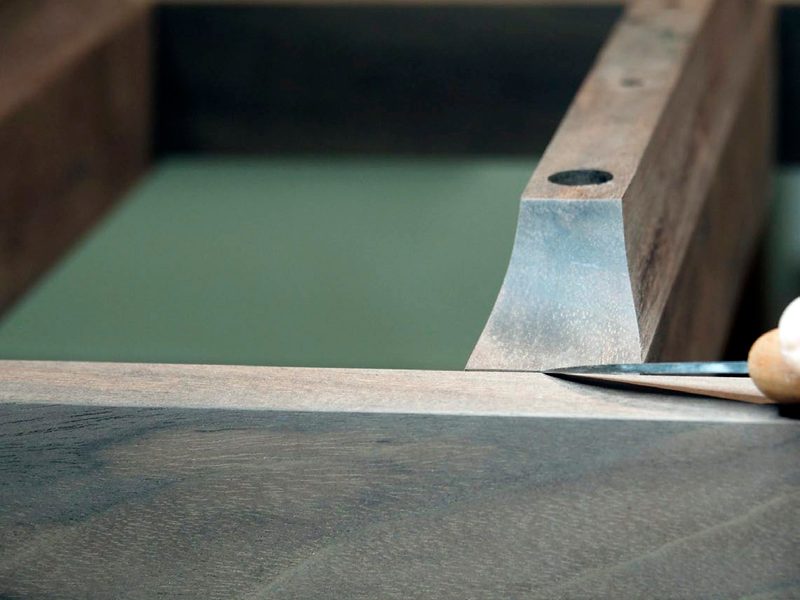
Cut the curved end pieces for the lower stretchers from the third long piece. Place them against the ends of the glued section, sliding them into a position that creates symmetrical curves. To cut the ends of these shorter pieces accurately, place them on your full-size drawing and scribe cut lines . Trim the adjoining surfaces with a block plane so they fit together without gaps.
I cut cauls to the shape of the lower stretchers to facilitate cutting their mortises with my Festool Domino. Hand cut mortise and tenon joints or dowels can be used wherever I have used Festool Dominos. The cauls position the ends of the stretchers perpendicular to the top of the cauls.
To drill the holes for the dowels, back the workpiece up with the caul to prevent tear-out. Use 1/4″ bolts through the holes backed up with washers to prevent damaging the surface of the workpieces, and clamp the stretcher sections together. When the glue is dry, remove the bolts and add the dowels. I cut dowels from straight-grained walnut to match the rest of the table.
The upper stretchers
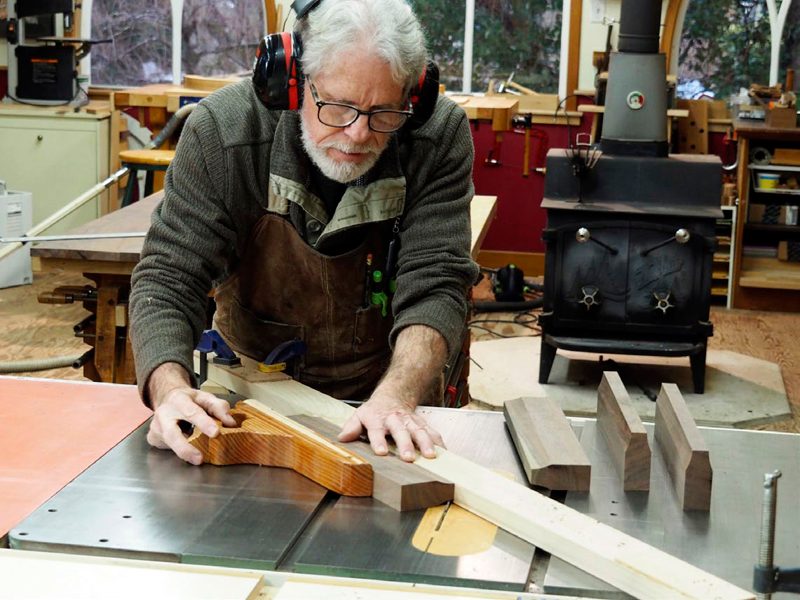
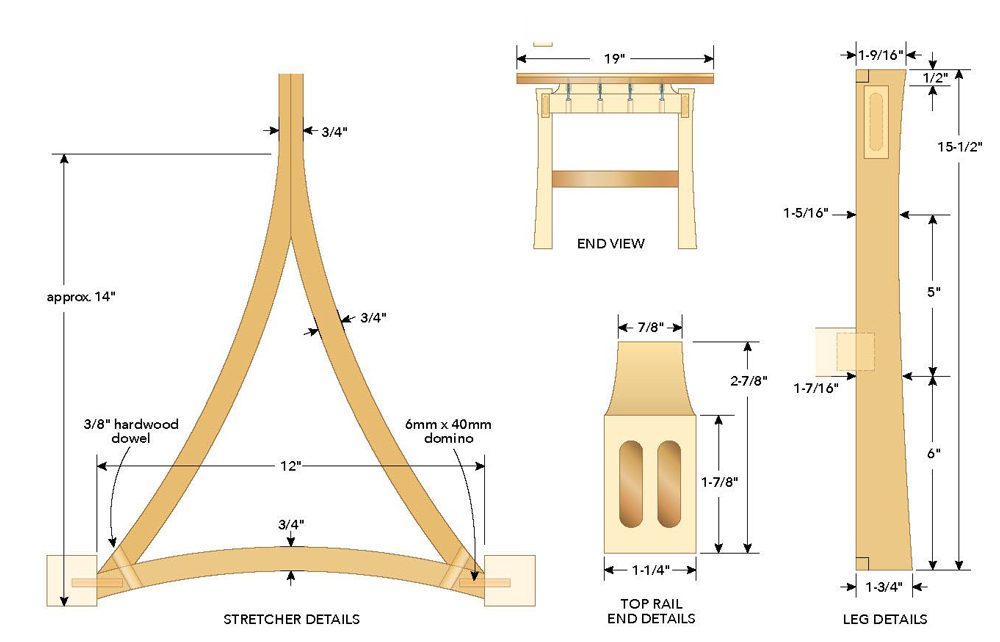
I cut curves on the tops of the upper stretchers to help give the floating top a sense of being lifted. On a low coffee table this will seldom be seen, but the same feature on a matching desk or hall table will be more noticeable. Cut the curves on the table saw. Clamp your fence securely and use scrap pieces for test cuts. Cut the curves in the ends on a bandsaw or scroll saw and clean them up on a spindle sander. Sandpaper wrapped around larger dowelling will work as well. I used two 10mm Dominos for tenons in each end of these stretchers.
Aprons
Cut your aprons the same length as the lower stretcher to ensure your legs will be plumb when the table is finished. When choosing lumber for this project I set aside some walnut with grain that nicely compliments the curve of the underside of the apron. I milled 1-3/4″ wide floating tenons to join the aprons to the legs. Using the Festool Domino, I cut 10mm mortises to the same width and 30mm deep.
Joining the top stretchers to the aprons
I cut mortises in the aprons that leave them a little proud of the stretchers. After dry-fitting and marking them I sanded them flush.
Attaching the tabletop
I drilled 1/2″ diameter holes in the top 3/4″ of the upper stretchers so the screws attaching these stretchers to the tabletop will bend slightly as the solid wood top moves with the seasons. The two centre holes don’t need to be wider than the screws.
Finishing
I prefer to finish parts before assembly. First, however, I dry-fit all the parts, except for the top, to ensure mortises and tenons go together smoothly and everything is plumb and square. I finished this project in Osmo Polyx Satin 3043.
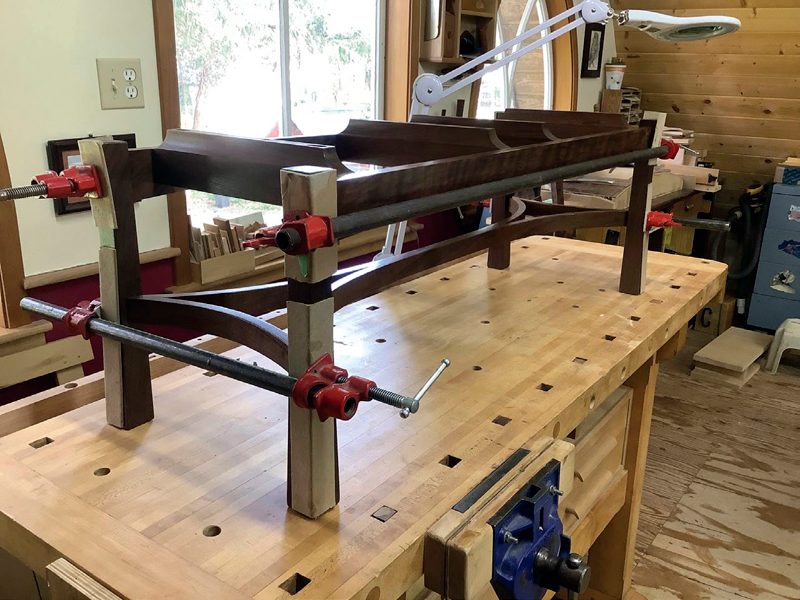
Glue-up
I glued the top stretchers to the aprons first. The legs and lower stretchers were next. Do a dry assembly first because this is a tricky glue-up. I used Titebond III, but using hide glue or epoxy will allow a long working time. Conscript a helper, if possible. If all of your mortise and tenon joints are cut accurately you won’t require a lot of clamping pressure to attach the legs to the aprons and lower stretcher.
Attach the top
Before attaching the top, slip your screws into every pre-drilled hole in the stretchers to ensure that none come through the surface of the top. If any screw projects more than 5/8″ beyond the upper surface of the stretcher, use washers to shorten its projection or use a shorter screw. The lower stretcher makes it difficult to drill the pilot holes and fasten some of the screws.
A final note
The Edward Barnsley stretcher is a challenge to build, but it gives this table an elegance it would not have with straight stretchers. Keep your jigs and sleds because they will make the whole process easier when you build that desk or hall table to match.
Photos by Paul McCuish
Safety First
This is McCuish’s set-up to machine the bevel on the ends of the curved top. Move your fence to the left side of your blade to allow your off-cut to fall onto the table rather than jamming between your fence and the blade.
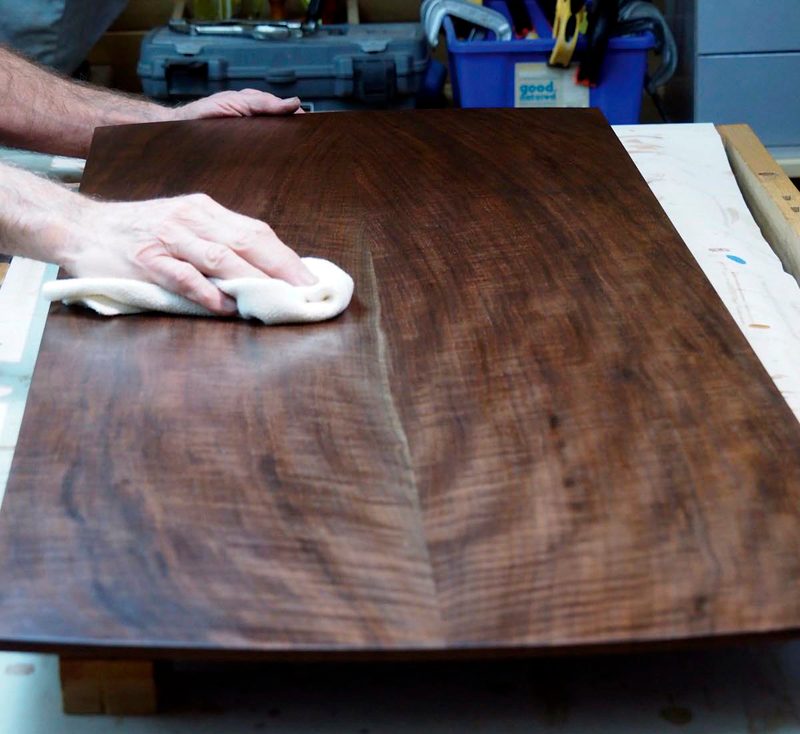
Nice Grain
Claro walnut is often highly figured, though you can make your table out of any species. Claro walnut is durable and easy to work, and its unique colour produces a rich finish.
Post Cleanup
The burns and machine marks on the curved bevel were not pretty, so McCuish planed, sanded and finished the tabletop before working on the rest of the table just to make sure it could be sized to his liking.
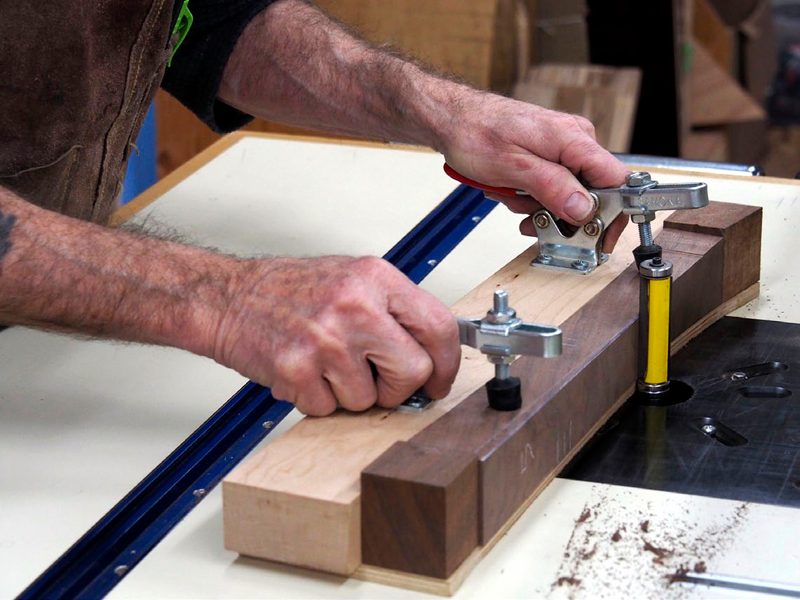
Avoid Tear-Out
Attaching blocks at both ends of your routing jig will help to hold your stock firmly in place and will prevent tear-out.
Cut an Extra
Cut one, even two, extra laminations in case some are damaged in the thickness planer.
Determine Grain Direction
To avoid having to use your extra laminations, mark the direction of the grain on each piece and feed them into the planer so the portion of the lamination that’s being machined isn’t lifted off the table at all.
We Love Masking Tape
McCuish uses masking tape to secure the laminations to each other while he rips them to width. He finds this approach makes it easier to keep the laminations in order, ensuring the grain and colour are continuous.
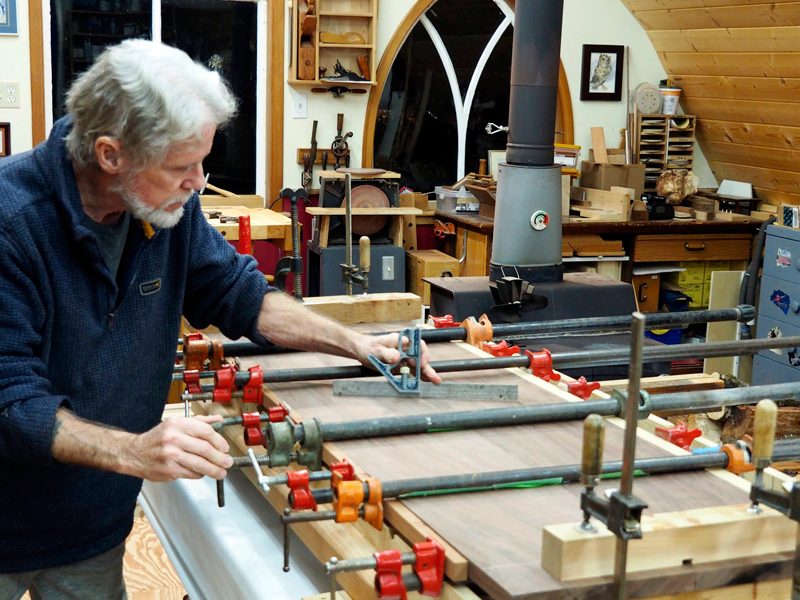
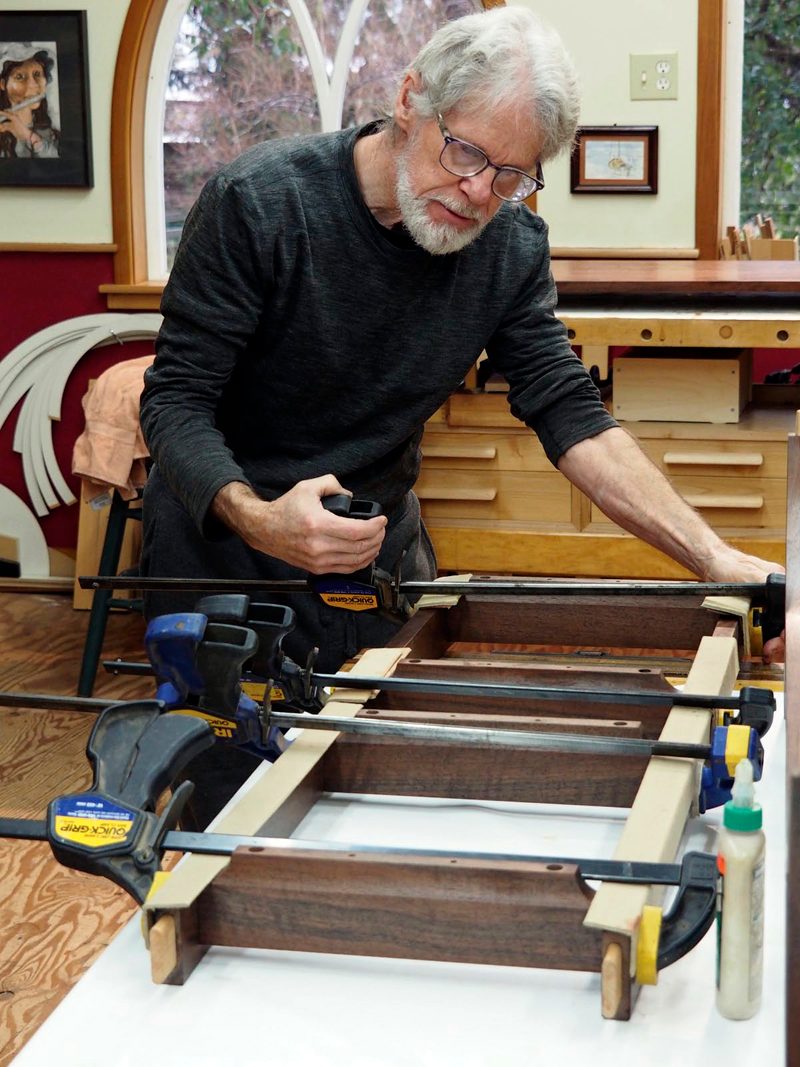
Too Many Clamps?
No, you can never have too many. Here, McCuish is using vise grips to tighten one of his clamps. Clamp near the middle first and work toward the ends, watching that your laminations stay flush to the base of your form as you work.
Cutting Mating Surfaces
Fastening each piece of the stretcher securely and accurately to your sled is critical. The mating surfaces should be 17" to 18" long and should extend an equal distance from your centre mark.
Cutting Angled Ends
If you’re relying on the sticky tape for these final cuts be certain that it’s still holding your work securely. Replace it or add a fence or hold-down clamp to be safe.
Cutting Stretchers to Width
McCuish put fresh double-sided tape on the sled to cut each piece to width. He keeps steady pressure on them as they pass through the saw. Notice that his pinky finger is straddling the edge of the fence to ensure his hand will stay clear of the blade.
Use Your Full-Size Drawings
If the longitudinal section of the stretcher is a little wider or narrower than 12", increase or decrease the dimension of the end pieces accordingly.
Mortising the Ends
Cutting the mortises square to the ends of the stretcher is critical for keeping the table legs square.
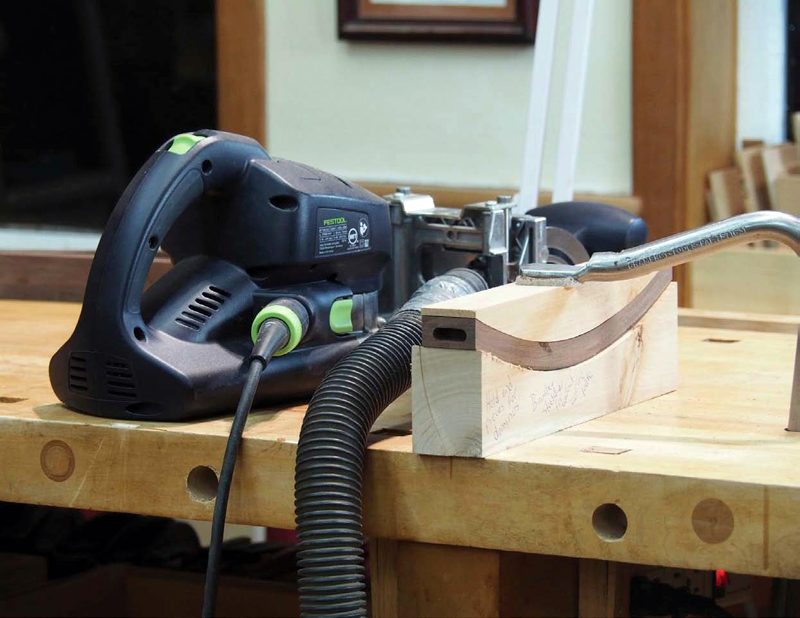
Holes for Dowels
Hold the end pieces firmly to their mating parts. When the first corner has been drilled, use a bolt to hold it in place while the next holes are being drilled. Back your stock up with your caul and use a block to prevent the pieces from moving while being drilled.
Adding Curves to Flat Surfaces
A table saw, when equipped with a straightedge clamped to its table, can cut curved surfaces into faces of workpieces. In this case, the upper faces of each of the top rails gets a curve added to it. Use a piece of scrap to dial in the curve. Multiple passes are needed; raise the blade about 1/16" with each pass.
Finish the Ends After
Dry fit the top rails with slip tenons and mark their ends, then sand them to your marks with a spindle sander.
Allow for Expansion
Giving long screws room to bend with the seasonal movement of wood is a technique used by Charles and Henry Green and others that has stood the test of time.
The Final Coat
The tabletop receives a third coat of Osmo. Two coats were sufficient for the rest.
Keep It Square
Check the diagonals of the aprons to ensure this portion of your table will be square. If it isn’t, the tenons won’t fit tightly into the mortises in the legs, and your table will wobble.
Attaching the Legs Is Tricky
Warming hide glue to 120°F in water will help to make the tenons slip easily into mortises. Installing the legs in stages is also an option.
Almost Done
A right-angle attachment for your drill will make the final step much easier.
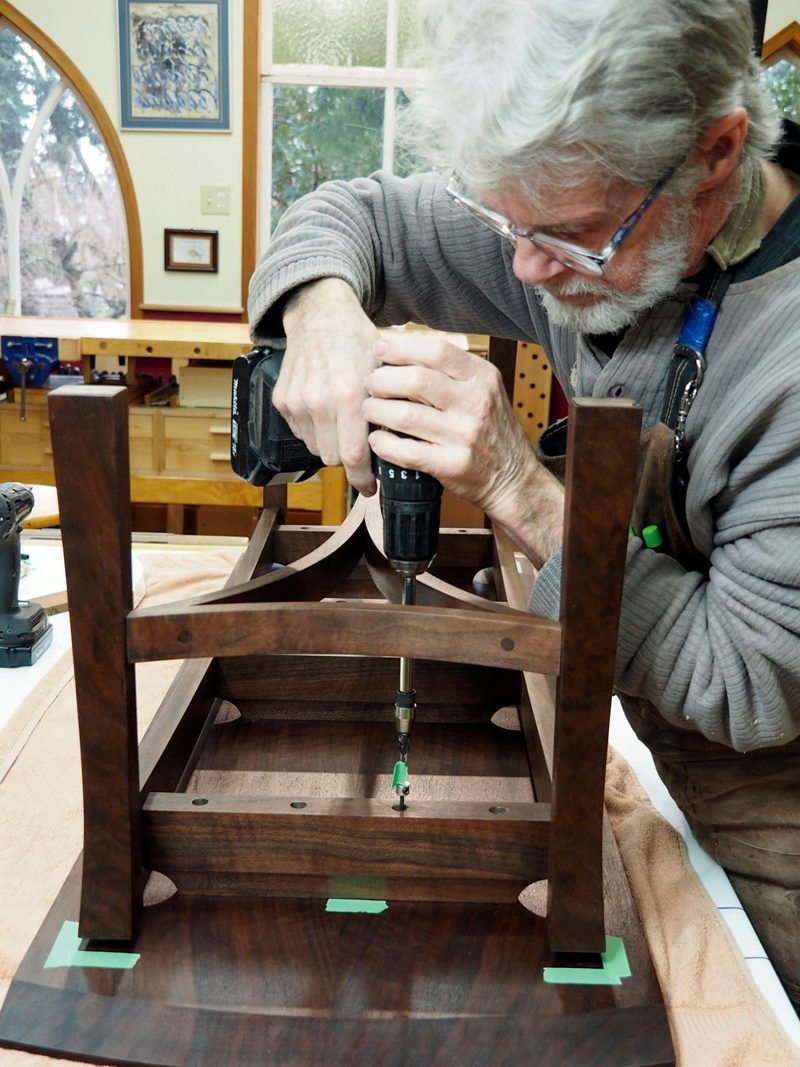
Illustration by Len Churchill


You’re welcome, and thank you for your generous comment.
Amazing, intuitive designs is all I can say. And yes A huge big Thank tou