PROJECT
Canada goose

David Bruce Johnson

Find more Carving projects
This project - carving a Canada Goose with its head turned – is a very simple application of the Johnson Method.
In the last issue, I introduced you to the Johnson Method for Direct Carving. The Johnson Method is an effective process for carving a three-dimensional subject without creating a detailed pattern or clay model for reference. Instead, the Johnson Method uses a simple wire skeleton to help position the subject accurately in the wood. Subsequently, carving can be done with confidence that the wrong wood won’t be removed.
This project – carving a Canada Goose with its head turned – is a very simple application of the Johnson Method. I will also show you a method for colouring a carving without using paint.
Canada goose
Carving
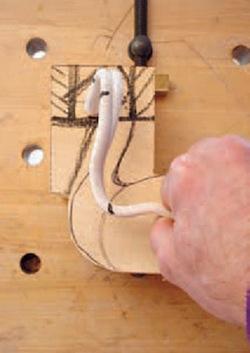
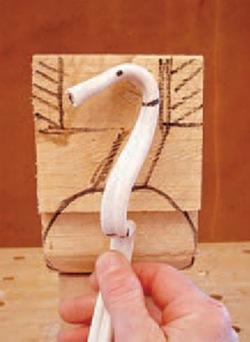
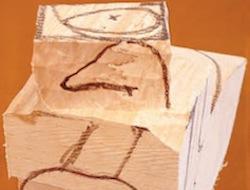
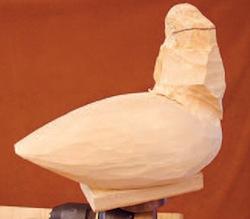
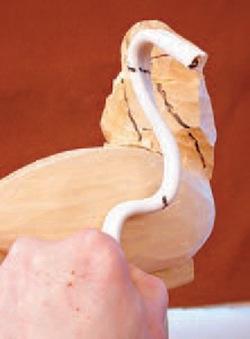
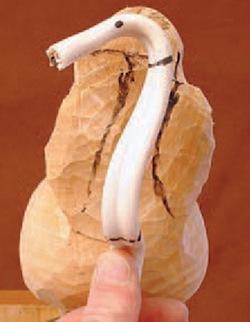
Anatomically speaking, a Canada Goose has a small tear drop head and a large tear drop body connected by a tube. To save time, I drew a profile of my subject onto the wood block and cut it out (the body only from behind the head to the tail) with my bandsaw. That left a vertical block where the head and neck will be carved using the Johnson Method. For my reference skeleton, I bent a scrap piece of electrical wire (nice and fat so it will show in the photos) to match the head and neck of my drawing. The dimensions of this skeleton are fixed; even though I bend and twist it into a different shape/position, it will remain anatomically accurate.
The Johnson Method for Direct Carving is essentially a ‘connect-the-dots’ approach. First, the head is positioned and carved. Second, the body is shaped. Third, the neck is carved to join the head to the body.
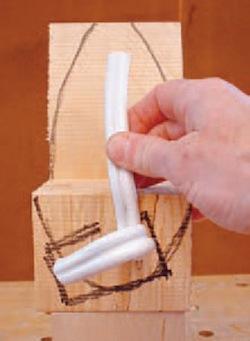
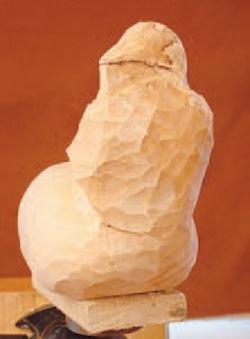
Establish the position for the head by comparing your wire skeleton to your block of wood from three views: front, side, and top. Note that the position of the head is controlled by the bends in the neck. Now, the head can be carved with confidence that you have enough wood in the right place for the neck. When you can’t resist the urge, remove some of the wood in the neck area. Carve the large teardrop for the body with as much detail in the shape as you wish. I chose to keep the shape very simple and merely rounded the body. You will be forced to remove more wood from the neck area to establish the base of the neck. Using the wire skeleton for reference, I determined the curvature of the neck to join the head to the body in a graceful and pleasing way. I worked from several angles and gradually reduced the wood to its final form. To avoid breaking the neck, this is a time for very sharp tools.
Adding Colour
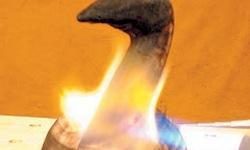
Since the carving is wood, and a Canada Goose is a brown bird with a black head and neck, it’s easy to colour by burning. Use a torch to actually burn the entire carving. Lightly burn the body, but char the head, neck, and tail black. Use an old rag to rub off the superficial burn, and then sand the body (120 grit sandpaper) to create a smooth overall brown body. Don’t sand the black areas of the neck and head. Instead, cover them with black shoe polish. To create the Canada Goose’s characteristic cheek patches, scrape away the shoe polish down to raw wood.
And there you have it – your own decorative Canada Goose, created using the Johnson Method for Direct Carving. In the next issue we will cover wood grain and its contribution to effective carving.
Draw profile of goose on blank
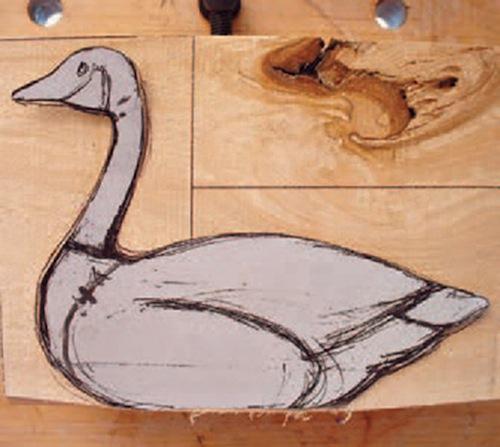
Head and neck profiled
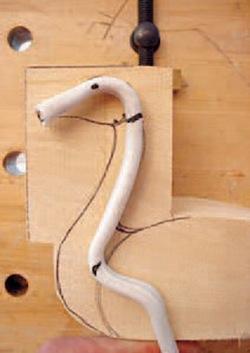
Front profile
Side profile
Top profile
Begin carving the head and neck
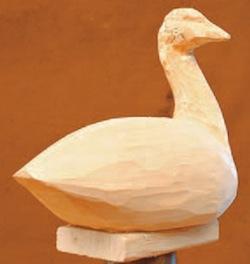
Carve the teardrop shaped body
Carved form before colouring
Outline curve of neck from one angle
Establish neck curve from different angle
Final form achieved with sharp tools
Lightly burn the body
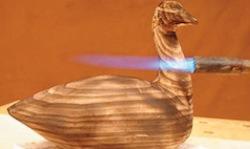
Char head, neck and tail