PROJECT
Build an Upholstered Foot Stool

Mark Rose

Find more Chairs and benches projects
This easy-to-make project will teach you some basic upholstery techniques. It will also give you place to put your feet up after a busy day and read some of the magazines stored inside the stool.
When making the legs, it’s best to choose a hard, straight-grained wood so it will match nicely after the mitres are cut and the halves are glued together. It’s easiest to mitre the leg parts then glue them up in one blank before cutting four legs out of the length. A 36″ long board will be mitred in two, giving you mating, mitred parts. Machine the wood to 1″ x 6-1/2″ x 36″ long. Put a sharp blade on the table saw and tilt the blade to exactly 45 degrees. The fence should be set at 2-1/4″ from the inside of the 45 degree angle, in order to split the blank in half. If you’re a little large, don’t worry, as the exact leg profile will be shaped later. Make your cut as even as possible and keep the wood from lifting off the saw table, as this newly cut surface will become your gluing edge. If you’re having problems getting a good finish off the blade, move the fence in a hair and take a light skim cut or run the pieces over the jointer with the fence at 45 degrees.
Lay the two pieces on the workbench with the bevel down and in to each other. Apply strips of masking tape between the parts, bringing their mitred tips together. Test the fit by turning the pieces in together – they should close tightly. Glue the inside of the bevel and turn the pieces together for good. If needed, add a few clamps to close the joint. Use good masking tape; you’re looking for a tape that stretches a bit but does not break.
When the glue is dry, remove the masking tape and scrape off any squeeze out. Now cut the single long piece into four pieces 8-3/16″ long. You can make the template for the leg out of 1/4″ masonite or plywood. Draw out the pattern from the template on the inside of the leg and rough off the waste using the bandsaw. Temporarily attach the template using two-sided tape. Use a top-bearing flush trim router bit in the router table to finish the edges. Remove the template and repeat the process on the opposite edge. If you make more than one template the job goes faster. You could also bandsaw close and sand the edge smooth.
The edge profile on the legs is made from a fingernail round-over bit (Lee Valley 16J6151 or Busy Bee 757714). The sides and top are profiled using the router table.
Build an Upholstered Foot Stool
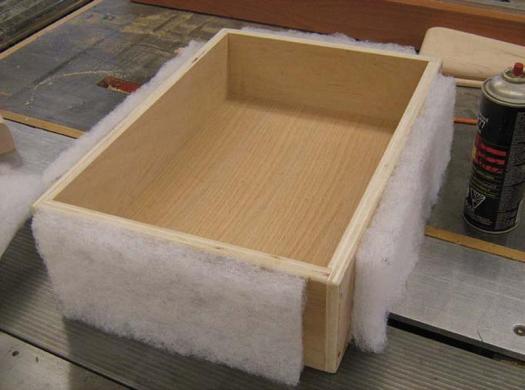
Build the box
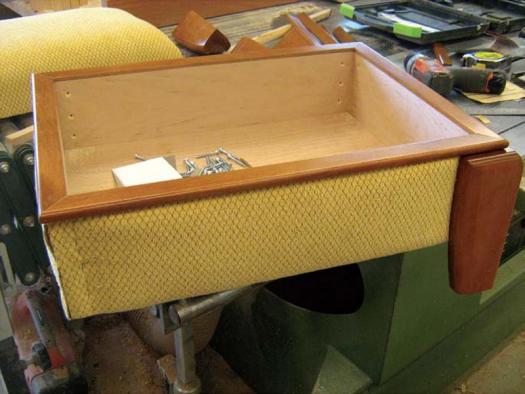
Next the simple box is made which the four legs will be fastened to. This 5″ high box is made from 3/4″ plywood. Rabbet joints fastening the four sides together are 1/2″ deep x 3/4″ wide and are machined on the two long sides. Cut all four sides 5″ wide. The length is what determines the overall size of the stool. I made mine big enough for two stacks of magazines. I cut the two long sides 20″ long, and the two short sides 13″ long. Machine a 1/4″ deep x 1/2″ wide dado 1/2″ away from the bottom of the sides to accept the 1/2″ plywood bottom. Assemble the sides and bottom with screws or brads and glue. Clamps ensure everything is tight. Once assembled, a 1/16″ x 3/8″ rabbet needs to be cut in the top, outside corner of the box. It will form a fabric stop.
Next you will have to machine some 1-1/8″ wide 5/8″ thick trim. This trim will be mitred and attached to the top of the box and the underside of the top, after the fabric has been applied. With my 20″ x 13″ box, I machined two 6′ lengths. Rout a 5/8″ bullnose or half round on one of the edges and a 7/8″ wide by 3/16″ deep rabbet on the other. That will leave a 7/16″ thick tab that can be attached to the box or top. It will also provide a small lip that will visually cover the slightly varied fabric edge. Sand and finish all the “show wood” as upholsters call it – the legs and trim – and apply a finish.
The Top
The top is 3/8 Baltic birch, cut the exact size of the box. With great care, I made some plunge cut slots on the table saw but the same thing can be done with a router. Space the slots about 1-1/2″ from each other and about 2″ from the edges. The idea is to make the top slightly springy and more comfortable but still rigid without going through the added time of traditional webbing. It’s certainly not the end of the world if you didn’t add these slots to your top.
Fabric
A trip to the fabric store or foam/upholstery supply is needed. I brought the top with me to get the foam cut to size. The top is 3″ high-density white foam but 2″ will work. Medium density was too soft for my liking. While you’re there, you could ask the store to bevel the corners back about an inch or so, but I used my bandsaw back in the shop, which cuts this density foam surprisingly well. You will also need a piece of white soft batting cut 3′ by 4′. If you add batting over the foam, it makes the surfaces feel softer. While you’re there, pick up some black bottom covering or some thin black fabric. Total cost was just over $20.
Upholstery
I used the 3M Super 77 spray adhesive to attach strips of batting to the sides of the box. Don’t apply batting right up to the corners. Staying back an inch from each corner will reduce the build-up near the legs. Spray the top board and stick on the foam. For the rest of this project you may want to get an inexpensive upholstery air stapler around $70 or an electric stapler to make the job much easier. Lay the top, foam side down, on the centre of the batting and rap it over to the bottom of the top. Staple one of the center points first, about 1/2″ from the edge. Pull the opposite edge tight at the center and staple it, then do the other two sides. Flip the top over, press on it and see if it feels and looks right. If so, flip it back over and continue working from side to side pulling and stapling. You may find it easier with a second set of hands. Trim off the extra batting when you’re done.
You will need just over a yard of fabric to cover the box. I would use a simple, small pattern to learn on. Large patterns can be difficult to centre and make look right. Cut pieces for the sides 2″ wider than the edge of the box, but the exact length. Staple at the top of the box into the 1/16″ deep rabbet made earlier. Then pull the fabric around to the bottom and staple it to the bottom edge. Cut off any additional fabric.
The top is little more difficult to cover with fabric, but similar to the batting procedure. Place the top upside down on the center of the fabric. Put one staple on one side then pull the opposite side tight and staple it. Work down the sides going back and forth but stop 2″ from the corners. At this point, it’s a bit like wrapping Christmas presents, you have to find a folding-in procedure you like. On mine, I folded the corner under and rolled the sides in to meet up at the edge. It might take a couple of tries, so don’t put lots of staples in until you’re satisfied. Trim off any extra fabric.
The black cover fabric is stapled at the edges to cover the box’s bottom and the underside of the top. The wood trim that was made and finished earlier is mitred on the corners, then attached with either screws or a fine finishing nail gun. To attach the legs, drill clearance holes for the screws on the corners of the box. Use a band clamp around the outside to hold the legs in place while you screw them on from the inside. They butt up against the trim. The top is hinged using four way hinges from Lee Valley (00H63.01). They have a nice built-in stop and they pull shut.
Photos by Mark Rose
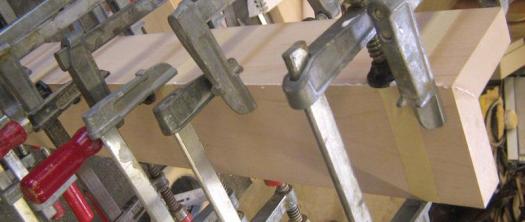
Glue the Legs
After applying masking tape to the front of the legs, apply glue to the surfaces and fold the legs together. If more clamping force is needed, use opposing F-clamps to close the joint.
Use a Template
After making a template, use it to mark the legs then cut the majority of the waste off with a bandsaw. You can then use double-sided tape to adhere the template to the leg and flush trim the rest of the waste with a router.

Springy Top
In order to give the top some additional comfort, you can machine grooves in it before applying the batting and fabric.

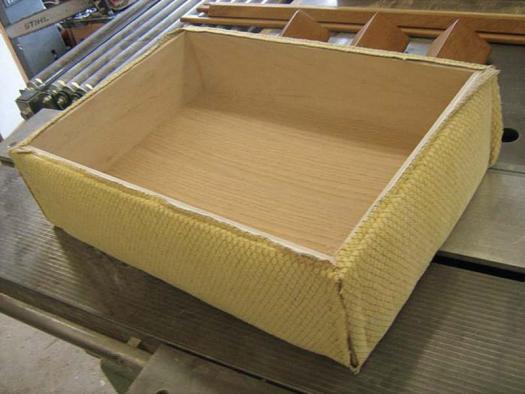
Apply Batting
Once the box is made, use a spray adhesive to attach the batting to the sides of the box. The batting gives a softer look and feel to the stool.
One Nail at a Time
First attach the fabric to the top by nailing through the fabric into the 1/16" deep fabric rabbet on the top of the box. Then slowly work your way around the rest of the perimeter.
Show Wood
With the fabric in place, install the “show wood”; the trim on top of the box and the legs. Install the trim to the underside of the top as well.
It’s a Wrap!
Like wrapping a Christmas present, the corners of the fabric have to be dealt with carefully. Don’t use too many nails until you’re satisfied with the look.
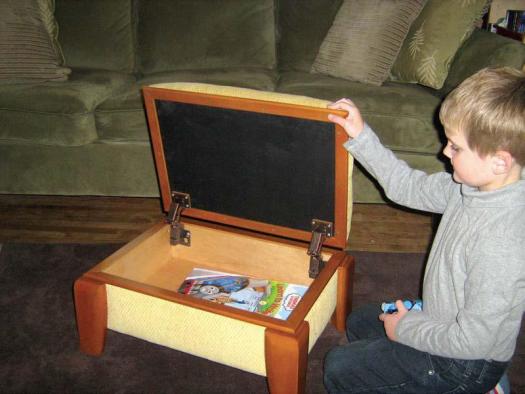
Illustration by James Provost