TIPS & HOW TO
Turning beads and coves

J.P. Rapattoni

This article will help you get more use out of your gouges and rely less on your scrapers for shaping.
For many new turners, finding the right technique can be a little frustrating, and they often end up using scrapers to do most of their turning.
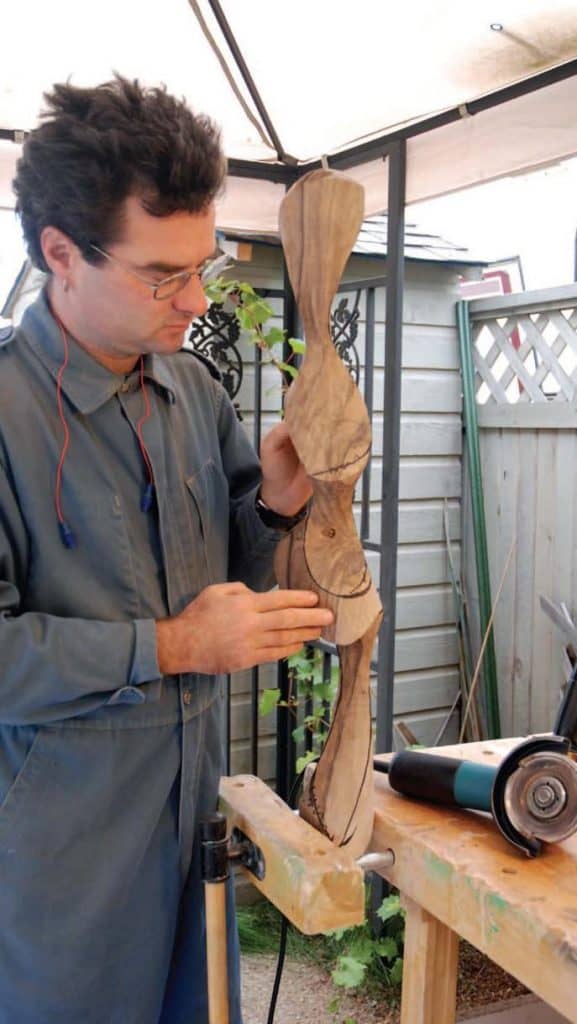
There are only three shapes you can produce on a lathe – a flat, a bump or “bead”, and a hollow or “cove”. You combine these three shapes to produce your desired form. The spindle illustrated, although wildly shaped, only contains combinations of flats, beads and coves. In my last article I discussed the importance of rubbing the bevel (see Basic Techniques, issue #39). But how do you maintain bevel contact when the shape of the work is always changing direction? Practice the techniques below and you will soon see it’s not as difficult as it first seems.
Once the blank has been roughed out and is running true, it’s time to start the shaping. The first thing to remember is to always cut “downhill”. That is to say, cut from the large diameter to the small diameter. Cutting in the opposite direction brings the cutting edge up under the grain and causes tear out. Whether you want to cut a bead or a cove, it has to be done in steps, creating a space for the chisel to progress into the work.
Cutting a Cove
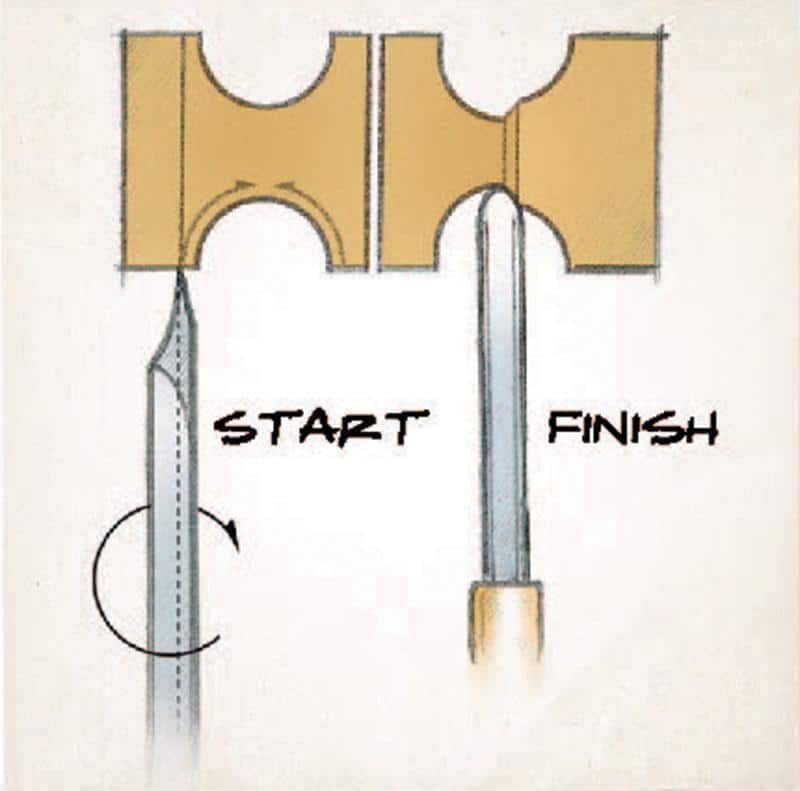
To cut a cove, begin in the center of the desired cove. Cut a small cove from one side to the center, then from the other side to the center. Continue in this manner bringing the cove to the desired size.
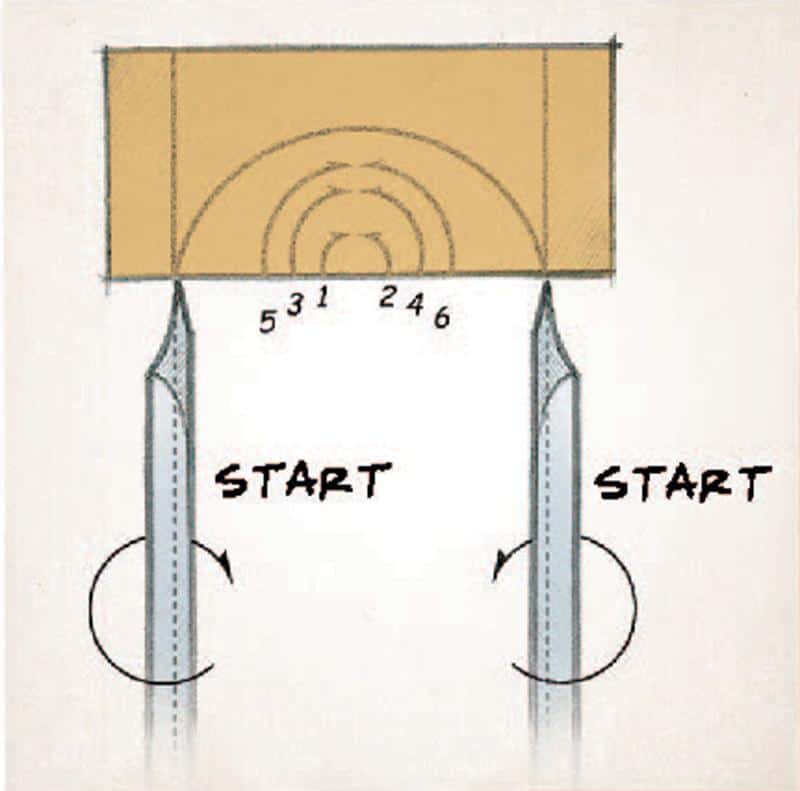
Start with your tool rest about ⅛” below center. Hold the chisel horizontal and perpendicular to the axis of the lathe, with the flute facing the center of the cove. Starting this cut is the most difficult part. The gouge may want to “skate” a bit when you start. If that happens, swing the handle away from the center a bit, start the cut, and then quickly swing the handle back to the start position.
From the start position, make the cut by lowering the handle and twisting it at the same time so the chisel ends up with the handle low and the flute facing up in the center of the cove. Start again on the opposite side and repeat, twisting in the opposite direction. This should be done in one smooth, fluid motion, as if you were scooping the wood out.
Try to get the two sides to meet cleanly at the center of the cove. Changing the rate at which you twist and lower the handle will change the shape and size of the cove. While practicing this cut, make sure that the bevel always stays in contact with the wood.
Turning a Bead
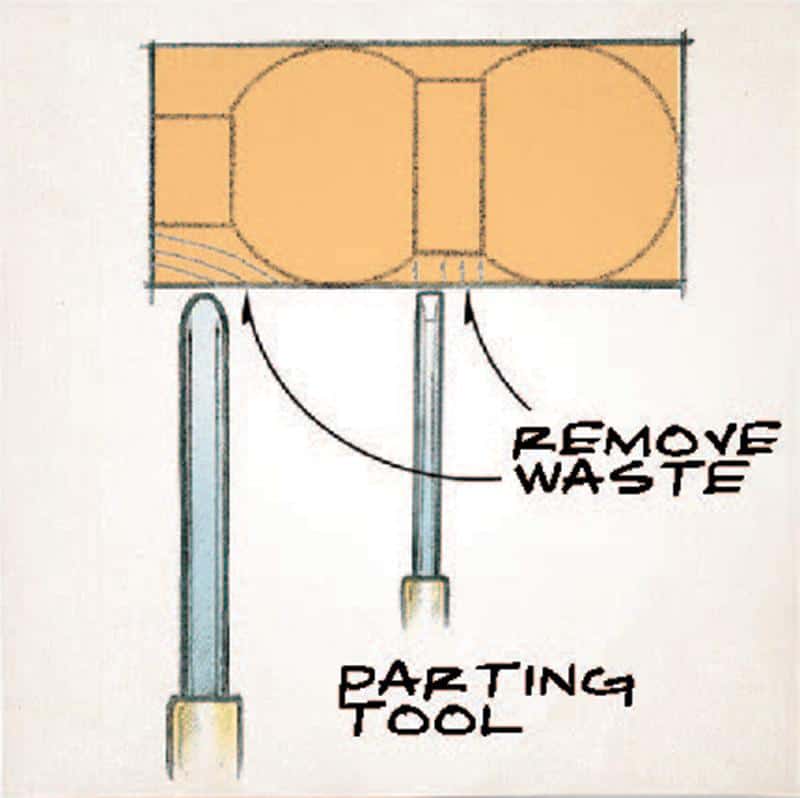
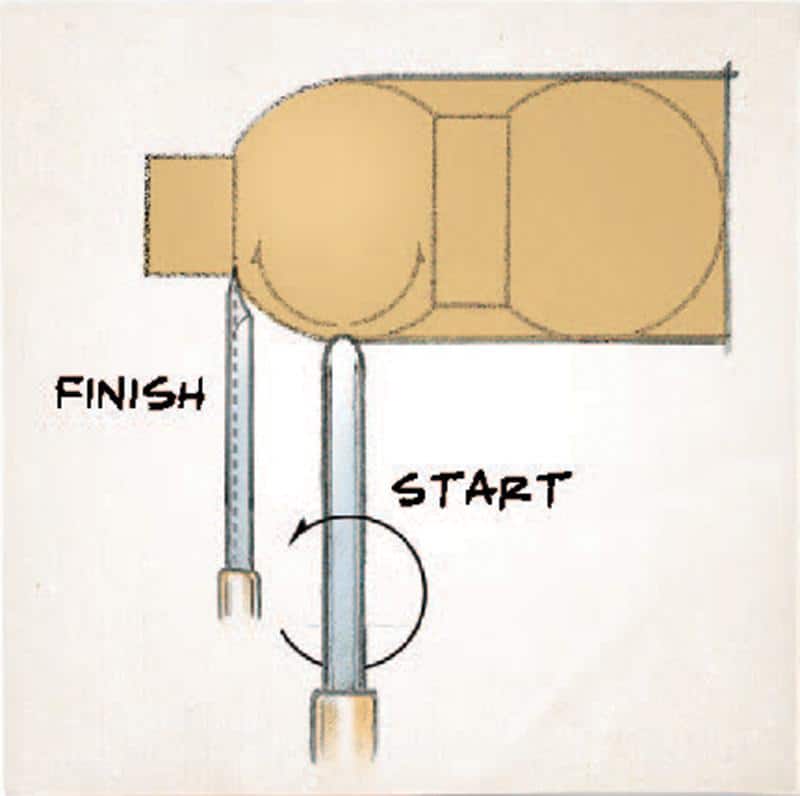
Turning a bead (or ‘rolling a bead’) is just the opposite of cutting a cove. Start with the chisel handle low and the flute facing up. Lift the handle and turn the chisel until the handle is horizontal and the flute is facing the side. Work from the center to each side, starting at the large diameter working toward the small diameter (i.e. downhill). Just as with cutting a cove, you must remove material ahead of the cut, so that the chisel has a place to go. If there is a flat on one or both sides of the bead, start by parting down each side to the rough dimension, and then roll the bead between the parts. If you are turning a bead or a ball at the end of a work piece, start by removing the corner and working towards the finished diameter. Just as with turning a cove, you control the size of the bead by changing the rate at which you raise the handle and roll the chisel. When you roll a bead properly, it’s very easy to see how the bevel stays in contact with the work at all times. Turning a flat, whether it is parallel, perpendicular, or at an angle to the axis, can be done in a number of ways. I will discuss some of these techniques, focusing on the skew, in a future issue.
Starting a cove cut
Steps in turning a cove
Starting a bead
Steps in rolling a bead


Just starting out doing wood turning and find your explanations and diagrams incredibly helpful. Many thanks.