TIPS & HOW TO
Routing Basics – Part 5: Joinery Bits

Michael Kampen

Without a bit, the router is just a fancy paperweight; but when you slip one of these joinery bits into the collet you unlock the potential of creating a multitude of strong and attractive joinery options for your projects.
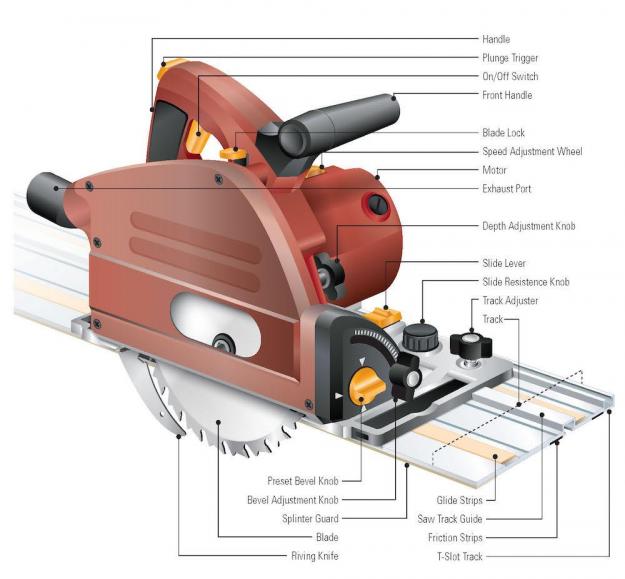
The router excels at cutting joinery with a precision and speed that are hard to match. The bit does the cutting and determines the nature of the joint, while the guide system determines how precise the joint will be. In this article we take a look at some of the joinery bits woodworkers can choose from, and in future articles we will take a closer look at guide systems. As with all tools, time spent setting up the cut and defining the range of motion for the router will reward you with accurate and precise results. Most of these joinery bits are used on a router table. Before using any bit ensure that you understand how it functions.
Dovetail
Dovetail bits will likely be the first joinery bit to come to mind, and there are many to choose from. These bits are available in a range of lengths, with the cutting sides angled from 7º to 20º. The bits are typically used in conjunction with a dovetail jig, of which there are several high quality models to choose from, including the Leigh Super Jig, Akeda BC24, and Porter Cable OmniJig. Each of these jigs operates in a slightly different manner, but they are simply guides for the router and bit. Not all dovetail bits are the same and it is important to note that various dovetail jigs require specific dovetail bits. Some jigs use a guide bushing to control the path of the router while others use a bearing. If in doubt, consult your manual or contact the manufacturer for the specific bits to fit your jig.
Dovetail bits can also be used to create sliding dovetails, for example to join a shelf to a cabinet side. When cutting sliding dovetails, the bit is completely buried in the wood and must work very hard to cut the groove to house the tail. To achieve the best possible quality of cut, it is a good practice to make the initial pass over the stock with a straight bit. This will clean out the majority of the waste and the dovetail bit will only need to cut the angled sides of the channel. You can mill the groove with a hand held router and an edge guide, or on a router table. However, you should always mill the tail across the edge of the board on a router table. Maintain firm pressure on the board and make a shallow climb cut along the sides. If you simply were to rout the edge in one pass in the traditional direction, as the cutter exits the material the fibres are not supported and will tend to break out or leave a fuzzy edge.
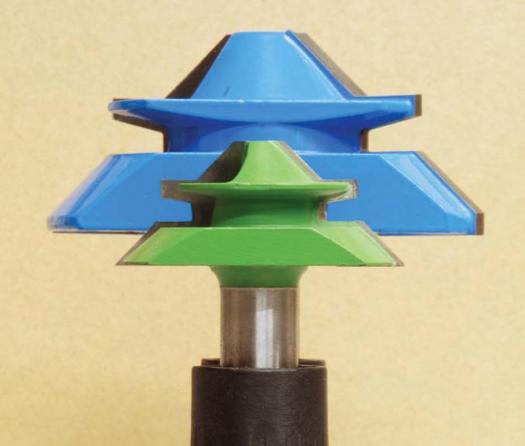
Lock Mitre
The lock mitre bit is the answer when you need to make a strong corner joint with plenty of glue surface. It’s ideal for assembling frames, boxes, boxed posts and columns. The lock mitre bit creates a symmetrical 45º cut on both pieces with one bit, and you don’t have to change the bit set-up. One side of the joint is cut with the piece laying flat on the router table and the other side is cut with the piece on-end, running along the fence. This bit must be used in a router table with a fence, and setting the proper projection from the fence and the proper bit height can be a little finicky. The most complete and comprehensive instructions I have come across for using these bits is included when you purchase one of these bits from Lee Valley. The instruction sheet is also available on their website. Fine tuning this bit is a matter of setting the proper projection from the fence first and then dialing in the final height setting. Prepare some test pieces – you will need to make several test cuts as you sneak up on the perfect setting. Each thickness of wood will require a different setting, once you have achieved a perfect fit, make a cut on an extra piece of wood, which you can save as a quick set-up guide. Use the guide to align the bit for wood of the same thicknesses in the future. It will save you both time and frustration.
Lock mitre bits are available in several different sizes and it pays to check the specifications to be sure you have one that will accommodate the thickness of wood you will be using. This was one of the first router bits I ever bought, and I made the mistake of ordering it through a catalogue from a dealer that didn’t know any more about the bit than I did at the time. The bit that I ended up purchasing was not only huge and expensive, it was the wrong size for the single speed router and 3/4″ stock I intended to use it with. The two sizes sold by Lee Valley Tools will cover any stock thickness you are likely to encounter. A similar bit with a 22-1/2° mitre will produce a box with eight sides.
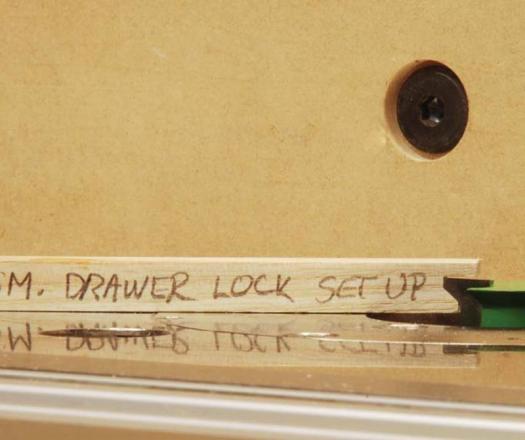
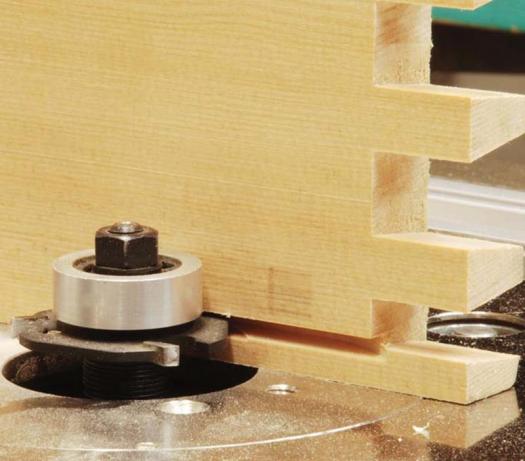
Drawer Lock
A variation on the lock mitre bit is the drawer lock bit. As the name implies, this bit is used to cut the corner joints for drawer boxes. Like the lock mitre joint, this bit increases the glue surface resulting in a stronger joint. The geometry of this bit also provides another advantage; as you tighten the clamps during the glue-up, the joint draws itself tightly together. Like the lock mitre bit, this bit comes in a couple of sizes, one for ¾” thick stock and one for stock less than ½” thick. These bits work equally well in plywood or solid wood and are a fast and efficient way to make boxes and drawers.
Like the lock mitre bit the drawer lock bit uses one setup to cut both sides of the joint, with one piece passing through the bit horizontally and the other vertically. Setting up this bit is much easier than the lock mitre, but you will still need to rout some test pieces and don’t forget to make a set-up piece once your settings are perfect.
Slot Cutter
The slot cutter is one of the most widely used joinery bits. It excels at cutting slots in stock for cabinet backs and drawer bottoms and provides a much cleaner result than using a table saw. If you use splines when gluing up panels, then using a slot cutter to cut the panel grooves is fast and simple. I find it much easier to mill splines of the exact size I need using a thickness planer, than trying to mill grooves to the exact width of pre-cut splines.
These bits consist of a cutter mounted on a shaft with or without a bearing on top. There is a nut on the top of the shaft and some washers acting as spacers to hold everything together. Slot cutters are sold as complete units or you can purchase the pieces separately. Buying the pieces separately allows you to purchase one bearing and one shaft and then a number of different slot cutter heads of various widths. While this can save you some money, the inconvenience and the need to reconfigure the bits for cuts of different thicknesses may seem to make the slight savings per bit less than worthwhile. These cutters are available in two, three and four wing versions. The four wing version will provide a smoother cut than the three wing version. These bits can be used with a hand held router or table mounted.
Tongue and Groove
The tongue and groove (T&G) bit has many uses from flooring to frame and panel construction. They are ideal when you need to cover a wide surface with wood paneling or siding. The T&G configuration enables you to leave a slight gap between boards before fastening each pair with a single nail in the center. This will accommodate any seasonal expansion. A variation of the T&G cutter, the V-Panel bit adds a bevelled cut to the edges of the panel that forms a ‘V’ where two pieces meet.
Like rail and stile bits, T&G bits are available in single unit form with reversible cutters or as a matched set, and both styles of bits must be used on a router table. With the reversible cutter, a nut on top of the shaft holds the cutters and spacer shims in place during the cut. After cutting the first profile, the nut is removed and the cutters reassembled to cut the matching profile. The reversible sets are less expensive than a matched set but they can be tricky to set up for a perfect fit if any shims are needed. The matched cutters are a little more expensive but they provide accurate joints without the additional set-up time.
Rail and Stile
Rail and stile (R&S) bits are available in many different profiles in either a reversible set or as a matched pair, and they make the construction of cabinet doors a breeze. These bits are only for use on a router table and must be used with a fence when cutting the long edges of the rails and stiles, and some form of a cross cut sled when cutting the ends of the rails. Setting up a rail and stile bit in the router table is much easier than setting up some of the other joinery bits such as the lock mitre bit. Most rail and stile sets come with a bearing mounted on the shaft above the cutting edges. Mount the router bit in the router table and set it to the correct height for the stock you will be using. When you set up the fence, place a ruler or a straight piece of stock on the bearing and slide the fence forward until the ruler indicates it is level with the bearing and then fasten the fence down. Run a piece of stock through the bit and look at the edge to see if it has been set up correctly; if the bit is a little proud of the fence you will get a little snipe at the beginning and end of each piece, if it is recessed too far into the fence then the groove will not be cut to the full depth. Remember to make a set-up guide that you can store with your bits for future use.
Routing the long edges on the fence does not present a problem and using a feather board to hold the bit against the fence is a good idea. Another feather board used to keep the material firmly on the table is a good idea as well. Using two properly set up feather boards will only allow the material to move one direction – past the cutter.
When routing the short ends of the rails you will need some sort of a cross slide. The Jessem router fence has a very smooth and elegant cross slide but you can also make a cross slide from a simple piece of plywood cut square on the table saw and with a handle fastened to it. While some router tables such as the Kreg Precision Router Table have mitre tracks built into them, you will find it far easier to reference the cross slide off the fence, rather than use the track. As the slide is squared to the fence you need not worry about squaring the fence to the table. If you make a set-up guide you can use it to accurately set the correct projection from the fence. Now all that’s left is to place the square piece of wood to be used as the cross slide on the table with the work piece on the front end and slide the assembly along the fence. To avoid having the piece shift as it passes the cutter, close up the sacrificial wooden fences so that there is no space around the cutter, effectively creating a zero clearance insert.
The Hand Cut Dovetail Look
One of the main complaints about router cut dovetails is that they look like they were done with a router. When cutting dovetails by hand, the narrow end of the pin can be as narrow as the kerf left behind by the dovetail saw.
The kerf left by the Adria dovetail saw (adriatools.com) for example, is in the area of .022 inches wide, but as you can well imagine this would be impossible for a router; a bit with such a narrow section would break the first time it touched the wood. Jigs such as the Akeda and the Wood Rat use special proprietary router bits that, while not as narrow as the dovetail saw, are considerably narrower than the standard dovetail bits. The price to pay for this look will be the occasional bit that breaks off if it is pushed too hard. These specialized narrow bits are typically made of High Speed Steel to allow for the narrow profile. There is simply not enough space to solder on carbide edges, so they won’t hold an edge as long as carbide, but they seem to cut a little easier than carbide bits when new. The Leigh D4R and the new Leigh Super Jig allow you to mill variably spaced dovetails, which help emulate the look of hand cut dovetails.
Correction: A full range of joinery bits is also available from Woodline USA, woodline.com
THE EDITORS
Our series on Routers concludes here.
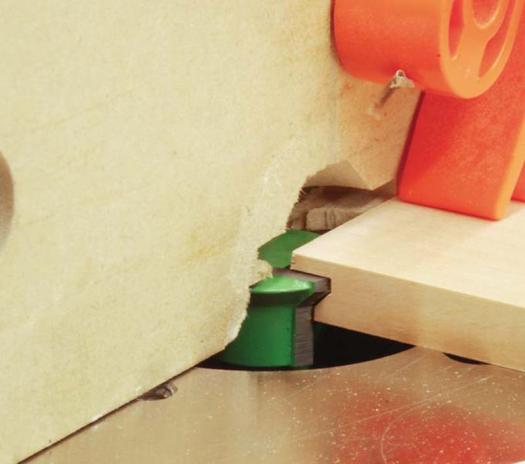
Lee Valley small drawer lock bit
Slot cutter bit
Similar bits, different sizes
Re-usable set up guide