TIPS & HOW TO
Refinishing wood floors

Steve Maxwell

Make your wood floors look like new with these four steps to achieve a furniture-grade urethane finish.
If you’re used to finishing furniture projects, the prospect of urethaning an entire wood floor can feel daunting. But success is easier than it looks, and doing the work yourself can save you a bundle, beginning with the first of four essential steps.
Understanding Sanding
Are you finishing a new wood floor? Completely refinishing an old one? Unless your floor is smaller than about 100 sq ft, start with a rented floor sander that you walk behind. Belt-style machines are less likely to create a divot in your floors than drum-style models. A vibrating pad sander is also easy to use safely, though it’s less aggressive than a belt sander.
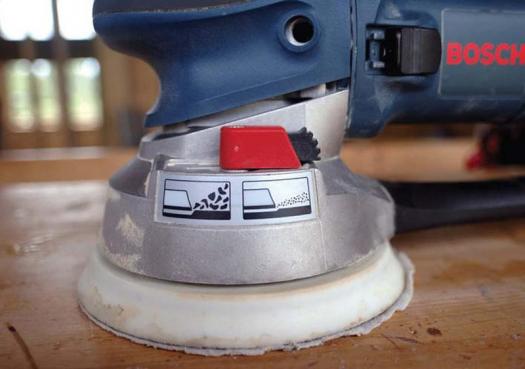
A walk-behind sander will only get you so close to corners and obstructions, and to smooth these areas you need to turn to smaller sanders of the sort that woodworkers everywhere use. A hand-held belt sander spinning an 80-grit abrasive is perfect for levelling board-to-board mismatch. You’ll find that a random orbit sander spinning a 100- or 120-grit disk is perfect for a second pass in tight areas. Just be sure to use light hand pressure, as random orbit sanders will leave behind swirl marks that will not be obvious until the stain goes down.
Pre-Finish Cleaning
Your floor must be absolutely dust-free before applying any stain or urethane, and a broom cannot do a good enough job. You’ll need some kind of a vacuum, and while a workshop vacuum is the best tool for this application, there are some things you need to watch out for.
Plastic shop vacuum attachments can leave large black marks behind on the wood, so work with a light hand until you know for sure how the wood behaves.
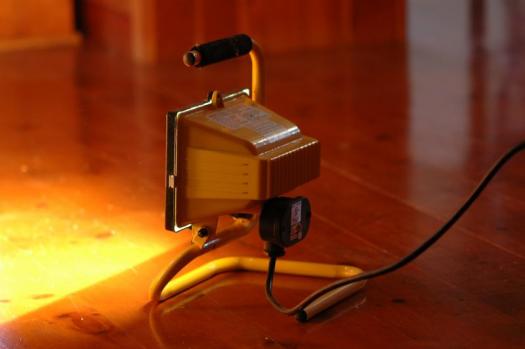
Another critical issue is lighting. You’ll never vacuum all the dust off under ordinary, overhead lighting because you can’t see it well enough. That’s why a 500 watt, quartz halogen flood light is so useful for floor finishing. The entire fixture costs less than $20 and it sits directly on the floor, shining light across the surface at a shallow angle. Dust, dirt and debris can’t hide.
Product Choice and Application
To stain or not to stain? That is a question that goes beyond aesthetics. Adding colour to floors before sealing the surface with urethane brings out wonderful wood grain patterns, but it also makes the floor finish more vulnerable to damage later on. Dents and scratches that go through the stain show up as light marks surrounded by darker wood. Stain is great as long as you understand what is involved.
Solvent-based or water-based urethane? This is your next choice, and both offer different strengths. Water-based offers low odour, water cleanup and very fast dry times. Solvent-based urethanes, on the other hand, are somewhat easier to apply because they typically dry more slowly, allowing brush strokes to flow out before hardening.
Need to get your floor finished fast? Look for quick-drying urethanes that are designed to go down quickly, one coat within hours of applying the previous one. This allows three or four coats to be applied in one day, leaving your floor ready for real life the next day.
Have you opted to stain before urethane application? Here’s a trick for applying stain to floors with minimum waste. Use a 3″ or 4″-wide brush to apply a generous squiggle of stain to the floor in one area. No need for full coverage with the brush, just get some liquid on the floor in a zigzag pattern over a four- or five-sq ft area. Next, use a clean, lint-free rag or shop towel to spread the stain evenly over the wood, wiping in the direction of wood grain. Wipe all stain off the surface, leaving behind only the stain that has soaked into the wood. You might have to apply more stain if some areas in your work zone are too dry.
Eventually, as you continue the process of brushing and wiping, your rag will get too wet to remove stain properly. Rather than throw it out (along with all that good stain), use the too-wet rag to apply stain to bare areas of the floor, instead of a brush, before wiping the floor with a fresh, dry rag. You’ll still have to slosh on fresh stain with a brush now and then, but not as often; the wet rag will do much of that work. Let your stain dry completely before applying any urethane. I like to leave it for a full day.
Although you can apply urethane to floors with a pad applicator, a wide brush is easiest for beginners to master. Use a natural bristle brush with solvent-based urethane and a synthetic brush with water-based stain. Either kind can be applied over solvent-based or water-based stains as long as it is fully dry.
Now is the time to get out that floodlight again. While it was easy to see where the stain went down because of its colour, urethane is different. Being clear, it is easy to overlook areas you have missed. Strong light at a shallow angle is your best friend here, making it easy to achieve complete coverage.
Some urethane formulations are specifically made to go down without sanding between coats. Choose this option if you need to complete your urethane job in one day. For the smoothest possible results, consider sanding between coats using some 220-grit paper in a quarter-sheet finishing sander. Go over the surface lightly, just as you would any other woodworking project. Vacuum the floor when you’re done, then coat again. Sand after three coats have dried, apply a fourth, then stand back and admire a floor that will look great for a long, long time.
Dust Free Floor Renewal
Most Canadian floors include some kind of clear, protective top coat, but regardless of how tough this finish is, eventually it will start to get worn, dented and scratched. However, fixing this problem does not necessarily require sanding back to bare wood and starting from scratch. There are ways to make that tired floor look better without the hassles of sanding. And depending on the floor you have and the products you choose, the process may be surprisingly fast and effective.
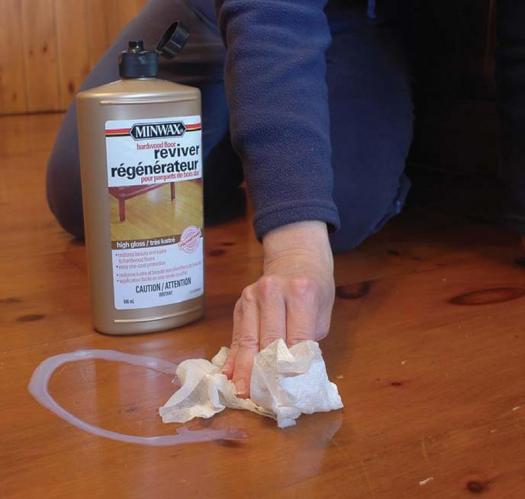
Clear-coated wood floors that haven’t been stained are the simplest to renew because there is no colour to restore. Just re-establish a protective layer in dented and high-traffic areas and you’re done. No major sanding needed, though areas of discoloured wood will benefit from a little hand sanding before resealing. Minwax Floor Reviver is a unique, wipe-on product that is easy to use when the surface layer is lightly scuffed. It offers up to six months of renewed good looks. Got a stained floor to renew? The best way to re-establish colour in worn floor areas is with a stain and sealer combination.
Photos credit: Steve Maxwell
Sanding options
You can choose from a drum sander (left), vibrating pad sander (right) or a belt sander to get the job done.

Light touch
When using a random orbital sander for some of the tighter areas, ensure that you use light pressure to avoid swirl marks.
Light your way
Using a bright halogen light at a low-angle will help you to see all the debris left behind on the sanded floor.
Breathe in new life
There are products available to revive a floor’s finish without sanding down to bare wood.


Where can I get a copy of this article? I can’t seem to download it, or make a copy. Is it copy-pretected?
Hi Lou. You can order a print copy of the magazine here or you can take out a subscription here which will give you access to all our articles,and enable you to download any article in a PDF format to your computer – you’ll be automatically entered into our monthly draw for great woodworking giveaways.