TIPS & HOW TO
Miniatures

John Ottewill

John Ottewill is a craftsman of miniature museum and antique furniture.
Sometimes when I mention that I make miniature furniture I receive a blank stare, but when I add that miniature furniture is “like dollhouse furniture”, those same faces light up in recognition as they remember their childhood toys.
In many ways that comparison is correct, but I also like to include an analogy from the automobile industry, which started with the Model T and has gradually progressed to our modern marvels of engineering. Similarly, the “doll furniture” of the past has become a marvelously intricate and detailed expression of fine woodworking.
From Toys to Fine Woodworking
Originally, dollhouse furnishings were children’s toys, with no reference to any period or scale. Gradually the quality and detail got more and more elaborate, until it reached the hands of the specialist artisan, who skillfully produces the ultimate in terms of detail and scale. At this ‘highend’ of the scale, you are mostly dealing with collectors who want a reproduction of a museum piece, or a reproduction of other antique furniture. The pieces are often displayed individually, but many collectors make a room setting of a particular period in time or style. Such collectors go to great lengths of research to ensure that all of the details are correct. Then they search out artisans to make the required pieces. Usually there is nothing available commercially that meets the collector’s requirements. Fortunately, whatever has been made in full size can be created in miniature.
Scaled Down
The general scale to which miniatures are built is one inch equals one foot. There has been a tendency in later years for a smaller scale of one half inch to one foot, but this scale precludes being able to put much detail into the piece. Most collectors use the larger scale, with their main requirement being that the miniature be like the full size piece in material, with all working parts and complete with traditional joinery techniques, including dovetails and mortise and tenon joints. There are a number of books available that show all the details and measurements for the various styles and periods of furniture. Some samples are already drawn to the one inch scale, but others need to be drawn up from the dimensions given. In some cases, where no drawings are available, the collector may provide a photograph of the item. Then, if the length/depth and height are known, a scale drawing is prepared.
Where possible, the miniature piece should be constructed in the same wood as the original. However, for oak I usually use quarter-sawn basswood, as the grain structure of oak is large and doesn’t lend itself to scale. Basswood, on the other hand, when stained looks just like oak. Whatever wood is used, it is necessary to select a piece in which the grain is suitable in scale.
Making the Miniatures
The equipment used in making miniatures is much the same as what is used in any regular woodworking workshop. I purchase wood from a lumberyard rather than a hobby shop, and then cut it to size on a table saw using a fine blade. From here I go to the thickness sander, which enables me to produce thicknesses down to 1/16″, finely sanded on both sides. I constructed my sander with a machinist friend, and it can best be described as a belt sander on its end, with an adjustable table underneath (so that the wood passes between the roller of the sander and the table). On pieces that require marquetry, I use a hand fretsaw with a 8/0 blade instead of using the scroll saw, as I find that I am able to maintain better control when cutting very small pieces. While I use a regular drill press for most drilling and some routing operations, I use a homemade drill press/router to make mouldings and other detail pieces. The cutters I use are dental burrs, which come in a variety of shapes and sizes. With a combination of several passes, using different burrs, I can replicate the original mouldings. In other cases I make a special cutter on the lathe and then suitably temper the cutter.
For turning work I use a Unimat lathe that is similar in size to a jewellers lathe and can handle small scale work. When it is necessary to repeat pieces exactly to the same size, as with making legs, I use a homemade jig, fitted to the bed of the lathe. It consists of a cutter that follows the fixed guide of a pre-made pattern. When only a few repeats are needed I turn the pattern from a piece of hardwood, otherwise I cut the profile from sheet metal so as to get consistent results. When there is a need to plane the wood, I most often use a block plane in conjunction with a shooting board, which is a jig that helps you plane an edge or end of a board square using a hand plane.
Much of my work involves carving, and for that I use a variety of commercially available palm chisels. With ‘micro chisels’ you need to be careful as the quality of the steel is often not very good and it is difficult to keep a sharp edge. I prefer to use dental chisels that I grind to various sizes of gouges, and add a handle similar to a palm chisel. Dental steel is excellent and retains a sharp edge for a long time. As an aid in fine detail carving, I use magnifying glasses that clip on to eyeglasses. I use a lot of jigs, and make them from Plexiglas, which is a very stable material and ensures that the jigs will last a long time.
During the years I have been teaching this subject, many students show initial concern because they have had no experience in the use of tools. However, when the correct methods of using tools is explained to them, and they progress one stage at a time, those same students end up being amazed at what they can accomplish.
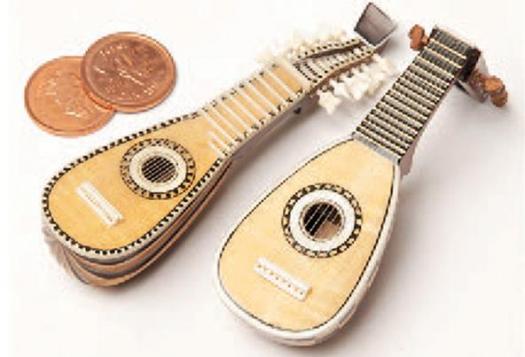
Mandora(L) Medieval lute(R)
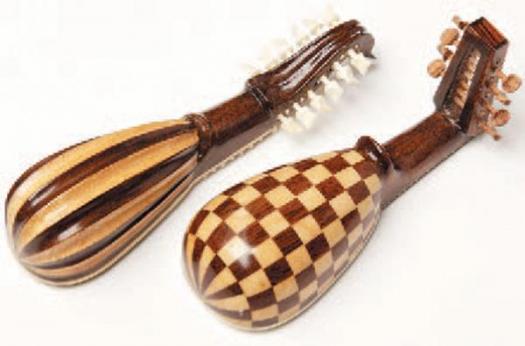
Back of mandora and lute
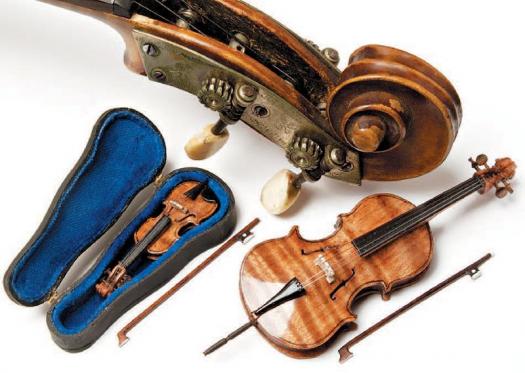
Violin and cello
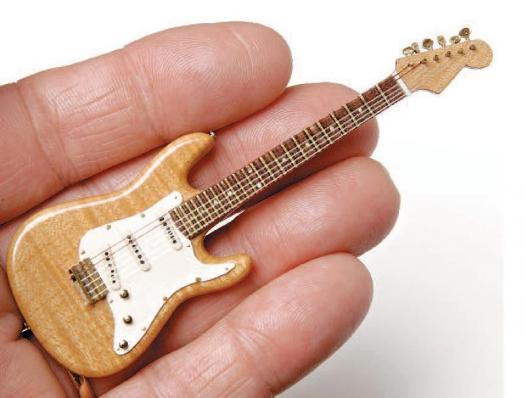
Fender Stratocaster
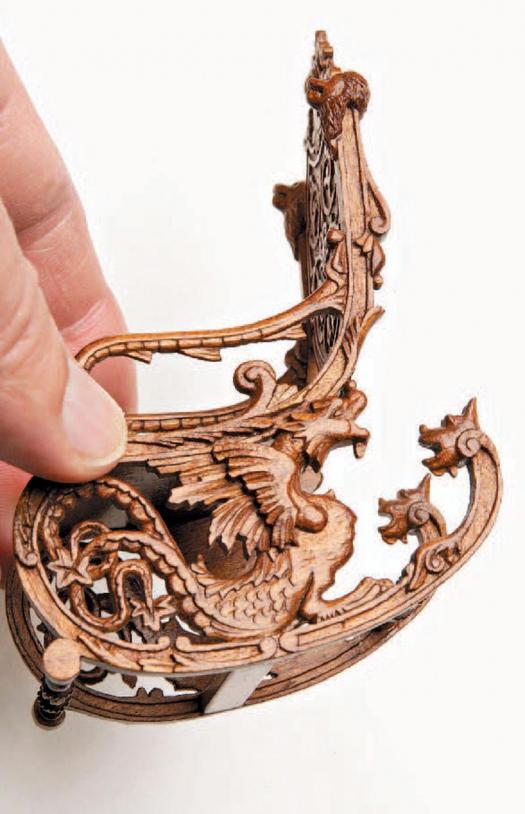
Sideview of Venetian rocking chair
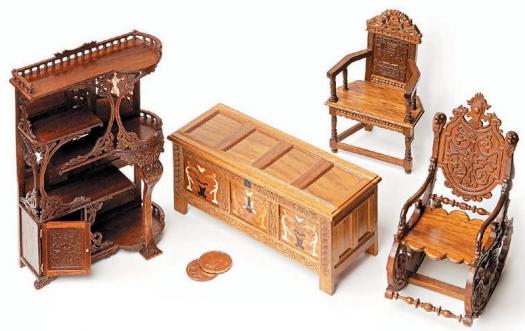
From left to right
Victorian Etagere circa 1818, Jacobean Chest circa 1600, Jacobean Caquetoire circa 1662, Venetian Rocking Chair circa 1860