TIPS & HOW TO
Lap joint

Michel Theriault

Lap joints may not be as highly regarded by the craftsman as the dovetail or the mortise & tenon, but they serve a very important role and are quite versatile.
Lap joints may not be as highly regarded by the craftsman as the dovetail or the mortise & tenon, but they serve a very important role and are quite versatile. They are used where two or more pieces meet or cross, enabling you to keep the surfaces of the two pieces flush while improving the strength of your assembly. This includes frame members in a cabinet, legs that cross (to add some style), and other support pieces.
The lap joint can meet at the ends to make an ‘L’ shape, in the middle of one piece and the end of the other to create a ‘T’ shape, or two pieces can meet in the middle to make a ‘X’ shape. The pieces don’t have to meet at right angles – almost any angle will work. At the point where they join, a half-lap is used, with half of each matching piece cut away so the pieces are flush with each other where they cross. This improves the gluing surface and resists twisting forces.
What You Need
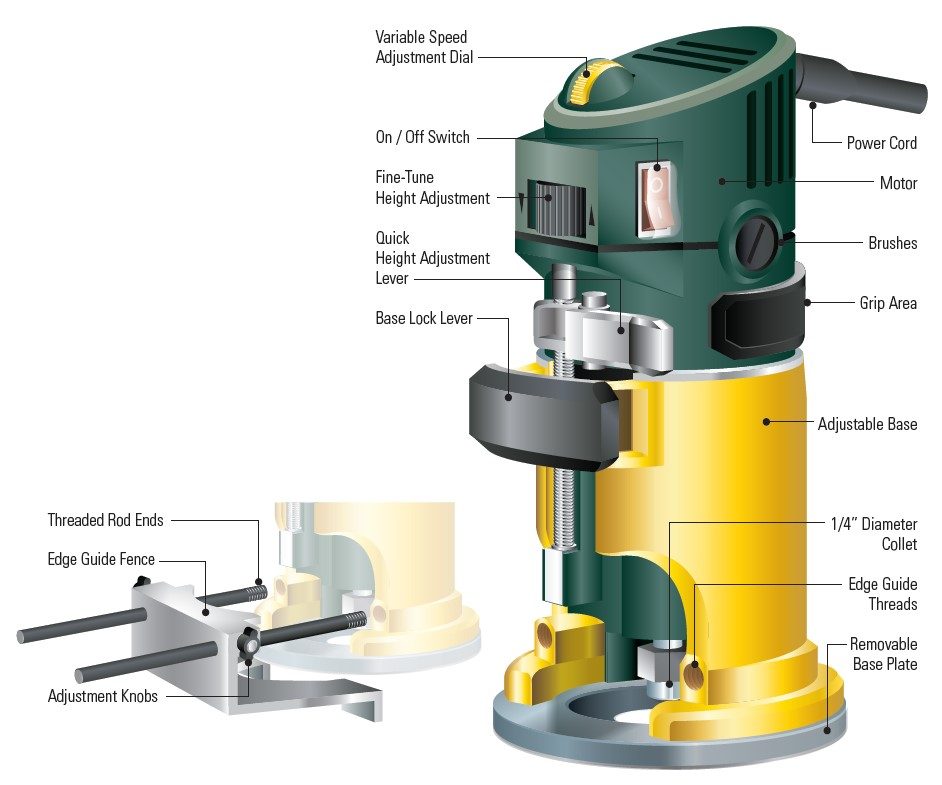
You can make lap joints using several techniques. In each case, it is as simple as removing the waste on each piece to match the other overlapping piece. The important part of making them is to get a crisp, tight, joint both for strength and for appearance. The simplest way is to make the joint with a saw and chisel. While a handsaw works well, a bandsaw is a quicker, more accurate approach. You can also use a table saw or router table to cut the joint.
How to Make the Joint
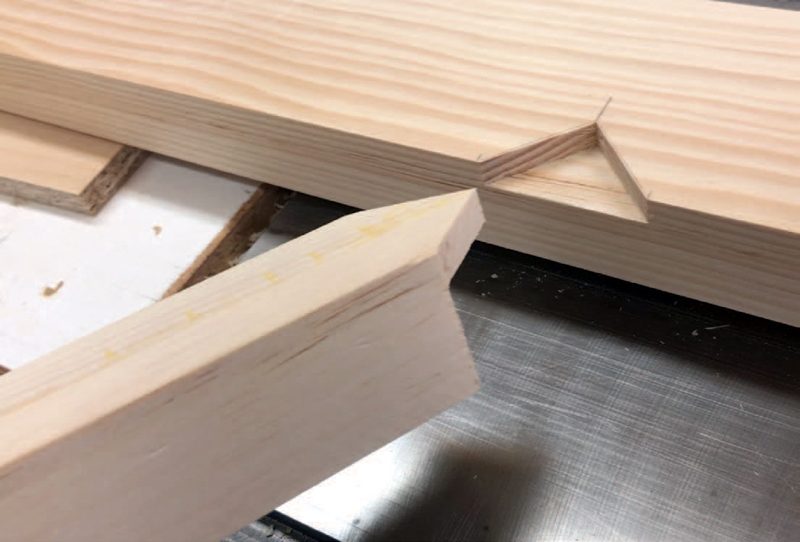
First, overlap the two pieces in the way they will be in the final project. Using a very sharp pencil or a marking knife, mark where each piece crosses the other piece. Using a square, follow this line down the edge of each piece to half the thickness, creating the shoulder. Scribe a line across at that point, marking the cheek.
Now that you have your reference marks, it’s time to start removing the waste. Using your bandsaw or handsaw, cut down the inside of the shoulder mark to the line you made for the cheek. Leave a little extra material to fine-tune the joint. If your lap is on the end of your piece, use the saw to cut the cheek as well. Next, use the saw to make some relief cuts down to the cheek. This will make it easier to remove the waste.
Clamp the piece on your workbench and use a chisel to remove the waste, carefully working your way down to the cheek. You could also cut out the waste using a dado blade on your table saw, or a bottom cleaning bit in your router. Repeat for the second piece.
Test fit the pieces and carefully remove more material until you get a snug fit, with the surfaces flush.
Marking the shoulder

Cutting the shoulder on a bandsaw

Chiselling out the waste

Bottom cleaning bit