TIPS & HOW TO
Gluing strategy tips

Chris Wong

Glue-ups don’t have to be nerve-wracking experiences. Some basic material and adhesive knowledge, coupled with lots of planning, will go a long way to ensuring smooth gluing.
Glue-ups used to be the most stressful part of woodworking for me. With large, unwieldy parts falling and knocking others over, long and heavy clamps, glue everywhere and the rush to get it all together before the glue sets, the pressure of a glue-up is no surprise. But that has all changed. My glue-ups are now quiet, organized, efficient and even relaxed. What changed? You could say experience but what it really boils down to is preparation. That means knowing how everything goes together, what adhesive to use, how best to hold it in place while the glue hardens and how to do it all in an organized, timely fashion.
Preparation is Paramount
The first step in a successful glue-up takes place well before the glue bottle is opened. You need to know that the parts fit together properly (not necessarily snugly). If you use one of the many water-based glues, remember that moisture causes wood to swell, so that sweet fit you had when you did your dry run (which is always, always a good idea) may well be too tight once the glue is applied.
In addition to knowing the components fit together, you also need to know how they go together – both the correct orientation and in which sequence. To help with the orientation of parts you can label them – either by writing directly on a surface that will not be visible or applying a piece of masking tape to the part and writing on it.
You should be able to get a pretty good idea of how well the glue-up will go during the dry run. Put the assembly together without glue using a stopwatch to time how long it takes while working at a comfortable pace. When the assembly is complete, compare the time on your stopwatch to the open time of the glue you’re using. Hopefully you have at least 30 percent of the time left over to allow for the glue to be applied and any complications to be worked out without getting flustered. If you don’t think you’ll have enough time, you have a few options: break the assembly into two or more sub-assemblies, choose a glue with a longer open time or enlist a helper.
Another benefit of the dry run is that it highlights what clamps, cauls and other miscellaneous items you need close by in order for the glue-up to be successful. Any time spent searching for stuff once you’ve started applying glue is wasted time. And this is not the situation to be wasting time.
Time is one challenge presented with the introduction of glue; alignment is another. Most glues are quite slippery and parts can slip out of alignment easily. The best way to prevent this is to incorporate interlocking joinery into the design, such as dowels, dadoes, dovetails and so on. An added bonus of using joinery is that the assembly will better hold itself together while you add clamps. A simpler way to ensure alignment is to nail or screw parts in place, either with or without glue and clamps. Your choice to use glue is dependent on how much strength is required. As a general rule, if you use glue, you should use clamps of some sort. Rubbed joints are the exception.
Proper Glue Application
Most woodworkers spread glue with their fingers. Others use brushes, rollers, plastic glue spreaders, or scraps of wood. What I use depends on the type of glue I’m using and the size of area being covered. For hot hide glue, I use an acid swab with shortened bristles (just push them back into the handle until about ¾” of bristles remain exposed) for both mixing and applying. For epoxy, I use a plastic glue spreader. I scrape off most of the epoxy after the job is done, then after it hardens on the spreader, I flex the spreader to crack off the film of glue. For applying PVA glue to wide areas, I use a cheap paint roller or an even cheaper scrap of wood. I use the scrap of wood like a squeegee and by varying the pressure exerted, I can control the amount of glue left on the surface. But for most “normal” situations I use my index finger.
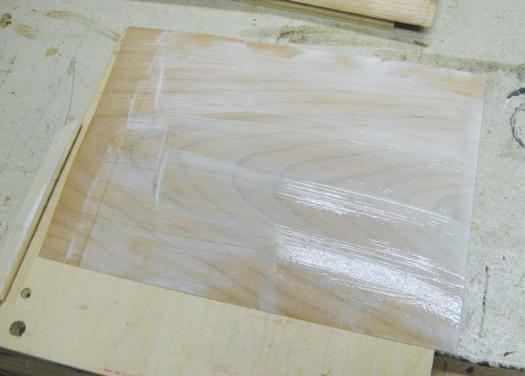
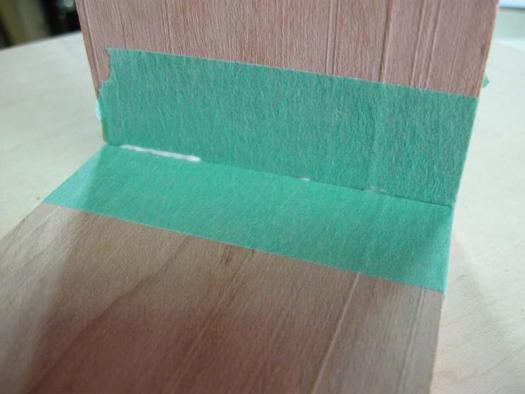
They say “an ounce of prevention is worth a pound of cure” and that’s certainly true with gluing. You know how hard it is to clean PVA glue that has found its way into an inside corner and dried. The worst part is any little bit you miss will be glaringly obvious once a finish is applied. To control squeeze-out, you need to know how much glue to use and where to apply it. I apply a thin coat of glue to both mating surfaces. How much exactly? Enough to cover the surface completely but not so much that you can’t see the wood grain through the layer of glue. When edge-gluing boards you want the squeeze out to be visible along the entire joint but long runs of glue indicated you applied too much. Aside from waste, extra glue running down a surface may find its way into corners and permanently stain the wood. To avoid having to clean up squeeze-out, mask off the areas around the joint during dry-fitting so that excess glue ends up on the masking tape rather than stuck to your project. If some glue does get onto your project, I prefer to allow it to firm up before scraping or chiseling it off. A great alternative (especially when building boxes which can have limited access) is to mask off the areas that will be glued and apply the finish before assembly.
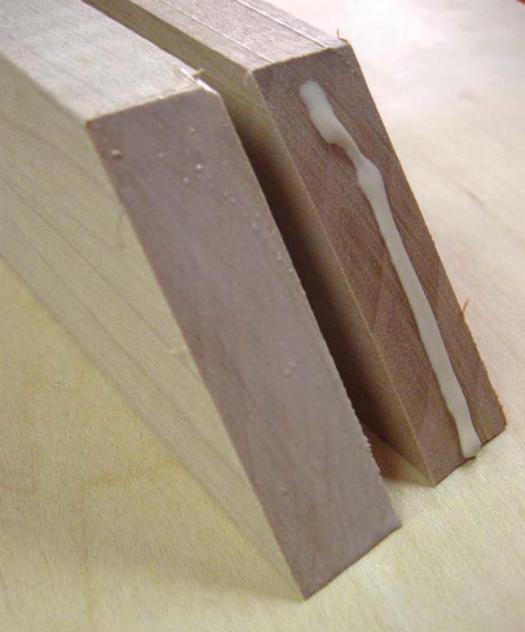
Long-grain gluing surfaces are the best, and that’s why finger joints are one of the strongest glued joints. End grain, on the other hand, is not a good gluing surface, making miter and butt joints among the weakest glued joints. If you need to glue end grain, be aware that it has a tendency to wick up glue, resulting in a glue-starved, weak joint. The solution here is to apply a coat of glue, called size, let it soak in for a few minutes, then apply more to areas that look dry right before it goes together – just like applying an oil finish where you first flood the surface, then apply more to areas that have absorbed all the finish. Just keep in mind, glue sizing ensures as strong of an end grain glue joint as possible but it’s still considerably weaker than a long-grain joint.
Clamps Hold the Joint Tight
The purpose of clamping is to hold parts properly aligned and in good contact with each other while the glue cures. Bar clamps in their many various forms are the most used clamps in my shop and they get the call when I’m clamping something with parallel or near-parallel surfaces. I also employ a number of other clamps for special situations: handscrews for odd angles, corner clamps for precisely aligning square corners, usually for pre-assembly work, band clamps, rubber bands and shrink wrap for contoured work, packing or masking tape for light-duty and hard to clamp applications, pinch dogs for coopered work and custom forms with wedges for odd-shapes.
Different types of clamps have different strengths and weaknesses and it’s important to recognize that. Parallel bar clamps have broad faces that remain parallel and distribute pressure more evenly than most clamps, making them really useful for assembling cabinets. They are, however, heavy and awkward, which presents a challenge in positioning and handling them. Whenever possible, I try to rest either a clamping face or the bar on a horizontal surface to support the weight, slipping scraps of wood between the bar and the work piece to avoid marks. If the large assembly does not need a really strong clamp to pull it together, I use lightweight aluminum bar clamps. They are easy to position and still have a decent amount of clamping power.
When gluing up panels, clamps should be alternated top and bottom so as not to induce any cupping to the panel. I’ve found that even parallel bar clamps have this tendency as long as the panel is right next to the bar. I used to struggle to get clamps underneath, so I built myself a set of I-beams to raise the work piece off the workbench. Their broad surfaces make it easy to support two mating parts. It also makes them very stable. Invariably, they end up being used as cauls as well.
Cauls Have Many Jobs
I use cauls in nearly every glue-up, for a number of different reasons. Cauls are sometimes used for one specific reason, and sometimes they’re called on to do a number of jobs at the same time. They can be thick or thin, long or short, straight or curved and can be made of almost any material.
One of the primary functions of a caul is to distribute clamping pressure over a given area without the use of lots of clamps. I have a well-sized collection of clamps, but even if I had all the clamps in the world, it’s often difficult logistically to use a lot of clamps during a single glue-up. Plus the weight of the clamps themselves can become an issue. For example, if you’re laminating thinner stock, the sheer weight of the clamps can put a curve in the lamination if it’s not properly supported. The solution, to a certain degree of course, is to use more cauls and fewer clamps. Remember that you still need enough clamps to apply ample pressure to hold the work piece together.
Cauls also help to keep a panel flat during a glue-up. By placing cauls across the glue line and clamping them flat, the likelihood of a panel staying flat during a glue-up increases drastically. Cauls for this use need to be strong enough to resist flexing under loads.
Another important benefit of using a caul is to protect the edge of the work piece you’re gluing up. Clamps apply a lot of pressure and many woods (especially softer woods) will be easily damaged by a normal clamping situation. Cauls that will only protect the work piece don’t often have to be overly thick or strong.
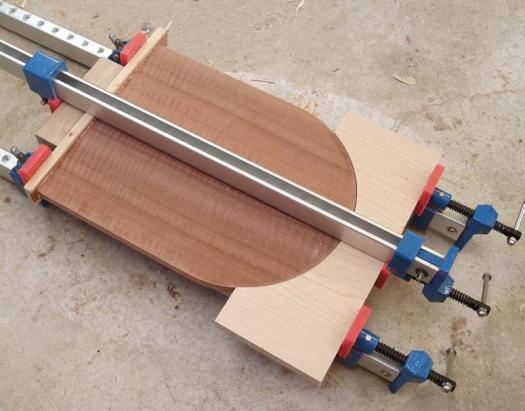
A final, often overlooked function of a caul is to allow clamping on irregular shaped work pieces. Sometimes cauls need to be shaped or cut to mate with the part. Curved or angled surfaces are the most common situations where this is the case.
When keeping a panel flat during glue-up, I’ve found that ¾” thick cauls are good because they stand up on their own and distribute pressure well without being too bulky. For cauls less than 12″ long, I use 2″ wide stock. For larger glue-ups like tabletops, I would use cauls an inch longer than the width of the assembly and 3″ or wider to increase the rigidity. For longer cauls, a slight convex shape helps distribute pressure to the hard-to-reach middle area. It’s a good idea to apply some sort of finish, wax, or packing tape to the cauls to prevent the caul from sticking to the work piece. This is especially true when gluing up softwoods. I’ve found when you remove the cauls, they can sometimes take a chunk of the work piece off.
In Closing
Glue-ups don’t have to be daunting. You shouldn’t dread them because you’re afraid of what might go wrong. Instead, anticipate and prepare for tricky and complicated situations beforehand. Work your way through the process first without glue and identify where you might have troubles. Then look for ways to correct those issues. In a way, a glue-up is like orchestrating a symphony – every part has to work together to ensure perfect harmony. So with good preparation and sound techniques, assembly can be as fun as the rest of woodworking. And that’s the way it should be.
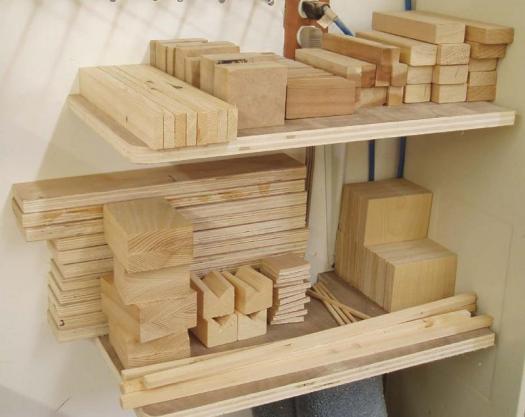
Shelf of Cauls
I keep a collection of smallish cauls on hand for use during the many glue-ups that take place in my shop. They range in size from small, thin strips of wood to larger scraps cut from big offcuts. They’re often straight but it’s handy to have some curved or angled mini cauls around for weird situations. For a glue-up I will either cut a custom caul or reach for a selection of these mini cauls. They protect the work piece from the jaws of the clamps, support larger clamps or apply even pressure across a glue line. Sometimes I just use a stack of mini cauls to keep the work piece raised off the bench so I can position a few bar clamps underneath the panel. Next time you’re going to throw away a larger off-cut, chop it up into a number of smaller pieces that you can use as mini cauls.
– Rob Brown
Photos credit: Chris Wong
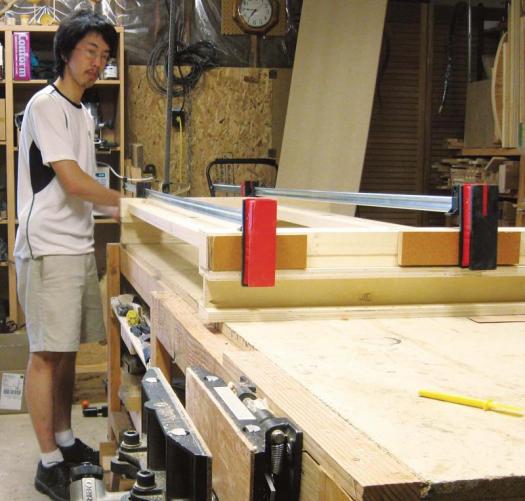
Preparation Complete
Take the time to gather all the clamps, glue, cauls, etc. that are required before you apply the first bead of glue.
Even, But Not Thick
You need ‘just enough’ glue – an even layer on both surfaces that allows you to still see the grain underneath
Perfect Beads
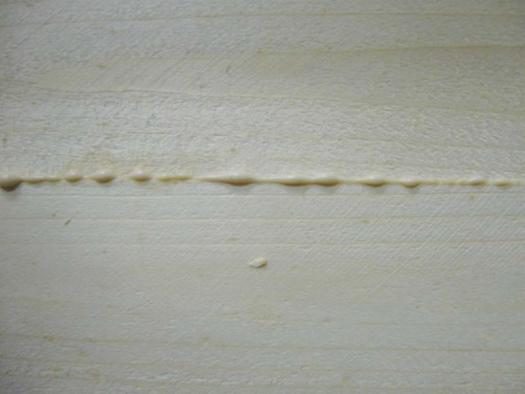
The perfect amount of glue leaves small beads of glue. Any less and you’ll have a weak joint. Any more and you’ll have a mess and potential finishing problems.
An Ounce of Prevention
Sometimes it’s possible to tape off areas next to the joint, so the glue squeeze-out will end up on the tape, not the wood surface.
Size Matters
Apply a light coat of glue, called size, to the end grain surface of a joint.
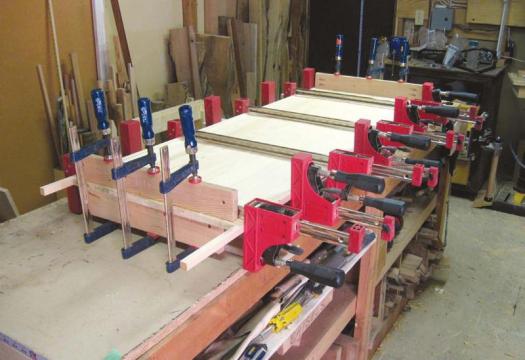
Clamps and Cauls, Working in Unison
Many bar clamps are used to apply even pressure to the panel while the glue dries.
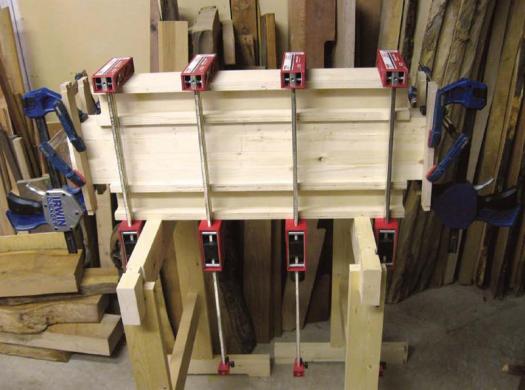
Work With Gravity
Rest clamps on a surface so manipulating and adjusting them is a little easier, especially with heavier bar and pipe clamps.
More Cauls = Fewer Clamps
Get in the habit of using cauls to spread the clamping pressure of fewer clamps so you don't end up with too many clamps on a glue-up.
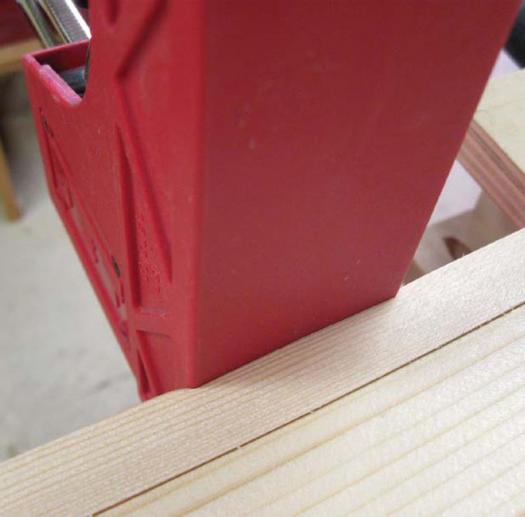
Crushing Strength
A caul will help protect the edge of a work piece from the strength clamps provide.
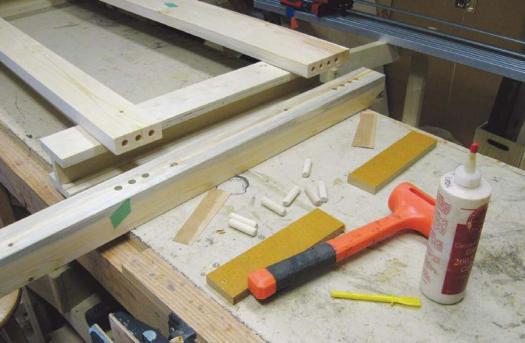
Not Everything Is Standard
When you aren’t dealing with parallel, even sides you may have to make a custom caul. (Photo by Rob Brown)
Custom Cauls
Often a special caul is needed and it’s nice to have a selection on hand to choose from. An assortment of sizes, shapes and thicknesses are helpful to have beside your glue-up area. (Photo by Rob Brown)