TIPS & HOW TO
Give your clamp collection a home

Rob Brown
None of us have enough of them, and they all need a home. Here are some ways to store your clamp collection.
When I started working wood, the only tools I owned were some hand-me-downs from my grandfather. My father also had some tools, and together we were on our way to outfitting our first small shop. One major gap was clamps, so we bought a small collection of F-clamps, some spring clamps and a few C-clamps. We stored them close by – usually just on the floor – as they were almost always in use, or about to be.
Problems started a few years later when we had a fairly large collection of assorted clamps. They were scattered everywhere and we tripped over them on a regular basis. A proper storage solution was needed. I started to hang them on nails or screws, but though it was a simple and fast solution, it had serious limitations. Each nail didn’t hold many clamps, the clamps sometimes fell off the nails and it looked just awful.
Beyond the screw
I figured if I had a spot for each clamp I would put all the clamps away when I was finished with them. Turned out I was right. I started using 2x4s and plywood to construct homes for each specific clamp. Not only did the clamps find their way back home after use, but they were all easy to grasp whenever I needed them.
Now that I have my own shop, I keep the vast majority of my clamps on the wall, in a dedicated corner. I attached a sheet of 3/4″ plywood to the wall so I could install the wood racks anywhere I needed. I try to stick to my general rule of having a specific space for each clamp, as this helps keep things organized, but sometimes I cheat a bit and put up to three miscellaneous small clamps on a large screw. I also do my best to create a proper home for the types of like clamps I have many of, whereas if I only have one or two of a specific clamp a screw in a wall will likely suffice.
Wood Blocks
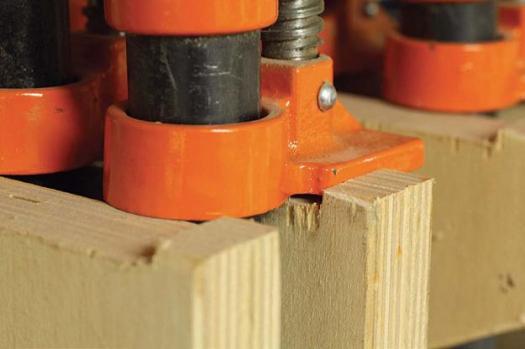
To store most of my medium-to-large-sized C-clamps and F-clamps, I continue to use 2×4 material in many cases. I cut shallow grooves in the top of the material, into which the clamps fit comfortably, and sometimes add small notches in the face of the wood to help locate each clamp. Gravity holds the clamps in place fairly well, but the thing that ensures these clamps don’t fall off the rack is a shallow rabbet across the back of the rack. The wide section of the clamp pad fits into this rabbet and will not move unless the clamp is lifted slightly.
After careful layout, I cut the grooves with a tablesaw. Sometimes I fine-tune the fit with some hand tools.
Space the grooves so you can easily get your hand in between each clamp, but not so far apart that space is wasted. I use L-brackets of various sizes to attach the wood racks to the plywood wall, or in the case of some smaller racks I screw them directly to the plywood wall.
Plywood Racks
Light-duty pipe and bar clamps don’t require an extremely strong rack, just something that holds the clamps in place, and will allow each clamp to be removed from the rack, and returned home with no fuss whatsoever. Like the wooden block racks, a series of grooves or notches can be cut into a small-to-medium-sized piece of plywood, then brackets can secure it to the wall. A bandsaw or tablesaw works well for cutting the plywood.
Heavy-duty pipe and bar clamps need a stronger rack, as you don’t want a rack to give way under the collective weight of a set of clamps. I laminated two pieces of 12″ x 12″ x 1/2″ Baltic birch to form panels, then trimmed the panels square. Each square can then be bandsawn approximately corner-to-corner, creating two supports. You can either glue a small block of solid to the front, top corner of each vertical support surface, or remove a 1/4″-wide strip of material from the top of the piece to create a small notch that will stop the clamps from sliding off the rack. Once you have enough supports, fasten them to a strong back panel with glue and large screws, spaced so your clamps will fit nicely between the supports. Secure the entire rack to the wall and load it with clamps. You will notice that if you keep all the clamps turned the same way, their jaws will not interfere with each other.
The main reason I like to store my longer bar and pipe clamps vertically is so I can attach the racks well above my head and still be able to remove the clamp from the rack by holding it near the end. This uses lots of otherwise wasted vertical wall space.
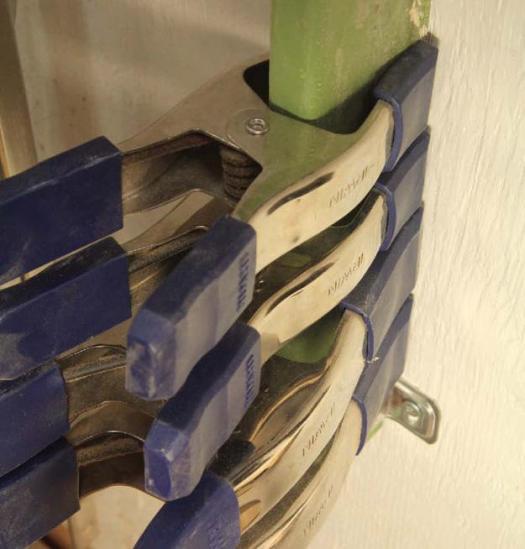
Plywood is also the perfect material to build racks for parallel clamps. In a 4″ wide piece of plywood, cut a series of slots slightly wider than the bar of the clamp. Space the slots so there is enough room to fit the clamps beside each other. You can make the rack as long as you need, then fasten it to the wall.
Protruding Racks
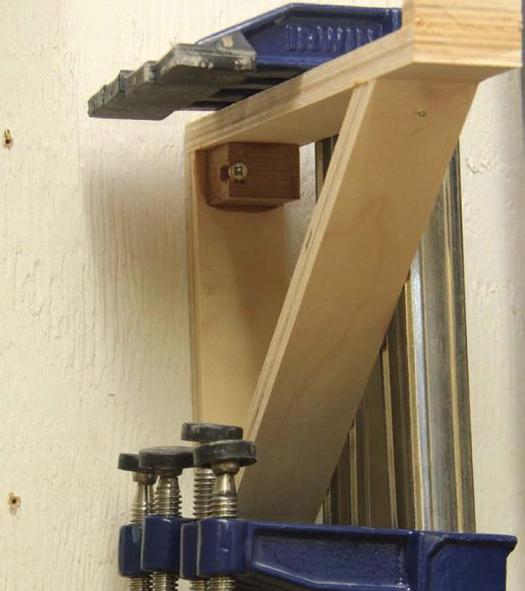
To store most of my medium and small F-clamps, I make simple racks that protrude from the wall. A vertical piece, which will be attached to the wall, is fastened at 90° to a horizontal piece, which supports the clamps. To add strength, a 45° cross-brace is fastened between these two pieces, and then a solid wood glue-block is attached to the upper-back corner.
I screw through this glue-block into the wall. A small wood block is glued to the front of the horizontal piece to stop clamps from falling off. Though it depends on the size of the clamps, I can usually store about 8–10 clamps on each rack.
Removable Wood Racks
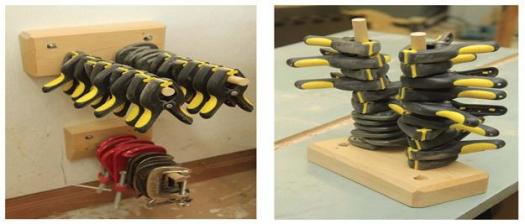
Because my small spring and C-clamps are small, numerous and unwieldy, I built a small moveable rack that can be taken directly to the assembly table. I drilled a couple of angled 1/4″ diameter holes in a 6″ long piece of 2×4 material, then glued eight long pieces of hardwood dowel into each hole. I drilled two 3/8″ diameter hanging holes in the wood base then drove two mating 3″ x #8 screws into my plywood wall. The moveable rack, loaded with small clamps, hangs on the screws, ready for action.
Straight Cleats
For some clamps, the simplest approach is the best. Larger spring clamps and Quick Gripstyle clamps fit nicely on a straight wood cleat. Attach a piece of wood to the wall, or another shop fixture, and add clamps. I find a horizontal cleat works best for Quick Grip-style clamps, as gravity will assist you in closing the clamp on the cleat.
Plastic Bins
Because I have about 30 C-clamps of various sizes hung on the wall, all easily accessible, the rest of my collection isn’t used regularly. Rather than take up wall space, the other half are in a plastic bin for times when I have a large glue-up and need loads of clamps. Bins don’t work perfectly, as clamps sometimes turn into one big, jumbled mess, but they do serve a purpose for seldom-used clamps. Bins keep the excess clamps from littering the floor, and allow them to be moved around the shop easily.
Specific Use Locations
I have a few small groups of clamps scattered around the shop next to where I regularly use them, so I don’t have to run to ‘clamp corner’ every 10 minutes.
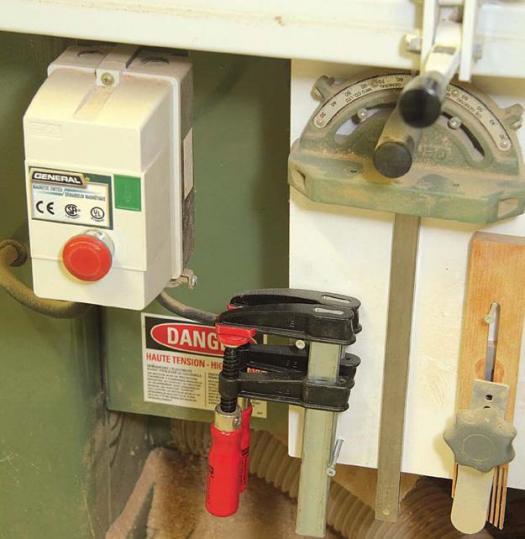
Near my tablesaw’s on/off switch I have two 6″ F-clamps I use to temporarily attach any sacrificial fences to my saw’s rip fence. They hang on two #8 screws. I also have a similar set of clamps near my drill press for securing my auxiliary fence to my drill press table.
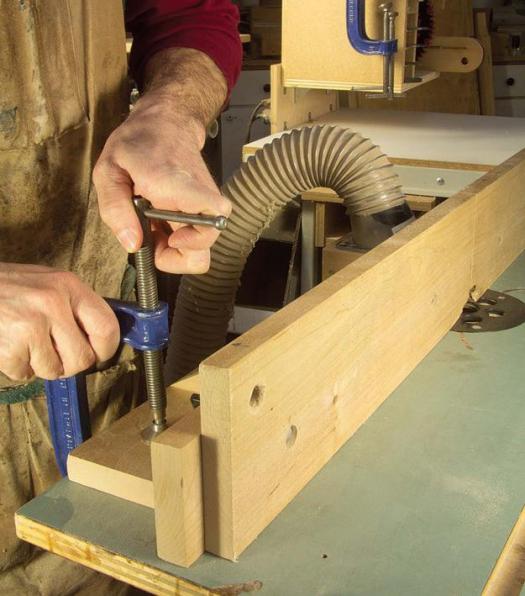
Directly behind my router table I keep three 4″ C-clamps. I attach my solid wood fence to the top of my router table with these clamps. I spend a lot of time on my router table and my three C-clamps are always right there waiting for me.
Under one end of my workbench are two 12″ F-clamps with deep reach throats. They are great for holding down a workpiece I’m working on. I machined a piece of hardwood 12″ long x 2-1/2″ wide, then cut a large notch in it, leaving a couple inches of material on either end. When it was installed under my bench, the arms of my clamps fit perfectly between the hardwood and my bench, and gravity holds them in place until I need them. A bit of experimentation is needed to get the right size of notch.
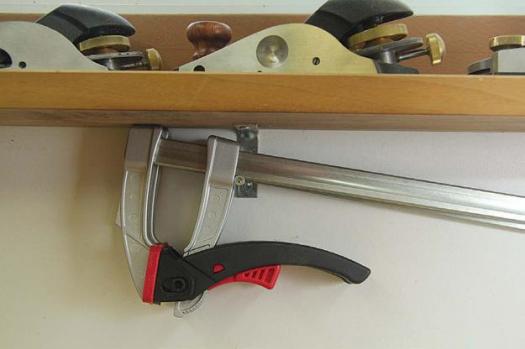
Just above my bench, under my hand tool shelf, are two lightweight clamps that regularly come in handy. I installed a single screw, which the clamps fit over. They don’t fall down or rotate because the ends of the bars come in contact with the underside of the hand tool shelf. They remain close by and are always out of the way – the pinnacle of storing clamps.
I do a lot of freehand machine and hand shaping, and often clamp a workpiece to the outfeed table of my tablesaw. To keep the piece I’m shaping stationary, I use a heavy-duty ratcheting F-clamp. It’s stored just under my tablesaw’s 52″ table on a single screw. Like the clamps under my workbench, cantilever action holds it in place.
Get Creative
There are many other ways to store clamps, but I have found these methods work well for me. Ingenuity is often required, but creating proper homes for your clamp collection can reap big dividends by making your workshop a safer, more productive and better looking place.
Photos credit: Rob Brown
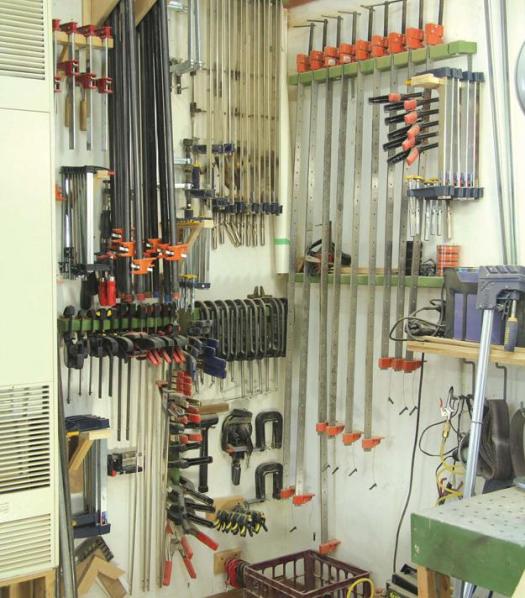
Clamp Corner
Brown has dedicated one area of his shop to store almost all of his clamps. He attached a sheet of plywood to the wall so he could store clamp racks anywhere.
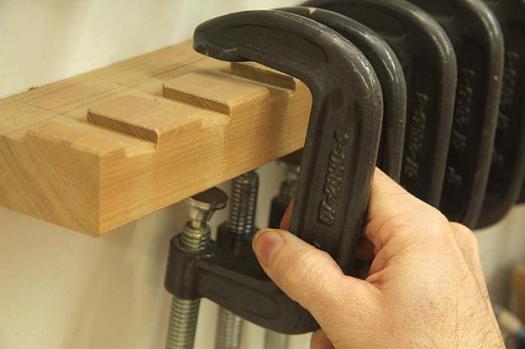
Solid Wood
2x4 material is cheap and strong, and makes great racks for medium and large F-clamps and C-clamps. Notches on the top of the rack will help align the clamps, while a wide rabbet across the back of the rack ensures the clamps will not fall forward, off the rack.
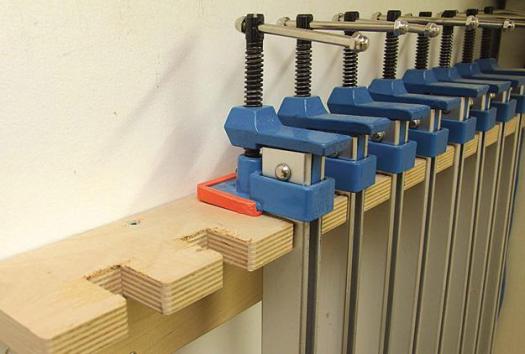
Plywood
Another great material for securing clamps is 3/4" plywood. Brown cuts notches into it, adds a wooden bracket below the plywood and fastens the rack to the wall to store his light-duty bar and pipe clamps.
More Plywood
To make a rack strong enough to hold a selection of heavy-duty pipe clamps, plywood is a great choice. Attaching angled pieces to a backer board at the right spacing makes for a strong, easy-to-use rack.
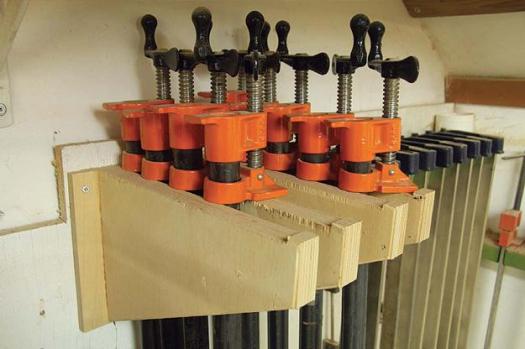
Small Notch
To ensure these heavy clamps don’t fall off the rack, either add small blocks to the top of the panels, or cut away 1/4" from the top of the rack, to leave a notch.
Protruding Racks
Simple racks to hold F-clamps can be made of solid wood or plywood. The key is to glue a solid wood glue-block at the upper, back inside corner of the rack then screw through it into the wall.
“On-The-Go”
To house, and move, his smallest clamps Brown installs long dowels into 2x4 material, then hangs the small rack on two screws. They can easily be brought to the assembly area when needed.
Simplest of Them All
Straight cleats can be attached to pretty much anything with L-brackets, and store spring clamps nicely.
Specific Uses
Brown keeps these two clamps at his tablesaw and uses them to attach sacrificial fences to its fence. They are always handy when he needs them.
Close, Quick and Easy
Brown uses his router table regularly so he keeps a set of quality C-clamps within arms reach.
Hidden Away
Starting with a piece 12" long and 2-1/2" wide, Brown created this cleat to hold two F-clamps under his workbench, where he often needs them.

Single Screw
Just above his workbench, under a hand tool shelf, Brown keeps two light-weight ratcheting clamps. They hang on a single screw, and rotate into the shelf above.


a good article. Clamps – you need a lot of them (or at least I do) and you need a good way to store the. 🙂