TIPS & HOW TO
Easy radial checkerboard parquetry

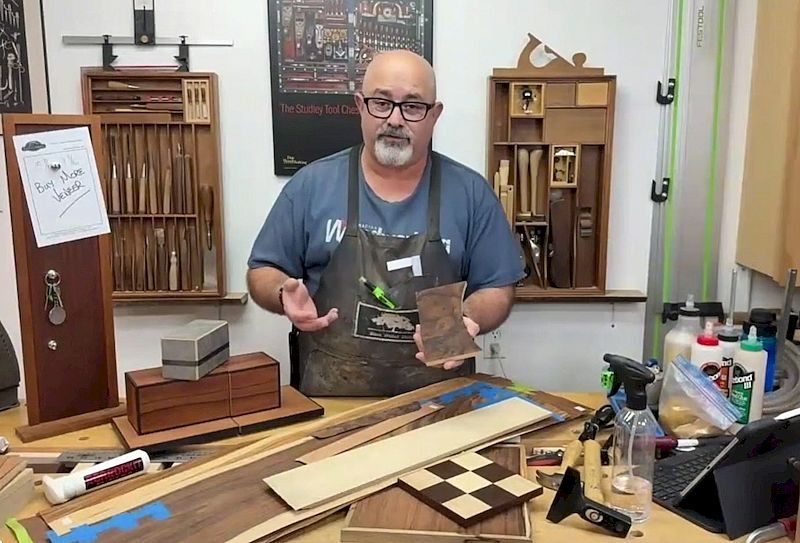
Craig Kosonen

This parquetry pattern is an impressive way to dress up a piece of furniture, a box top or any woodwork that could use a bit of embellishment.
This radial checkerboard pattern for parquetry looks impressive with two different wood species, as well as with a single species with the grain rotated 90° each time. It looks rather complex to create, but it’s fairly straightforward and the only specialty tool required is a shop-made circle cutter.
Accurate template gives accurate results
The first step is to lay out the pattern in full size. Depending on the size of panel, you may want to change the width of the rings.
I find 1″ wide is a good size for medium-sized panels, like a 10″ × 12″ box top. Smaller panels should have thinner rings so the pattern repeats enough times. Small rings on larger panels would get tedious to make and be visually busy. A neat effect on large panels would be to increase the size of each ring by a certain amount as the pattern moves away from the centre.
Once the ring size is determined, mark the centre point with an awl, then use a ruler to mark where each ring will be. Use a compass to draw the full-size rings on the template. Now that you have a series of circles on the board, it’s time to divide the circles into segments. I’m using 12 segments, though you can use more or less to change the effects. Just remember to keep the number of segments even.
The segments are stepped out with dividers using trial and error. Pick a mid-size ring to avoid too small or too large steps and mark a starting point. Step around the ring making sure each step lands on the ring, adjusting the step size until you land back on the starting mark in 12 steps. Mark out the step points on the ring, then use a ruler to draw a line from the centre through the marks all the way out to the edge of your pattern. The final step to complete the pattern is to mark the segments with either the wood species or the grain direction, then mark a single segment from the centre to the very edge with an alignment mark; I use a star. For my example, I’m using walnut and curly maple, but “M” and “W” can easily be mixed up, so I used “W” and “C” on my template board.
Build the circle cutter and start cutting
The shop-made circle cutter is fairly simple to make. It’s a piece of Baltic birch with a cutter screwed to the end (Lee Valley, Item 05K1110 ). A 1/16″ nail serves as the pivot point, and multiple holes are drilled in the Baltic birch that align with the radii of the rings. Finally, a small wood strip with a counterbore allows you to focus pressure on the nail without hurting your finger.
Once the pattern is complete and the circle cutter is made, the veneer work can begin. Cut strips of veneer that will be cut down into the segments. The strips need to be a bit wider than the 1″ ring thickness to account for the arc of the circle; 1-1/2″ works well for this case, though a larger panel (requiring larger veneer segments) might need wider segments. Once you’ve got a bunch of strips the segmenting can begin.
Start with the first ring; the centre circle can be done after the first ring. Tape a veneer strip over a segment, then cut it along the line in the direction you are filling the segments, leaving the opposite edge oversized. For this panel I’m using a utility knife and metal ruler. The metal ruler needs to be long enough to align with the lines on the template board. Depending on the veneer type and grain type, a veneer saw or hand plane blade may work better.
Continue around the ring with each segment. These segments are a bit different as both edges must be cut. I cut the first edge by lining it up with another ring segment to get the rough angle. Tape that edge to the previous segment and then cut along the next line. When you get to the last segment it will overlap the first segment that was left long. Cut through both segments at the same time along the line for a perfect fit. Make sure to mark the alignment on the appropriate segment before cutting it loose in the next step.
Before the circle cutting commences, ensure the full ring is taped down. The veneer is fragile so it could be ripped apart if not adequately secured. Use the circle cutter to cut the inner ring. The key is to take multiple, very light passes with the cutter, as the grain will be going in all sorts of directions and it’s easy to tear out. Once the inside is cut, remove the waste that’s taped down and add some new tape to keep it secure while the outside is cut. Then cut the outside, taking multiple, very light passes with the cutter. You now have your first ring. Subsequent rings are built on the template and cut out the same way. Because the cutter is a knife there is no kerf so the rings should fit together snugly with no gap. The set-up for the cutter to cut the outer circular edge of one ring is the same set-up to cut the inner edge of the next larger ring.
The centre serves a different challenge as the pivot point for the cutter will be on the surface and the nail will wreck this surface. This is solved by attaching a piece of scrap to the centre for the pivot to go on. However, locating the pivot is another challenge. This can be done by aligning a ruler with two of the radial lines and marking the scrap; the point where they intersect is the centre.
Continue to build and cut out rings until you have enough for your panel. If you’re building a rectangular panel, you’ll need to build arcs as you get closer to the edges. These follow the same process as the rings.
Ready to assemble
Once the centre and all the rings have been cut out they can be taped together with blue tape, ensuring all the alignment marks line up. If the segments on the template aren’t perfectly equal (they never are) having them aligned with the marks ensures everything lines up nicely. It can be difficult to align everything with all the tape in the way, so align it on the tapeless side and add a bit of tape to keep it together, then flip it over and cover the whole side with blue tape.
Finally, you can remove the alignment tape from the opposite side and get the first assembled view of your parquetry panel. Don’t sweat it if there are some misalignments or gaps; the pattern is pretty busy so these won’t likely be noticed. Any large gaps can be filled by cutting and inserting small pieces of veneer. Smaller gaps will be filled by glue. The glue I use dries brown so it blended in with the walnut.
Next, the front surface needs to be taped with veneer tape. You can get away with just taping the veneer seams, but there are so many seams I find it easier to tape the whole panel.
Once the veneer tape is dry the blue tape can be removed and the whole thing can be glued down on your choice of core. Plywood and MDF make great substrates for veneer. A panel this size doesn’t need anything too special to glue up. Some PVA glue and a number of clamps and cauls will do a good job. Veneer both sides of the panel for a balanced panel construction.
Photos credit: Craig Kosonen
Accurate Template Board
Mark the centre of the pattern and use a compass to draw the ring locations.

Lay Out the Segments
Mark a starting point and step along the ring using dividers until you end up right on the starting point.

Completed Template
Draw the segment dividing lines, label the wood species and add an alignment mark to complete the full-size template.

A Simple Cutter
A piece of plywood with a series of holes to cut each ring and a cutter on its end makes a simple circular cutting device. You can use a screw or nail as a centre point but ensure there is absolutely no slop and that the plywood arm won’t flex in any direction during use.

First Segment
The first segment gets taped down and cut only on one edge. Align your straightedge with the lines on the template.

Work Your Way Around
The first ring gets built up one piece at a time. Ensure the straightedge is aligned as closely as possible with the pencil lines to keep the segments as accurate as possible.

Cutting the Last Ring Segment
Cut through both the last and first segment at the same time for a perfect fit when completing the ring.

Cut the Inner Circle
Use light passes to cut the inner circle.

A Bit More Tape
A few strips of tape stabilize the assembly so you can cut the outer circle.

Cutting the Outer Ring
Adjust the circle cutter to the next size and take light passes to cut the outer circle.

Flip It Over
The first ring is assembled and cut out. There’s still blue tape on the other surface, holding the parts together.

Finding the Centre
Tape a scrap to the centre so the veneer doesn’t get damaged, then line the ruler up with some lines and make a cut on the scrap. The intersection point is the centre and is where you can reference the circle cutter to cut the outer circular edge of the inner circle.

Cutting Arcs
As you get close to the outer edges you’ll be cutting arcs instead of rings, though the same process still applies. Kosonen uses a piece of wood to press down on the nail to ensure it doesn’t move while making the circular cuts.

Taping the Rings Together
It can be difficult to align the rings on the side that already has tape, so align everything on the tapeless side and use a few more strips of tape to keep things in place.

Veneer Tape
Apply veneer tape to the whole front surface and then remove the blue tape from the back. It’s possible to skip right to this step, instead of adding blue tape to the entire back side. This will mean the pattern of the completed design is mirrored though.

Cover the Whole Surface
Completely tape the back side with blue tape to hold everything together.

Get Your First Look
Remove the alignment tape from the front and get a view of the completed pattern.

Basketweave
This pattern also works well when a straight-grained veneer is used with the grain direction alternated 90° each time. A solid centre or some marquetry can also change the look.


How to make a three sided box
Check out this article Larry.