TIPS & HOW TO
3 simple (yet essential) shop-made router jigs

Rob Brown

Routers can be made even more efficient and accurate with the use of jigs. Jigs don’t have to be complicated to work well. Even beginner woodworkers can make these router jigs with limited tools.
A jig is a device that guides a tool (usually a power tool) to cut or shape wood. The results are generally very accurate and repeatable as long as the jig is made properly. The jigs covered here are all quite simple to build and are just the tip of the iceberg. If you have a need for a specific, repeated operation, making a device for controlling a tool might be the answer. A bit of imagination and some material are all that’s needed.
I opted to showcase some router jigs here because routers are not expensive, they’re multi-functional and it’s likely woodworkers of all skill levels own one. Jigs can be made for pretty much any tool, though, so once you understand the basics of how jigs work, let your imagination run wild.
A few basic usage tips
Routers work best when they’re not overloaded. Don’t remove a lot of material with a single pass. And although a thin router bit will remove less material with each pass, thin bits are also weaker so still proceed conservatively. Routing grooves and cutting mortises with multiple passes is the best approach.
Always consider which direction you move a router. Since a router bit rotates in a certain direction, climb cutting is always a risk if you’re not careful. To avoid climb cutting, always move the router in the same direction as the bit is travelling when the bit is cutting the material. For example, if you’re rounding over an edge, and the router is being held in its usual way (with the motor above the bit), you want to move the router from left to right. This is because the portion of the bit that’s actually doing the cutting is also moving in a left to right direction. When you climb cut, the router will want to quickly move ahead, or “climb” onto the material it’s cutting. A router that jumps forward like this can damage the bit, router, workpiece or user.
When selecting materials for jigs, plywood is usually what I reach for. It’s stronger than particleboard and MDF, and doesn’t shrink and swell like solid wood does. Having said that, using hardwood for certain jig parts (stops, cleats, etc.) makes for a strong and lasting jig.
Circle Cutting Router Jig
Straight lines are relatively easy to work with in woodworking. Curves, on the other hand, can be much harder to create. The ability to make a full circle, a half circle or just an even arc adds a lot to our design and build options. Circular table tops, arched rails and aprons are just some of the workpieces you can create with this jig.
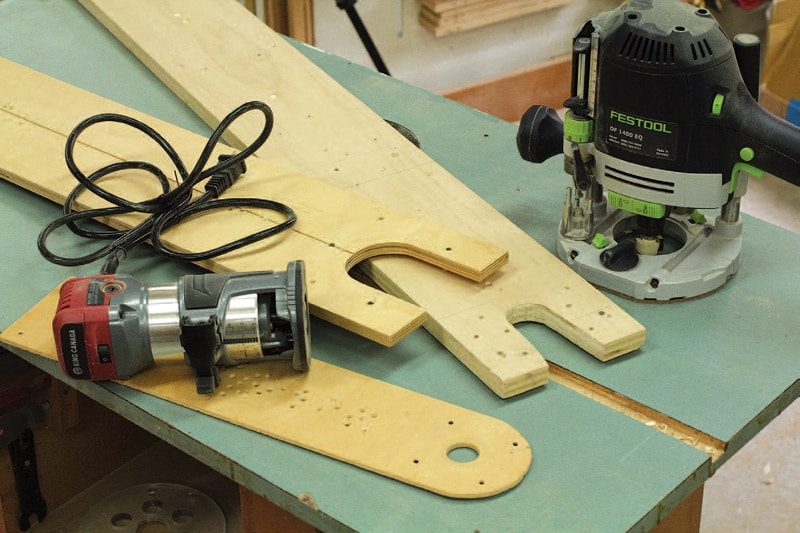
I’ve made three circle cutting router jigs. The two 48″ long 1/2″ plywood jigs are for different fixed-base routers I have, while the last is for a laminate trimmer and is only about 15″ long and is made from 3/8″ thick plywood. The differences between the jigs are in their overall size and the hole pattern I drilled in the jig to secure the base of a router to one of the jigs.
Cut the jig slightly wider than your router’s base. The length is up to you. Longer jigs can cut larger radii, though they can be more cumbersome for making smaller radius cuts. Drill holes in the end of the jig so your router can be attached to the jig, bore a hole for the router bit to protrude through the jig and you’re done.
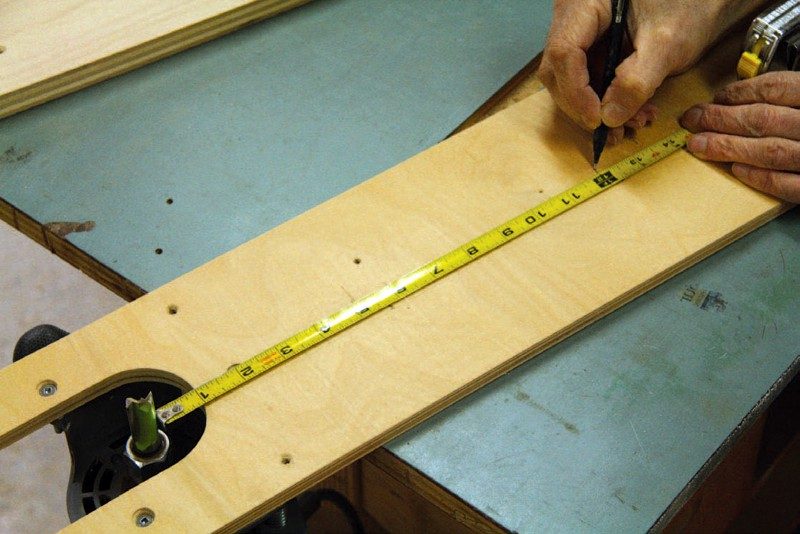
In operation, install a straight router bit. I usually opt for a 3/8″ bit; thinner bits are weaker while thicker bits take a lot of energy to remove the waste from a workpiece. Fix the router to the jig, flip the router upside down and mark a line for the radius you want. Be sure to reference off the correct side of the router bit, depending on whether you’re cutting an outside circle (for example, a round tabletop) or an inside circle (a curved table apron). Drill a small hole through the jig at the pencil mark, insert a screw through the hole and drive it into the center point of your workpiece. If you’re cutting an inside arc you’ll have to clamp or screw the workpiece to a work surface and drive the screw through a piece of material the same thickness as the workpiece, then clamp or screw that piece of scrap. This is to ensure the router bit is perpendicular to the workpiece.
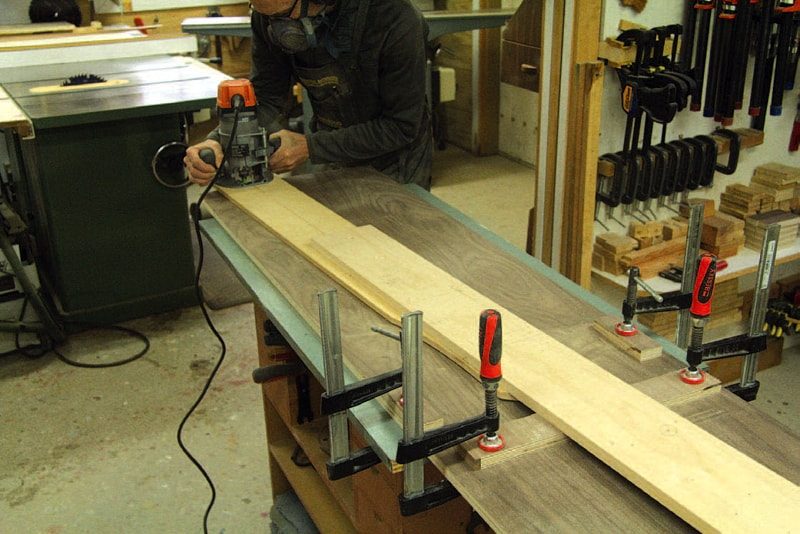
Multiple passes, adjusting the depth of the router bit with each pass, is safer than a single, deep pass and gives best results. And if you need to cut a larger radius than your jig is long, screw a piece of plywood to the end of the jig to act as an extension.
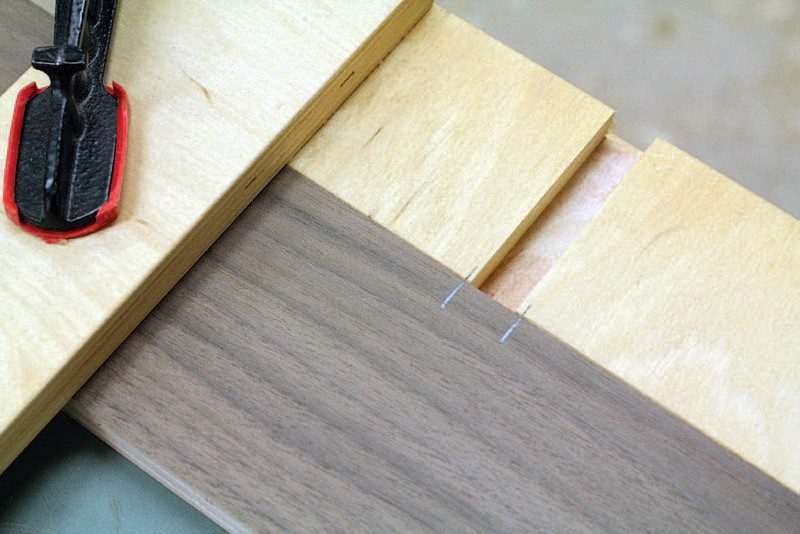
90° Router Jig
Essentially two pieces of plywood fixed at a 90° angle to guide a router, this jig will help you cut dadoes, grooves, rabbets to accept shelves, gables and other workpieces. I often use it to machine dovetail grooves in carcass pieces. Whatever joint I’m machining with this jig, one piece sits flush against the edge of a workpiece while the other guides the router. Clamps hold the jig in place when in use.
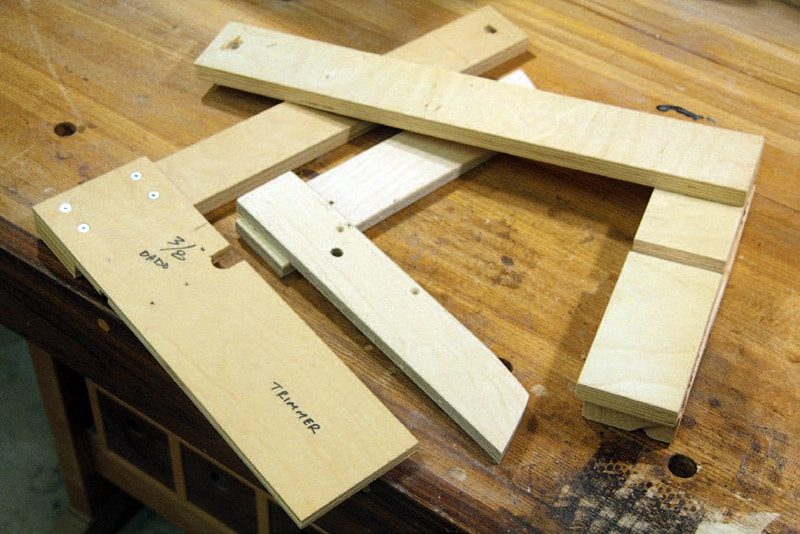
I made a few of these for the different routers I have, as well as the different bits I would use with the jigs. You could easily make just one jig and use it for all your router and bit options, but my approach allows me to quickly and easily align the jig with a pencil mark on my workpiece before I clamp it in place, because the location of the groove the bit leaves is visible on the portion of the jig that aligns with the edge of the workpiece during use.
Cut two lengths of 3/4″ thick plywood. How wide these pieces should be depends on how long the joints you want to cut are. Longer joints mean wider parts are needed to reduce flex in the jig parts. Countersink a few holes in the end of one length, then add glue to the mating surfaces and screw the parts together, making sure the parts meet at exactly 90°.
Once dry, you can clamp the jig to the workpiece. The edge that will guide the router must be offset from the location of the groove you want to make. If you make a jig for each router you own, you can write the offset distance on the jig. I made a number of these jigs so I can actually mark the location of the joint on the workpiece and align the notch that’s already been cut in the jig from previous operations with the pencil lines. There’s also nothing wrong with guiding the router with either side of the jig’s straightedge.
Because of the bit’s rotation, you must avoid climb cutting while using this jig. If you move the router in one direction, the rotation of the bit could cause the router to leap forward or away from the straightedge. If the router is moved in the opposite direction, the rotation of the bit constantly presses the router into the jig.
Basic Mortising Jig
Mortise and tenon joints are typically very strong. The main downside is that it can be hard to accurately and precisely machine a mortise. Tenons are fairly easy to machine, though making “slip” or “loose” tenons is also a good option. This simple jig will have you creating accurate mortises with a plunge router.
Once you have a straight router bit the width of your mortise and a template guide that will fit on your plunge router’s base, you’re ready to make this jig. You need to be sure the router bit you’re using will fit inside the template guide, as some guides are very small.
I made my jig with 3/4″ plywood, though thinner plywood would work okay. Thicker plywood offers a bit more rigidity, which is good. The overall size isn’t crucial, though it needs to be large enough to support the plunge router when in use. Make a pair of kerfs with your table saw so the distance between the two kerfs fits the template guide perfectly. Sneak up on the final width, as any slop between the template guide and the template will cause this jig to not work. Glue two pieces of solid wood in the opening so they will create the length of mortise you want. The distance between the two pieces should be equal to the length of the mortise you want to cut, plus a bit extra to account for the fact that the template guide will stop the travel of the router bit before it becomes flush with the pieces of solid wood. If I really need to obtain a specific length of mortise, I’ve driven #8 screws into the inner edges of the mortise recess, instead of the two solid wood blocks. I can use a screwdriver to adjust the distance the router travels.
In use, the jig can be clamped to the workpiece to guide the plunge router while it machines the mortise. If a mortise on the end of a workpiece is needed, screw a few pieces of blocking to the underside of the jig and clamp the jig on the end of the workpiece. You could also make a few of these simple jigs so you have a jig setup to rout mortises in a range of different workpieces.
Rob has six routers yet still feels the need for more. They’re so helpful in a small shop setting; you can never have enough. They’re the clamps of the power tool world.
Photos credit: Rob Brown
Make a Few
Different circle cutting jigs can be made for different routers, though it’s not mandatory. Shorter jigs do make it easier to cut smaller radii.
Measure Carefully
Once the jig is made and the router and bit are ready for action, make sure you measure from the correct side of the router bit. Shown here, Brown is measuring for an outside circle cut because he’s measuring from the inside (or close) cutting edge of the bit.
Extra Long
You don’t need to make an extra-long circle cutting jig; you can easily screw an extension to the one you have. Here, Brown used a walnut plywood offcut to screw the jig to, then clamped the offcut to the workpiece.
Right Angle for the Job
Making more than one 90° angle jig is easy to do. You can even label them for a specific router you have, as this makes it easier to align the jig to locate each cut.
Easy Alignment
Using dedicated jigs for specific routers, or even for both a router and a bit, makes it easier to align the jig with the workpiece. If you mark where the mating workpiece will go you can easily center the pencil marks or routed groove on the marks.
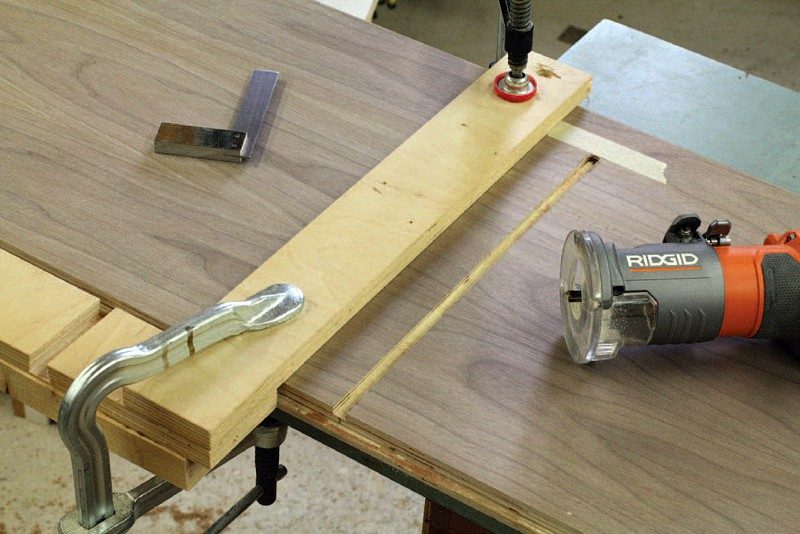
Which Direction?
It’s acceptable to reference the router on both sides of the straightedge. To avoid climb cutting always move the router in the correct direction. It’s different when cutting on the opposite side of the straightedge, but in this instance Brown started the cut at the outer edge of the workpiece and finished the stopped dado he was machining at the masking tape.
Make Two Kerfs
Start with a piece of plywood and cut two kerfs in it so the distance between their outer edges is exactly the same as the width of your template guide. A stop block will give you a solid starting point; press the workpiece against the stop and tilt it down over the blade. Next, trim the waste from the center.

Screw on a Stop
In this example, Brown started routing at the far edge of the workpiece and finished his cut at the near edge. He also screwed a piece of wood to the jig to act as a stop because he was machining a number of grooves the same distance.

Two Pieces of Wood
Although there’s nothing saying you can’t skip adding the two pieces of solid wood, Brown finds it easier to rout to an even edge. It’s also easier to set the width of the mortise when adding these pieces, but that’s only important if you need a very specific width of mortise.

Add Blocking If Needed
If you want to rout a mortise in the end of a workpiece, add some blocking to the underside of the jig to allow you to clamp the jig to the workpiece. Getting creative here will allow you to rout all sorts of mortises.

The End Result
The resulting mortise, made with multiple passes, will accept either a slip tenon or a workpiece with a tenon machined on its end. Both will provide a strong, lasting joint.


Great to be educated by great educators!