PROJECT
Walking-stick stand

Michael Kampen

Find more Furniture projects
Walking sticks and umbrellas are handy to have near your entrance, but storing them attractively is another thing.
Some hang their sticks or umbrellas in their hall closet, others tuck them behind the coats in the back corner. Either way, they often aren’t readily available, and when you come in wet, where do you put them then?
This stick stand offers an attractive and convenient way to store your walking sticks and umbrellas. With this stand they’ll always be there when you need them, and when you’re done with them, wet or not, you’ll have somewhere to put them.
When choosing stock for this project, try to find some quarter-sawn lumber for its appearance as well as dimensional stability. The stand looks best when contrasting species of wood are used. Except for the legs and bottom trim, all of the parts are made from ¾” stock. Because of how this project comes together it’s best to mill your stock and do all of your routing with one setup. That will ensure a problem free assembly. I used penetrating oil with a natural beeswax finish on this walnut and alder version. To avoid glue related finishing problems it’s best to pre-finish all pieces.
Walking-stick stand
Make the Legs
Make the leg blanks from solid or glued up stock. By using quarter-sawn wood you could glue up a blank from ¾” stock without serious grain matching problems. Mill the blanks for the four legs to 1 ⅜” x 1 ⅜” x 24″ and set them aside until later.
Cut the Panel Parts
I use a matched set of tongue and groove cutters in a table-mounted router for all panel shaping. Cut a tongue on the ends of the front, rear and side rails. I use a router table in conjunction with a fence and right angle sled to cut a ⅜” x ¼” tongue along both ends of each rail board. Set these aside and repeat the operation on the ends of the four picket boards.
With the same bit setup, using only a fence, rout a tongue down the length of the walnut blank the filler blocks will be cut from. Sand the faces of all parts at this stage. Be careful not to round the pieces towards the edges. With a good quality ripping blade in a table saw, rip each of the picket boards into ¾” x ¾” pickets. Keep them in the order they come off the board and set aside. Next, rip each of the rail boards into two smaller sections, 1 ⅛” and 1 ⅝” respectively. Using a fence with the slot cutter, cut a groove, ¼” wide x ⅜” deep along the inside edges of the top and bottom rail. Keeping the same face of the piece on the table, use the same setup to return a groove on the other side, just far enough to completely form a tenon. Run a groove in some scrap to provide support when you cut the filler blocks from the long blank. I recommend making a clamping jig by routing a groove into a piece of scrap 1 ¼” x 2″ x 26″.
Finish sanding the pickets to remove saw marks. Use a hand plane to put a chamfer on the ends of each face to provide some extra visual detail. The actual size of the parts may have changed slightly during sanding, so test-assemble each panel first. Subtract the total width of the pickets from the length of the groove, and then divide by the number of filler blocks required for that panel. Use the scrap piece with the groove to support the walnut and cut the number of filler blocks you’ll require for each panel.
Assemble the Panels
Using the clamping jig that you prepared earlier, assemble the panel without glue using one clamp on each rail and two on the panel. When I am ready for glue, I use a small ¼” artist’s brush to spread glue in the grooves. Then, I quickly assemble and clamp the panel.
The top is a mitred frame with splines glued across the outside corners for added strength. I use a jig that cuts perfect complementary angles on the ends of the walnut pieces and then glue the frame together using a band clamp. After the glue has set overnight I cut the slot for the splines and glue them in place. Sand and stain the frame before the final assembly. Lay out and cut the mortises in the legs to receive the tenon on the panels. Place the panel on the legs and transfer the locations with a pencil. Extend the lines around the side with a Veritas saddle square. When the mortises are finished, sand the legs and use a hand plane to chamfer the bottom edges to reduce splintering. Apply the finish of your choice. Test-fit the 4 legs and 4 panels, and then glue and clamp the body of the stand. The top frame attaches with biscuits and the base is held by the bottom trim pieces. These have a chamfer on the outside top and bottom edges and are attached to the stand with countersunk brass screws.
Lay out the parts before gluing. Note filler block layout
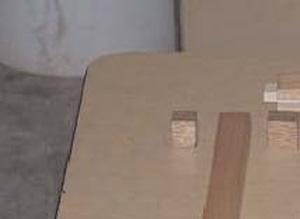
Illustration by Mike Del Rizzo