PROJECT
Turn a sunrise bowl

Ken Rude

Find more Woodturning projects
Adding some contrasting, figured wood to a piece is sometimes all that's needed in order to make it stand out from the crowd.
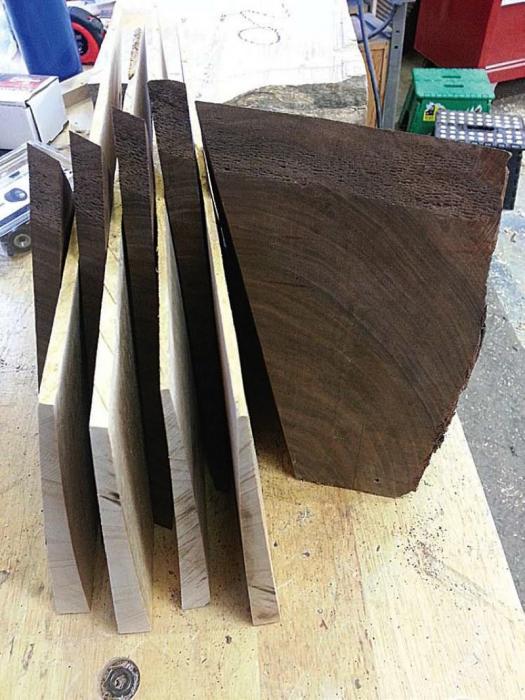
One of my suppliers gave me a piece of wood and asked me to make him a turned bowl. This piece of wood was a pyramid shaped eastern walnut that was planted in the mid to late 1800’s near Chilliwack, B.C. He was able to salvage this wood when the city had to take down some of the trees to widen the streets. It took me a year to decide what I was going to turn with this piece, as it came to a narrow peak at the top end. I decided to use bird’s eye maple slices to give me four tapered wedges I could glue between walnut layers.
Turn a sunrise bowl
Contrasting maple slicesMount the blank
The next step was to cut four ½ slices off the one side of the walnut piece. By placing the tapered maple pieces between the walnut slices, with the wide part of the taper to the top, it would spread the narrow top to give me more of a foot or tenon to hold the piece with the chuck while turning the inside.
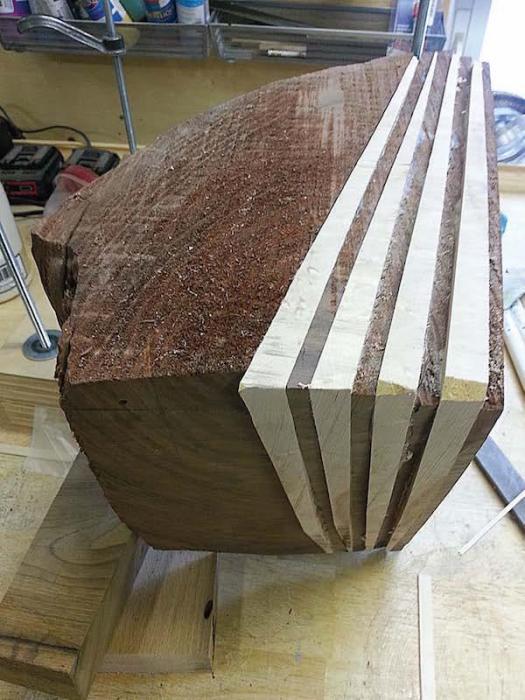
All the pieces were glued and clamped tight and left for the next day. As I did not try to cut the maple to fit, I then had to trim off the excess maple slices to get a reasonably smooth surface. I forgot to clamp the centre of the slices on the wide bottom end so ended up with a gap between the slices in the middle of the piece of wood. I now needed to find some brown pigment quickly to mix with some epoxy to fill this void. This bowl was to go on a showpiece shelf and I wanted to ensure that there were not any color breaks. Without the pigment, I could fill it with epoxy but it would have shown as a clear fill; I wanted it to blend in.Mount the blank
Mount the blank
With the colored epoxy cured it was time to mount the piece of wood on the lathe, and start turning the basic shape of the bowl. I was very excited to see how the colours were going to look. One of the things I enjoy about turning is that you never know what treasures you will find in the grain or colour of the wood, as the surprises unfold in front of you while you turn, and are often spectacular.
Start turning
Turning the shape of the bowl starts to show the colours in the walnut – the dark brown, light brown and the reds. At this time, I defined the placement of the base of the bowl and made the tenon in which to hold the bowl when it is turned around to secure in the chuck. The end is still held secure with the live centre in the tail stock. I found there were a few voids in the walnut and these would be filled with more brown epoxy.
Adjust the tool rest
By changing the position of the tool rest, it was time to give the top of the bowl a smooth flat top by cutting off the uneven wood on the top and making it parallel with the bottom of the bowl.
The wood looks smooth as silk as it spins at approximately 1200-1500 rpm. All of the colors blend together giving another view of the mystery of what will finally show in the finished bowl.
First finishing step
When I completed the outside turning and had it sanded to my liking it was time to apply an orange paste wax finish. After the finish is applied the extra wood below the tenon needs to be removed so it can be mounted to the chuck for completion.
This was a very dense and heavy piece of wood so when I mounted it in the chuck, I also used the tailstock to help support the wood until I had removed some of the weight out of the centre. I left the tail stock on until I had most of the centre wood removed, almost to the bottom of the bowl. I then did some preliminary sanding at this time, then removed the tailstock from the centre post so I could finish turning the inside of the bowl.
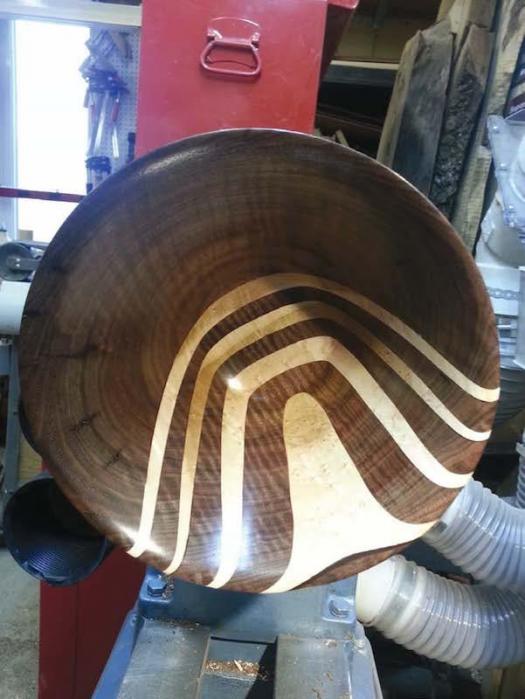
The centre of the bowl is now finished turning, the voids in the walnut have been filled with the colored epoxy as needed, and the bowl is ready for sanding and finishing. The orange paste wax finish enhances the colors, the grains and the contrast of the maple inlays in the wood.
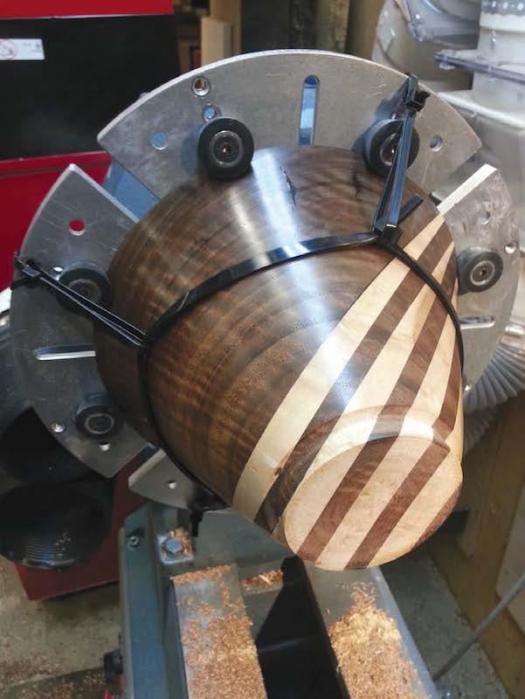
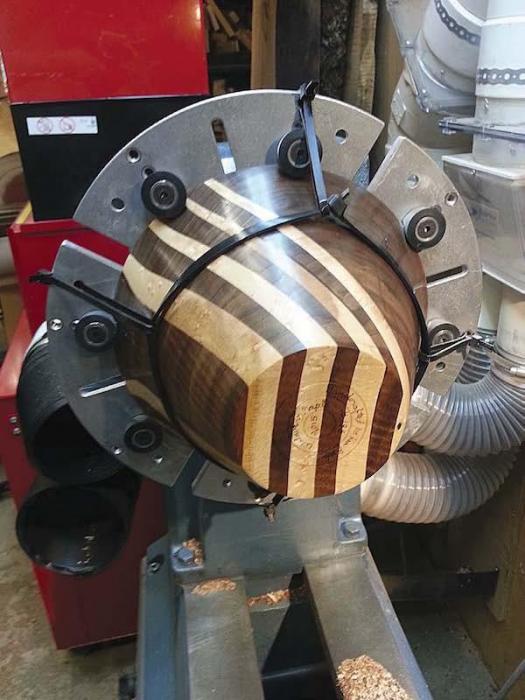
Remove the tenon
Mounting the almost completed bowl onto the bowl jaws, it is time to take the tenon off. I did not want the bowl to become airborne at this time so I used zip-ties to secure it to the bowl jaws.
After removing the tenon, I signed, dated and numbered this bowl, a process I do with each of the bowls I make. I have returned this bowl to its owner in Chilliwack where he displays it on the shelf with other renowned turners.
Photos by Ken Rude (Lead Photo April Steegstra)
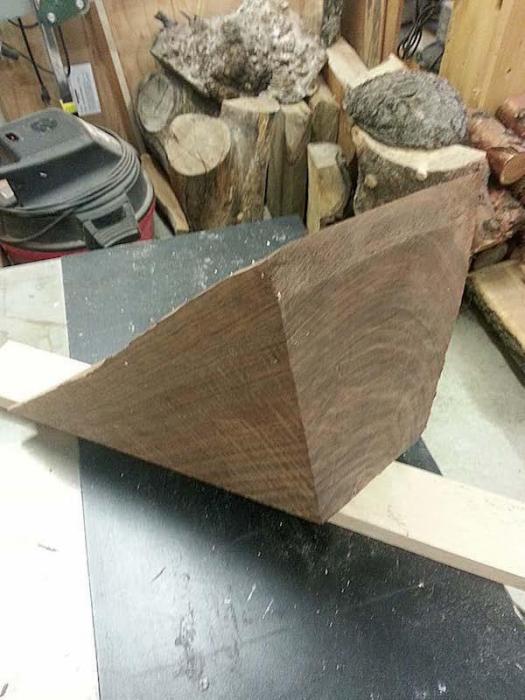
Great Pyramid
The blank Rude received was a basic pyramid shape, and fairly small.
Making Wedges
Rude cut maple wedges on his bandsaw, though a plane sled would also make very uniform wedges. A simpler option is to used flat dressed pieces of wood as contrast.
All Glued Up
Once the layers of maple and walnut were cut, Rude glued them together. Gluing these layers a few at a time might be the safest approach.
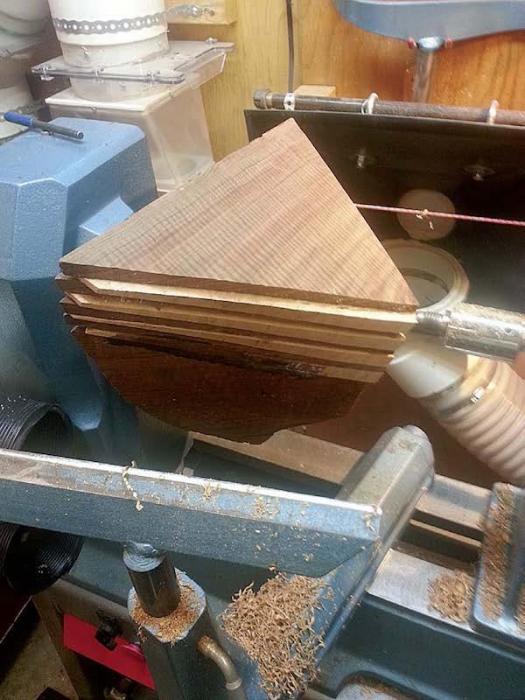
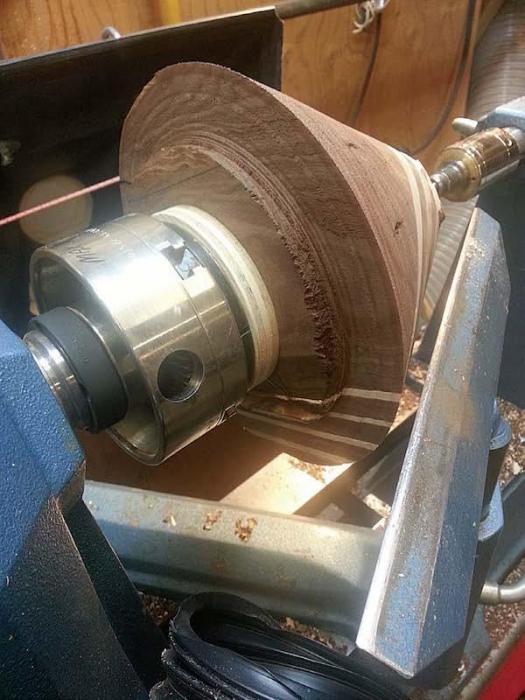
Take it for a Spin
With the layers are cured, Rude trimmed them relatively flush before mouting the blank on his lathe to begin the turning process.
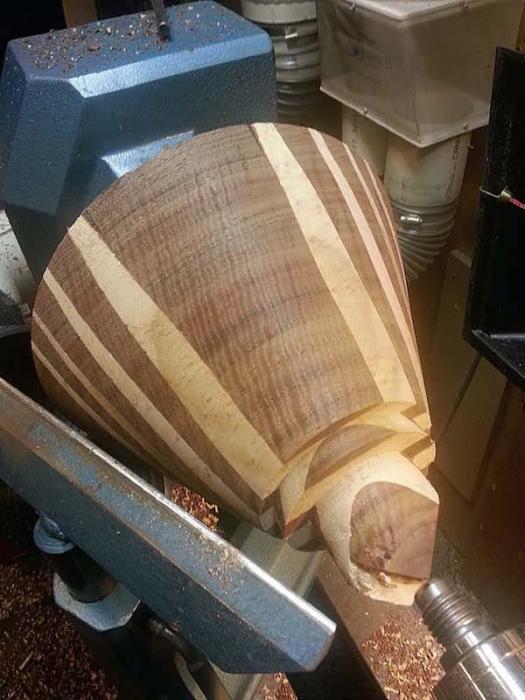
The Exterior First
At this stage the exterior shape of the bowl can be turned, as well as the tenon on the base.
Define the Top Edge
Adjust the tool rest and define the top edge of the bowl.
First Coat
Once the exterior of the bowl has been shaped and sanded, apply a finish to the outer surface.

Turn it Around
Remove the bowl, rotate it, chuck the tenon and start to hollow out the center of the bowl. Rude used the tailstock to support the bowl during the initial stages of hollowing out the bowl.
Getting Closer
With the majority of material removed from the center of the bowl Rude sanded the inner edges.
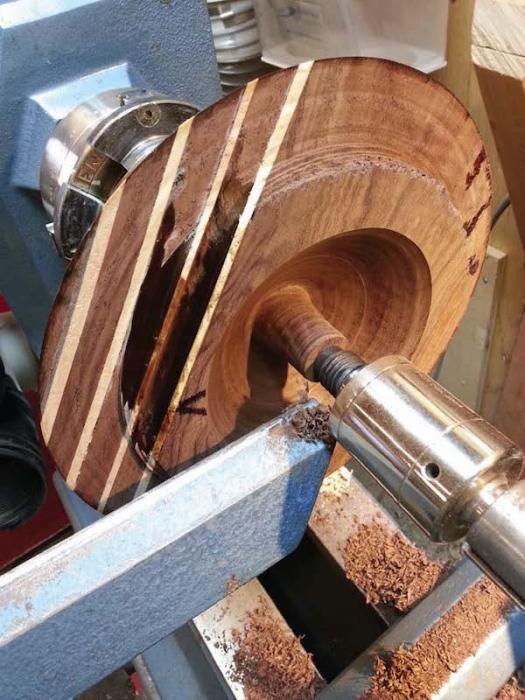
Further Wood Removal
Rude removed the center of the bowl and the tailstock, then finished turning the inside of the bowl before sanding it.
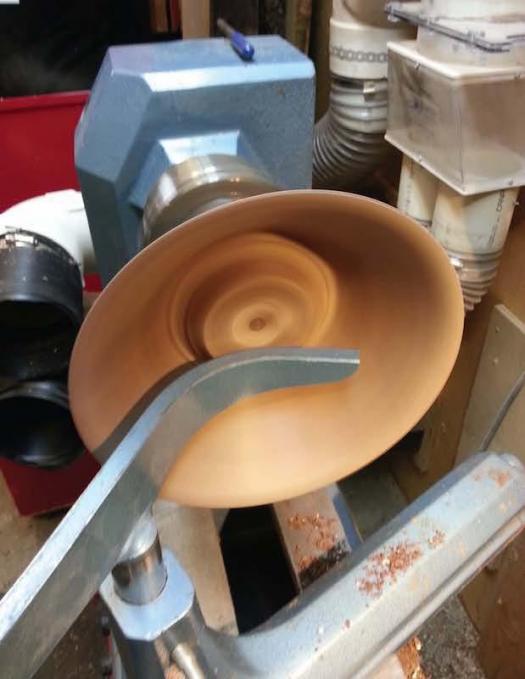
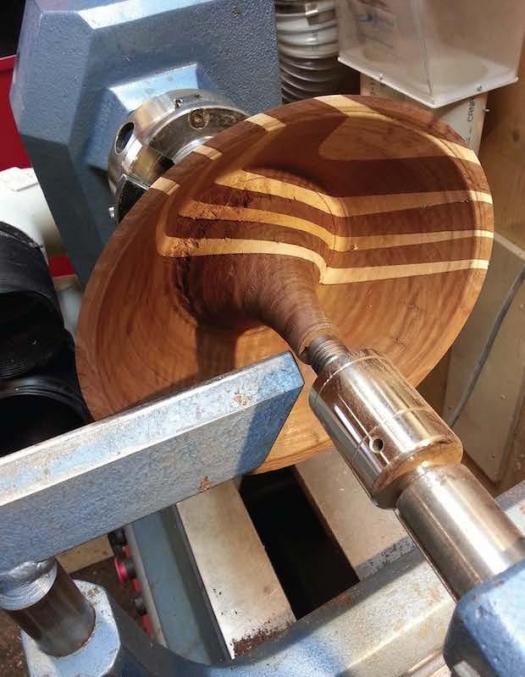
Finish the Inside
The proper finish will accentuate the wood's natural colour and grain, which not obscuring the wood.
Extra Strength
Zip ties add an extra level of assurance while turning the base of the bowl.
Final Details
With the tenon removed, and the base finished, it's time to sign and date the piece.


Hi Ken,
Do you provide woodworking classes? It would be for my husband who is very handy and interested by this type of art.
Thank you for letting me know,
Aude