PROJECT
Turn a pencil crayon pen

James Dobson

Find more Woodturning projects
You may have seen these turned pens made from pencil crayons before, but you’ve probably never seen one that’s so easy to make. Forget about resins, casting and pressure pots. All you need here is plenty of CA glue.
I was first approached by a long-time customer who wanted a set of pens as a wedding present for two teachers who were getting married. He showed me a photo of a similar pen that used round pencil crayons with the spaces between them filled with resin. At first, I told him I couldn’t take the job as I didn’t have the necessary tools, and that one job wouldn’t pay for their initial cost. A few days later I happened to find myself in my local dollar store where I found hexagonal pencil crayons. I had a lightbulb moment and bought a couple of packs.
Turn a pencil crayon pen
CA adhesive to the rescue
Cyanacrylate, or CA, glue is a staple in many shops. It’s quick to dry, forms a very strong bond, dries clear and is relatively inexpensive. Turners are especially drawn to it as a durable finish for pens and other small items. It comes in different viscosities from a thin, water-like glue, all the way up to thick, syrup-like glue. The glue also responds to an accelerator that causes the glue to cure instantly. I’ll be using both the thin and the thick glue as well as the accelerator on this project.
Short lengths
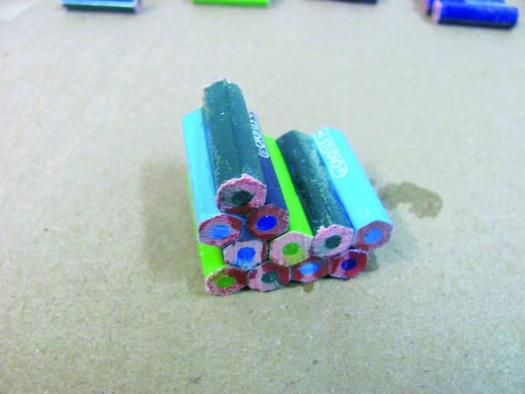
I start with a package of hexagonal pencil crayons. Twelve is just enough to build up a blank long enough for the kit that I’m using. You may need more or less depending on the kit you’re using. Cut the pencils to lengths of 1″ with the saw of your choice. I used a band saw, but made sure to hold the pencil crayons securely with each cut so they wouldn’t rotate. A Japanese hand saw and bench stop is a good option for many woodworkers.
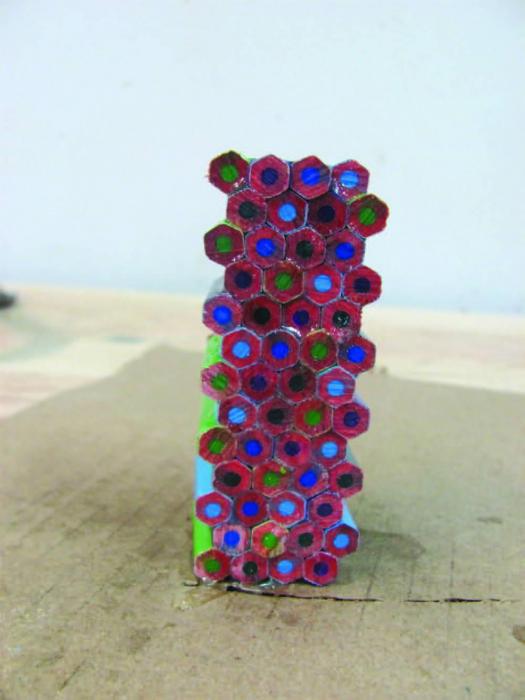
With your thick CA glue and accelerator handy, start by gluing a triangle of three blanks. Keep adding to this until you have two layers of four pencil segments. Work quickly so squeeze out doesn’t harden on surfaces you need to glue to later. Also mind your fingers. CA glue forms very strong bonds with skin and it’s common for me to glue my fingers together several times while building a blank. Use the accelerator to ensure joints are adhered to each other as you work. Continue to build up your blank, piece by piece, until it’s slightly longer than the brass tube.
Prep your blank
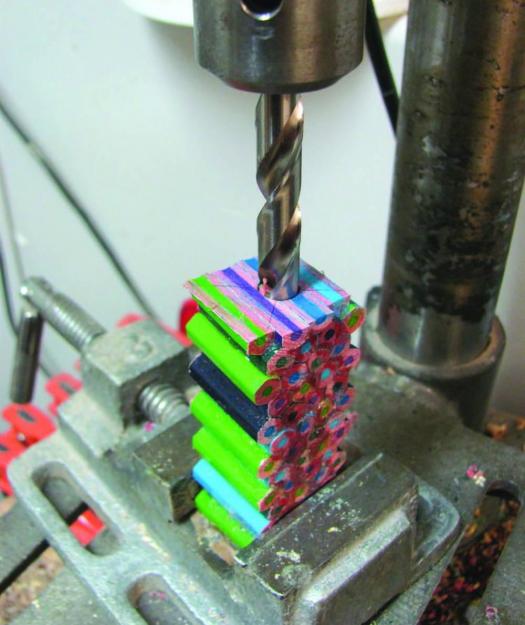
Now that you have your blank you can prepare it for the lathe. I square up one end of the blank using the band saw again. This doesn’t need to be perfect, but it helps with layout for drilling. Mark for, and drill out, the center with the appropriately sized drill bit. Some people use CA glue to attach the brass tube to the blank, but this is not the time for that. Use a good five-minute epoxy. You want the added strength to keep each segment secure and it helps with gap filling if needed. There are products that you can buy to plug the ends of your tube while gluing, but I have gotten good results with playdough. Make a ¼” thick disc and push the ends of your tubes into to block them. This keeps the inside of the tube clean, because as the playdough dries it shrinks, making it easy to remove.
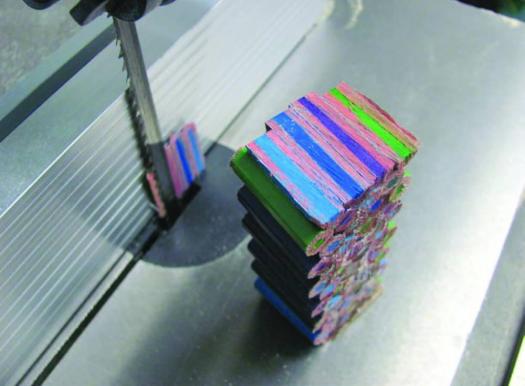
Once the epoxy has fully cured you can finish cleaning up the ends. I use a disc sander I made for my lathe, but there are many other options available. If you have an end mill you can use that here, but note that I have never tested how the tool cuts through the pencil segments so proceed at your own risk. I cut the corners off of the blank with my band saw here. This isn’t 100% necessary but it speeds the turning process. No need to be overly precise; just don’t cut too close to the tube.
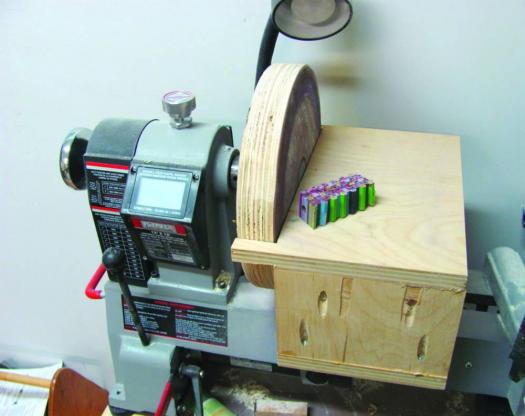
Mount on the lathe
Mount the blank on your lathe with the right mandrel and bushings and get to turning. I use a 1″ oval skew chisel exclusively. Its shearing cuts are perfect for this application. I turn around 1800 rpms. Turn your blank down to the size required by the bushings. You should use a very sharp tool for your final pass as we will not be sanding this blank. We want to avoid staining the wood with the dust made by the leads. However, in my experience, a little staining is unavoidable. Coat the blank with dewaxed shellac and allow this to dry before proceeding with finishing. This coat seals the colours and helps reduce staining.
Finishing it off
For the finishing process I turn back to CA glue. Turn your lathe speed to as low as it will go. Grab a blue shop towel and fold it over itself a few times. Hold this on the bottom of the spinning blank with your left hand. With your right hand hold the bottle of thin CA glue and run a line of glue from left to right. Your left hand should follow the right so that the towel is levelling out the glue as it pours. Wait for the glue to dry and then give it another coat. Continue until you’ve applied six coats. Some people recommend more but I’ve found six to be sufficient.
You can use the accelerator to speed this process, but be careful. If you spray it too close to the blank or the droplet sizes are too big you may be left with white spots in your finish. If this happens, you need to sand away all the glue, but if you recall, we’re trying to avoid sanding these blanks. It’s better to just be patient and allow the glue to cure on its own.
Time to sand
With the CA finish applied and cured we can finally break out the sandpaper. Lay a towel over the ways of your lathe bed and get a small container of water. Lightly wet sand starting with 600 wet/dry paper before switching to micromesh pads. Continue wet sanding all the way up to 12,000. You can apply a plastic polish at this point if you wish or just buff with paste wax.
To remove the finished blank from the mandrel I use a fresh blade in a utility knife. Hand spin the lathe away from you while keeping the knife just on the edge of the bushing. A few passes will do. Remove the blank from the lathe and a little lateral pressure will break the blank free from the bushings. If any glue is protruding past the edge of the blank, trim it with the disc sander as well. I use a drill bit that fits inside the brass tube to align the barrel to the sanding disc. Assemble the pen as per the kit instructions and you’re finished.
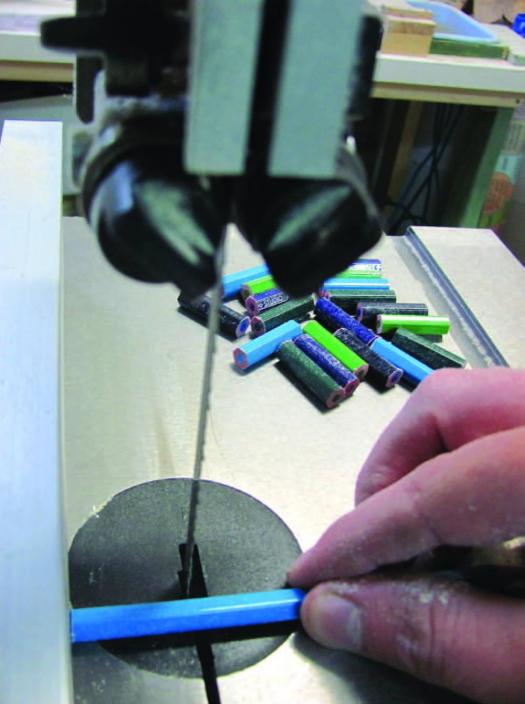
Cut into Short Lengths
Though Dobson uses a band saw to cut short lengths of pencil crayons, a hand saw would also work well. He holds each pencil securely while cutting so it doesn’t rotate.
Start with a Triangle
CA glue will bring the short lengths together quickly. Start with a trio of pieces, ensuring they are as aligned with each other as possible.
Keep Adding
Add more short lengths as you go, making sure to keep them all as aligned and straight as possible.
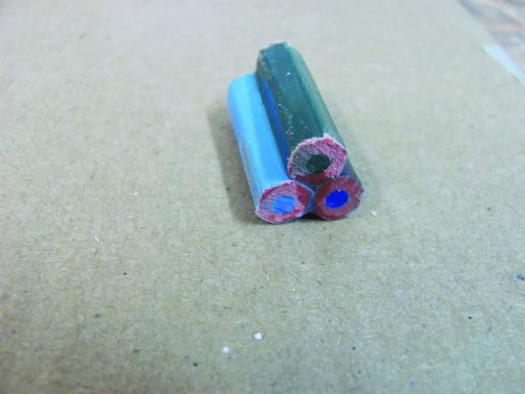
The Final Blank
When the blank is large enough to create the final workpiece, you can stop adding to it.
Trim One End Square
Although it doesn’t need to be perfect, creating a fairly flat, square end makes boring a hole through the center of the blank easier.
Down the Middle
With the blank securely held, use a drill press to bore a hole to accept the pen hardware.
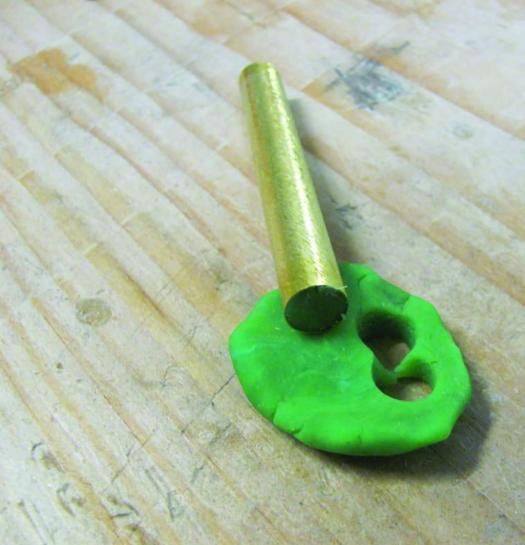
Not Just for Kids
Playdough is great for capping the ends of the tube while you’re using epoxy to secure it in the workpiece. It soon dries and falls out.
Epoxy is the Solution
For relatively fast curing and great gap filling abilities, epoxy is a great adhesive for securing the tube to the workpiece.
Even Up the Edges
Touch up the ends of the blank with a disc sander.
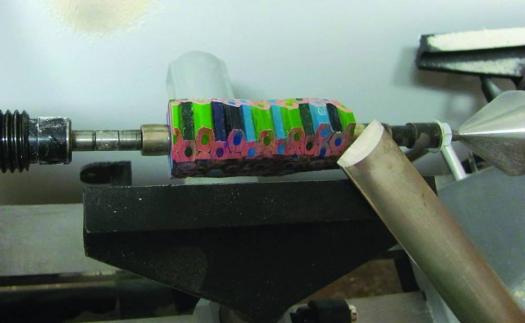
One Turning Tool
Dobson uses a 1" oval skew to do all the turning. Before turning the lathe on he removes some of the material off the four edges to make turning easier and quicker.
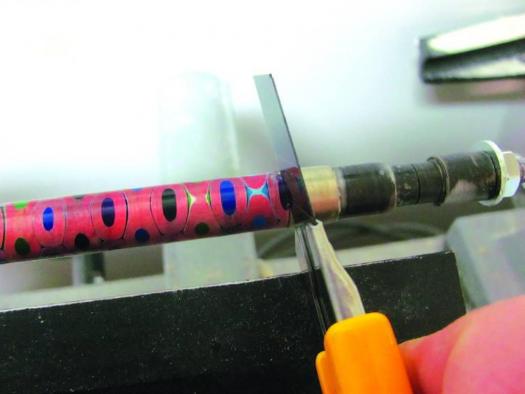
Removal
Dobson uses a sharp blade in a utility knife to remove the turned blank from the mandrel.
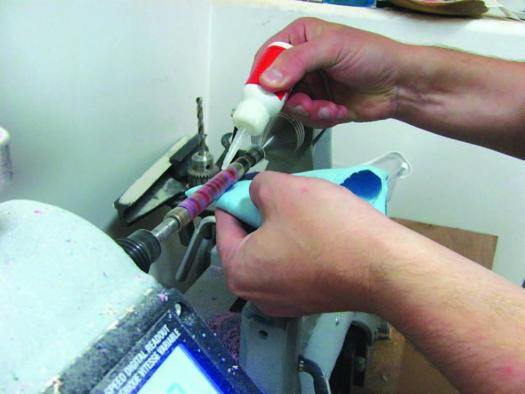
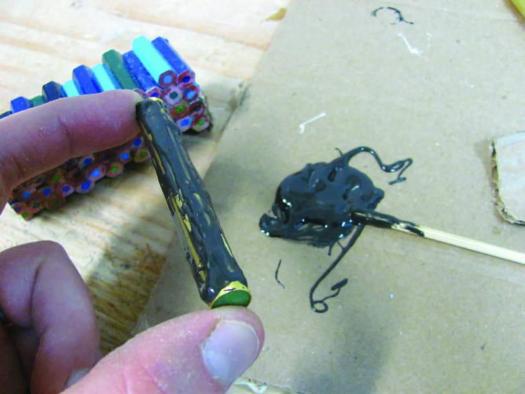
CA Adhesive Finish
Dobson applies six coats of CA glue to the turned workpiece to protect it and provide a glossy finish.