PROJECT
Torsion box shelves

Mark Salusbury

Find more Home Decor projects
Torsion boxes involve using a thin layer of sheet goods on both faces, held together by narrow strips of solid wood. They allow you to create thick looking and strong workpieces, but keep the weight down. Torsion box, or "hollow core" projects can be tailored to suit a budget, a look, a finish or a scale.
Here, simplicity, scale and finish drive the project. Physically very light, the shelves will confidently, conveniently and attractively support supplies above a sewing table. And with the torsion box skills you learn completing this project you’ll be able to confidently tackle larger-scale projects.
My shelf materials are Baltic birch plywood, a skeleton of pine strips, white Arborite, sapele for the edging and white paint for the show surfaces. You can use veneered plywood for a look that includes more visible wood if you’d like.
The process is simple; accurately draw-out the construction on the inside of the inner shelf and end skins; cut, then assemble the skeleton parts on top of the layout lines then bond the skeleton to the skin; join the end to the shelf; add the outer skin panels to both shelf and end and trim the assembly once the glue has cured. Next, apply and trim the Arborite, apply, trim, sand and clear-coat the wood edges and paint the outer show surfaces.
To match the thickness of the sewing tabletops (also a torsion box build) I used 1/4″ plywood applied over pine strips ripped 1-1/4″ wide for a finished thickness of just over 1-3/4″ once the Arborite is applied. Hollow, the shelves slip-fit over a 1″ thick solid hardwood bracket that gets screwed solidly to the walls’ studs. The shelves are then deftly fastened to the brackets, appearing unsupported…surprise!
Torsion box shelves
Start with the skins
With dimensions decided, begin by cutting plywood to make the top skin of each shelf. Next, lay out in detail where each skeleton part will be glued. This reveals the exact length of the parts, which can all be cut now. With skeleton parts cut, precisely located within the layout lines and clamped lightly together, one or two 1/2″x 1/2″ staples bridging the joint dry-bonds the skeleton together.
After carefully relocating the top skin nearby, apply glue to the top face of the skeleton assembly then invert and position the skin on top of the skeleton, keeping the front edge and the end that will be under the end assembly flush with the skeleton as reference; four or so short pins or brads will hold everything in place so you can flip the assembly over to check for alignment and tweak things if required before they are clamped uniformly and set aside to cure. A proven perfectly flat bench and careful alignment governs how straight and true each assembly will be once bonded. Repeat this process to assemble the end assemblies.
Bring it all together
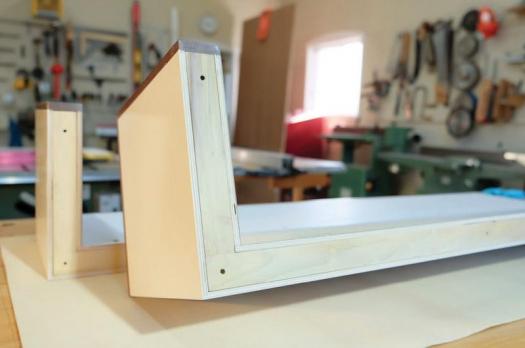
Next, accurately place and align the end assembly on the shelf assembly where it will later be secured. This allows you to mark out and remove the plywood corner of the shelf where the L-bracket will need to go. It’s easier to remove that corner before final assembly.
Now, checking for square, clamp the end in place on the shelf, drill through the shelf skeleton/top into the end skeleton and glue and screw the end sub-assembly to the shelf. Once the clamps are removed, applying the outer skins to the project covers the skeleton and screw holes, produces a nice tight mitre and flush front edges. Now you can do any necessary trimming of ends and sand all surfaces flush and square.
L-bracket
Using the shelf assembly as a jig and model, the next step is to make the L-bracket to mount to the wall. Using stock milled to 1″ thickness and ripped +1-1/4″ wide, cut parts to produce a tight fit within the recess at the rear of the shelf/end. A bridle joint with glue and pins unites the two parts and once cured can be trimmed and sanded to a piston-like fit within the shelf recess.
I found it quite useful to take the rough L-bracket to the wall it would mount to, locate and mark the studs, then mark and drill the corresponding screw holes in the L-bracket. Using a couple of loose fitting screws allowed me to insert and extract the L-bracket from the recess in the shelf assembly during testing and fitment.
Apply Arborite
Now it’s time to apply Arborite to the working surface of the shelf and inside of the end. Alternatively, you could forego the Arborite and apply a standard wood finish, if that’s what you prefer.
Squarely cut and slightly oversize, the Arborite is bonded using contact adhesive. First the shelf gets covered, tucking the Arborite tightly into the shelf/end corner and rolling it firmly into place with a J-roller, followed by applying the Arborite to the inside of the end tightly to the shelf surface.
Now trim the Arborite squarely flush with all edges with a router and flush trim bit, file and/or sand on a flat sanding block and clean up any rogue contact adhesive.
With the L-brackets’ fit perfected, and with the five holes for the 2-1/2″ x #10 flathead screws to secure the brackets to the wall drilled, it’s time to mark out, drill and countersink for the screws to hold the shelf onto the bracket. I chose 1-1/4″ x #8 flathead screws for this. Four screws is adequate in this application, each clear of the wall mounting screw holes, slightly countersunk beneath the Arborite surface and drilled through into the L-bracket making final installation easy and precise.
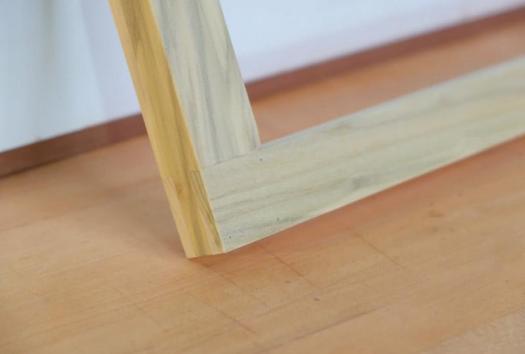
The solid edging is best all ripped and dressed from the same piece of stock for a consistent appearance. From 2″ wide x 8′ lengths ripped into 1/2″ thicknesses and dressed down to 7/16″ x 1-7/8″, I produced enough stock to cut and mitre around the ends and face of all three shelves to achieve the look I was after…confident but understated. Four edge parts per shelf, each carefully measured, mitred, fit, glued and pinned in place before moving onto the next part. A 1/32″ overlap both above and below each piece allows for the edging to be trimmed flush with the Arborite and soon-to-be painted surfaces with a router and trim bit and careful sanding once all the edging is applied and the glue cured.
Apply a finish
At this stage, using blue painter’s tape pressed firmly in place to avoid the finish from creeping underneath, I masked off the Arborite and to-be-painted show surface, and finished the wooden edges with three spray coats of satin Varathane for a smooth, durable, clear result, sanding lightly with 320 grit abrasives between first and second applications.
Once that fully cured over 72 hours, I taped off the edging as above and spray applied three uniform coats of Rustoleum Painter’s Touch semi-gloss white to finish the outer show surfaces.
Installation
Finally, with the L-brackets installed level and plumb on the wall it’s an easy job to slip each shelf over its respective bracket. As each will be slightly different I identified and labeled each set to avoid any surprises at this stage. Drop in the #8 screws and drive them just below the Arborite surface for a concealed installation. I left mine uncovered as they’re only visible if you look for them closely, but could be concealed further with a veneer of white painter’s caulk or PVC screw covers such as those sold by Lee Valley Tools (product #s 00S53.06/09/11).
Torsion box projects such as these are incredibly durable and supportive well beyond expectation, while at the same time very cost effective to build and can be tailored to suit any function, look or style in whatever choice of finishes you could imagine. Over the years I’ve built freestanding and built-in bookcases, tables, desks, and shelves in a host of finishes. Each one has been a pleasure to design, make and enjoy. Floating shelves such as these are a great way to find out if a torsion box project is your cup of tea.
Photos by Mark Salusbury
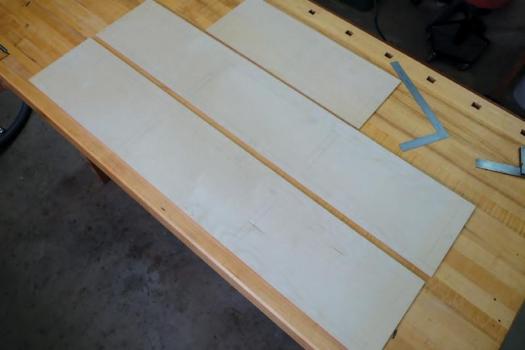
Skeleton Part Dimensions
With the skins cut to size the skeleton parts can be marked onto the inner surfaces. This will provide you with exact dimensions to cut the skeleton parts to. These layout lines will also help with assembly down the road.
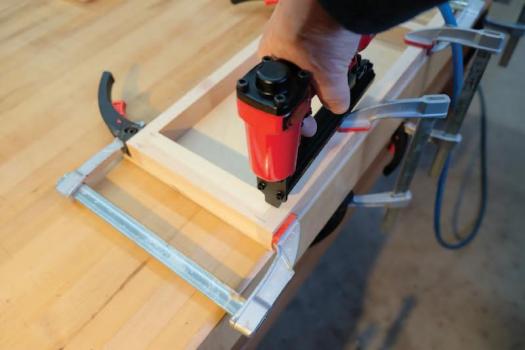
Staples are Strong Enough
Salusbury uses staples to dry-bond the skeleton parts together. Once sandwiched between the inner and outer layers of plywood the assembly will be very strong.
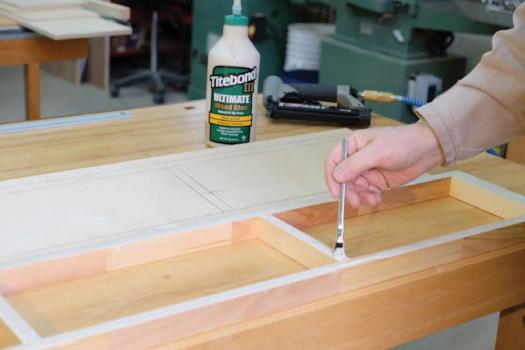
Ready for Glue
Glue is applied to the skeleton so the skin can be pinned and bonded to it.
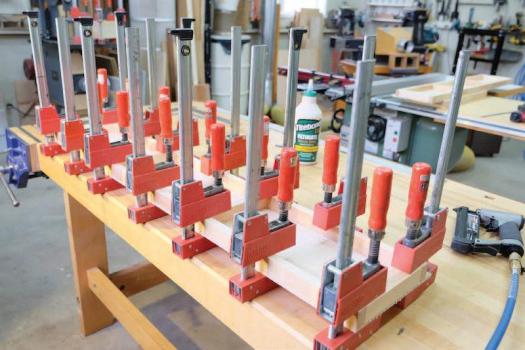
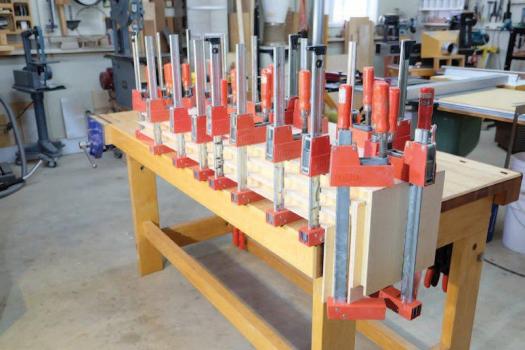
Lots of Clamps
A healthy amount of clamps, and not a lot of pressure, will provide you with a strong, even bond between the skins and skeleton structure.
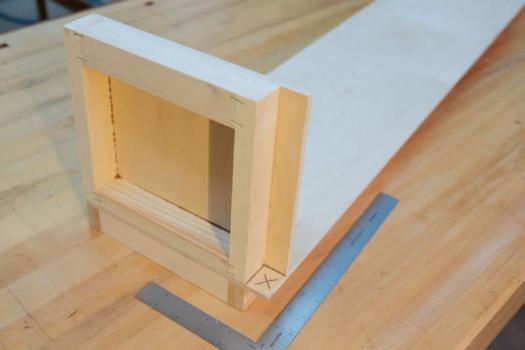
Align, Mark and Cut
Place the end assembly on top of the shelf, aligned with the end. This will allow you to carefully mark the location of the cut-out, and to allow for the insertion of the L-bracket during assembly.
Fix Them Together
Drill screw clearance holes to secure the end and shelf sections to each other.
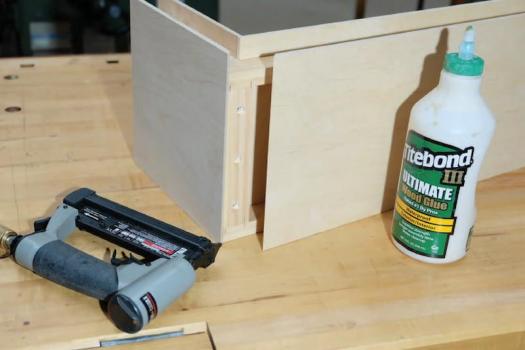
Cut the Skins to Size
Here, the end section has the outer skin attached to it. Now the skin on the underside of the shelf section will be glued to the main structure.
Gang and Glue Them
Salusbury opted to clamp the three shelf skins on their undersides at the same time by ganging them together. You can also glue them up one at a time.
Strong Joint
A bridle joint is a strong option for joining the two parts that make up each L-bracket.
Final Touches
With the solid edges applied, the finishes applied and the L-brackets fit, it's time for installation.
L-Brackets Secured
Salusbury levelled the L-brackets and fixed them to studs, providing a solid foundation for the shelves.

Illustration by Len Churchill