PROJECT
The Chessboard Cheeseboard

Geoff Coleman

Find more Gifts / Crafts projects
Forget about perfecting your hand-cut dovetails, three-way mitre joints, and French polishes. If you want to impress people with your woodworking skills, crank out a few of these beauties. A popular gift, they serve multiple purposes from trivets to cheese trays to cutting boards.
The alternating colour butcherblock design is the straw that stirs the drink. It looks great and appears to have required a lot of careful work. In truth, it is an easy trick, but non-woodworkers don’t need to know that. You can make them small enough to act as a drink coaster right up to 25 pound turkey-ready carving boards.
Just as water parts to make way for a canoe paddle, but rushes back in at the end of the stroke, tight end-grain absorbs knife slices and closes up with little visible damage. Germaphobes will be pleased to know this quality also helps keep bacteria at bay.
The Chessboard Cheeseboard
Contrasting woods
Start by picking a couple of contrasting colour hardwoods. Maple is a traditional choice for cutting boards, but cherry and purpleheart are good options too. Work begins with milling your wood to the desired thickness, then ripping it into strips. For a classic, symmetrical design like you would see on a chessboard, you need pieces with equal width and thickness. I found it effective to use the table saw to get them close, then let the planer do the fine work of unifying width and height. Cut an equal number of both colours, lay them out in an alternating pattern and glue them flat. Be sure to apply a solid coating of waterproof glue. If not sufficiently covered, the joint may fail under stresses applied later in the build, particularly with thinner pieces.
After letting the glue dry thoroughly, you are going to take what is now probably a pretty good-looking kitchen accessory and destroy it. However, with some glue and a twist of the wrist, it will be reincarnated and elevated to another level. Speaking of level, dress each face once more to eliminate any thickness inconsistencies, and return to the table saw. Install a fine-toothed cross-cutting blade. Use a cross-cut sled to slice that long-grain cutting board across the grain to yield a new stack of strips. The length these strips are cut determines the overall height of the finished board. A quality 80-tooth blade will produce a very smooth cut, leaving an exposed end grain that barely needs sanding.
Now for the magic
You should have numerous lengths of alternating light-dark squares ready for final assembly. Line up your pieces as they were before you cut them, then turn every second piece end-for-end to create the checkerboard pattern.
With that done, it’s time for the second, and final, glue-up. To apply the glue, keep the long-grain sides up and cover all those faces, except for the last piece in the assembly. Then you just give them all a quarter turn so the end grain is up and get the clamps out.
Gluing can be tricky, particularly on smaller boards, so a dry run is recommended. A lot of sanding can be avoided later by taking some care at this stage to ensure the pieces sit as flat as possible.
The flatter, the better
One method I have used to help ensure a level surface involves making a stand that accepts the pieces to be glued and keeps them flat. Carefully cover the surface of a 12″ x 16″ piece of 3/4″ MDF with packing tape and screw a 4″ high wood block at the middle on the bottom. You end up with an oversized flat caul that won’t end up permanently glued to the projects. Raising the surface makes it easy to get clamps under it.
With the pieces in place on the stand, position more tape-shrouded cauls across the tops of the joints as needed to keep everything flat. You should be able to clamp them down with minimal interference from the central base. Then the clamps needed to pull the components together are applied. They have more than enough power to seat the pieces tightly, despite the downward forces of the leveling clamps.
Once the second glue-up is dry, you have some sanding ahead of you.
Because the grain is running in different directions, a random orbit sander does the best job of smoothing things. You could also reach for your belt sander to help even the surface. A good starting point is 120 grit, progressing to 220. The tough, tight, hard grain that makes wood like maple stand up to knife abuse isn’t any more forgiving to sandpaper, so be patient – sanding might take longer than you expected. The silky smooth, touchable surface will be worth the effort.
Customize it
After that, it is just a matter of adding some purpose-driven custom touches to make the piece easier to use. Smaller ones that are easy to lift with a single hand might need little more than a 1/8 ” radius to soften the top edge. Bigger units benefit from a finger hold on the underside and an easing. A slot for knives is a nice touch, too, as is building two that can be attached to each other with rare earth magnets to create a larger surface when needed.
Finally, protect the wood with a wipe-on finish. Commercially made butcher-block oil treatments are popular, as are finishes combining beeswax and various food-safe oils. I have had nice results with Clapham’s Salad Bowl Finish. It is extremely easy to apply, and smells great. With oils, just keep applying it and wiping it off until it pools on the surface. Waxes take two or three coats. And plain old mineral oil has worked just fine for a long time. All of the finishes will need re-application, the frequency depends on the amount of use.
I have made enough jewellery boxes, picture frames, and other wooden gifts to know that nothing guarantees a universally glowing response from the lucky recipient like these do. People will look at you like you are a magician, and wonder aloud how long it took you to glue 320 little blocks together so evenly. Just don’t reveal your secret.
Non-symmetrical boards
As attractive as the symmetrical pattern is, you can produce some interesting designs with a few tweaks in the milling or gluing process. For example, when the wood is ripped to a width that is different from the height, the look of a brick wall or a basket weave results. Things really get intriguing when you cut the strips into varying widths – but remember to keep them in pairs.
Bear in mind that when you have an extra one of a specific species instead of matching pairs, the twist of the wrist trick no longer makes any difference in the pattern.
However, it does give a more finished appearance in another respect, since two edges are the same colour. Rather than glue the panel so its edges are even during the second glue-up, setting all the parts on a slight angle, or offsetting every other strip 1/4″ or so, produces enough variation and pattern to be aesthetically pleasing. Even using a single wood species looks fantastic once it’s assembled. And mixing a sapwood/heartwood combination is also fun.
As a general rule, the thickness of the wood when it is first milled establishes the length of the visible “blocks” in the pattern. The finished size of the project, and the appearance you desire, will influence the thickness you settle on. Thick wood makes long looking blocks, so you will have fewer in your sequence. More intricate top designs start with thinner wood, down to 1/2″ and less. Bear in mind thin wood doesn’t leave much gluing surface later on. The patterns are endless, so experiment and something great might happen.
Photos by Geoff Coleman
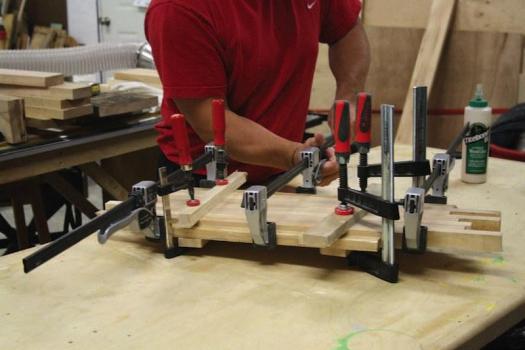
Glue-Up
Although Coleman is working on a maple board here, the first stage of gluing is the same. After milling all the lengths of wood, apply glue to the joints and bring the parts together using clamps. Coleman uses cauls across the panel to keep the surfaces as flush as possible.
Cross-cut Strips
With the panel dressed smooth on both surfaces,
Coleman cuts parts to length with a cross-cut sled. The length of these parts determines the finished height of the board.

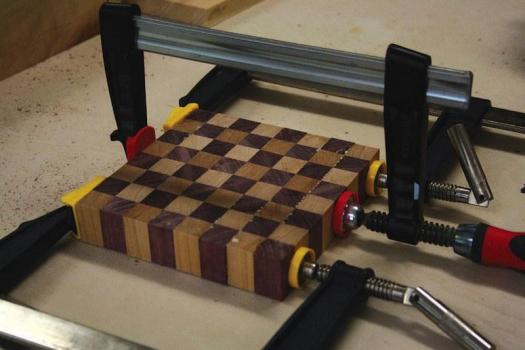
Glue-Up
Here Coleman glues the parts back together, so the end-grain surfaces are facing out. Though he’s not using any cauls in this photo, if you’re finding it hard to keep the parts aligned during this stage you can use tape-wrapped cauls.
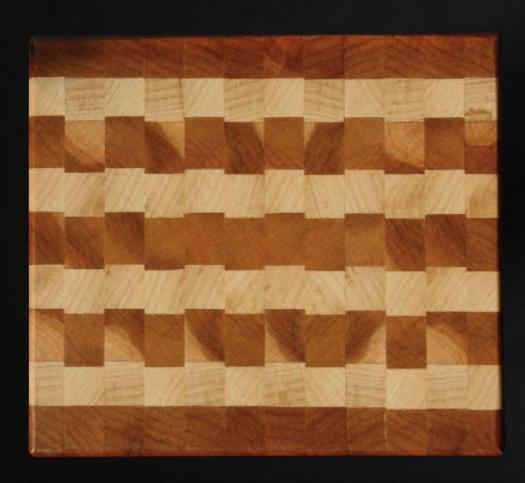
Basket Weave
This board was created with strips of wood that were the same thickness, but different widths. Coleman glued up an even number of strips, then before the second glue-up he turned every other piece end-for-end to create this pattern.
Slight Differences
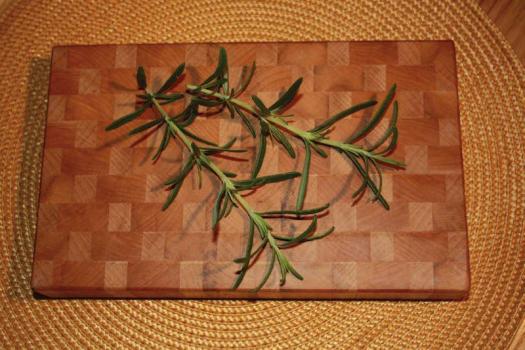
With a bit of planning, just about any pattern can be made. Coleman used cherry strips that were all the same size, but with a slight difference in the outermost maple strips, and by flipping every other piece end-forend, he created this offset pattern.
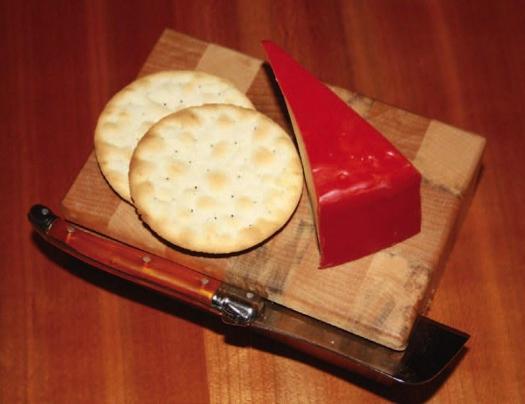
Knife Groove
Coleman machined a simple groove into the side of this board, in order to hold a knife in place. He took care to make the board thick, otherwise the groove would create too much short grain, and could easily break.