PROJECT
Spokeshave

Michael Kampen

Find more Tool projects projects
This is an easy and enjoyable project to make and a great way to use up some exotic off-cuts.
The spokeshave looks somewhat like a drawknife, but performs more like a hand plane. Like the drawknife, it has two in-line handles, and as with the plane, it uses a cutting blade which projects from a short sole to regulate the depth of cut. Traditionally used to shape spokes for ships’ steering wheels, wagon wheels and the like, shaves are still the tools of choice to shape and smooth convex and concave surfaces, and are a favourite tool of chair makers.
Spokeshave
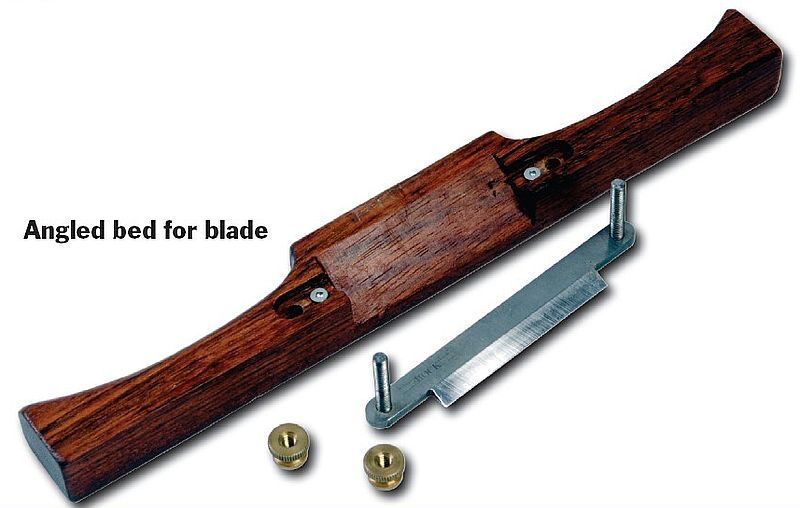
This is an easy and enjoyable project to make and a great way to use up some exotic off-cuts. Make the shave to suit your hand size. A blank of wood approximately 1″ x 2″ x 12″ should be sufficient. You’ll also need a blade and a couple of #4 flat head wood screws. Shaves can have flat, convex or concave soles – we’ll make one with a flat sole. When choosing your wood try to find something that feels nice to the touch when finished and has a comfortable heft. This version uses bubinga for the handle.
• Mill the blank for the handle being sure that it is perfectly square.
• Using a pencil draw a centered line lengthways down the blank and place a mark on the front of the shave.
• Draw a line 3/8″ in from the back top of the blank. Locate the tang holes along this line. It is vital that these holes be laid out and drilled accurately. Drill the hole so that it is just slightly larger than the diameter of the tang. Confirm the actual measurements with the blade you will be using.
• Turn the blank over and insert the blade so that the top of the blade is resting on the bottom of the blank. Use a sharp pencil to trace the outline of the blade onto the bottom of the blank.
• Extend the lines from the edge of the blade to the rear of the blank and use a square to extend these up the back of the shave. Mark a line, 1/4″ down from the top of the shave, between the first two lines. This defines the upper edge of the rear opening. The front edge of the blade defines the forward edge of the opening on the bottom. Use a saw to cut along the sides of the opening to the two depth lines.
• Use a sharp chisel to remove most of the waste between the two cuts. Clean up the remainder with a rasp and then a fine file.
• The tang ends of the blade are let into mortises on the bottom of the shave. The mortises must be slightly deeper than the thickness of the blade. The blade sits on two jackscrews at the bottom of the mortise. This allows you to adjust the blade a little.
• The simplest way to cut the mortise is to use a Forstner bit in combination with a fence on the drill press to remove most of the material, and then follow up with a sharp chisel to clean up the rest. If you use this method, be extremely careful when working on the rear of the mortise. The section of wood at that point is very narrow and can easily break away. Optionally you can use a spiral bit in combination with a router fence and a couple of end stops on the router table. This will produce a flatbottomed, clean cut that needs no further work.
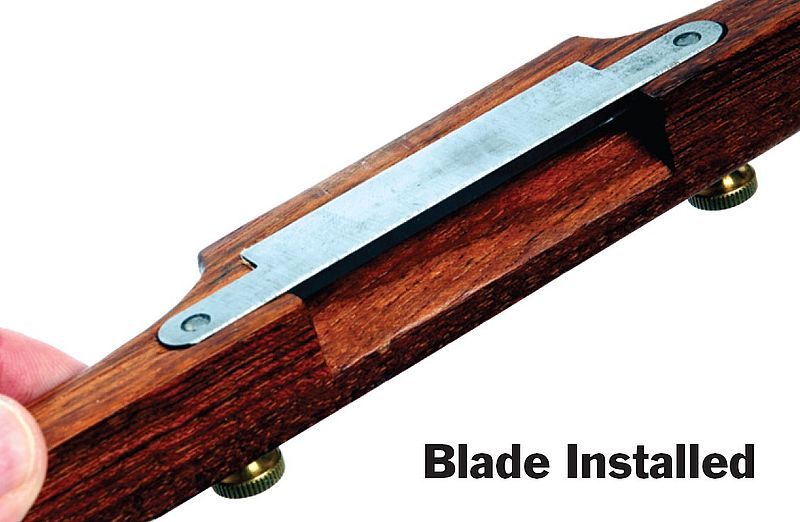
• Test fit the blade to the handle. It should slide in smoothly and be slightly below the level of the wood.
• Drill two small pilot holes for the #4 screws that the blade sits on. Locate these half way between the tangs and the opening.
• If you plan on adding a piece of harder wood as a wear strip ahead of the blade, cut a mortise for this piece now and glue it in place.
• To complete the business end of the shave, use a stationary sander to bevel the area just ahead of the blade. This section, called the shoe, should slope away from the blade by one or two degrees.
• Shape both ends of the shave to fit comfortably in your hand while still giving you plenty of grip to control its movement. Use the template provided or experiment with your own version. Use band saw, scroll saw or fret saw to cut out the handle shape, and rasps and files to soften the edges and shape the handle. To provide a smooth surface, sand the handle using a sanding mop mounted in a drill press.
• Install the two #4 screws under the blade. Countersink the hole as the head must be able to sit flush with the surface of the wood.
• Install the blade and note how deep it sits in the mortise. Remove the blade and back out the screws until the blade just barely projects above the surface of the wood at the leading edge of the blade. Try the shave on some wood. When you are able to take a fine wisp of a shaving the blade is set correctly. By changing the angle at which the blade meets the wood, rolling the shave towards or away from you slightly, you can easily control the depth of cut. If the shavings pile up inside the opening, refine it gradually using a fine file. Proceed slowly, fitting the blade often and taking a few test cuts as it is easy to make the opening too large.
If you choose a softer wood for the handle stock, you will need to cut a recess into the handle ahead of the blade and glue in a small section of harder wood to prevent premature wearing of the shave.
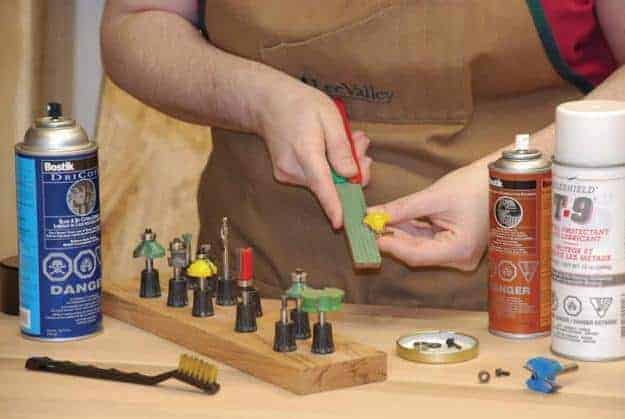
Shaves are Easy to Use and Maintain
Keep it sharp. Even though spokeshave blades are quite small, they are easy to sharpen. Spray glue 400 grit wet/dry sandpaper to one side of a 1″ x 2″ x 10″ block of wood and 600 grit paper to the opposite side, and secure the block in a vise. Skew the angle of the blade as you hone – this will reduce the chance of rocking the blade.
Cock the cutter. Try setting one side of the blade a bit higher than the other. Cocking the blade enables you to change your shaving thickness without adjusting the depth of cut: use one side of the blade for fine cuts and the other side for coarser cuts.
Push or pull. Use whatever is most comfortable and efficient for you. For either method, keep your hands toward the center of the shave, use light even strokes, and let the shave do the work.
Go with the grain. Shave with the direction of the grain to help reduce tearout and chatter.
Skew the blade. This will generate less resistance, particularly when working on curved surfaces.
Practice. Unlike with hand planes, it takes some practice to master a spokeshave. But stick with it, and you’ll marvel at what you can do with this versatile tool.
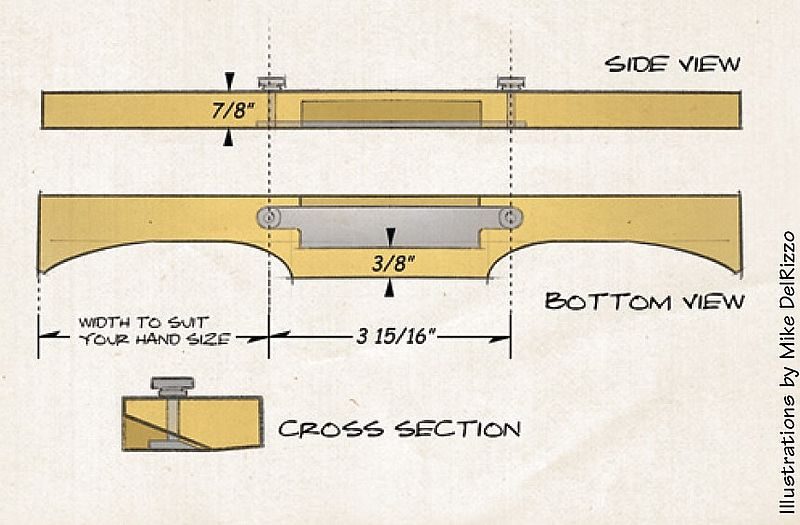
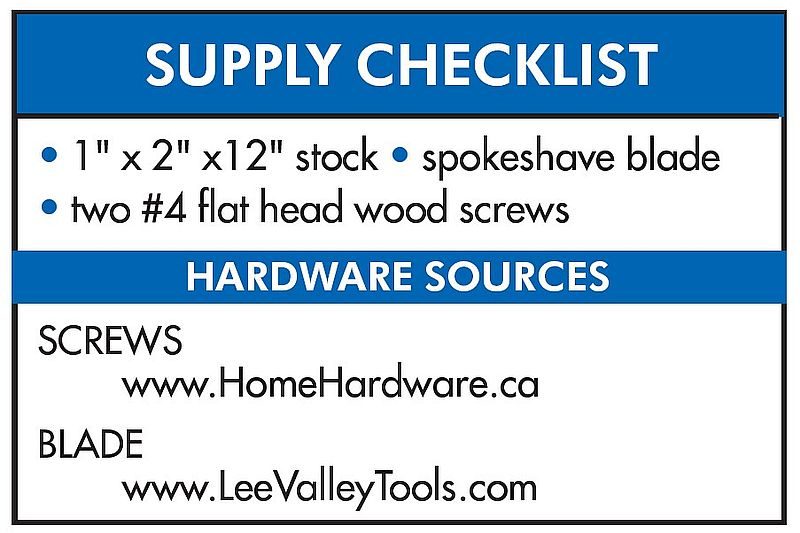
Illustration by Mike Del Rizzo


How on earth does that blade cut? It sits all wrong – your photos are not clear! Can you show better drawings or sketches – of how the blade sits in this awkward handle?