PROJECT
Mystery coin capsule

Paul Ross

Find more Woodturning projects
When this project is complete, the turned piece has a coin inside. The intriguing thing about this turning is that although there is obviously a coin inside, the way that the coin got inside is not so obvious.
This is an old trick I learned years ago in a seminar by Vic Wood from Australia. His specialty was square edged boxes, burnt rim bowls, and mystery coin capsules. Vic has turned many coin capsules for children, placing a coin with their year of birth inside. They were made to be lifelong keepsakes, and there was, of course, the constant mystery of how the coin got in there.
When Vic made his capsules, they were totally enclosed – with no hole. I added the holes after a friend suggested it to me.
The mystery of how the coin got inside is solved when you realize that the project is really two separate bowls glued together. It’s that simple! However, care must be taken to ensure the illusion. If turned properly and joined carefully, no seam will be perceived and the mystery will continue. This project makes a great gift, because everyone enjoys a good mystery!
I used oak because I had it on hand. However, I think that a darker and tighter grained wood would yield better results. The size should be about 4″ to 5″ finished and about 1 ½” thick. You need two pieces from the same piece of wood for grain orientation – that is very important.
I began with 2″ stock and sliced it in half lengthways. I glued on spigots to which I attached the piece with a chuck. I have many of these waste block spigots that I just keep using over and over. I glue them on with cynoacrylite glue because it’s extremely strong if pulled on, but if knocked sharply, it will let go. That allows me to re-use my spigots.
Do your sanding as you progress through the project, rather than at the very end. The accompanying photos show you the key steps in turning this coin capsule.
Mystery coin capsule
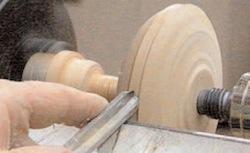
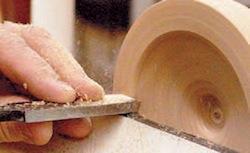
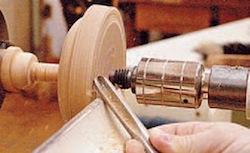
Push gouge towards headstock
With the piece mounted in a chuck, use a ⅜” bowl gouge and take an outside cut to true up or round the wood. Face the flute of the gouge towards the cut. The direction you push the gouge is towards the headstock, so that the mass of the headstock will help to absorb any vibration.
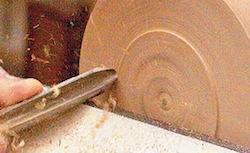
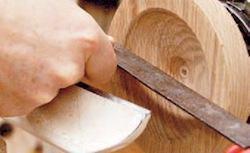
Clean up the face
Next, make a facing cut to clean up the face of what will be the inside of one half the pieces. Use dividers to mark off the diameter of the inside flange.
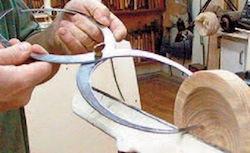
Check the thickness
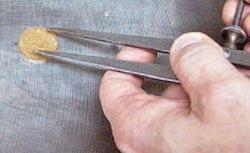
From the inside of this mark, start to hollow out a shallow dish just as you would cut the inside of a bowl. Use double ended calipers to check the thickness of the wall. Begin cutting the hole from the inside. First, measure the diameter of the coin you are using, and then set the dividers less than that diameter. That way, the coin will not fall out.
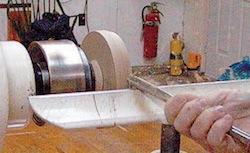
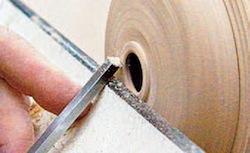
Cut the flange
Use a small ⅜” spindle gouge to cut the hole from the inside. This gives a clean surface on the inside of the piece. The next part is most important. The flange must be perfectly flat on both pieces. Use a sharp square end scraper. Check that the rim is flat by using a straight edge. Now repeat this whole process on the other piece, and then glue the two sides together. Remember that it is very important that this joint be perfectly flat, so that the joint will be invisible.
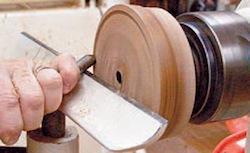
Add a bead at the hole
Pop off one spigot and grab the other side with the spigot in the chuck. Shape the outside following the profile of the inside. You can add a bead at the hole using a small tool like a skew. To turn the other side to shape, knock off the other spigot. In the chuck grab a piece of round stock a little larger than the diameter of the hole in the piece. Turn down one end of the round stock so that it fits snugly in the hole. Use the tailstock for support to do all your shaping.
Blend the Halves at the Joint
At this point you should spend time to blend the two halves at the joint. When you are ready to roll the bead, remove the tailstock. There should be enough holding strength at this point to gently roll the bead. If not, apply a small dab of hot glue. Don’t take heavy cuts at this point. To complete the piece successfully, sanding is required as you progress through this project.
This project offers many opportunities for gift giving:
• Birthday gift (coin with birth date)
• Graduation gift (coin with graduation date)
• Wedding gift (coin with year of marriage, or two coins each with partner’s birthdates)
• Mother’s day (multiple coins, with birthdates for each child)
• Christmas (with memorable coins)
You can also come up with other things to put inside. Try a ring, stone, or other meaningful small objects.
Push gouge towards headstock
Clean up the face
Measure the inside
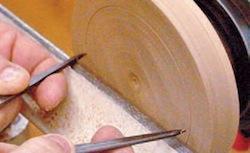
Check the thickness
Measure the diameter of the coin
Cut the hole
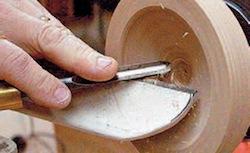
Cut the flange
Check that the rim is flat
Turn the outside
Add a bead at the hole
Use the tailstock for support
Blend the halves at the joint