PROJECT
Make a table saw mitre spline jig

Rob Brown

Find more Jigs projects
Accurately and safely machining grooves to a mitred corner will add strength and beauty to a classic joint.
Tight-fitting mitre joints are a thing of beauty. They’re visually clean and tidy as they don’t show any end grain. They also show virtually continuous grain running through the joint at 90° as long as the two mating parts were cut from the same board. The downside of a mitre joint is its lack of strength when compared to many other joints that can be used in the same situation. There are many situations where a bomb-proof joint isn’t required; a picture or mirror frame, for example. There are, however, many times when a strong joint is a necessity.
If you really want to use a mitre joint, but need something strong, adding a spline is one fairly easy solution. Briefly, the steps go like this: cut and assemble the mitres, let them dry, run the mitre joints on end over a blade to produce the slots for the splines, machine and install the splines, trim the splines flush. It’s all surprisingly easy, but only if you have a jig to help you cut the slots in each joint. But where would you get such an incredible jig? Good question. I’ve got just the solution.
Make a table saw mitre spline jig
Simple and specific
There are only a few main parts that make up this jig, and you very likely have them in your shop already. The parts on my jig are all plywood, but you could easily make everything except the main jig base out of solid wood. In fact, that approach might even make for a stronger, longer-lasting jig. The parts are glued and screwed together.
When it comes to sizing the jig and working to the specific dimensions I talk about in this article, you may have to adjust your jig to suit your table saw’s fence. I’m using this jig on a General T-fence system, though your fence may be different. The main things you have to consider when making the jig are that its base sits perpendicular to the table, it travels parallel to the blade and it has no movement in its fit to the fence.
Plywood base
Cut the base to size. If you generally make larger pieces of furniture, feel free to make the base larger. If you only build small items, a smaller base like this will work just fine. When unsure, always err on the larger side to ensure adequate workpiece support when needed.
I used 1/2″ thick plywood, but there’s nothing wrong with using thicker material if you have it on hand. I find at least half the time I’m building jigs I end up using what I have on hand as long as it will get the job done.
Consider your fence
Working with my T-fence was pretty simple. A metal rectangular tube makes up the center section of my fence, and a 1/2″ thick piece of Baltic birch plywood is secured directly to both outer faces of the tube. These plywood pieces extend about 1/2″ above the upper face of the rectangular tube, and gave me something to hook my jig onto.
I was lucky, as the thickness of the piece of plywood attached to the face of my rip fence was the exact same thickness as a piece I had on hand. Tolerances at this stage have to be pretty exacting if the jig is going to operate smoothly and accurately. I was able to glue the inner and outer fence attachment pieces together with their long edges offset by 1/2″. When I temporarily screwed this assembly to the jig base, the gap between the outer fence attachment and the back surface of the jig base accepted the plywood attached to the face of my rip fence.
With the fence attachment assembly complete and sized properly, I placed the long edge of my jig base on the main table surface of my table saw with the back of the base pressed up against the fence. I then set the fence attachment assembly on top of the plywood rip fence face and screwed it in place from the front face of the jig.
Maybe you need to make adjustments
If you don’t have a piece of plywood the exact width of your fence’s face, you have a few options. One option is to machine a piece of solid wood to the exact thickness and substitute it for the inner fence attachment piece.
Another option is to make your entire fence attachment assembly out of solid wood. Start with a block about twice as thick as your rip fence’s face and machine it to about the same length as your jig base, by about 3″ wide. You will then have to machine a rabbet in its edge to accept the top portion of the rip fence’s face perfectly. Be careful here, as taking even 1/32″ too much material off will leave you with a sloppy fitting jig. Temporarily screwing it to another surface to test the fit will be necessary.
If you’re working with a completely different rip fence system, you will have to improvise. Making a cavity that will fit right over the entire overall width of your rip fence might be necessary. If that’s the case, just ensure the members that make up the cavity hold the jig base at a right angle to the table when complete, and allow the jig to slide smoothly and properly along the rip fence.
The jig face
Now that the jig is running wonderfully along the rip fence, you need to attach two 2″ wide strips to hold the workpiece in place at 45° to the table saw’s table during use. I attached them to the jig’s face so their intersection would hold the workpiece slightly above the top surface of the table saw.
Attach the first one at 45° to the bottom edge of the jig with a pair of screws, then use a square to ensure the second strip is square to the first strip and will hold the workpiece slightly above the table saw. Be sure to drive the screws high enough so that the blade won’t come into contact with them during use.
Using the jig
I usually hold the assembled workpiece (often a door, picture or mirror frame) against the jig base with my left hand, and push the jig and workpiece over the blade with my right hand. To give my right hand a great grip on the jig I added a simple wood block on the back of the base at about the midway point up the jig’s short edge. This block comes in handy when I’m pulling the jig back towards me after I remove the freshly machined workpiece from the jig.
I also added a 10″ long block of plywood to the back side of the jig base, near its top, so when the jig was lying on a shelf I could stack other jigs on top of it without having them tip over.
I usually use a flat-top rip blade to create a thin slot, though if I need a wider slot a dado set works just fine. Once you have the workpiece in place, adjust the height of the blade and the location of the rip fence according to the piece you’re working on. I generally try to center the blade on the workpiece, and also try to have the ends of the spline finish directly in line with the inner edge of the frame members for aesthetic reasons, but sometimes making it larger, and therefore stronger, is what’s required.
With the settings dialed in, press the workpiece against the jig’s base and run it over the blade. If your workpiece is smaller, you may want to use a hold-down device to secure it in place during machining the slot. Once the slot has been created, remove the workpiece, return the jig to its starting position and repeat as necessary with the other joints in the workpiece.
Splines
Machine a long length of solid wood to act as splines. One of the edges must be straight and square, as it will sit against the narrow inside edge of the slot. Make sure the fit isn’t too tight or it will be very tough to get the spline to seat into the slot completely. Gaps between a spline and the workpiece are unsightly.
Once enough material has been cut to size, I cut the individual splines from the long length, ensuring they will be long enough to extend out both ends of the slot. I often opt for contrasting colours of wood, but the choice is yours. Apply a small amount of glue to both the inner surfaces of the slot and the outer surfaces of the spline before pressing them into place. A few light taps with a hammer may also be needed, but clamping the workpiece to a work surface first will work best. A pair of cauls to protect the workpiece and a clamp to ensure no gaps ensures a good glue-up.
When the splines are dry, I often trim them to rough length on the bandsaw before using a chisel or hand plane to flush them to the workpiece.
Get creative
You can also get fancy, and cut and install a thick spline first, then cut a narrower slot directly in the first spline, and install a third type of wood. Even adding two or more splines across the width of a wider workpiece is an option. This approach will add strength and provide a strong visual element. Every situation is a bit different. Consider the strength you need, as well as how powerful a design element you want, then set out to cut and install mitre keys as you see fit.
Photos by Rob Brown
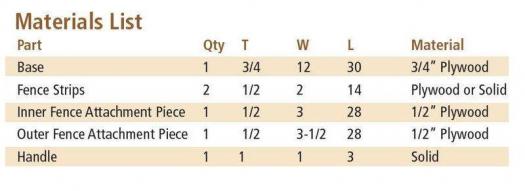
Fence Attachment Assembly
Brown used a simple system of two slightly different sized pieces of plywood that were attached to the rear face of his jig to ensure it travelled along the fence properly.
Snug, But Not Tight
The inner fence attachment piece is the same thickness as the outer face of the rip fence. The outer fence attachment piece extends below the inner piece and helps keep the jig perpendicular to the table saw's surface while in use.

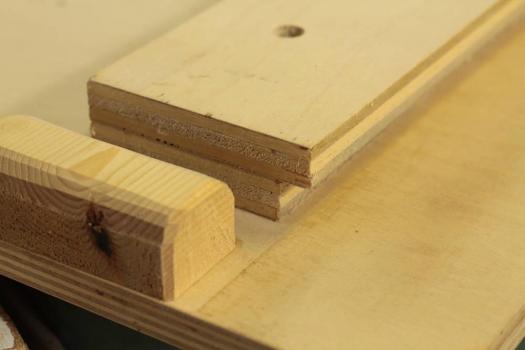
A Good Grasp
The shaped piece of solid wood on the rear face of the jig base acts as a handle during use. It allows the jig to be easily returned to the starting position after a groove has been made in the workpiece.
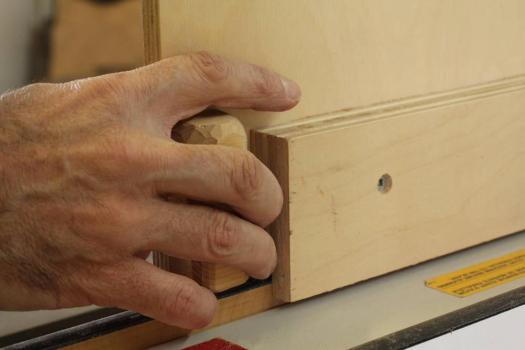
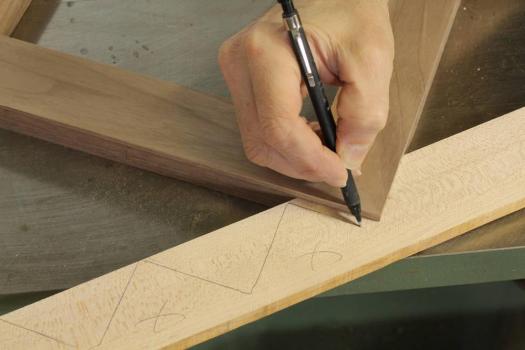
Align the Ends
Although there are very few hard rules, Brown often lines up the end of the groove with the extension of the inner edge of either the horizontal or vertical members of the frame he's working on. Raising and lowering the blade makes this adjustment.
Cut the Keys
With the slots cut and the solid for the keys dressed to proper thickness, mark and the cut the keys oversized so they can be glued in place.
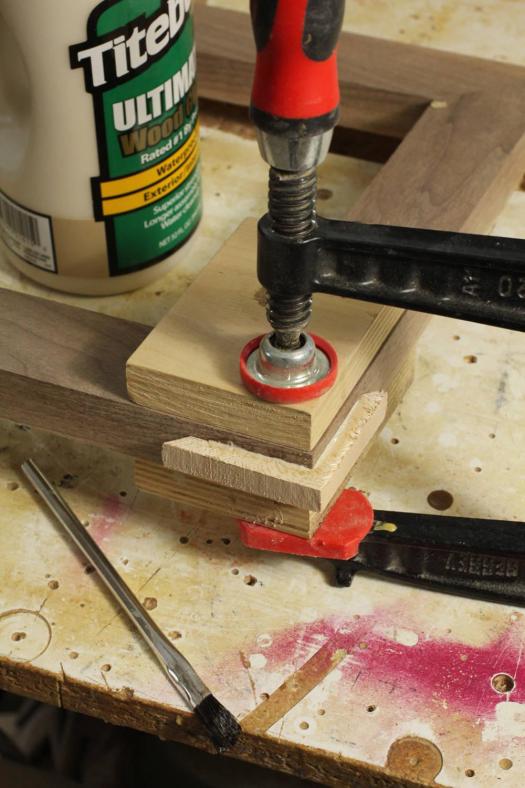
Cauls and a Clamp
Apply glue to both faces of the workpiece, as well as both faces of the key, then slide the key into the slot. A caul on either side of the key and a clamp to add a small amount of pressure are all that's needed.
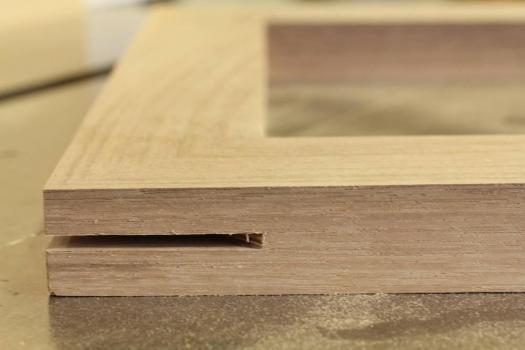
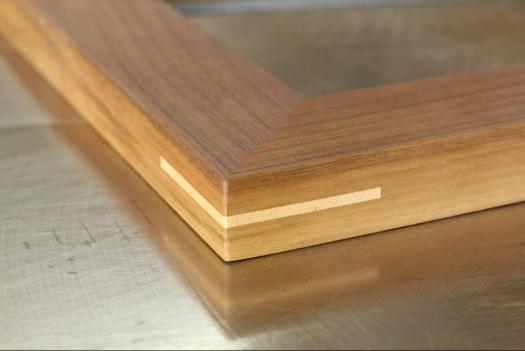
Finished Mitre Key
Once installed and trimmed flush, the mitre key provides a lot of strength and some nice contrast to the joint. You can also use the same species if you want an even simpler look, but need the strength.
Get Creative
By installing a wider contrasting key first, then cutting a slot in that key and installing a key made from a third species of wood, you will create a very strong look.
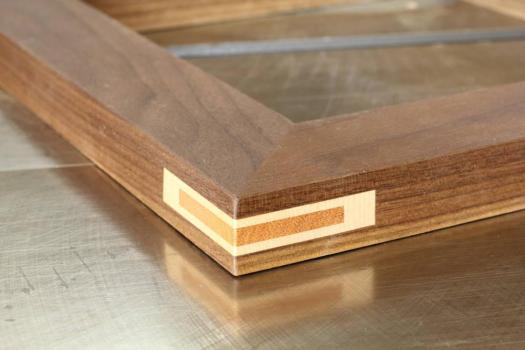
Illustration by Len Churchill


Hi Rob,
I have tried to find “flat Top” blades, but this seems like a never-ending saga, let alone a dado stack. Suggestion?
Thanks
Dave